
Introduction
Black TPO roofing problems can be fixed with a careful DIY approach that targets common issues like seams, flashing, and membrane damage.
The guide explains practical steps, tips, and rules of thumb to help you assess, patch, and prevent leaks, so you’ll know how to troubleshoot major trouble spots and perform safe, effective fixes.
Key takeaways
- Inspect for heat hotspots and membrane stretching around edges after sun exposure.
- Clean debris with non-abrasive methods before patching or seam repairs.
- Use compatible TPO patch materials and primers specified by manufacturer guidelines.
- Monitor for blisters and fishmouths after rainfall; reseal promptly if found.
- Schedule annual inspections focusing on flashing joints, penetrations, and membrane edges.
- Document all repairs with dates and photos to guide future maintenance.
Table of Contents
- Introduction
- Key takeaways
- What Is TPO Roofing and Why Is “Black” Different?
- Common Problems Specific to Black TPO Roofs
- DIY Inspection Checklist and Visual Checkpoints
- Step-by-Step DIY Repairs for Common Black TPO Problems
- Safety, Stop Rules, and When to Hire a Professional
- Maintenance Plan, Preventive Measures, and Budgeting
- Restoration Options, Coatings, and Alternatives (Pros/Cons)
- Common Mistakes to Avoid and Environmental Considerations
- Conclusion
- FAQ
What Is TPO Roofing and Why Is “Black” Different?
TPO stands for thermoplastic polyolefin, and it’s a single-ply membrane used on many rooftops. It typically includes reinforcing layers and a flexible base that helps with seam welding and UV resistance. Color is a pigment choice that can influence heat absorption and performance over time.
In black TPO, the pigment darkens the membrane, which can change how the roof responds to sun and temperature cycling. This color choice affects heat gain, potential expansion, and energy performance in certain climates. Consider how a dark surface might interact with your building’s design, maintenance needs, and local weather conditions.
TPO composition and manufacturing basics
TPO membranes are made from a blend of polymers, primarily polypropylene and polyethylene. The base layer is reinforced with a fabric scrim for added strength.
Manufacturing variables like polymer ratios, scrim type, and thickness can affect the membrane’s performance. Quality control checks ensure consistency in production runs.
Pro tip: Check manufacturer specs to understand how these factors impact your specific TPO product.
Why color matters: black vs white/reflective TPO
The main difference between black and white/reflective TPO lies in their thermal behavior. Black TPO absorbs heat, while reflective TPO reflects it.
Black TPO can reach higher temperatures under the sun, which can lead to accelerated aging and potential shortening of lifespan in hot climates. However, in colder regions, black TPO’s heat absorption can be beneficial for melting snow and ice.
Key takeaway: Consider your climate when choosing between black and reflective TPO. In hotter areas, reflective TPO may offer better long-term performance.
Common Problems Specific to Black TPO Roofs
Seams and seam weld quality matter a lot on black TPO, where heat can emphasize gaps and weak welds. Look for loose, bubbled, or split welds that may leak under sun exposure. These are common trouble spots in hotter climates.
Flashing and detailing failures often show up at walls, curbs, and penetrations when sealing or substrate movement isn’t addressed. Heat-driven shrinkage can cause cracks or edge curling on dark membranes. Ponding, punctures, and UV-driven wear round out the typical set of issues for black TPO roofs.
Heat-related failures and seam problems
Black TPO roofs expand and contract more due to heat absorption, causing seam issues. Hot climates accelerate this process.
Seam pull-apart: Check seams for gaps or bubbling. Heat causes adhesives to break down, leading to leaks.
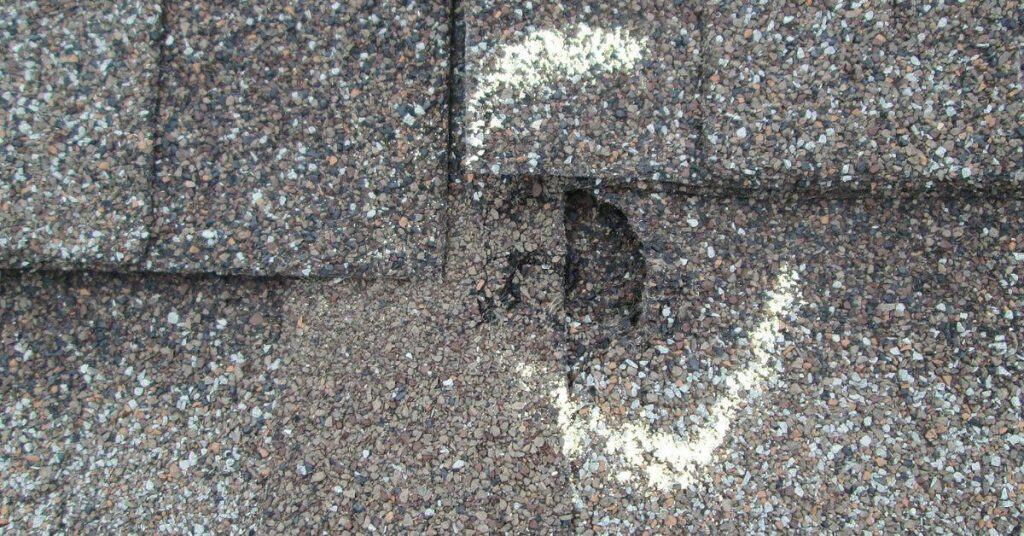
Top-layer deterioration: High temperatures can cause the top layer of TPO to degrade, making it more susceptible to damage and leaks.
Mechanical damage, punctures, and ponding water
Punctures can occur from foot traffic, debris, or hail. Ponding water stresses the membrane, leading to slow leaks or punctures over time.
Common puncture areas: Roof walks, equipment staging, and around penetrations are hotspots for damage.
Ponding effects: Standing water accelerates membrane degradation. Check low-slope sections regularly.
DIY Inspection Checklist and Visual Checkpoints
Begin with safety gear and a simple plan to document findings before you climb. Check weather conditions and use a stable route with fall protection if needed. Keep notes or photos to reference later.
Visual checkpoints include the membrane surface, edge details, flashing integrity, and any lifted seams or fasteners. Look for blisters, cracks, or punctures, and note drainage patterns or signs of water movement. Document penetrations and accessories for later assessment.
Roof Walk and Visual Checkpoints
Before you start, make sure the weather is dry and calm. Use this checklist during your exterior inspection.
- Safety first: Wear non-slip shoes, use a safety harness for fall protection, and keep a phone with you.
- Tape off areas: Mark any damaged sections to avoid further harm and ensure your safety.
- Inspect membrane surface: Look for blisters, cracks, punctures, broken or lifted seams. These can lead to leaks and water damage.
- Check flashing integrity: Ensure flashings around vents, skylights, and parapets are secure and intact. Gaps here cause water intrusion.
- Examine edge details: Check for any lifting or damage at the roof’s edges where it meets walls or other structures.
- Inspect nearby fasteners: Ensure they’re tight and not causing any membrane damage. Loose fasteners can lead to wind uplift.
- Check for standing water: Ponding water accelerates roof degradation, leading to leaks and reduced lifespan.
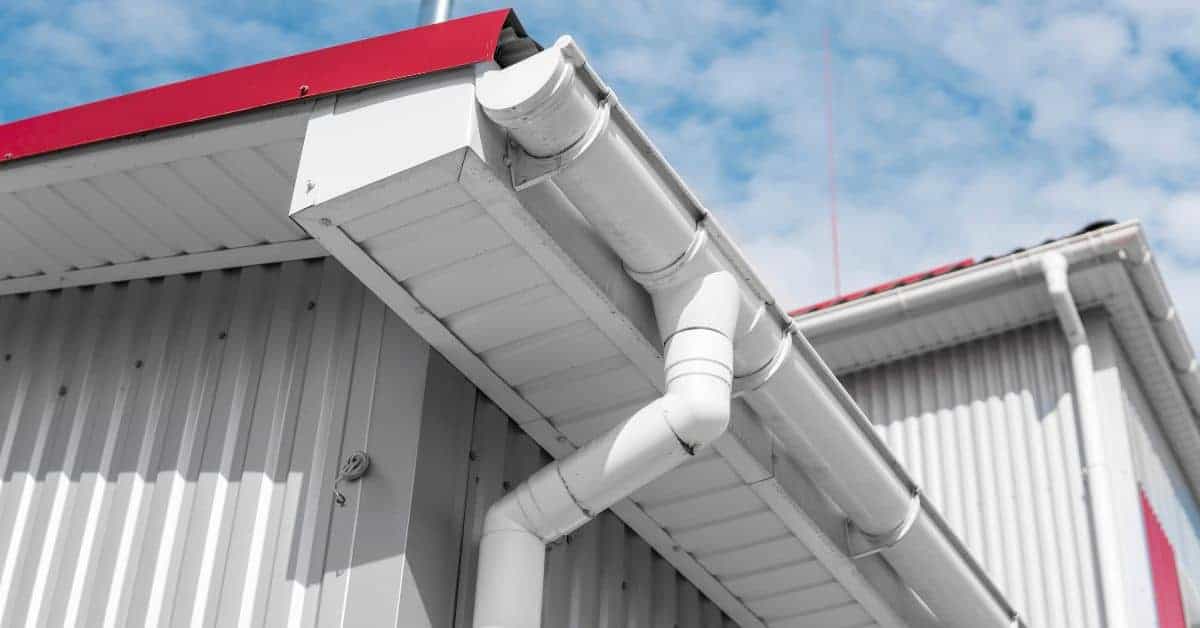
- Evaluate drains and scuppers: Ensure they’re not clogged or damaged. Poor drainage causes ponding and membrane damage.
- Look for signs of water movement: Discoloration, stains, or algae growth may indicate water is moving across the membrane.
Quick rule: If you find any major issues like widespread blistering, severe cracks, or multiple lifted seams, stop and call a pro immediately.
Tools and Materials Checklist for Inspections
Before you start your inspection, ensure you have the right tools. This list will help you prepare.
- Telescope ladder: To safely access the roof. A 28-foot one should reach most two-story homes.
- Binoculars: For a preliminary inspection from ground level to spot any obvious issues.
- Moisture meter: To detect hidden moisture beneath the membrane. It’s crucial for identifying potential leaks early.
- Infrared/thermal imaging (optional): For a more detailed look at heat loss or gain, helping to pinpoint issues not visible to the naked eye.
- Safety harness: For fall protection while on the roof. Always use one when working at heights.
- Hard hat: To protect against falling debris or impact with low structures like vents.
- Work gloves: To protect your hands from sharp edges, hot surfaces, and other hazards.
- Notebook and pen: To document findings during the inspection. Note any issues, their locations, and photos you take.
Quick rule: Always prioritize safety. If you’re unsure about using a tool or performing a task safely, don’t hesitate to call a professional.
Step-by-Step DIY Repairs for Common Black TPO Problems
Define the scope first: identify small seam splits, punctures, flashing issues, and minor ponding. Decide what you can safely handle as a DIY project. Reserve professional help for bigger problems or uncertain conditions.
Step-by-step methods cover cleaning, priming, and sealing with compatible patching materials. For flashing, reseal with the proper TPO components and verify overlaps. For ponding, adjust or level the area, and know when to escalate to a professional coating or repair.
Step-by-Step Repair Process
Follow this clear, numbered sequence to safely and effectively perform DIY repairs on common black TPO problems.
- Inspect your roof in dry conditions. Wear non-slip shoes and a safety harness if necessary.
- Identify the problem areas: seam splits, punctures, flashing failures, or ponding issues.
- Gather tools and materials based on the repair needed (see earlier checklists).
- Perform the main repair work as outlined in the following sections. If unsure about any step, consult a professional before proceeding.
- Clean up the work area and perform final checks to ensure repairs are secure and watertight.
Fixing seam splits and re-welding basics
TPO seams can split due to heat, age, or poor installation. Here’s how to fix them using cold or hot welding.
Cold Welding: Use a compatible adhesive and patch material. Clean the seam, apply primer if needed, then adhere the patch. Allow it to cure according to manufacturer’s instructions.
Hot Welding: Use a heat welder or torch. Ensure the seam is clean and dry. Apply even heat along the seam until the membrane melts and fuses. Allow it to cool before testing.
Patching punctures and tears (quick-repair method)
Punctures can be quickly repaired using patches or seam sealant. Here’s how:
Clean the area around the puncture. Use a suitable adhesive, patch, or fluid seam sealant. Apply according to manufacturer’s instructions, ensuring proper overlap and coverage.
Allow the repair to cure for the recommended time before subjecting it to heavy foot traffic or equipment loads.
Minor flashing and penetration repairs
Flashing around vents, pipes, and curbs can fail over time. Here’s how to replace or re-seal them:
Remove any damaged flashing. Clean the area thoroughly. Apply a compatible sealant around the base of the penetration.
Replace the flashing, ensuring it overlaps properly. Secure with mechanical fasteners if needed. Perform a quick check for wind uplift by trying to lift the edge gently.

Safety, Stop Rules, and When to Hire a Professional
Hard stop rules define when DIY is off the table, such as steep slopes, advanced age of the membrane, or signs of structural rot. Use clear criteria to decide if you should call in a pro. Document these signs to justify a professional evaluation.
Safety for DIYers centers on PPE, fall protection, and working only in suitable conditions. Have a simple two-person workflow and a plan to protect adjacent surfaces. Know when to stop if conditions worsen or if you uncover hidden damage.
Safety gear and safe work practices
Before you start any DIY TPO roof repair, safety should be your top priority. Here’s what you need to ensure a secure working environment.
- Personal Protective Equipment (PPE): Gloves, safety glasses, and long sleeves protect against sharp edges and hot surfaces. A harness with lanyard and anchor points is crucial for fall protection.
- Heat Safety: Black TPO absorbs heat. Work early or late in the day when temperatures are cooler. Stay hydrated and take breaks to avoid heat exhaustion.
- Ladder and Roof Access: Use a sturdy, extendable ladder with safety feet. Secure it at the top and bottom. Always have three points of contact while climbing.
- Weather Windows: Avoid working in high winds, rain, or extreme heat. Check forecasts before starting.
- Two-Person Workflow: Never work alone on a roof. Have someone to assist you and call for help if needed.
Clear limits for DIY vs pro—stop rules
While it’s great to save money with DIY repairs, there are clear limits. If you encounter any of these issues, stop immediately and hire a professional.
Structural Concerns: If you notice sagging, soft spots, or evidence of structural rot, do not proceed. These could indicate serious structural damage that requires professional evaluation.
Large-Area Damage: If more than 20% of your TPO membrane shows signs of delamination, punctures, or tears, it’s time to call a pro. This indicates widespread damage that may require full replacement rather than repairs.
Compromised Decking and Interior Water Damage: If you find water stains on ceilings or walls, or if your roof deck feels spongy underfoot, stop work immediately. These signs indicate water intrusion that could be causing hidden damage.
Maintenance Plan, Preventive Measures, and Budgeting
Set a seasonal maintenance cadence with inspections in spring and fall, plus after major storms. Create a simple checklist for each visit so nothing gets missed. Use this routine to catch issues before they escalate.
Routine tasks cover drainage checks, debris removal, and gentle cleaning. Preventive measures include trimming branches, ensuring ventilation, and resealing fasteners or flashing as needed. Budget for periodic coatings or patches and keep a contingency for unexpected repairs.
Routine maintenance tasks and frequency
Keep your TPO roof in tip-top shape with these routine tasks. They should be done twice a year, once in the spring and again in the fall.
Spring: Start by clearing any debris – leaves, twigs, or dirt – from the surface. Use a soft-bristled broom or a leaf blower on low setting. Next, inspect seams, flashings, and edge details for any wear or damage. Check gutters to ensure they’re free of blockages.
Fall: After the leaves have dropped, repeat the debris removal process. Inspect your roof for signs of UV damage, punctures, or pooling water. Assess the condition of your coating and note any dirt or staining trends.
Budgeting for repairs, coating, and replacement
Understanding your TPO roof’s maintenance costs helps you plan ahead. Here’s a breakdown:
Repairs: Minor issues like resealing flashings or fixing small tears can cost as little as $50-$100 each. However, they add up over time.
Coating: Applying a new coating every 3-5 years can extend your roof’s life and costs around $0.70 – $1.20 per square foot. This includes materials and labor.
Replacement: A full replacement runs about $3-$6 per square foot, including removal of the old membrane. Factors affecting budgets include roof size, accessibility, and local labor costs.
Restoration Options, Coatings, and Alternatives (Pros/Cons)
Restoration coatings such as silicone or urethane can address UV degradation and leaks on black TPO, but evaluate expected lifespan and maintenance needs. These coatings are most effective when the underlying membrane is still sound. Check manufacturer guidance and local rules before applying.
Compare coating pros and cons, including application ease, cure times, and long-term performance versus replacement. Consider spray foam overlays carefully, weighing insulation benefits against potential for concealing underlying issues. Use a clear decision framework to decide between restoration, replacement, or switching materials.
Roof coatings and restoring black TPO
Restoring your aged Black TPO roof with a coating can extend its life. But, not all coatings stick well to old TPO.
Silicone and urethane are best for TPO. They address UV degradation, leaks, and crazing. Prep involves cleaning, removing debris, and fixing minor issues.
Expect 5-10 years lifespan with coatings. Maintenance is minimal – just keep it clean. But, they won’t fix major problems like widespread cracking or delamination.
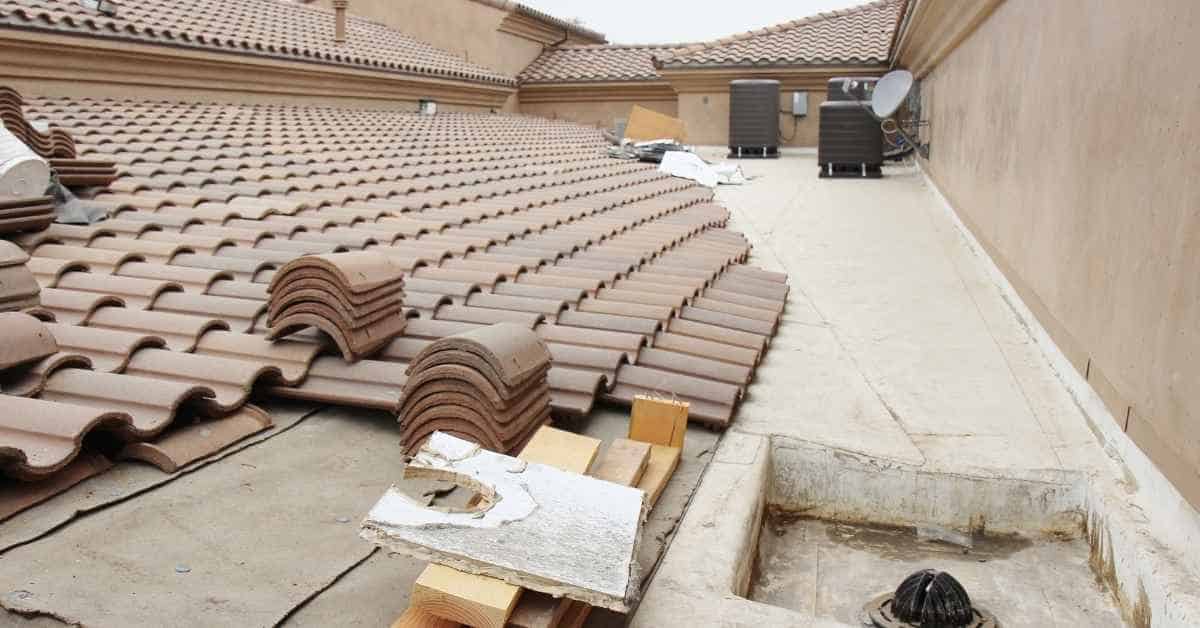
Comparing TPO to PVC and EPDM for replacements
When it’s time to replace, consider PVC or EPDM. They outlast TPO.
PVC beats heat better than TPO. It’s also easier to weld seams. But, it’s pricier. EPDM is cheaper and durable but needs more maintenance.
TPO has hot-weldable seams like PVC. But, its lifespan is shorter. Consider your climate, budget, and long-term maintenance when choosing.
Common Mistakes to Avoid and Environmental Considerations
Frequent DIY missteps include insufficient surface prep, using incompatible adhesives, and skipping debris removal. Avoid layering overlays without interim inspections and seam checks. These missteps can compromise long-term performance.
Environmental considerations cover recycling options for old TPO and safe disposal of scrap material and solvents. Be mindful of VOCs and choose eco-friendly sealants where applicable. Plan work around favorable weather and ensure proper waste containment on site.
Installation and repair pitfalls
Here are common mistakes to avoid during DIY repairs or when hiring contractors to prevent premature failure.
- Under-applying adhesive: This weakens the bond, leading to peeling. Apply evenly, following manufacturer guidelines.
- Poor seam welding/tape application: Inadequate heat or pressure causes leaks and splits. Ensure proper equipment setup and technique.
- Incompatible fasteners: Using wrong fasteners can damage the membrane. Stick to TPO-compatible options.
- Ignoring manufacturer guidelines: Skipping recommended primers, flashings, or edge details invites leaks. Follow instructions closely.
Regularly inspect your work and address any issues promptly to avoid costly repairs down the line.
Environmental impact and end-of-life handling
TPO recycling is challenging due to its composition, but there are ways to minimize environmental impact during repairs and at the end of its life.
VOC management: Use low-VOC sealants and coatings to reduce emissions. Proper ventilation is crucial during application.
Proper disposal or recycling involves contacting local waste management facilities or specialized recyclers. Some may accept old TPO for grinding into road base material, but options vary by region.
Scrap membrane and solvents should be disposed of according to local regulations. Always check with your local hazardous waste facility for guidance.
Conclusion
Protecting a black TPO roof means staying practical, measured, and safe. The goal is a durable, watertight roof that looks right and lasts, without creating extra damage or costly surprises.
Reach a clear plan in one pass: put on safety gear, walk the roof to inventory issues, note leaks, blisters, cracks, or seam problems, check edges and flashings, test repairs on a small area, then fix in the proper order—clean, dry, patch, reseal, and evaluate whether a coating or restoration option fits the budget and climate. Keep a simple log of what you did, what worked, and what still needs attention, and follow the stop rules to avoid overreaching beyond your skill or the season.
Common mistakes to avoid include rushing the inspection, skipping the safety steps, and trying to seal or coat areas that show structural damage or hidden moisture. Always test a repair in a small area first, respect weather windows, and never work on a roof alone if you can help it. If you see widespread bubbling, significant ponding, or suspect substrate damage, pause and reassess—the cost of chasing the problem can exceed the repair itself if you push past safe limits.
If the job feels beyond your comfort zone or you face persistent leaks after a first pass, call a professional. Professionals can confirm stop points, perform more durable restorations or coatings, and help you design a maintenance plan that fits your budget. Stay proactive, stay safe, and you’ll finish with a roof that performs well and ages gracefully. You’ve got this.
FAQ
What’s the most common problem with black TPO roofs?
leaks from bad seams, punctures, and worn flashing are the usual suspects. inspect around edges and seams first, then check for exposed fasteners. fix it fast or you’ll pay later in a big batch of water damage.
Can I fix a TPO leak myself, or should I call a pro?
small punctures and seam repairs can be DIY if you follow the product instructions. major damage or a large area needs a pro with proper tools and safety gear. do not skimp on safety or proper patch products.
What should I use to patch a hole in TPO roofing?
use a patch kit rated for TPO and follow the manufacturer steps exactly. clean and dry the area, then apply patch and adhesive as directed. never mix brands or skip curing times.
What are the stop rules for DIY TPO repairs?
always shut off the area, protect yourself with gloves and eye protection, and keep children off the roof. test a small area first, and if you see bubbling or peeling, stop and reassess. if you smell solvent or see fumes, stop and ventilate.