
Introduction
A low slope roof is a roof with a gentle incline that sheds water more slowly than a steep roof. This intro will give you practical, hands-on tips for planning and starting a DIY project without guessing. You’ll want to check local rules and follow manufacturer instructions for any material you choose.
Best roofing materials for low slope roofs include options designed to resist water on a shallow grade, but always read the product label. I’ll cover how to prep a roof, choose underlayment, and install materials with safety and good drainage in mind. When in doubt, verify limits and installation steps with the manufacturer or local building code requirements.
Key takeaways
- Inspect roof deck for moisture and rot before selecting low-slope membrane.
- Ensure proper drainage slope and edge flashing to prevent ponding.
- Verify compatibility of underlayment, fasteners, and membrane with local codes.
- Use safety harnesses and fall protection when working on roofs.
- Schedule inspections during installation to catch alignment and seam issues early.
- Plan for energy efficiency with radiant barriers and proper ventilation strategies.
Table of Contents
- Introduction
- Key takeaways
- Defining a Low Slope Roof
- Common Materials for Low Slope Roofs (Overview)
- How to Choose the Best Material for Your Low Slope Roof
- Design and Installation Best Practices for Low Slope Roofs
- Installation Methods and Common Problems to Avoid
- Energy Efficiency and Sustainability Options
- Cost, Lifespan, and Maintenance Guide
- DIY-Friendly Tools, Materials, and Visual Checkpoints
- Conclusion
- FAQ
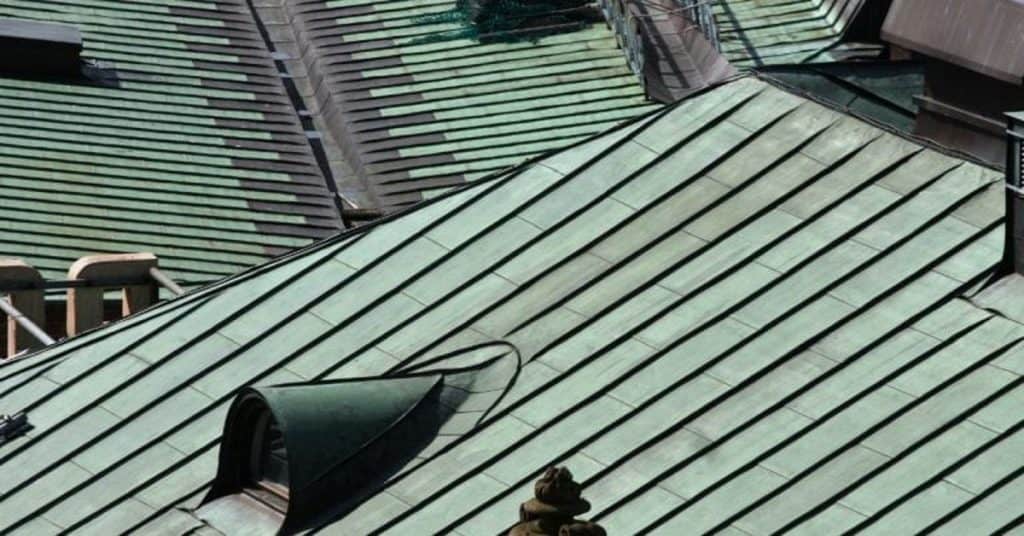
Defining a Low Slope Roof
A low slope roof is a roof where the surface does not rise steeply toward the edges. In practice, you’ll see slopes described in both degrees and rise/run measurements, but the exact threshold depends on local rules and the roof type. Always verify with the product label or local code requirements to determine what counts as low slope in your area.
Why slope matters is more than appearance. It affects drainage, waterproofing details, and how materials perform under weather conditions. Knowing the definition helps you choose suitable membranes, flashing, and installation methods that meet code and performance goals.
Roof Slope Terminology and Measurement
A low slope roof’s angle is measured by its rise over run. This means it’s the vertical height (rise) divided by the horizontal distance (run). For example, a 4/12 pitch has a rise of 4 inches for every 12 inches of run.
You can also express this as a percentage or degrees. A 4/12 slope is about 18%. In degrees, it’s around 9.5°. To convert between formats:
- Percent to rise/run: (Percent * Run) / 100 = Rise
- Degrees to rise/run: (Tan(Degrees)) * Run = Rise
Low Slope vs. Flat vs. Steep Roofs
Understanding your roof’s pitch is key to choosing the right materials and maintenance plan.
Flat roofs have a slope of 2/12 or less (less than 9°). They’re prone to water pooling, so need special membranes and regular inspections. Low slope roofs range from 2/12 to 4/12 (2-18%). They can handle most materials but may still face water issues if not properly installed or maintained.
Steep roofs, with slopes over 4/12 (>18°), shed water quickly and can use a wider range of materials. However, they pose safety risks during installation and maintenance.
Common Materials for Low Slope Roofs (Overview)
This overview covers the main material families you’ll encounter on low slope roofs. Each type has its own strengths and tradeoffs, from installation ease to durability in different climates. Always check the manufacturer instructions and local code for compatibility with your roof.
Common options include sheet membranes and built-up systems, with single-ply membranes and bitumen-based products also in frequent use. Pros and cons vary by weather exposure, UV resistance, membrane seams, and maintenance needs. Use product labels to confirm expected lifespans and warranty terms for your project.
Single-ply membranes (TPO, PVC, EPDM)
Single-ply membranes are popular for low slope roofs due to their waterproofing capabilities and ease of installation. Here’s a quick rundown:
TPO: Thermoplastic Polyolefin is a single layer membrane with reinforcing scrim. It’s heat-welded at seams, making it strong and leak-resistant. Lifespan: 20-30 years.
PVC: Polyvinyl Chloride is similar to TPO but has a plasticizer for flexibility. It’s also heat-welded. Lifespan: 15-30 years.
EPDM: Ethylene Propylene Diene Monomer is a rubber membrane, usually installed with adhesive or mechanical fasteners. Its lifespan is around 20-30 years but can last up to 40+ years with proper maintenance.
Modified bitumen and built-up roofing (BUR)
Modified bitumen and BUR are layered systems, providing excellent durability for low slopes.
Modified Bitumen: This is a hybrid of asphalt and rubber or plastic. It’s applied in layers with heat-welded seams. Lifespan: 15-20 years.
BUR (Built-Up Roofing): BUR consists of multiple layers of bitumen and reinforcing materials. It can be applied using hot asphalt or cold adhesive, then covered with gravel or a reflective coating. Lifespan: 20-30 years.
Metal roofing adapted for low slopes
Metal can work on low slopes with the right system and installation. Here’s how:
Metal panels are installed in overlapping courses, with seams sealed using specialized fasteners or sealants. For low slopes, standing seam metal is often used due to its tight seaming and minimal water penetration risk.
Membrane systems can also be used under metal panels for added protection against leaks on low slopes. Metal’s lifespan is typically 40-75 years but depends on the quality of materials and installation.
How to Choose the Best Material for Your Low Slope Roof
Start with climate and expected weather patterns, then consider your budget and roof accessibility. Some materials handle heat and UV exposure better, while others offer easier repairs or lower installation costs. Always align choice with your goals for energy efficiency and longevity.
Building codes and warranty requirements can influence material selection. Check the local code, and read the manufacturer data sheets for required installation methods and venting needs. If in doubt, ask a pro or verify through the product label and instructions.
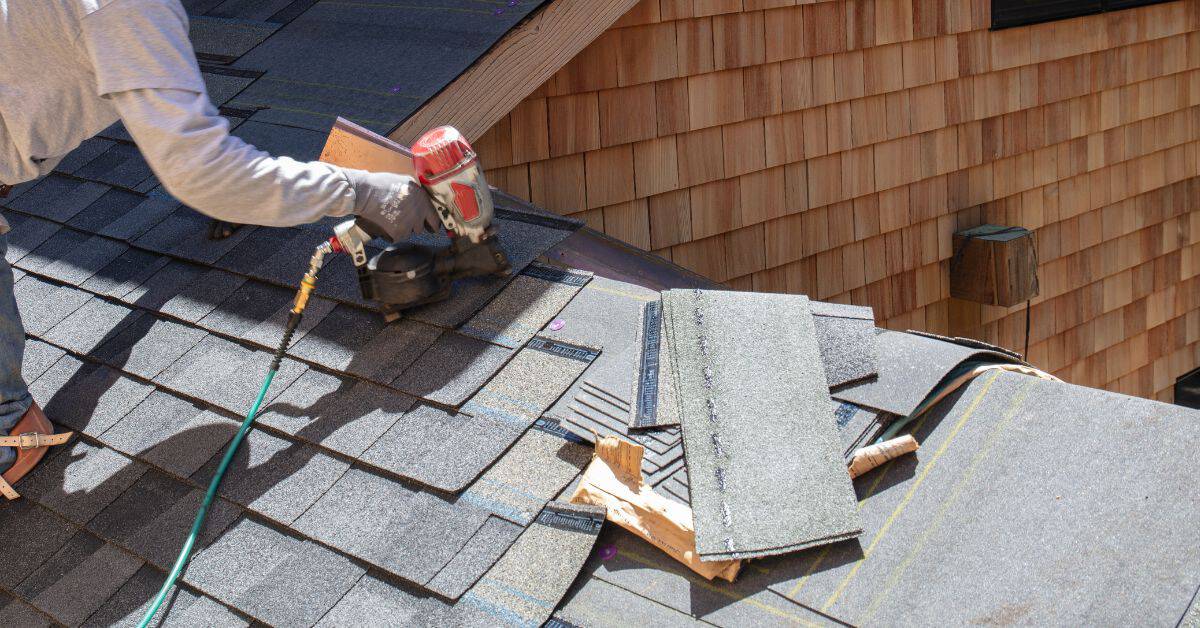
Step-by-Step Process
Follow these practical steps to choose the best material for your low slope roof, ensuring safety and efficiency.
- Inspect your roof: Check for damage, measure slopes, and ensure it’s safe to walk on. Why: Identify any repairs needed before installation.
- Gather materials: List what you’ll need based on chosen material. Why: Ensure nothing is missed during the job.
- Prepare your roof: Clean, prime if necessary, and ensure it’s dry. Why: A clean surface promotes better adhesion.
- Install the material: Follow manufacturer’s instructions for laying out and securing chosen material. Why: Proper installation ensures longevity and performance.
- Inspect your work: Check for any gaps, bubbles, or improperly secured areas. Why: Catch any issues before they become problems.
Climate and weather considerations
Temperature extremes, UV exposure, wind, and ponding water risk significantly impact material performance. Consider these factors when choosing your low slope roof.
Hot climates: Opt for materials with high reflectivity to combat heat gain and UV degradation.
Cold climates: Choose materials that can withstand freeze-thaw cycles without cracking or delaminating. Consider insulation as well.
Wind-prone areas: Select materials with good wind uplift resistance, and ensure proper attachment methods are used.
Budget and lifecycle cost analysis
Compare upfront costs with maintenance and replacement cycles to make an informed decision. While cheaper options may seem appealing, they might not be the best long-term choice.
Initial cost: Consider both material and installation costs. Some materials may have higher initial costs but lower long-term expenses.
Maintenance: Factor in regular maintenance needs. Some materials require more upkeep than others.
Lifespan: Higher-quality materials often last longer, reducing the need for frequent replacements. However, they may have a higher initial cost.
Building code, warranty, and insurer requirements
Check local building codes to ensure your chosen material complies. Also, consider manufacturer warranties and insurance implications.
Building codes: Some areas have specific regulations regarding roofing materials and installation methods. Always check before starting any work.
Warranty: Understand the warranty terms for your chosen material. Some may require specific installation methods or maintenance to remain valid.
Insurance: Some insurers may offer discounts or prefer certain materials. Check with your provider to see if this applies to you.
Design and Installation Best Practices for Low Slope Roofs
Key design details include establishing a proper drain plane and adequate slope to direct water toward drains. Insulation and deck ventilation play important roles in moisture control and energy performance. Substrate preparation must be clean, dry, and compatible with the chosen system.
Always follow the manufacturer instructions for seam detailing, flashing, and edge details. Use compatible fasteners or adhesives as specified, and verify that all components are rated for low-slope use. If you’re unsure, consult the product label or installer guide before proceeding.
Ensuring adequate drainage and slope correction
A low slope roof needs proper drainage to prevent water buildup. Here’s how:
Check your roof’s slope. It should be at least 1/4 inch per foot for most materials, but check manufacturer specs. Too flat can cause leaks and ponding.
Improve drainage with these methods:
– Add slope using tapered insulation or fillers.
– Install cricket at the lowest point to direct water towards drains.
– Ensure your roof has enough drains and they’re well-maintained.
Deck preparation and flashing details
A solid, dry deck is key for a long-lasting low slope roof. Here’s how to prep it:
– Ensure your deck is flat, clean, and dry. Remove any debris or moisture.
– Install a moisture barrier to prevent future issues.
Flashing is crucial around penetrations and edges. Here’s how:
– Use continuous flashing around pipes, vents, and other penetrations.
– At the roof’s edge, use drip edge flashing to direct water away from the deck.
Insulation, ventilation, and thermal considerations
Proper insulation and ventilation keep your roof performing well. Here’s how:
– Install insulation with the right R-value for your climate.
– Place it directly under the membrane to prevent moisture buildup.
Ventilation is key to preventing condensation:
– Use continuous ventilation along the eaves and ridge.
– Consider using mechanical vents in hot climates or high-heat buildings.
Installation Methods and Common Problems to Avoid
Common methods include fully adhered, mechanically attached, or ballasted setups. Each method has specific fastener patterns, ballast requirements, and surface prep needs. Matching the method to wind, roof type, and substrate is essential for performance.
Avoid typical mistakes such as improper seam preparation, inadequate drainage details, and skipping cure/adhesion times. Poor substrate preparation and incorrect flashing are frequent failure points. Always verify installation steps against the manufacturer instructions and local rules.
Seaming and Fastening Techniques
When it comes to low slope roofs, proper seaming and fastening is crucial to prevent leaks. Here are the common methods:
Seam Welding: This is ideal for single-ply membranes like TPO and PVC. It uses heat to fuse the seams together, creating a strong, watertight bond.
Heat-Bonding: Similar to seam welding, heat-bonding is used for some TPO membranes. It melts the membrane’s surface to create a seal.
Adhesives: For fully adhered systems, adhesives are applied between the membrane and the substrate. This method is common with modified bitumen and built-up roofs.
Mechanical Fasteners: These are used with mechanically attached systems. They secure the membrane to the substrate using screws or other fasteners. Use them sparingly to avoid puncturing the membrane.
Ponding Water, Leaks, and Maintenance Pitfalls
Ponding water and leaks are common problems on low slope roofs. Here’s how to avoid them:
- Improper Drainage: Ensure your roof has adequate drainage to prevent ponding. This might mean installing scuppers, internal drains, or even a roof drain system.
- Poor Installation: Inadequate seaming, improper fastening, or using low-quality materials can lead to leaks. Always follow the manufacturer’s instructions.
- Foot Traffic: Excessive foot traffic can damage your roof, especially around penetrations and curbs. Limit access when possible.
- Weathering: Over time, UV rays and temperature changes can degrade roofing materials. Regular inspections can help catch these issues early.
Regular maintenance is key to preventing these problems. Inspect your roof annually, clean debris regularly, and address any issues promptly.
Contractor Selection and Quality Control Tips
Choosing the right contractor is vital for a successful low slope roof installation. Here’s what to look for:
Experience: Look for contractors with proven experience in low slope roofs. Ask for references and examples of their work.
Licensing and Insurance: Ensure they’re licensed to work in your area and have adequate insurance coverage to protect both parties.
Quality Materials: Insist on high-quality materials that meet or exceed industry standards. Check the manufacturer’s warranty to ensure it covers labor as well as materials.
Contract Details: Review the contract carefully. It should include a detailed scope of work, timeline, payment schedule, and warranty information. Any changes should be documented in writing.
Energy Efficiency and Sustainability Options
Cool roofs and reflective membranes can reduce heat gain and improve comfort in hot climates. Green roofs and lightweight plantings offer insulation benefits but require careful structural assessment. Look for materials with low-VOC content and recyclable components where available.
Consider how system choice affects long-term energy use and maintenance. Check product labels for reflectivity ratings and sustainability claims, and verify with manufacturer guidelines and local building requirements before committing.
Cool roof coatings and reflective membranes
Low slope roofs can get real hot under the sun. That’s where cool roofs come in. They reflect sunlight, keeping your roof – and your home – cooler.
Reflective surfaces reduce heat gain by up to 70%. That means less energy used for cooling, saving you money on those summer bills.
These coatings are usually applied over existing roofs. They’re easy to maintain but do need recoating every few years to keep their reflective power.
Green roof and solar-ready options for low slopes
Got a green thumb? A green roof might be your thing. It’s like a garden on top of your house, helping insulate, reduce stormwater runoff, and even improve air quality.
But remember, low slope roofs need special attention. They’ve got to support the weight of all that greenery. Make sure your roof can handle it before you start planting.
Solar panels are another option. They’re light but need a solid surface to sit on. Go for solar-ready roofs designed with attachment points for easy panel installation.
Cost, Lifespan, and Maintenance Guide
Expect variability in initial costs based on material type, labor, and accessibility. Use quotes that reference the scope of work and local market conditions rather than guessing numbers. Always confirm any cost estimates with supplier or contractor ailing requirements and warranty terms.
Discuss anticipated lifespan ranges with the product data sheet and installer, recognizing that climate and maintenance impact longevity. Create a seasonal maintenance plan that focuses on drainage, membrane integrity, and flashing checks, and verify intervals with manufacturer guidance.
Typical costs and expected lifespans by material
Material choices significantly impact your low slope roof’s cost, lifespan, and maintenance needs.
- Built-up Roof (BUR): Uses layers of bitumen and felt. Cost: $2.50 – $4.50 per sq ft. Lifespan: 15-30 years with proper maintenance.
- Modified Bitumen: Fiberglass or polyester reinforcement, asphalt, and rubber modifiers. Cost: $2.00 – $4.00 per sq ft. Lifespan: 15-20 years. Avoid low-end materials to prevent cracking.
- EPDM (Rubber): Single-ply membrane made of synthetic rubber. Cost: $3.00 – $6.00 per sq ft. Lifespan: 25-35 years. Check for proper adhesion to avoid weak bonds.
- TPO (Thermoplastic Polyolefin): Single-ply membrane with hot-air welded seams. Cost: $4.00 – $8.00 per sq ft. Lifespan: 15-25 years. Look for high-quality materials to prevent staining.
- PVC (Polyvinyl Chloride): Single-ply membrane with hot-air welded seams. Cost: $5.00 – $9.00 per sq ft. Lifespan: 15-30 years. Avoid low-end materials to prevent weak bonds.
Seasonal and annual maintenance checklist
Regular inspections keep your low slope roof in top shape, preventing costly repairs and extending its lifespan.
- Spring: Inspect flashings for damage or gaps. How to confirm: Look for any visible gaps or cracks around vents, chimneys, and walls.
- Summer: Check for ponding water. How to confirm: Look for standing water after a rainstorm; it should drain within 48 hours.
- Fall: Clean gutters and drains. How to confirm: Ensure all debris is removed from gutters and roof drains are clear.
- Winter: Inspect for ice dams. How to confirm: Look for icicles or ice buildup at the edges of your roof; this can cause water damage if left unchecked.
- Annually: Inspect seams and membranes for cracks or tears. How to confirm: Use binoculars to inspect your roof’s surface for any visible damage.
- Every 2-3 years: Have a professional inspection. Why: Some issues may not be visible to the untrained eye, and regular professional inspections can catch them early.
Quick rule: Inspect your low slope roof at least twice a year – once in spring and again in fall – to stay on top of potential issues.
When to repair vs. when to replace
Deciding between repairing and replacing your low slope roof depends on several factors:
Age: If your roof is nearing or past its expected lifespan, replacement may be more cost-effective than frequent repairs.
Damage extent: Minor issues like a few missing shingles can often be repaired. However, widespread damage may warrant a full replacement.
Frequency of repairs: If you find yourself making repairs frequently, it might be time to consider a replacement. This is especially true if the repairs are due to normal wear and tear rather than exceptional circumstances.
Remaining expected service life: Consider your roof’s remaining lifespan when deciding whether to repair or replace. A 10-year-old roof with 5 years of expected life left may be better off repaired, while a 20-year-old roof with only 2 years left might warrant replacement.
DIY-Friendly Tools, Materials, and Visual Checkpoints
As a homeowner, assemble a basic toolkit for minor repairs and inspection tasks. Include safety gear, measurement tools, and surface-cleaning supplies. Use manufacturer instructions to determine which materials you can handle safely on your own.
Visual checkpoints help you spot early issues: look for loose seams, pooling water, and worn flashing. Always stop and recheck with the product label or instructions if anything seems unclear, and when in doubt, consult a professional.
Tools and materials checklist for basic repairs
Use this checklist before starting any small patch jobs or preventative maintenance to ensure you have the right tools and safety gear. It’s designed to help you avoid common mistakes that can lead to expensive rework.
- Safety glasses: Protect your eyes from debris. Check they fit well and are comfortable for extended use.
- Work gloves: Choose a pair that provides good grip and protection. Ensure they’re not too thick to handle tools properly.
- Dust mask or respirator: Essential when dealing with concrete dust. Check the filter type is suitable for your task (e.g., P100 for silica dust).
- Hearing protection: Use when using power tools like grinders or jackhammers. Check they fit well and reduce noise levels sufficiently.
- Tape measure: Accurate measurement is crucial for purchasing the right amount of materials. Check it’s in good working order before starting.
- Chalk line: Helps mark out repair areas accurately. Ensure it has a sharp tip and makes clear, visible lines.
- Concrete chisel & hammer or rotary hammer: For removing damaged concrete. Check tools are in good condition and have the right size bits for your task.
- Concrete repair mix or patching compound: Choose one suitable for your climate and repair type (e.g., fast-setting, flexible). Check it’s within its usable lifespan and stored correctly.
- Concrete trowel or squeegee: For applying the repair material. Ensure it’s the right size for your job and is clean before use.
Quick rule: Always check your tools and materials before starting any repair work to avoid delays and ensure a professional finish.
Visual inspection guide and red flags
Before you start any repair work, use this checklist to inspect your roof visually from the ground and on-roof. This will help you identify serious issues that need immediate attention.
- Blisters: Look for bubbled or swollen areas. These indicate trapped moisture under the membrane. Use a sharp tool to gently poke them; if they’re full of water, they need repair.
- Seam failure: Check all seams (where sheets overlap) for cracks, gaps, or lifted edges. Use a straight edge to ensure seams are tight and sealed properly.
- Standing water: Inspect low spots where water can pond. Standing water accelerates membrane degradation; ensure no areas hold water for more than 48 hours.
- Extensive membrane damage: Look for large areas of damaged membrane (tears, punctures, or missing sections). These need immediate repair to prevent further water intrusion.
- Curling edges: Check roof edge metal and flashing. Curled edges can allow water to get underneath, causing leaks. Straighten and re-secure if necessary.
- Missing or damaged gravel: On gravel-surfaced roofs, check for missing or damaged gravel. This exposes the membrane to UV damage and punctures; replace as needed.
- Clogged drains: Inspect roof drains (scuppers, gutters) for clogs. Clogged drains cause water to back up and pond on the roof, leading to leaks.
- Sagging or deflected insulation: Check underneath roofing for sagging or deflected insulation. This can indicate moisture problems in the roof system that need immediate attention.
Quick rule: If you find any of these issues, don’t ignore them. Address them immediately to prevent small problems from becoming expensive reworks.
Conclusion
Choosing the right material and following solid installation practices now pays off in safety, durability, and curb appeal. A low slope roof can look clean and perform well when you respect the basics and don’t rush the work.
Before you start, confirm the roof slope and drainage, pick a material that fits climate and warranty, gather the DIY-friendly tools and materials, review the underlayment and flashing needs, and plan a safe sequence for the job. Work in dry conditions, test a small area first, and follow the product instructions for fasteners, sealants, and overlap. Scaffold or harness as needed, and perform a continuous visual check as you go to spot misalignments or damaged components early.
Common mistakes to avoid are skipping proper underlayment or flashing, ignoring drainage paths, and proceeding with poor safety discipline or in wet weather. Never skip fall protection, always wear appropriate PPE, and don’t step on weak roof sections or carry tools over edges without a secure plan. If any part of the project feels large, risky, or beyond your confidence level, call in a pro before you cause costly damage.
If you keep it practical and staged—start small, test as you go, and stop when the risk rises—you’ll finish confident and safe. When in doubt about flashing details, warranty implications, or complex roof transitions, get a professional involved. You’ve got this, and steady, careful work yields solid results that stand up to the elements.
FAQ
How do I tell if my low slope roof needs replacement rather than a repair?
Look for widespread sagging, persistent leaks, and multiple patches that fail. If you’re chasing leaks around many penetrations or the surface shows blistering and cracking, plan replacement after checking manufacturer guidance and local rules.
What are practical roofing material options for a DIY low slope roof?
Consider materials that are forgiving on low slope angles and come with clear installation instructions. Always read the product label, installation guide, and local requirements before buying, and confirm suitable underlayment and seam methods with the manufacturer.
What are common mistakes to avoid during installation on a low slope roof?
Avoid improper drainage, mismatched fasteners, and skipping the underlayment. Don’t seal or bond where the substrate is dirty or oily, and follow the manufacturer’s step-by-step directions for sealing seams and edges.
What maintenance steps help extend a low slope roof’s life without hiring a pro?
Keep debris off the surface and check for signs of pooled water after storms. Inspect seams, edging, and flashings periodically and follow the product’s maintenance guidance from the label or datasheet.