
Introduction
Insurance coverage for thermal cracking shingles is often limited and depends on your policy and the cause of damage.
This guide walks you through how to determine eligibility, how to document damage, and practical steps and common mistakes to avoid when pursuing a claim or deciding on repairs.
Key takeaways
- Identify shingles showing blistering, curling, and random hairline cracks across the roof.
- Distinguish thermal cracking from wind or hail damage using crack patterns and age.
- Homeowners insurance coverage varies; check policy specifics and endorsements for shingles.
- Document damage with date-stamped photos, roof line locations, and contractor estimates.
- Do temporary repairs safely, avoid ladder overreaches, and retain receipts for claims.
- When in doubt, hire a pro for permanent repairs to protect warranty.
Table of Contents
- Introduction
- Key takeaways
- What are thermal cracking shingles?
- How to identify thermal cracking vs. other shingle damage
- Does homeowners insurance cover thermal cracking?
- Documenting damage for a successful insurance claim
- DIY assessment and temporary repairs before filing a claim
- Permanent DIY repair options and when to hire a pro
- Common mistakes homeowners make (and how to avoid them)
- Preventing thermal cracking and protecting roof value long-term
- Conclusion
- FAQ
What are thermal cracking shingles?
Thermal cracking is long, hairline cracks that develop in asphalt shingles from repeated heating in sun and cooling at night. As shingles age and UV exposure brittles the asphalt, they become prone to cracking when you bend or foot-traffic them. Quick signs to spot: fine cracks running along or across shingles, not just at the edges.
Shingles expand in heat and contract when it’s cold, stressing the joints and increasing crack risk with temperature swings. The binder hardens in winter and softens in summer, reducing flexibility and making cracking more likely. For DIYers, cracks can lead to leaks and often require replacement rather than patching; document them with photos and call a pro if the cracks are widespread or in critical areas.
Causes and mechanics of thermal cracking
Thermal cracking happens when asphalt shingles expand during the day from heat exposure and contract at night as temperatures drop. This constant cycle puts stress on the shingle joints, leading to hairline cracks over time.
The aging process doesn’t help either. UV rays break down the protective granules and make the underlying asphalt brittle. As a result, older shingles become more prone to cracking when bent or stepped on during foot traffic.
Manufacturing defects and poor storage conditions can also play a role. Shingles that aren’t stored properly before installation can develop cracks even before they’re put up on your roof. And if the asphalt binder isn’t mixed right, it won’t hold up well to temperature changes.
Types of shingles prone to thermal cracking
Not all shingles are created equal when it comes to resisting thermal cracking. Older, standard three-tab asphalt shingles tend to be more susceptible compared to modern laminated or architectural styles.
Laminated shingles have a layered design that adds durability and flexibility, making them less likely to crack under temperature stress. They also often come with enhanced UV protection and impact resistance features.
When inspecting your roof for thermal cracking, pay extra attention if you have older or lower-grade shingles. These are more vulnerable due to their composition and lack of advanced protective coatings against the elements.

How to identify thermal cracking vs. other shingle damage
Thermal cracking shows fine, map-like cracks and shallow surface checks that tend to run in vertical patterns from heat cycles. It often reads as a network of hairline lines across the shingle surface, not a single impact mark. Distinguishing it from hail is easy once you note the round dents and localized granule loss that come with hail, and from wind or aging by looking for a uniform crack matrix rather than torn edges or cupping along the perimeter.
When you touch it, the crack lines may feel rough or chalky, and you might notice soot or staining from extended heat exposure. A quick DIY check is to review weather history, inspect from a safe vantage, photograph the patterns, map crack clusters, and compare surrounding shingles for uniform damage versus scattered spots. Understanding these cues matters because thermal cracking changes how you plan repairs or replacements and helps you avoid chasing the wrong culprit or overreacting to weathered edges that aren’t the root cause.
Step-by-Step Process
This sequence helps you systematically identify thermal cracking versus other types of shingle damage.
- Climb up safely with a ladder and wear safety gear. Check the weather history for heat waves.
Why? Heat is key to thermal cracking, so know your roof’s recent conditions. - Inspect from ground level first using binoculars. Look for fine cracks resembling maps or shallow surface checks.
Note: Hairline cracks are common in thermal damage; hail will show dents and granule loss. - Climb up to the roof if needed, but stay safe. Feel the shingles along crack lines for roughness or chalkiness.
Tip: Thermal cracking feels different from wind damage which shows cupping or curling edges. - Note any soot or staining around cracks due to heat exposure. Compare with surrounding undamaged areas.
Check: Uniform patterns of hairline cracks indicate thermal issues, while scattered damage points to hail or age. - Photograph the roof from various angles and map crack clusters on a diagram for reference.
Note: Documenting is crucial for insurance claims if you suspect thermal cracking.
Visual checkpoints and inspection checklist
Use this checklist when inspecting your attic or roof for signs of thermal cracking.
- Granule loss: Check if granules are missing in clusters. Confirm by comparing with undamaged areas.
Note: Granule loss can also be from hail, so look for round dents too. - Linear cracks: Look for fine, map-like cracks or shallow surface checks. Verify patterns match thermal cracking descriptions.
- Pattern locations: Note if crack clusters form vertical lines due to heat cycles. Compare with hail damage’s random scatter.
- Edge lifting: Check edges of shingles for cupping, curling, or lifting. Confirm wind uplift by looking at surrounding areas.
Note: Skipping this step can miss crucial signs of wind damage versus thermal cracking. - Rough texture: Feel along crack lines for roughness or chalkiness. Verify against smooth, flexible shingles nearby.
- Soot staining: Look for dark sooty stains around cracks due to heat exposure. Confirm by checking other areas without damage.
Quick rule: Thermal cracking shows uniform patterns of fine hairline cracks and rough texture, while hail or wind damage is more scattered and varied.
When to suspect underlying decking or flashing issues
If you notice interior stains, sagging decking, or gaps in flashing around thermal cracking, it may indicate deeper damage beyond just the shingles.
Sagging decking can be a sign of structural weakening due to prolonged heat exposure. Check for any soft spots or uneven areas when walking on the roof.
Note: Ignoring this could lead to significant water damage and further deterioration.
Interior stains, especially near walls or ceilings, might indicate moisture penetration through compromised flashing or decking. Look for signs of wet insulation or discoloration in your attic.
Note: Addressing these issues early can prevent costly repairs later on.
Flashing gaps around chimneys, vents, and valleys should be inspected closely. Missing or improperly installed flashing allows water to seep into the roof structure.
Note: Proper sealing is crucial for preventing long-term damage from thermal cracking.
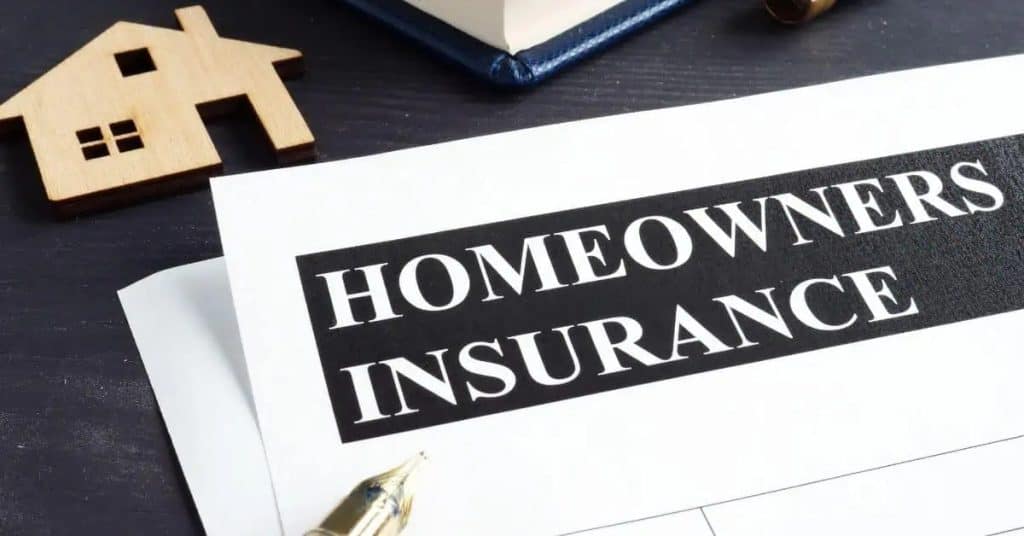
Does homeowners insurance cover thermal cracking?
Homeowners insurance often covers sudden, accidental damage from covered perils, but thermal cracking can fall into exclusions if it’s due to wear, improper maintenance, age, or workmanship. Whether a crack in the roof is covered depends on the proximate cause—was it a sudden event tied to a covered peril, or gradual deterioration outside the policy’s scope? Check how your policy defines covered perils and what “sudden and accidental” means versus gradual damage, and read the exclusions closely.
For DIY homeowners, the practical takeaway is to document everything, keep a clear timeline, and photograph damage as it appears. When you file a claim, be ready to show maintenance records and any steps you’ve taken to mitigate further damage; insurers will often request details about the cause, repairs attempted, and the roof’s age. Avoid claim denial by staying on top of routine maintenance, keeping good records, and involving your agent or adjuster early if you suspect a thermal crack ties to a covered event or if pre-existing issues could affect coverage.
Covered perils vs. maintenance exclusions
Your homeowners insurance policy covers sudden and accidental damage from covered perils like wind, hail, or fire. But it doesn’t cover gradual wear-and-tear or deterioration over time. This means if your shingles develop thermal cracks due to normal weather changes and aging, that’s considered a maintenance issue, not an insured event.
Insurance policies define covered perils as sudden and accidental damage from specific events. Thermal cracking is usually gradual and related to temperature fluctuations, which isn’t covered under most standard policies. If your shingles crack suddenly due to a hailstorm or wind-driven debris, that would likely be covered.
The key takeaway: thermal cracks caused by normal weather changes are not sudden accidents but rather progressive deterioration. This means you’ll need to maintain your roof and address any issues before they become major problems. Regular inspections can help catch small issues early on.
How manufacturer or installation defects affect claims
If thermal cracking is due to a defect in the shingles or poor workmanship during installation, your insurance might not cover it. Instead, you’d need to file a claim with the manufacturer or installer under their warranty.
The first step is determining whether the issue falls under a warranty from the shingle maker or an installer’s guarantee. If so, contact them directly and follow their process for filing a claim. This often involves submitting photos of the damage and proof of purchase.
When dealing with both insurance and warranties, coordinate closely between all parties involved. Your insurer may require you to exhaust warranty options first before they’ll consider your claim. Keep detailed records of all communications and documentation related to your roof’s condition.
Avoid common mistakes like assuming everything falls under your homeowners policy or delaying action when a defect is clear. Addressing issues promptly can save time, hassle, and money in the long run.
Documenting damage for a successful insurance claim
This section guides you to document damage for a successful insurance claim. You’ll establish an incident log, photograph damage from wide to close, and build a clear damage timeline with observations and any temporary fixes. Gather insurance-relevant documents and professional assessments, and organize everything so the claim can move smoothly.
With proper evidence and orderly records, you avoid common pitfalls and speed the process. It helps you prove the extent of damage, supports repair estimates, and makes it easier for insurers to verify what happened.
Photo, video, and measurement best practices
To make your insurance claim stronger, take clear photos from multiple angles. Use a tape measure to show scale in the frame for each shot of damage. Include wide shots that capture the whole roof area and close-ups focusing on cracks or damaged shingles.
For videos, shoot steady footage with good lighting. Timestamps are key—show the date and time clearly when you start recording. This helps insurers track the progression of damage over time.
Remember to keep all your photos and videos in a single folder, organized by date. Back up everything electronically so nothing gets lost during the claims process.
Written records and professional inspections
Maintain detailed written logs of any damage observations and repairs made over time. Include dates, weather conditions, and actions taken to secure your property.
- Date stamp: Record the exact date when you first noticed thermal cracking or other issues.
- Detailed notes: Write down what you see and any immediate steps you take to protect your roof from further damage.
- Maintenance receipts: Keep all receipts for repairs, inspections, and maintenance work done on the roof. This proves ongoing care before an incident.
- Inspection reports: Get a dated report from a professional inspector or contractor who can confirm the extent of damage and recommend necessary repairs.
Quick rule: Always document everything in writing and keep it organized to support your insurance claim effectively.

DIY assessment and temporary repairs before filing a claim
Knowing what to observe and how to phrase it helps you communicate with the insurer without promising a permanent repair, and you’ll have a clear path to escalate when a professional adjuster or roofer is needed.
Finally, have a plan to transition to professional help, documenting what a pro will want to see, and compiling the information you’ll hand to the roofer or adjuster for a smoother inspection.
Safety-first inspection tips
Before you start assessing your roof for thermal cracking, make sure to follow these safety guidelines.
- Ladder setup: Ensure the ladder is stable and extends at least three feet above the roof edge. Check if it’s on a solid surface.
- Harnesses: Use fall protection gear like harnesses and lanyards for any work over six feet high.
- Weather conditions: Avoid working in wet or icy conditions to prevent slips and falls.
- Personal protective equipment (PPE): Wear sturdy shoes, gloves, and a hard hat. Use safety glasses when handling materials.
- Roof access points: Identify safe entry and exit points on the roof that minimize walking over damaged areas.
- Inspect ladder stability: Before climbing, check for loose rungs or damage to the ladder frame.
- Avoid overreaching: Keep your center of gravity within the ladder’s rails. Overreaching can cause you to lose balance and fall.
- Check roof surface: Look out for slippery spots, debris, or uneven areas that could lead to a slip.
Quick rule: If any step feels unsafe, stop immediately and call in the pros.
Temporary patching methods that won’t void claims
When dealing with thermal cracking, it’s crucial to take steps to prevent further damage without altering your roof permanently. Use materials like roofing sealant or tarps for quick fixes.
Apply a thin layer of roofing sealant over cracks and gaps in the shingles. This can help stop leaks temporarily but won’t interfere with future repairs by professionals. Make sure not to apply too much, as it could cause issues during re-roofing.
Cover exposed areas with tarps or plywood sheets secured with rope or clips. These should be non-permanent and easy to remove when a professional arrives. Document the placement of these temporary measures in your damage diary for insurance purposes.
</p)temporary></p)on-roof></p)document></p)safety>
Permanent DIY repair options and when to hire a pro
For experienced homeowners, some thermal-crack repairs can be done in place, but the feasibility depends on crack size, roof age, pitch, and access. Short-term fixes, sealing or patching, and limited shingle or flashing resealing can work if the damage is isolated and the roof isn’t past its useful life. When the crack is large, the deck feels soft, or multiple areas are involved, plan for professional replacement rather than DIY patching, and check the product label or datasheet for guidance.
Safety and feasibility come first: wear proper fall protection, use a stable ladder, and pick a weather window with no wind and no imminent rain. For repairs, document the issue with photos, note the roofing materials, and keep a simple checklist to decide when to call in a pro and what to ask them about—warranty, scope, and typical turnaround. Knowing what information to provide helps insurers or contractors quote accurately and ensures you’re comparing apples to apples when you hand off the job.
Step-by-step for replacing an individual cracked shingle
This sequence helps you replace a single damaged shingle without causing further roof damage.
- Remove the old shingle by prying it up with a flat pry bar. Check that the underlayment is intact before proceeding.
- Cut a new shingle to fit, ensuring it matches the existing ones in size and shape. Measure twice for accuracy.
- Nail the new shingle into place using four nails per tab, making sure they are set just below the surface of the shingle. This prevents water intrusion.
- Seal around each nail head with roofing cement to prevent leaks. Ensure a good seal by pressing down firmly on the shingles after applying the cement.
When roof replacement or professional remediation is the smarter choice
If you notice widespread cracking, especially across multiple rows of shingles, it’s time to call in a pro. This indicates deeper issues that need expert attention.
Aging roofs, typically over 15 years old, often require professional assessment due to wear and tear affecting overall roof integrity. Code compliance is another critical factor; local building codes might mandate certain standards for safety reasons.
Insurance claims can also be affected by the condition of your roof. If there’s a chance that extensive damage could void warranties or affect future coverage, it’s best to consult with professionals who understand these nuances.
Common mistakes homeowners make (and how to avoid them)
Common mistakes cost homeowners when thermal cracking shingles turn into claims headaches and costly repairs, especially if you ignore underlying moisture or substrate damage. Don’t patch cosmetic cracks without fixing the root cause, and don’t guess on repair versus replacement—insurance people want a clear scope, proper material choices, and documentation that supports your decision. Plan upfront by evaluating moisture sources, noting any visible damage, and spelling out who will do which tasks so your coverage doesn’t get tangled in disputes.
Build a practical pre-work checklist with photos that are date-stamped, key details from your policy language, and a written scope of work that distinguishes DIY tasks from professional requirements. This keeps everyone honest and helps prevent coverage confusion if a claim ever comes up, while also guiding you to correct underlayment, ventilation, and substrate preparation. Avoid common DIY traps like inadequate attic ventilation, using incompatible shingles or sealants, faulty flashing, and rough surface prep that accelerates cracking or invites leaks, and remember to document any changes you make for the insurer.
Poor documentation and delayed reporting
When it comes to thermal cracking shingles, one of the biggest mistakes homeowners make is not documenting damage properly or delaying their report to the insurance company. Waiting too long can lead to additional damage that complicates claims and may even void coverage if the insurer sees it as preventable.
To avoid this, take photos and detailed notes immediately after noticing cracks. Include dates and descriptions of each crack’s location and severity. Keep these records organized in a folder or digital file for easy access when you need to submit them to your insurance provider.
Acting quickly also means not waiting too long before filing your claim. Once you notice thermal cracking, aim to report it within 30 days. This gives the insurer time to assess and address the issue without complications from further damage or wear.
Remember, thorough documentation is key. It shows the insurer that you are proactive in maintaining your roof’s condition and can help prevent claim denials due to lack of evidence.
Using mismatched materials or improper fastening
The wrong choice of materials or incorrect installation techniques can lead to significant issues with thermal cracking shingles. Mismatched materials may not bond properly, leading to premature failure and additional damage.
- Shingle type: Ensure the shingles match your roof’s climate conditions and slope requirements. Look for UL or FM ratings that specify durability under extreme temperatures.
- Nail placement: Follow manufacturer guidelines on nail depth and spacing to prevent uplift during storms. Use a nail gun with proper settings.
- Underlayment quality: Always use high-quality underlayment that matches your shingles’ material type, such as synthetic or felt paper. Check for manufacturer compatibility charts.
- Flashings and vents: Install flashings correctly around chimneys and valleys to prevent water intrusion. Ensure proper ventilation terminations with compatible materials.
- Surface prep: Clean the roof surface thoroughly before installation. Avoid installing shingles over debris or old sealants that can cause weak bonding.
Preventing thermal cracking and protecting roof value long-term
Thermal cracking starts when shingles expand and contract with temperature swings, and small stresses accumulate over years until the surface shows lines and micro-cracks. Regular maintenance slows this process and helps preserve roof value by catching problems before they cascade into leaks or panel failures. Upgrading to higher-grade or architectural shingles, along with better underlayment, flashing, and venting, can reduce the crack risk and extend the life of the roof, but always check the product label or datasheet for specifics and local guidance before committing.
As a DIY homeowner, you should treat preventive care as a routine investment: inspections, keeping gutters clear, and verifying attic ventilation get done on a predictable schedule, with micro-cracks addressed early to prevent water intrusion. The cost vs. benefit mainly hinges on upfront material and labor choices, the expected lifespan extension, and how a maintained roof supports resale value and insurance considerations; no numbers here replace product details, so check the label for guidance. Decide what you can safely handle and where to call in a pro, using simple checklists and seasonal tasks to track roof performance over time and document it for resale or insurance reviews.
Routine maintenance and inspection schedule
Follow this checklist every season to catch issues before they become big problems.
- Spring: Check gutters for debris; clogged gutters can cause water damage. Confirm by running water through them.
- Summer: Inspect shingles for micro-cracks or lifting edges; missed cracks can lead to bigger issues later. Confirm with a close look at the roof surface.
- Fall: Clean gutters and downspouts thoroughly; clogs cause water backup, leading to leaks. Confirm by ensuring free-flowing water during rain.
- Winter: Look for ice dams or icicles; they indicate poor drainage. Confirm by checking roof edges for signs of water damage.
- Attic ventilation: Check vents are clear and working properly; inadequate ventilation traps heat, causing shingles to crack. Confirm with a thermometer in the attic during hot weather.
- Flashings: Inspect around chimneys, skylights, and valleys for damage or gaps; improper flashing leads to leaks and structural issues. Confirm by checking for water stains inside.
- Roof deck: Look for sagging or uneven areas; a weak roof deck can cause shingles to crack prematurely. Confirm with a visual inspection from the ground.
Quick rule: Regular checks save money by catching problems early, preventing costly repairs down the line.
Upgrades and design choices to minimize future cracking
Choose higher-quality shingles like architectural or composite types that are more resistant to thermal stress. Confirm by comparing their warranties and durability ratings.
Increase attic ventilation with ridge vents, soffit vents, and baffles to reduce heat buildup in the summer. Confirm by measuring airflow during peak season.
Install proper underlayment like ice-and-water shield to provide an extra layer of protection against moisture and thermal shock. Confirm by checking for any gaps or overlaps during installation.
Ensure professional installation with attention to detail, such as correct nailing patterns and sealing all flashing areas properly. Confirm by reviewing the workmanship and asking about warranties.

Conclusion
When you’re dealing with thermal cracking shingles, safety and a solid plan matter most. A durable roof keeps water out, looks clean, and protects your home’s value.
First, do a careful, on-the-roof check in daylight if you can do it safely: look for visible cracks, loose or curling shingles, and obvious edge damage; compare if the damage is localized or widespread, and note any other issues like granule loss. Then document damage for the claim with clear photos from multiple angles, a simple sketch of the affected areas, and a list of dates you noticed changes; before filing, perform any permitted temporary repairs only to reduce leaks, never to load the roof with weight or pressure. Finally, plan permanent DIY fixes only for small, clearly reachable areas and avoid climbing onto steep or damaged sections; if in doubt, step back and call for help rather than risking a fall or more damage.
Common mistakes to avoid include overestimating what you can fix from a ladder, using improper sealants or improvised patches, and rushing a claim without solid documentation or before the system is ready to review. Always prioritize personal safety, test any repair in a small, noncritical area first, and keep everything temporary and non-invasive until you’re sure it’s appropriate. If you’re unsure about the insurance angle or the extent of the damage, don’t push forward blindly—getting the specifics right saves money and headaches later.
If the roof is large, the damage is widespread, the roof is steep, or you’re unsure about the shingles’ condition or flashing, it makes sense to bring in a pro. A qualified roofer can verify coverage, perform repairs correctly, and prevent future leaks; you’ll sleep easier knowing the job is done right. Stay practical, stay safe, and follow your plan step by step until your roof is sealed, stabilized, and protected.
FAQ
Does insurance cover thermal cracking shingles?
Usually not. Insurance mainly covers sudden damage from storms or fire, not aging or heat damage. Read your policy and ask your agent to confirm what counts as a covered peril.
What should I check before filing a claim?
Take clear photos of the damage and keep records of when you noticed it. Document the shingles’ condition over time to prove it isn’t from improper installation or poor maintenance.
When is it worth filing a claim for shingles?
If a single event caused widespread damage, a claim makes sense. If the issue is gradual aging or thermal cracking, you’ll likely pay out of pocket and risk higher premiums.
What mistakes common homeowners make with thermal cracking?
Don’t delay repairs or ignore venting and attic heat. Don’t patch only the bad spots without fixing underlying causes. Bad repair work can void coverage and invite more leaks.