
Introduction
Applying a roof coating to your shingle roof is a time-sensitive project that requires careful planning. Understanding the timeline and schedule can help you ensure a successful application and extend the life of your roof.
This guide walks you through the process, breaking down each step with estimated durations to help you plan your project effectively.
The Roof Coating Timeline: From Prep to Finish
Applying a roof coating involves several stages, each with its own duration. Here’s a detailed timeline to help you understand the process and plan accordingly:
- Preparation (1-3 days): Inspect your roof, clean it, and make any necessary repairs. Allow 24 hours for drying.
- Priming (optional, 1 day): If required by the manufacturer, apply a primer coat to improve adhesion and seal the surface.
- Main Coat Application (1-3 days): Apply the roof coating in thin, even layers. Allow each layer to dry according to the manufacturer’s instructions before applying the next one.
- Sealing Details (1 day): Seal ridges, valleys, and penetrations thoroughly to prevent leaks later on.
- Cure Time (2-7 days): Allow the final coat to cure completely before exposing it to heavy rain or foot traffic. This step is crucial for ensuring optimal performance and longevity of the coating.
Total estimated duration: 5-14 days, depending on weather conditions, roof size, and manufacturer’s instructions.
Key takeaways
The preparation stage significantly impacts the overall timeline. Taking the time to thoroughly clean and dry your roof ensures better adhesion and a more successful coating application.
- Coatings extend shingle life by sealing minor granule loss and UV exposure.
- Select water-based acrylic or elastomeric coatings for flexibility and mildew resistance.
- Clean and dry roof surface before coating to ensure adhesion.
- Apply in thin, even coats following manufacturer temperatures and cure times.
- Seal ridges, valleys, and penetrations thoroughly to prevent leaks later.
- Weather windows and drying times influence performance; delays invite failures.
Table of Contents
- Introduction
- Key takeaways
- Why Coat Shingle Roofs?
- Choosing the Right Coating Materials
- Tools and Materials Checklist
- Pre-Application Inspection and Preparation
- Step-by-Step Application Process
- Sealing Details: Ridges, Valleys, and Penetrations
- Common Mistakes to Avoid
- Cost, When to Call a Professional, and Local Rules
- Conclusion
- FAQ
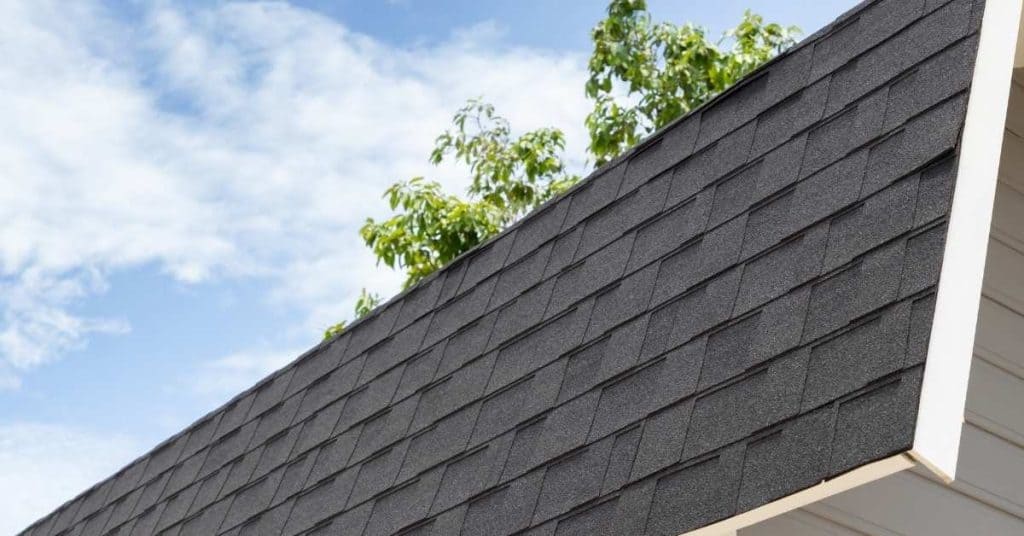
Why Coat Shingle Roofs?
Coating asphalt or composite shingles can give UV protection, improve reflectivity, and extend roof life, but it won’t fix major damage and has limited durability. It’s most effective on newer or lightly aged shingles with no active leaks, and results fade over time.
Before you start, inspect for damage, dry and clean the roof, and repair or replace shingles as needed, then verify coating compatibility with your shingles and climate. If you see delamination, ponding water, or a steep pitch, or if the shingles are past their service life, stop and get professional input—the wrong coating can trap moisture, fail early, or void warranties.
Benefits and realistic expectations
Coating your shingle roof can add years to its life by protecting it from UV damage and harsh weather. It also boosts reflectivity, which helps keep your home cooler in summer by deflecting sunlight. But don’t expect coatings to fix major issues like worn-out or damaged shingles; they’re more about maintenance than repair.
While a good coating can help with minor leaks by sealing small cracks and gaps, it won’t stop water from getting through big holes or severe damage spots. So before you coat, make sure your roof is in decent shape—check for missing shingles, loose nails, and other obvious problems first.
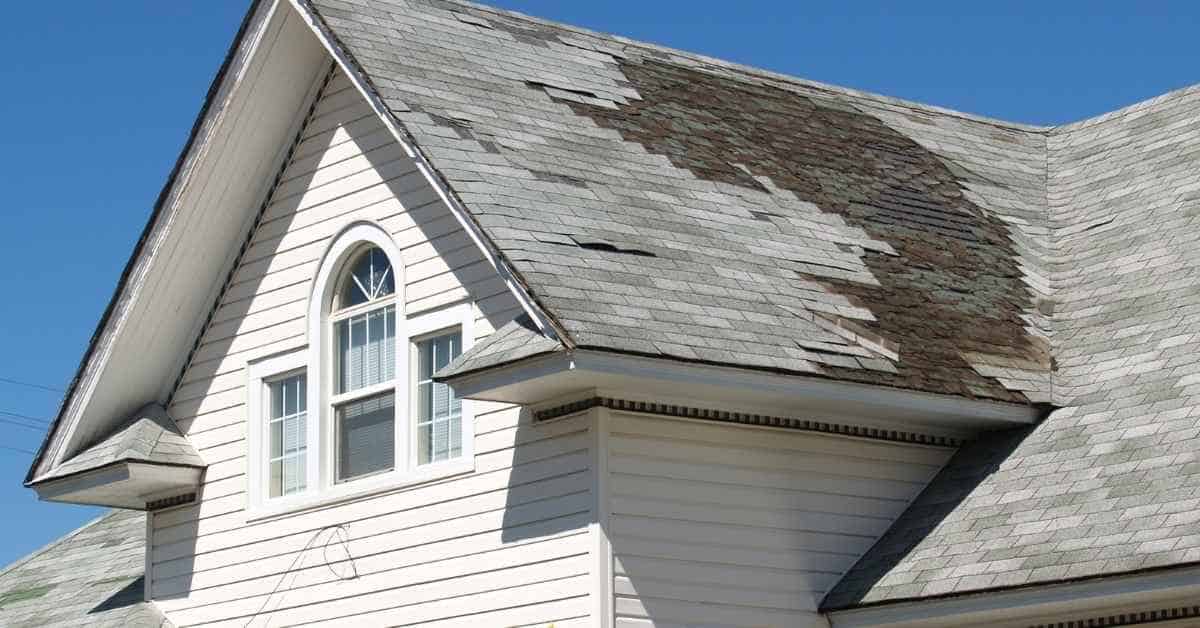
When not to coat (age, damage, code)
If your roof is old or damaged, coating it might be a waste of money. Check the age and condition first—coating won’t fix worn-out shingles. If you see missing granules, cracked shingles, or significant leaks, it’s time for repair or replacement.
Also, local building codes can limit what you do to your roof. Before coating, check the rules and warranty. Some coatings might void manufacturer warranties, leaving you with an expensive mess if something goes wrong later on.
Choosing the Right Coating Materials
Choosing the right coating materials means matching elastomeric acrylic, silicone, bituminous, and reflective roof paints to your shingle type, climate, and goals, so you get adhesion, performance, and maintenance without wasted effort or costly mistakes. Each option has its own balance of benefits and drawbacks, and you should note cure times, odor, VOC considerations, and how a coating may affect warranties when you plan priming, prep steps, and compatibility with asphalt, fiberglass, metal, or wood shingles.
In practice, this matters because a DIY job hinges on surface prep, application method, and re-coating schedules that fit your weather window and sun exposure, plus how age and substrate influence adhesion. It also matters for energy performance and traction in icy conditions, so you balance reflectivity with durability and safe footing. Use a simple, disciplined approach to avoid overloading incompatible materials, skipping flashing or ventilation, and you’ll know when to call a pro or pause work until conditions improve.
Material pros and cons (elastomeric vs silicone vs asphalt)
The right coating material can make your roof last longer, look better, and save you money on energy bills. Here’s a quick breakdown of the top three options:
- Elastomeric acrylic: Durable and UV resistant; good for high-temperature areas. Look for high solids content (60%+). Avoid over-applying in cold weather.
- Bituminous coating: Cost-effective, but less durable than elastomeric. Good for older roofs with minor damage. Watch out for cracking if not applied correctly.
- Silicone: Breathable and flexible; great for metal or wood shingles. Check for high UV resistance ratings. Avoid using on asphalt shingles without a primer.
Color, reflectivity, and energy considerations
The color of your roof coating can have a big impact on how much heat it absorbs. Lighter colors are more reflective and can lower attic temperatures by up to 20°F.
This means less strain on your air conditioning unit during hot summer months, potentially saving you money on energy bills. However, darker colors may be better in colder climates where they absorb sunlight and help warm the house.
Reflective roof coatings are a smart choice if you’re looking to reduce heat gain without changing the look of your home significantly.
Environmental and sustainability factors
When choosing a coating, consider its environmental impact. Opt for low-VOC (volatile organic compounds) products that minimize air pollution during application.
Some coatings are made from recycled materials or can be recycled themselves at the end of their life cycle. This reduces waste and conserves resources.
A longer-lasting product means fewer replacements over time, which is better for both your wallet and the environment.
Tools and Materials Checklist
This checklist covers every DIY-friendly tool, PPE, primers, sealants, and accessories you need to safely and professionally coat shingles, from surface prep to final cleanup. It emphasizes proper prep, careful application, and thorough cleanup, with clear steps for cleaning and degreasing, masking and protection, choosing primers, applying the coating, and managing waste. Use it to assemble a complete kit before you start and to keep the job steady, safe, and predictable, even if you encounter porch light or wind changes.
Expect to wear essential safety gear, keep fall-arrest or ladder-safety practices in mind for elevated work, and select coating types designed for shingles that balance breathability, adhesion, and flexibility. Also include surface prep tools, mixing aids, rollers, brushes, sprayers or extension poles, trays, and sealing materials for seams and flashing, plus labeling, storage, and disposal guidelines. For best results, read the product label or datasheet for mixing hints, pot life, temperature and moisture limits, and always check local rules for waste and leftover material.
Essential tools and PPE
Before you start coating your roof, use this checklist to ensure you have everything needed for a safe and professional job.
- Safety harness: Wear it when working at heights. Check straps are secure; avoid falls.
- Ladder setup: Ensure ladder is stable and extends three feet past roof edge. Avoid tipping over.
- Non-slip shoes: Choose shoes with good traction. Inspect soles for wear; prevent slips.
- Eyewear protection: Wear safety glasses or goggles to shield eyes from debris. Check lenses are clear and secure.
- Dust mask/respirator: Use a respirator if coating is dusty or has strong fumes. Confirm fit is snug; avoid inhaling harmful particles.
- Brushes, rollers: Have brushes for corners and edges, rollers for large areas. Check tools are clean and in good condition.
- Sprayer setup: Ensure sprayer is properly assembled and tested before use. Confirm no leaks or blockages.
- Mixing pails: Use sturdy containers to mix coating evenly. Verify they’re clean, free of debris.
- Moisture meter: Check roof surface moisture levels before applying coating. Ensure readings are accurate; avoid wet surfaces.
Quick rule: Always wear PPE and use the right tools to ensure safety and quality work.
Product quantities and material specs
This checklist helps you calculate how much coating you need, ensuring proper coverage and adherence to product specifications.
- Coverage area: Measure roof dimensions accurately. Include extra for overlaps and ridge caps; avoid running short on materials.
- Material adhesion: Check manufacturer’s data sheets for bonding strength. Ensure coating adheres well to shingles; prevent peeling or cracking.
- Elongation rating: Verify the coating can stretch without breaking. Confirm it handles roof movement and expansion joints; avoid cracks from thermal changes.
- UV resistance: Check UV protection ratings for long-term durability. Ensure coating resists fading and degradation; maintain color and integrity over time.
- Pot life duration: Note the usable timeframe after mixing. Confirm you can apply before it sets; avoid wasted material.
- Temperature constraints: Review minimum/maximum application temperatures. Apply only within specified range; prevent poor curing or failure.
- Mixing ratios: Follow precise mixing instructions carefully. Ensure consistency is correct; avoid uneven coverage or separation.
- Weather window: Plan for a dry, calm period before applying coating. Confirm no rain or high winds expected; prevent washout or damage.
Quick rule: Always verify material specs and calculate quantities accurately to ensure a successful application.
Pre-Application Inspection and Preparation
Start with a comprehensive roof condition survey: look for damaged, loose, or delaminated shingles; check flashing, valleys, and sealant integrity; and note any structural concerns that could affect coating adhesion. Do moisture testing and dry-down planning to confirm the deck is dry, and set a weather window with days suitable for the work. Clean the surface thoroughly, remove debris, needles, moss, and dirt, and plan for minor repairs to create a solid substrate before you apply anything.
Double-check coating compatibility by following the manufacturer’s recommendations and testing a small area for adhesion with existing coatings or treatments. Verify permit requirements and local rules, and build a fall protection, ladder, and access plan plus PPE into the job. Document findings with photos, moisture readings, and repair actions, then create a maintenance note with next steps and timelines so you’re not guessing later.
Inspecting shingles and roof deck condition
Before you start coating your roof, run this checklist to ensure the surface is ready.
- Curling edges: Check for curled or cupped shingle edges. Replace if more than 10% of your shingles are affected.
- Granule loss: Look for missing granules, especially on low spots and valleys. Missing granules mean the roof is wearing out.
- Soft spots: Press down on shingles to check for soft or spongy areas. Soft spots indicate moisture damage underneath.
- Loose nails: Tap each nail with a hammer; if it moves, replace it immediately.
- Missing tabs: Check for missing or damaged tabs and replace them before coating.
- Flashing integrity: Inspect all flashing around chimneys, vents, and valleys. Replace any that are loose or damaged.
- Valley seams: Ensure valley seams are tight and free of debris. Clean out debris if necessary.
- Deck condition: Look for signs of deck damage like soft spots or rot. Address these issues before coating.
- Sealant condition: Check all sealants around flashing, chimneys, and vents. Replace any that are cracked or missing.
- Structural concerns: Note any structural weaknesses in the roof deck like sagging or uneven areas. Address these before coating.
Quick rule: If more than 10% of your shingles show signs of damage, consider replacing them instead of coating.
Cleaning, priming, and flashing repairs
Before applying the roof coating, make sure the surface is clean and any necessary repairs are made.
- Pressure washing: Use a low-pressure setting to avoid damaging shingles. High pressure can strip granules.
- Broom cleaning: For delicate surfaces, use a stiff brush or broom to remove debris without damaging the surface.
- Primer application: Choose a primer compatible with your coating material and apply it evenly over the entire roof. Skipping this step can reduce adhesion.
- Flashings repair: Clean around flashing areas, replace any damaged pieces, and reseal properly to prevent leaks.
- Vents cleaning: Clear out debris from vent openings to ensure proper ventilation after coating.
- Nail pops fixing: Drive loose nails back into place or use roofing cement to secure them. Loose nails can cause blisters in the coating.
- Surface scuffing: For glossy surfaces, lightly sand or scuff to improve adhesion of the coating material.
- Moss removal: Use a stiff brush or pressure washer on low setting to remove moss and other vegetation. Leaving moss can cause damage over time.
Quick rule: Always clean and repair before priming for best results.

Step-by-Step Application Process
Step-by-step roof coating on slopes starts with a clear weather window and sound surface prep. Check that conditions aren’t likely to change to rain or dew, and confirm the roof is clean, dry, and free of loose shingles or granules before mixing any coating or primer if needed. Follow the coating’s mixing guidance, keep to the pot life, and add safety notes for ventilation; apply the first coat with a direction and tool that suits the slope, watching for runs or ponds, then plan the second coat after the first tack or dry time and aim for uniform coverage while accommodating steeper or high-slope areas.
This matters because proper sequence, timing, and surface readiness prevent premature failures and costly rework. It also reinforces safe working practices on slopes—fall protection, ladder setup, edge protection, buddy system, PPE—and helps you spot issues early, like incompatibility with shingles or improper drying. If you notice unusual sticking, separation, or coating incompatibility, check the label or datasheet before proceeding, and don’t hesitate to call a professional if the job feels beyond your comfort zone or local conditions demand expert judgment.
Step-by-Step Process
This sequence ensures your roof coating is applied safely and effectively, from prep to finish.
- Check weather conditions; avoid rain or dew. Ensure temperature is between 50°F and 90°F with low humidity.
- Set up safety gear: harnesses, ladders, edge protection, and a buddy system for high slopes.
- Clean the roof thoroughly to remove dirt, debris, and loose granules; test moisture levels before starting.
- Mix coating according to manufacturer’s instructions in a well-ventilated area. Use safety gear when mixing.
- Apply primer if needed, ensuring full coverage for adhesion. Allow it to dry as per the product guidelines.
- Start with the first coat using a brush or roller; apply evenly and avoid runs on slopes by working from bottom up.
- Wait until the first coat is tacky but not fully dry before applying the second coat, ensuring full coverage.
- Clean tools immediately after use to prevent hardening. Dispose of waste properly following local regulations.
Measuring, Cutting Back, and Layout
Measure your roof area accurately using a tape measure or laser distance meter to calculate material needs. Round up slightly for waste allowance.
Lay out work zones by marking off sections with chalk lines or spray paint. This helps you avoid re-coating wet areas and ensures even coverage.
Cut back any overhanging vegetation that could interfere with your work, ensuring a clear path around the roof edges for safety and access.
Applying Primer and First Coat
If required by the coating material, apply primer evenly across the entire surface. Use a brush or roller to ensure full coverage without pooling in low spots.
The primer should be dry before applying the first coat of roof coating. Check for even adhesion by lightly touching the surface; it should feel slightly tacky but not sticky.
For the first coat, use a high-quality brush or roller and apply the coating evenly from bottom to top on slopes to avoid runs and ponding. Ensure coverage is consistent across all areas of the roof.
Overcoating, Drying Times, and Final Coat
Wait until the first coat is tacky but not fully dry before applying the second coat. This timing ensures good adhesion between coats.
The coating should be applied at temperatures above 50°F with low humidity to prevent condensation issues during drying. Check product guidelines for specific temperature and humidity limits.
Inspect the final coat after it has dried completely, usually within a few days depending on weather conditions. Look for uniform coverage without runs or missed spots; touch up any areas as needed before full curing.
Sealing Details: Ridges, Valleys, and Penetrations
Ridge caps and ridge vents must be sealed with roofing cement and flashing in the right order to stop wind-driven leaks. Valleys get treated with a chosen method—cement-based sealant or flashing—and must be clean, with flashing installed to keep water diverted away from joints. For penetrations like chimneys and vent stacks, use step flashing and counter-flashing and sealant that integrates with shingles without gaps.
Common mistakes bite you later: over-application of sealant, improper flashing overlap, and neglecting surface debris before sealing. This matters because a small leak at a ridge, valley, or penetration can travel and cause bigger damage, especially in wet weather. Stay safe, pick the right weather window, and escalate to a professional if you’re unsure.
Overlapping technique and ridge cap treatment
To seal ridges properly, you need to overlap shingles correctly. Start by placing the first row of shingles at the bottom of the ridge, ensuring they extend over the lower edge of the roof. Each subsequent row should overlap the one below it by about half its length. This creates a strong water barrier.
For the ridge cap treatment, use specialized ridge cap shingles that fit snugly together. Lay them in an alternating pattern to cover the entire ridge seam. Make sure each piece is securely nailed down and sealed with roofing cement at all joints. This not only looks neat but also prevents water from seeping through.
Applying roofing cement and sealing edges
When it comes to sealing ridges, valleys, and penetrations, using the right amount of roofing cement is key. Start by laying a bead of cement along the edge or seam where you need to seal. The bead should be about the width of your thumbnail—too thick and it’ll crack; too thin and it won’t hold.
For edges that are prone to wind uplift, like eaves and hips, make sure to apply a good seal around flashing and underlayment. This helps prevent water from sneaking in during heavy rain or snow melt. Remember, the goal is to create a strong bond between materials, not just a thin line of glue.
Edge sealing is crucial for preventing leaks at roof edges where shingles meet walls or chimneys. Use roofing cement to seal around any protrusions and make sure it’s thick enough to cover all gaps but not so much that it oozes out. A neat, professional look isn’t just about aesthetics—it also means your work will last longer.
Flashing and penetration best practices
To keep your roof watertight around pipes, chimneys, and skylights, you need to do it right. First off, make sure the base flashing is in place before adding any penetrations or detailing around them. Use a good quality metal flashing that can handle the job. For pipes, cut a hole in the metal big enough for the pipe but not too large.
When dealing with chimneys and skylights, use step flashing to bridge the gap between the roof and these structures. Make sure each piece of flashing is securely nailed down and sealed with roofing cement. Don’t forget to apply a thick bead around any edges or joints where water can sneak in.
For pipes, install boots that fit snugly over them. These should be flexible enough to move without breaking as the pipe expands and contracts. Seal the boot to the flashing and roof with plenty of roofing cement. Remember, if it looks loose or not sealed properly, you’re asking for trouble down the road.
Common Mistakes to Avoid
Common DIY mistakes start with skipping or skimping on surface prep, then coating over active leaks, and using the wrong type of coating for asphalt shingles, all while timing the job around poor weather. Do it right by thorough cleaning, flattening or spot-sanding warped areas, repairing damaged shingles, and sealing fasteners or seams before you apply anything. These missteps lead to film failure, premature wear, and patches that peel or blister.
Choose coatings that are actually compatible with asphalt shingles and read the label to know if elastomeric or asphalt-based products fit your roof. Nail down timing by avoiding rain, dew, or high humidity and by observing a reasonable drying window between coats; if the surface still feels tacky or you see rising moisture, pause and reassess. If leaks appear after you coat, or ponding shows up, switch to patching or bring in a professional instead of hoping it will fix itself.
Application and preparation errors
Mistakes in the application and preparation phase can lead to poor results or even roof damage. Here are some common pitfalls:
- Inadequate cleaning. Failing to clean the shingles properly leaves dirt, debris, and old coatings that prevent new materials from bonding. Clean thoroughly with a pressure washer or broom before starting.
- Coating wet surfaces. Applying coating on damp shingles can cause peeling and blistering. Wait until all moisture has evaporated to ensure proper adhesion.
- Ignoring brittle shingles. Damaged or old shingles may not hold the new coating, leading to premature failure. Repair any damaged areas before applying your roof coating.
- Wrong primer choice. Using an incompatible primer can cause issues like peeling and cracking. Always check compatibility with both the coating and existing surface.
Avoid these common mistakes for a long-lasting, high-quality finish on your roof.
Safety and warranty pitfalls
Missteps in safety protocols or ignoring manufacturer guidelines can lead to serious issues. Here’s what you need to avoid:
- Neglecting fall protection. Failing to use proper equipment like harnesses and guardrails can result in severe injury or death. Always wear full PPE when working on the roof.
- Violating manufacturer warranties. Using incorrect products or methods can void your warranty, leaving you with no recourse for defects. Follow all instructions carefully and use approved materials.
- Failing to secure permits. Some areas require permits for major roof work. Check local regulations before starting any project to avoid legal issues.
Maintaining safety and adhering to guidelines ensures a successful and compliant roofing job.
Cost, When to Call a Professional, and Local Rules
Cost runs on materials, tools, and labor, not just the coating itself. You can expect to compare DIY material costs, primers if needed, and rental gear against professional labor, with rough scopes for small versus large roofs, but check the product label or datasheet for what’s recommended. When in doubt, plan for a pro if you spot structural damage, extensive flashing or leak issues, a steep or complex roof, or a deck in poor condition, and use a quick decision flow to decide who handles what.
Local rules matter because permits, codes, and warranty terms can change how you work and who covers you if something goes wrong. Do practical digging by calling the building department, checking permit history, reading warranty terms, and noting any HOA restrictions, especially if a contractor performs the work. Have a short questions-to-pro list ready and run a quick DIY self-audit on safety, ladder stability, accessibility, weather windows, ventilation, and product compatibility, then avoid common mistakes like underestimating prep or skipping permits and misinterpreting warranty exclusions.
Price breakdown and ROI considerations
The cost of a new roof can vary widely based on materials like shingles or metal panels, plus labor. Check the product label for material costs and ask around for local labor rates to get an estimate. For a typical home, expect materials to be in the thousands, with labor adding another few thousand.
When considering return on investment (ROI), think about how a new roof can extend your home’s life by decades. Plus, energy-efficient options like cool roofs or solar panels can lower utility bills over time. Calculate potential savings and compare them against upfront costs to see if it makes sense for you.
Signs you should hire a contractor
If your roof has multiple layers or is starting to show extensive rot and decay, it’s time to call in the pros. These issues can be tricky for DIYers and require specialized tools and techniques.
Homes with historic status or those located in areas with strict building codes should also avoid do-it-yourself projects. Local regulations often have specific requirements that a professional will know how to navigate without running afoul of the law.
Permits, codes, and warranty impacts
Before you start any roofing work, make sure to check your local building codes and HOA rules. You might need permits for certain materials or roof designs. Ignoring these can lead to fines and headaches down the line.
When it comes to shingle coatings, be careful. Some coatings can void manufacturer warranties if not applied correctly. Always read the label on any product you plan to use and follow instructions carefully. If unsure, reach out to a professional or contact the coating’s manufacturer for guidance.

Conclusion
Coating your shingle roof is doable if you stay focused on safety, follow the steps, and protect the look and life of the roof. The right material, good surface prep, and careful application keep water out and avoids costly fixes later.
Start with a quick check: inspect for damaged shingles, clean and dry the surface, mask edges and penetrations, test a small patch with the coating, and then apply in calm, dry weather in the proper order—primer if needed, then the main coat, finally touch up ridges, valleys, and any penetrations. Work in manageable sections, keep a steady pace, and never rush through seams or corners. If anything looks uncertain, pause and reassess before proceeding.
Common mistakes to avoid include skipping a prep step or rushing the first coat, choosing the wrong material for your climate, and ignoring local rules or venting needs. Always wear eye and skin protection, keep a cleaner nearby, and test in a hidden area first to judge how the coating adheres and dries. If you see peeling, bubbling, or poor adhesion, stop and re-evaluate rather than chasing a quick fix.
If the roof has extensive damage, many penetrations, or you’re unsure about the coating’s compatibility with your shingles, call a professional rather than forcing a DIY solution. When you finish, you’ll have a durable, weather-resistant roof that looks good and protects your home—confident steps today mean fewer problems tomorrow.
FAQ
Do I need to remove old shingles before coating?
Not always. Some coatings go over clean, intact shingles. If the roof is leaking or shingles are curled or damaged, fix or replace first.
What materials do I need?
Use a coating that’s compatible with asphalt shingles. You’ll need a cleaner, primer if required, a brush or roller, and safety gear. Have ladders and roof shoes ready for a safe job.
How long does it take and when should I apply?
Choose a dry day with temperatures above about 50–60°F. Apply at least two coats and let each coat dry per the product rules. Don’t rush the cure time.
What are common mistakes to avoid?
Don’t skip cleaning or let dirty shingles stay under the coating. Don’t coat flashing or vents poorly. Don’t apply in rain or extreme heat, and don’t overbuild layers.