
Introduction
A roofing warranty covers defects in materials and workmanship for a defined period. It typically promises remedies if the roof leaks or fails due to covered issues. Check the exact terms with the manufacturer or installer to know what’s included and what isn’t.
Common pitfalls include limited protection for certain components and exclusions for improper maintenance or damage from weather. Read the fine print and confirm how your project fits, then ask the installer or manufacturer what to inspect and maintain. If in doubt, verify how coverage is triggered and what steps you must follow to keep it valid.
Key takeaways
- Understand what roofing warranties typically cover and what requires separate protection.
- Check transferability, proration, and duration rules before committing to a policy.
- Read exclusions, maintenance requirements, and common pitfalls to avoid voiding coverage.
- Document maintenance, weather events, and contractor work for smooth claim filing.
- Follow a step-by-step claim process and keep records, photos, and receipts.
- Always prioritize safe work practices and roof access when inspecting warranties.
Table of Contents
- Introduction
- Key takeaways
- Overview of Roofing Warranties
- Typical Coverage Components
- Common Exclusions and Limitations
- Duration, Transferability, and Proration Explained
- How to Read and Interpret Warranty Documents
- Filing a Claim: Step-by-Step Process and Best Practices
- Pitfalls and How to Avoid Them
- Costs, Value, and When to Buy Extended Coverage
- Conclusion
- FAQ
Overview of Roofing Warranties
A roofing warranty is a formal promise about how a roof is expected to perform. It typically comes from the manufacturer or the contractor who installed the roof. Understanding who issued the warranty helps you know who to contact for claims or questions.
For homeowners and property managers, warranties matter because they set expectations for defects, performance, and coverage. They also establish who bears responsibility if something goes wrong. Always check the issuer’s role and the scope of what is promised.
Types of warranties (manufacturer, contractor, extended)
Roofing warranties come in three main types: manufacturer, contractor, and extended. Each covers different aspects and has its own duration.
Manufacturer warranties cover defects in materials. They usually last 20 to 50 years but can be prorated after the first few years.
Contractor warranties cover workmanship errors. They typically range from one to ten years, with some contractors offering longer periods.
Extended warranties, also known as system warranties, cover both materials and labor for a specified period, usually 25 to 50 years.
Warranty vs. insurance vs. maintenance
A warranty is not the same as homeowner’s insurance or routine maintenance. Here’s how they differ:
Warranties are promises from manufacturers and contractors to fix or replace defective materials or faulty workmanship within a specified time frame, free of charge.
Homeowner’s insurance, on the other hand, covers damage caused by covered perils like storms, fire, or vandalism. It doesn’t cover normal wear and tear or maintenance issues.
Maintenance is your responsibility as a homeowner. Regular upkeep helps prevent problems that could void warranties and keeps your roof in good condition to minimize insurance claims.
Typical Coverage Components
Warranties generally cover material defects and workmanship issues. This means problems with the shingles, underlayment, or installation quality may be included. Claims usually hinge on whether the defect is documented and within terms.
Some warranties provide limited performance guarantees, which can outline expected resilience or leak prevention under specific conditions. Read the labels or data sheets to see exactly what is covered and for how long the coverage applies.
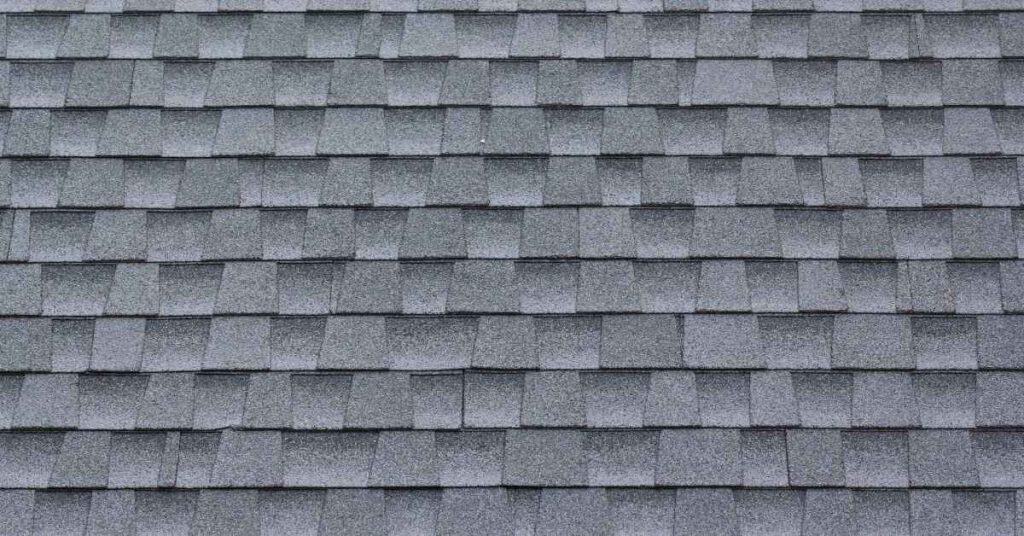
Material defect coverage
Choosing the right materials for your roof is crucial. The wrong ones can lead to cracks, stains, and weak bonds.
- Shingles: Look for high-quality shingles with a good warranty. Avoid cheap, low-rated ones that may crack or break easily.
- Underlayment: Opt for heavy-duty underlayment to prevent leaks and wind damage. Lightweight options can tear or blow off.
- Flashings: Choose durable flashings to protect valleys, hips, and ridges from water intrusion. Cheap flashings can rust or bend out of place.
- Felt paper: Use high-quality felt paper to prevent leaks and provide an extra layer of protection. Thin, low-quality paper can tear or blow away.
- Nails: Use corrosion-resistant nails designed for roofing. Regular nails can rust and cause leaks over time.
Workmanship coverage specifics
Workmanship warranties cover issues resulting from poor installation, not material defects. They’re typically backed by the contractor and last for a specified timeframe.
Timeframes: These warranties usually range from one to five years, with some contractors offering longer coverage.
Limitations: They don’t cover normal wear and tear or damage caused by natural disasters. Always check the fine print for exclusions.
Who backs them: These warranties are backed by the contractor who installed your roof, not the manufacturer. Ensure you’re hiring a reputable contractor with a good track record.
Common Exclusions and Limitations
Weather damage, improper maintenance, and pre-existing conditions are frequent exclusions. These items often void or limit warranty coverage. The specifics depend on the warranty language and local rules.
Prorated payouts are a common limitation as time passes. Look for language that explains how benefits change over the life of the warranty. If unsure, check the manufacturer instructions or the policy wording for clarity.
Weather and environmental exclusions
Roofing warranties often exclude damage caused by nature’s wrath. Here are some common culprits:
Wind: Warranties may set a threshold, like 50 mph sustained winds or gusts over 70 mph. If wind damage occurs below these speeds, you’re on your own.
Hail, UV rays, and seawater exposure: These are also typically excluded. Hail can dent shingles, UV rays fade them, and seawater exposure can corrode metal components.
Maintenance and homeowner responsibilities
Keeping your warranty valid is a two-way street. Here’s what you need to do:
Regular inspections: Check your roof annually for any signs of damage or wear. This includes gutters, flashing, and shingles.
Prompt repairs: Fix any issues promptly to prevent them from worsening and voiding your warranty.
Avoid DIY repairs: Most warranties require professional repair work. DIY fixes can void coverage.
Duration, Transferability, and Proration Explained
Warranty length determines how long coverage remains in effect. Some policies extend for many years, while others have shorter terms. Verify the stated duration in the official documents you receive.
Transfer rules affect value if you sell the property. Proration details determine how much coverage remains at different ages. Always confirm transfer conditions with the issuer or installer before signing or purchasing a home.
Full vs. prorated periods
Roofing warranties usually have two phases: full coverage and prorated.
Full Coverage: During the first few years, typically 5-10, you’re fully covered for both materials and labor. If something goes wrong, it’s fixed at no cost to you.
Prorated Phase: After that initial period, coverage shifts to a prorated system. You’re still covered, but the manufacturer or contractor only pays a portion of the repair costs. The percentage usually decreases each year until the warranty expires.
Transferring warranties on sale
Some roofing warranties can be transferred to a new owner, but not all. Check your warranty documents or ask the contractor.
Transfer Fees: There may be a fee for transferring the warranty. This is often a small percentage of the total warranty cost.
Verification Process: To transfer, you’ll need to notify the manufacturer or contractor in writing. They’ll likely require proof of sale and ownership change. The new owner should then receive updated warranty documents.
How to Read and Interpret Warranty Documents
Start with the definitions section to understand key terms. Look for what constitutes a defect versus normal wear. This helps you know when a claim is warranted.
Watch for red flags like vague language, narrow coverage, or missing contact information. Verify critical terms with the manufacturer instructions or the product label before buying or signing a contract.
Step-by-Step Process
Follow these practical steps to effectively read and interpret your roofing warranty document.
- Gather all relevant documents: warranties, receipts, and installation records. Why: You need a complete set of documents to understand your coverage fully.
- Find the warranty’s effective date. Why: This determines when your coverage begins and ends.
- Identify the type of warranties: manufacturer, contractor, or extended. Why: Each type has different coverages and durations.
- Check material defect and workmanship coverage specifics. Why: These clauses detail what’s covered and for how long.
- Review common exclusions and limitations. Why: Know what’s not covered to avoid surprises.
- Read about maintenance responsibilities. Why: Understanding your duties can prevent voiding the warranty.
- Check duration, transferability, and proration details. Why: This helps plan for future home sales or repairs.
- Do a final check: ensure all information matches your records. Why: Accuracy prevents disputes later on.
Key clauses to check (scope, remedies, exclusions)
Locate and scrutinize these critical clauses in your warranty document:
Scope of coverage: This defines what’s covered. Ensure it matches the materials and workmanship on your roof.
Remedies for defects: Check how the manufacturer or contractor will fix issues – repair, replace, or refund?
Exclusions and limitations: Read these carefully to understand what’s not covered. Common exclusions include weather damage and improper maintenance.
Requesting proof and registration
To validate your warranty coverage, ask for the following:
Registered warranty confirmation: Ensure your warranty is registered to your property.
Serial numbers: Ask for serial numbers of the products used. This helps track their origin and authenticity.
Installation records: Request records showing that your roof was installed according to manufacturer guidelines. Why: Proper installation is crucial for warranty validity.
Filing a Claim: Step-by-Step Process and Best Practices
Begin with a documented inspection and clear photos of the issue. Notes should include dates, locations, and visible damage. This helps establish a timeline for your claim.
Gather all required documentation and follow the issuer’s stated process. Use escalation paths if the claim stalls or you receive unclear guidance. Keep copies of every submission and reply.
Step-by-Step Process
Follow these practical steps to file a roofing warranty claim and ensure the process goes smoothly.
- Safety first: Inspect your roof safely. Use a stable ladder, wear non-slip shoes, and avoid wet or icy conditions.
- Identify the issue: Clearly define what’s wrong with your roof. Take photos to document the problem.
- Check your warranty: Locate your warranty documents. Ensure the issue is covered and within the warranty period.
- Contact the manufacturer/warranty provider: Reach out via phone or email, providing details about the issue and your warranty information.
- Schedule an inspection: If required, arrange for a professional inspector to assess the damage. Be present during the inspection if possible.
- Gather supporting documents: Collect any relevant invoices, maintenance records, or other evidence that supports your claim.
- Follow up: Keep track of your claim’s progress. Follow up with the warranty provider as needed.
Documentation and evidence to collect
Gather thorough documentation to strengthen your roofing warranty claim:
Photos: Take clear, well-lit photos of the issue from various angles. Include close-ups and wide shots.
Inspection reports: If you’ve had professional inspections, keep those reports on file. They can provide valuable evidence.
Invoices and maintenance records: Keep receipts for any roof-related purchases or repairs. Maintain a record of regular roof maintenance to demonstrate proper care.
If a claim is denied: next steps
Don’t be discouraged if your warranty claim is initially denied. You have options:
Appeal the decision: Review your warranty documents for an appeal process. Follow the outlined steps to challenge the denial.
Third-party inspection: Consider hiring a neutral, third-party inspector to assess the damage. Their report may provide additional evidence to support your claim.
Consumer protection resources: Contact local consumer protection agencies or the Better Business Bureau for assistance. They can provide guidance and mediate disputes.
Pitfalls and How to Avoid Them
Common mistakes include neglecting maintenance requirements or missing deadlines. These can void or limit coverage. Stay on top of routine upkeep as specified in the warranty documents.
Avoid using unapproved repair methods or contractors. Verify that work complies with the warranty terms and label the project with the issuing entity’s guidance. If in doubt, check the manufacturer instructions or product data sheet.
Hiring unlicensed/unsanctioned installers
Using unapproved installers might seem like a quick, cheap fix. But it’s risky. They may not follow manufacturer guidelines, voiding your warranty.
Always check:
- Installer’s license and insurance.
- Manufacturer approval for that specific product.
- References from previous jobs.
Misunderstanding coverage for repairs vs. full replacement
Warranties don’t always cover full replacements. Some only pay for spot repairs or phased replacements.
To avoid misunderstandings:
- Read your warranty carefully, as explained earlier.
- Negotiate with your installer and manufacturer about what’s covered.
- Document everything in writing to protect your interests.
Costs, Value, and When to Buy Extended Coverage
Extended coverage adds more years of protection beyond the base warranty. It is important to compare the potential cost against expected benefits and risk. Get a clear quote and read the terms carefully.
Pricing for extended coverage often depends on the roof’s age, material, and installation quality. Consider the timing and your maintenance plan when deciding if extended coverage makes sense for your situation. Always verify the details with the issuer or installer before committing.
Evaluating warranty price vs. expected lifespan
The first thing to consider is how much longer your roof has left before it needs replacing. Most roofs last around 20-30 years, but this varies depending on the material and installation.
Next, look at what’s covered under the standard warranty and for how long. Then compare that with the expected lifespan of your materials. If you’re getting a 15-year warranty on a roof that should last 25 years, it might not be worth extending.
Tip: Ask about prorated coverage. Some warranties only cover full replacement in the first few years, then switch to covering a percentage of repair costs.
Alternatives to extended warranties
Before you shell out for an extended warranty, consider these options:
1. Maintenance Plans: Some manufacturers or installers offer maintenance plans. For a fee, they’ll perform regular inspections and minor repairs to keep your roof in tip-top shape.
2. Periodic Inspections: You can hire a local roofer to inspect your roof every few years. They can spot potential issues early, helping you avoid costly repairs down the line.
3. Capital Reserve: Instead of buying an extended warranty, set aside money each year for future roof repairs or replacement. This way, you’re not paying a company to hold onto your money for you.
Conclusion
Know what your warranty covers, how long it lasts, and what can void it, because that clarity saves you from costly repairs, ugly leaks, or delamination later on. Prioritize solid, safety-minded work so the roof protects your home and looks right for years.
When you’re ready to wrap this up, check in a natural flow: verify the exact components covered and the exclusions, confirm the duration and whether transferability or proration matters, skim the fine print to see what triggers a claim, and keep all receipts and inspections organized. read the warranty documents carefully and keep a simple summary handy so you don’t scramble later. Use a step-by-step approach: inspect the roof surface and flashing, document issues with photos, contact the insurer or manufacturer if you see a covered defect, and follow any required notice timelines precisely. know the transferability and proration so you’re not surprised by out-of-pocket costs, and always weigh whether extended coverage adds real value for your situation.
Common mistakes to avoid are trying to push the roof into service beyond its rated limits, ignoring small issues that look cosmetic but may indicate deeper problems, and skipping safety procedures or test patches to save time. Always test any repair in a small, unobtrusive area first, wear proper fall protection, and never climb on a wet or damaged surface. prioritize safety and address defects before they become big failures.
If the job starts to feel bigger than you expected—especially with uncertain warranty triggers, complex exclusions, or signs of hidden damage—call a professional sooner rather than later. A qualified roofer can navigate transfer rules, document defects correctly, and prevent warranty pitfalls while keeping you and your home safe. With the right checks, steps, and caution, you’ll land a durable roof that stays protected and looks straight for years to come.
FAQ
What exactly does a roofing warranty typically cover—material, labor, or both?
Warranties usually specify what the manufacturer covers for materials and what the installer covers for labor. Check the label or manufacturer instructions to see if labor is included and for how long. If in doubt, ask for a written breakdown from the installer.
How do warranty terms handle installation mistakes or contractor errors?
Some warranties transfer coverage if you change contractors, but conditions apply. Look for workmanship coverage details, including what events are considered a fault of the installer and any required confirmation from the installer or manufacturer.
What can void or reduce a warranty, and how can I avoid it?
Improper installation, using non-approved materials, or modifying the roof without consent can void coverage. Follow the manufacturer’s installation instructions and use approved components. Always stick to what the label and local rules require and document decisions in writing.
What’s the best way to file a claim and keep it from getting stuck?
Document the issue with clear photos and notes. Contact the installer and the manufacturer per the claim instructions, and keep copies of all communications. Follow any specified timelines and keep records of work done or proposed repairs.