

Introduction
A composition shingle roof lasts for many years, with the exact span depending on climate, installation, and maintenance. It can be different in your area, and poor work or neglect shortens its life. I’ll walk you through what to look for and how to test its condition without fancy tools.
Start with a quick visual check for curling, cracking, missing tabs, and granule loss. For fixes, replace damaged shingles, seal leaks, and clean gutters to prevent moisture buildup, following manufacturer guidance. Always verify any step with the product label or local rules before you cut or nail, and plan a safe, DIY-friendly approach.
Key takeaways
- Visual inspection confirms curling, missing tabs, granule loss, and flashing wear.
- Schedule repairs before leaks expand; temporary fixes may protect interior but aren’t final.
- Inspect attic ventilation and roof deck for signs of moisture intrusion and underside rot.
- Review manufacturer and insurer guidelines for warranties and required maintenance steps.
- Plan replacement with budget buffers, code-compliant fasteners, and contractor oversight.
- Use proper safety gear, ladder discipline, and fall-protection during any roof work.
Table of Contents
- Introduction
- Key takeaways
- Typical Lifespan of Composition Shingle Roofs
- Primary Causes of Premature Failure
- How to Inspect a Composition Shingle Roof (Visual Checkpoints)
- Tests and Diagnostics to Assess Shingle Condition
- Repair Options and Temporary Fixes
- Replacement Planning and Budgeting
- Maintenance Practices to Extend Roof Life
- Warranties, Insurance, and Documentation
- Conclusion
- FAQ
Typical Lifespan of Composition Shingle Roofs
Composition shingles come in several styles, and their stated lives can vary by type. Homeowners often see longer life in architecturally shingled roofs and shorter life with basic 3-tab designs. Manufacturer warranties may promise certain performance windows, but real-world results depend on conditions at the home.
Expectations should balance common experience with what the label or data sheet states. Use the product instructions and local rules to gauge what might apply to your installation. Consider climate, roof slope, and maintenance history as the major drivers of actual longevity.
Lifespan by shingle type
The lifespan of a composition shingle roof varies depending on the type of shingles used. Here’s what you can expect:
3-Tab Shingles: These are the most basic and affordable. They typically last around 20-30 years, but proper installation is key. Poor nailing or inadequate underlayment can significantly reduce their lifespan.
Architectural/Laminate Shingles: These are thicker and more durable than 3-tab shingles. With good installation, they can last up to 30-50 years. Their layered design also provides better protection against the elements.
Luxury Shingles: Top-of-the-line luxury shingles can last upwards of 50 years or more. They’re designed to withstand harsh conditions and mimic the look of natural materials like slate or wood.
Impact of climate and exposure
Climate plays a significant role in determining how long your composition shingle roof will last. Here’s what to expect from different conditions:
Sun: Prolonged sun exposure can cause shingles to crack and curl over time. This is why roofs in sunny climates often have a shorter lifespan.
Temperature Swings: Wide temperature fluctuations, common in areas with four distinct seasons, can cause shingles to expand and contract, leading to warping or cracking.
Wind, Hail, and Humidity: High winds can lift and damage shingles, while hail can dent or crack them. Humidity can promote the growth of mold and mildew, which can weaken shingles over time. Roofs in areas with these conditions often need to be replaced sooner than those in more temperate climates.
Primary Causes of Premature Failure
Installation errors top the list of early failures, including improper nailing and inadequate ventilation. Poor underlayment and improper flashing also accelerate deterioration. A steep slope or insufficient attic venting can trap heat and moisture that degrade shingles.
Biotic growth, such as algae, and storm damage routinely shorten roof life. Each cause interacts with others to speed up wear, so a holistic view helps pinpoint risks. Check manufacturer guidance and local code notes for specifics on your system.
Installation and workmanship problems
The life of your composition shingle roof starts with its installation. Poor workmanship can lead to premature failure.
Wrong nailing: Nails driven too high or too low can cause leaks. Check nail heads; they should be just below the surface, not flush or sticking out.
Inadequate starter strips: These are crucial at eaves and rakes to prevent water intrusion. If they’re missing or improperly installed, expect problems.
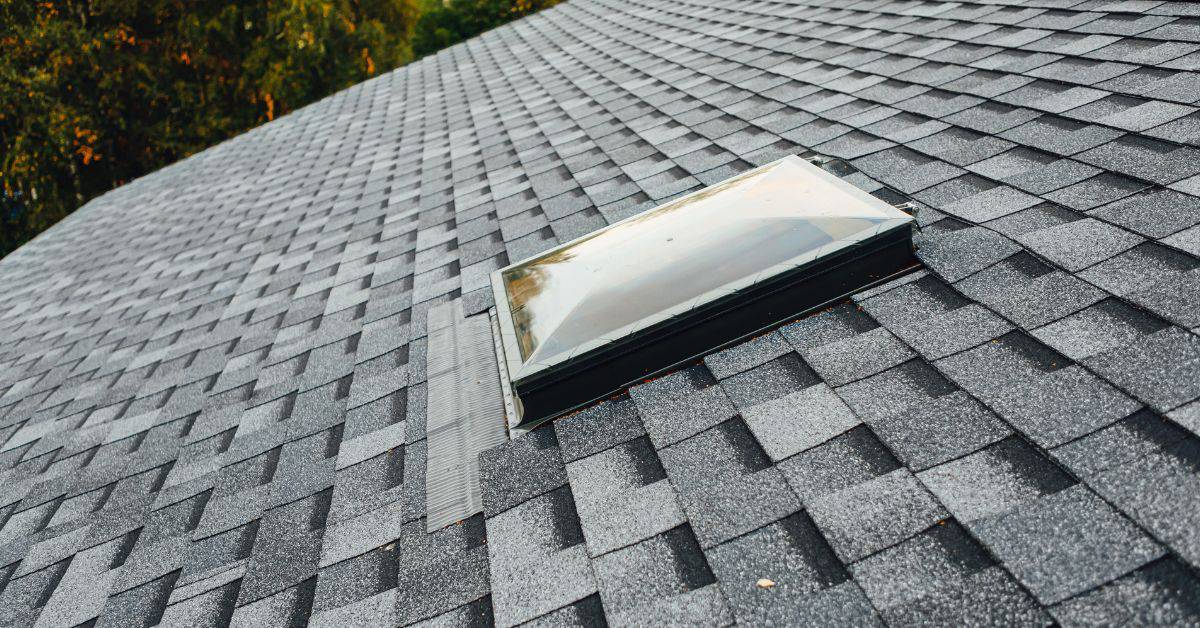
Improper flashing: Flashing around chimneys, vents, and skylights should be tight and well-sealed. Check for gaps or rust; if present, water will find its way in.
Environmental and material degradation
The materials used and the environment they’re exposed to can degrade your shingles faster than expected. Here’s what to look out for:
- UV breakdown: Prolonged sun exposure breaks down the asphalt in shingles, causing them to crack and curl.
- Granule loss: Shingles with missing granules are vulnerable to further damage. Check for bare spots on your roof.
- Temperature cycling: Extreme heat and cold cause shingles to expand and contract, weakening their structure over time.
- Biological growth (algae/moss): These can hold moisture, leading to rot and further growth. Look for dark streaks or green patches.
- Poor underlayment: If the underlayment is inadequate or improperly installed, water can seep in, causing damage not visible from outside.
How to Inspect a Composition Shingle Roof (Visual Checkpoints)
Start with safety: use a proper ladder setup and fall protection, and don’t work on a wet or icy surface. Inspect the attic for signs of excessive warmth, moisture, or water stains that point to leaks. Look at shingle condition from the ground and up close for curling or missing granules.
Check flashing around vents, chimneys, and skylights for gaps or rust. Examine eaves and gutters for shingle debris and granule loss. If anything looks suspicious, note where it is and plan further assessment or a pro visit.
Step-by-Step Process
Use this checklist to inspect your composition shingle roof safely and effectively. It’s best to do this annually or after severe weather.
- Preparation: Gather a ladder, flashlight (for attic), gloves, and safety gear. Check the weather forecast before starting.
- Safety first: Wear non-slip shoes, secure your ladder, and have someone with you for assistance.
- Start at the eaves: Inspect the edges of your roof where damage often begins.
- Move across the roof: Check each section visually, looking for signs of wear or damage.
- Inspect the ridge: Check the peak of your roof, ensuring shingles are secure and undamaged.
- Check flashing: Ensure all flashings around vents, chimneys, and skylights are intact and sealed.
- Inspect gutters: Check for debris, proper alignment, and secure attachment to your roof.
- Attic inspection: Use a flashlight to check for daylight through the roof deck, moisture stains, or damp insulation.
- Cleanup: Remove any debris from your roof and gutters. Store your ladder safely.
Quick rule: Always prioritize safety during your inspection. If you’re unsure about any aspect, consult a professional roofer.
Exterior visual inspection
Before climbing onto your roof, perform this exterior check from the ground and ladder to identify potential issues.
- Curling: Check for shingles curling up at the edges or corners. This indicates aging and reduced protection.
- Buckling: Look for middle sections of shingles lifting upward, which can occur due to improper installation or moisture intrusion.
- Missing granules: Inspect for bare spots on your shingles where granules have worn off, exposing the mat underneath.
- Exposed mat: Check for areas where the fiberglass mat is visible. This indicates significant granule loss and reduced protection.
- Loose shingles: Gently tug on shingles to ensure they’re securely fastened. Any movement could indicate nail pops or improper installation.
- Damaged flashing: Inspect all flashings around vents, chimneys, and skylights for cracks, gaps, or rust.
Quick rule: If you find any of these issues, address them promptly to prevent further damage and costly repairs.
Attic and interior indicators
Inspect your attic for signs of roof problems that may not be visible from the exterior. It’s best to do this on a dry day.
- Daylight through roof deck: Check for any light shining through the roof, indicating potential holes or gaps.
- Moisture stains: Look for dark spots, streaks, or discoloration on the underside of your roof. These could indicate water intrusion.
- Damp insulation: Inspect your attic insulation for any signs of moisture, which can lead to mold growth and reduced insulation effectiveness.
Quick rule: If you find any of these issues, address them promptly. Water damage in the attic can quickly spread to other parts of your home.
Tests and Diagnostics to Assess Shingle Condition
Perform a granule loss check by examining debris in gutters and on the ground near the downspouts. Do a curl or brittleness test by gently bending a sample shingle at the edge. For adhesion, press a corner of a shingle to see if it lifts easily.
Use a moisture probe or infrared survey if you suspect hidden moisture or insulation issues. When in doubt, consult a professional to interpret infrared images and moisture readings. Always verify any test results against manufacturer guidelines and local requirements.
Simple DIY tests
Before you grab your ladder, understand that safety comes first. Inspect your roof from the ground using binoculars.
Once on the roof, check for granule loss. Shingles should have a uniform appearance. If they’re bare or patchy, granules may be missing. Gently touch shingles to feel if they’re still flexible. If they’re brittle, it’s time for replacement.
Check for curling and brittleness. Curling happens when shingles lift at the edges. Brittleness means they break easily. Both indicate a roof nearing end of life.
Professional diagnostic tools and when to use them
Sometimes, DIY tests aren’t enough. That’s where professional tools come in.
- Infrared scans: Reveal moisture trapped under shingles. Useful after heavy rain or snow melt. Cost: $200-$400 per scan, or rent for $50-$100/day.
- Moisture meters: Directly measure moisture content in shingles. Ideal before re-roofing to avoid surprises. Cost: $30-$200.
- Professional inspection: Trained eyes spot issues missed by DIYers. Warranted if you’re unsure, or before selling/buying a home. Cost: $100-$300.
- Drone inspections: Safe, high-tech alternative to manual inspection. Useful for large roofs or where safety is a concern. Cost: $150-$400.
- Adhesion/tack tests: Check if shingles stick together properly. Useful after storms or suspected hail damage. Cost: Included in professional inspection fee.
Repair Options and Temporary Fixes
Damaged shingles can often be replaced one at a time, following the correct nailing pattern and sealant recommendations. Re-seal flashing and replace any rusted metal components to restore a weather-tight seal. In some cases, re-nailing or patching the valley may be appropriate if the underlying deck is sound.
After a storm, temporary measures like tarps can help protect the interior, but they are not a substitute for permanent repairs. Prioritize fixes that stop leaks and prevent further granule loss. Confirm any repair approach with product instructions and local rules before proceeding.
Small repair procedures
For minor damage, homeowners can attempt these repairs safely. Here’s what you’ll need:
Materials: Replacement shingles, roofing cement, nails, hammer, trowel, safety harness (for steep roofs).
Safety: Wear sturdy shoes, tie back long hair, and never work on a wet or icy roof. Use a safety harness for heights over 6 feet.
When to hire a roofer vs. DIY
Know your limits. Here’s when to call in the pros:
Hire a pro if: Damage is extensive, roof slope/height is steep, warranty coverage is at risk, or flashing repairs are complex.
DIY is fine for: Replacing damaged shingles, sealing minor leaks, and simple repairs on low-pitched roofs.
Replacement Planning and Budgeting
Signs you may need a full replacement include widespread curling, extensive granule loss, and frequent leaks. Decide between re-roofing with new underlayment or tearing off the old roof first, depending on the deck condition and existing layers. Reference local guidance and installer recommendations for the best approach.
Costs are influenced by deck condition, underlayment choice, ventilation improvements, and labor rates in your area. Get multiple quotes and compare scope, warranty terms, and schedule. Do not rely on a single estimate; verify each item with the contractor’s documented plan.
Choosing replacement materials and upgrades
The materials you choose for your new roof significantly impact its lifespan and performance. Here are key options to consider:
- Composition Shingles: Asphalt, fiberglass, or architectural shingles. Look for high wind resistance (110 mph+) and algae resistance. Avoid thin, low-quality shingles.
- Underlayment: 30# or 40# felt, synthetic underlayment, or peel-and-stick membranes. Use synthetic for better protection against moisture; avoid cheap felt that tears easily.
- Ventilation: Ridge vents, soffit vents, or gable vents. Improve airflow to prevent heat buildup and moisture damage; avoid inadequate ventilation leading to ice dams.
- Starter Shingles: Special shingles for the first course that improve wind resistance; don’t skip these to save money.
- Hip & Ridge Caps: Pre-cut shingles for hips and ridges. Use high-quality caps with good adhesion; avoid cheap caps that crack or blow off.
Expected timelines and disruption
A typical roof replacement takes 1-3 days, depending on size and complexity. Plan accordingly:
Preparation: Remove valuable items from the attic, cover landscaping, and inform neighbors about potential noise.
Weather plays a significant role in scheduling. Avoid peak summer or winter months for best results. Rain can cause delays; high winds make it unsafe to work.
Expect some disruption: noise during work hours, temporary loss of attic access, and possible discoloration of gutters from nail granules.
Maintenance Practices to Extend Roof Life
Create a preventive plan that includes regular inspections, especially after storms and seasonal changes. Clean gutters and downspouts to prevent water backing onto the roof edges. Trim branches that overhang to reduce debris and physical damage to shingles.
Address moss and algae with approved treatments and maintain proper ventilation to control moisture. Schedule small repairs promptly to avoid costlier fixes later. Base actions on manufacturer guidance and local recommendations for products and methods.
Seasonal maintenance checklist
Use this checklist to keep your roof in top shape throughout the year. Regular upkeep minimizes damage and helps you spot issues early.
- Spring: Inspect for winter damage, clean gutters, trim overhanging branches.
- Summer: Check for moss or algae growth, inspect flashing around chimneys and vents.
- Fall: Remove leaves from roof and gutters, prepare for winter by ensuring proper drainage.
- Winter: Inspect ice dams, remove heavy snow to prevent damage.
Quick rule: Stick to this schedule. Skipping seasons can lead to costly repairs down the line.
Long-term maintenance investments
Upgrading certain aspects of your roofing system can significantly extend its service life. Consider these long-term investments:
Ridge vents: These improve attic ventilation, reducing heat buildup and moisture that can damage shingles.
Better underlayment: Upgrading to synthetic underlayment provides superior protection against moisture compared to felt paper.
Professional coatings: Applying a protective coating can enhance your roof’s resistance to UV rays, algae, and moss growth.
Warranties, Insurance, and Documentation
Shingle warranties typically cover manufacturing defects and sometimes workmanship, with exclusions for improper installation or damage from external causes. Understand what is included and what is not by reading the warranty terms and the label. Manufacturer instructions and local rules help clarify coverage limits.
Document roof condition with dated photos and notes to support insurance claims or resale discussions. Keep receipts for materials and records of inspections and repairs. Always verify documentation needs with your insurer and local authorities before relying on it.
How to Read a Shingle Warranty
A shingle warranty is your safety net. Here’s how to understand it:
Prorated vs Non-Prorated: Prorated warranties reduce coverage over time. Non-prorated keep full coverage for the first few years.
Transferability: Some warranties let you transfer coverage to a new owner. Check if there’s a fee or process.
Labor Coverage: Some warranties cover labor costs, others don’t. Make sure you know what’s included.
Preparing for Insurance or Claim Disputes
When it comes to roof damage and insurance claims, preparation is key:
Document Damage: Take photos and videos of the damage. Keep records of repairs.
Timing Claims: File your claim as soon as possible after a storm. Many policies have time limits.
Estimates & Inspections: Get contractor estimates and professional inspection reports to support your claim.
Conclusion
One core truth remains: a roof that’s cared for safely and on schedule lasts longer, looks better, and costs less over time. Stay grounded in practical steps, test things carefully, and keep the work within your limits so you don’t create bigger problems.
Start with a simple, safety-first routine: begin with a ground-level check, then move to a controlled ascent only if conditions are calm and you have a solid ladder and fall protection. Inspect for curling or missing shingles, granule loss, and exposed underlayment. Look at flashing around chimneys, vents, and skylights; note any warped or loose edges. Check attic insulation and sheathing for signs of moisture or staining, and review warranty dates and documentation. Assess the scope of repairs or replacement needed, and set a realistic budget with a plan for permits, materials, and labor if you hire help. Document everything with notes and photos so you can track progress and justify decisions during maintenance or claims.
Common mistakes to avoid are obvious but frequent: rushing up onto a wet, unstable roof; ignoring the small leaks that grow into big damage; and skipping a proper safety setup or failing to test fixes on a small area first. Always use a stable ladder, wear non-slip shoes, and avoid working alone when possible. Do not force shingles back into place or apply temporary fixes over active leaks without testing first, and never ignore warranty and insurance requirements that could affect coverage.
If you’re unsure after an inspection, or the roof shows widespread damage, big patches, or persistent leaks, it makes sense to call a professional. A pro can confirm the diagnosis, handle hazardous work, and ensure proper flashing and underlayment. Stay disciplined about maintenance and documentation, and you’ll keep the roof performing well for years to come. Ready to act—assess today, fix what you can safely, and plan the rest with a clear, steady schedule.
FAQ
How can I tell if a composition shingle roof is worn out?
Look for curling, cupping, cracking, or missing shingles. Check for bare spots where granules have worn away, and inspect the attic for signs of leaks or dark stains after rain.
What simple checks can I do to assess shingle condition without a full inspection?
Walk the roof only if it’s safe; use a sturdy ladder and avoid walking on damaged areas. Lift a shingle edge slightly to see if it still lies flat and is firmly attached, and inspect visible nails for rust or misalignment.
What are safe repair options for minor damage on a composition shingle roof?
Secure loose shingles with roofing cement and properly driven fasteners if needed. Replace damaged shingles one by one, seal around flashing, and avoid drastic fixes that could trap moisture under the surface.
When should I plan for full replacement and what should I consider in budgeting?
If many shingles are failing, or the roof is approaching the end of its typical life based on what you see and feel, plan for replacement. Consider roof age, deck condition, ventilation, weather exposure, and any existing warranties or documentation from the manufacturer.