
Introduction
A home roofing contractor is a licensed pro who installs, patches, and maintains residential roofs. They should be able to walk you through their process and timelines. Before you hire, you want to check credentials and references and make sure they cover materials, warranty, and cleanup.
Ask about licensing, insurance, and a written estimate before any work starts. Request a clear scope of work, expected timeline, and how cleanup and debris disposal will be handled. Ask how they handle weather delays, material warranties, and who does the work day-to-day.
Key takeaways
- Verify licensing, insurance, and state contractor registration before signing any contract.
- Request written estimates with itemized labor, materials, permits, and disposal costs.
- Beware of dramatically low bids; verify scope matches bid details.
- Check reviews and ask for recent project references with similar roofing scope.
- Confirm safety plan, fall protection, ladder use, and site cleanup responsibilities.
- Clarify warranties, maintenance expectations, and dispute resolution process upfront in writing.
- Understand material specs, roof deck compatibility, and weather delay handling.
Table of Contents
- Introduction
- Key takeaways
- Why Vetting a Roofing Contractor Matters
- How to Verify Licensing, Insurance, and Credentials
- Getting and Comparing Accurate Estimates
- Key Questions to Ask During the Initial Consultation
- Safety, Permits, and Code Compliance
- Tools, Materials Checklist and Material Specs
- Aftercare, Maintenance and Dispute Resolution
- Conclusion
- FAQ
Why Vetting a Roofing Contractor Matters
Hiring a contractor without vetting can expose you to subpar workmanship, safety risks on the job, and potential legal or liability issues if something goes wrong. You may also face surprises if the crew isn’t properly insured or trained to handle roofing work.
Vetted professionals typically provide warranties, carry proper insurance, and follow current building codes. That commitment translates to more predictable results and protections that pay off over the life of the roof, even when you consider long term maintenance costs.
Common pitfalls homeowners face
Hiring the wrong roofing contractor can lead to costly mistakes and headaches. Here are some common pitfalls to avoid:
- Scams: Be wary of door-to-door salespeople or companies that demand full payment upfront.
- Unlicensed workers: Always check if the contractor is licensed and insured. Unlicensed workers can lead to shoddy workmanship and legal issues.
- Bait-and-switch estimates: Some contractors may offer low estimates but then add on hidden fees or switch materials once they start the job.
- Poor communication: Lack of clear communication can lead to misunderstandings about the scope of work, timeline, and costs.
To avoid these pitfalls, always do your homework. Check licenses, read reviews, and get detailed estimates in writing.
When to consider replacement vs. repair
Deciding between repairing or replacing your roof can be challenging. Here are some factors to consider:
Age of the roof: If your roof is over 20 years old, it might be time for a replacement, as it’s likely nearing the end of its lifespan.
Extent of damage: Minor leaks or missing shingles can often be repaired. However, widespread damage may indicate that a full replacement is necessary.
Material lifespan: Different roofing materials have varying lifespans. For example, asphalt shingles typically last 20-30 years, while metal roofs can last 50+ years. Consider the age and type of your current roof when making your decision.
How to Verify Licensing, Insurance, and Credentials
Start by confirming the contractor is currently licensed with the appropriate state or local authority. Check the status and any disciplinary history if available. Request proof of insurance and workers compensation coverage to protect you from liability on site.
Ask for the documentation you need to review and know why each item matters for permits and liability. Compare what they provide to the requirements on the permit application and with the manufacturer instructions for your roofing system.
Step-by-Step Process
Follow these practical steps to verify a contractor’s licensing, insurance, and credentials.
- Preparation: Gather the contractor’s business name, address, and license number. Ensure you have access to your local licensing board’s website or contact information.
- Safety Checks: Before starting any work, ensure the contractor has current workers’ compensation insurance to protect their employees.
- Main Work:
- Check the contractor’s license status with your local licensing board.
- Verify their insurance coverage by requesting an insurance certificate and contacting the insurer to confirm it’s valid.
- Ask for any relevant manufacturer certifications or professional association memberships.
- Cleanup/Final Checks: Ensure all documentation is in order, and you have a copy of everything. Double-check that the contractor has complied with all safety regulations.
- Pro Call: If at any point you’re unsure about a document or need clarification, don’t hesitate to call a professional for advice.
What licenses and certifications to look for
Contractors should have the following licenses and certifications:
License: A valid, up-to-date contractor’s license issued by your state or local government. This ensures they meet minimum standards for training and experience.
Manufacturer Certifications: These show that a contractor has been trained and certified by specific manufacturers to install their products correctly. Examples include GAF Master Elite or CertainTeed SELECT ShingleMaster.
Professional Association Memberships: Membership in professional organizations like the National Roofing Contractors Association (NRCA) indicates a commitment to industry best practices and continuing education.
How to check insurance and bond coverage
To verify a contractor’s insurance coverage, follow these steps:
Request an insurance certificate from the contractor. This document lists their policy number, coverage limits, and the insurer’s contact information.
Contact the insurer listed on the certificate to confirm that the policy is active and covers the contractor for the work they’ll be doing at your property. Ask about the following minimum coverages:
Liability Insurance (General Liability): Protects against property damage or bodily injury caused by the contractor’s negligence.
Workers’ Compensation Insurance: Covers medical expenses and lost wages if a worker is injured on your property.
Getting and Comparing Accurate Estimates
Ask for written estimates from multiple contractors so you can compare apples to apples. Ensure each estimate is thorough and in writing. Look for a clear scope of work and defined materials list.
Focus on comparing the scope rather than price alone. Check that line items cover removal, disposal, underlayment, ventilation, flashing, warranties, and cleanup. When line items differ, ask for clarification in writing before making a decision.
Red flags in written estimates
Be wary of estimates that are too good to be true. Here’s what to look out for:
Vague scopes: If the estimate doesn’t clearly outline what work will be done, it might mean they’re cutting corners or planning to tack on extra charges later.
Extremely low bids: While everyone wants a good deal, if a bid is significantly lower than others, it could indicate they’ll use subpar materials or take shortcuts.
Large upfront deposits: Be cautious of contractors asking for more than 30% upfront. It’s a red flag that they might not be legitimate.
No mention of permits and cleanup: Reputable contractors will include these in their estimate. If they don’t, it could mean extra costs or headaches for you later on.
How to negotiate scope without sacrificing quality
You can reduce costs without compromising quality by discussing these aspects with your contractor:
Materials: Ask about material options. There might be a more affordable, but still durable, alternative that’s not listed in the initial estimate.
Timelines: If the timeline is flexible, ask if there are any discounts for faster completion. Just ensure they won’t rush and sacrifice quality.
Change orders: Discuss potential change orders upfront. Make sure you understand what’s considered a change order and how additional costs will be handled.
Remember, the goal is to find areas where you can safely cut costs without compromising the integrity of your roof or the contractor’s workmanship.
Key Questions to Ask During the Initial Consultation
Use the first meeting to confirm project timelines, crew size, and supervision. Ask who will manage the job and how quality control is handled on site. Look for clear communication and a plan that fits your schedule.
Inquire about subcontractors, warranties, required permits, and the cleanup process. Verify who will be responsible for inspections and how issues will be documented and resolved. Bring a prepared checklist to stay organized during the visit.
Questions about materials and methods
The materials used and the installation method can significantly impact your roof’s performance, longevity, and appearance. Asking the right questions helps ensure you get a durable, long-lasting roof.
- What type of shingles do you recommend? Asphalt, wood, metal, or tile? Each has its pros and cons in terms of lifespan, aesthetics, and cost.
- What about underlayment? A good underlayment can prevent water damage. Look for a high-quality synthetic underlayment with a high perm rating to allow moisture escape.
- How will you ensure proper ventilation? Proper attic ventilation prevents heat and moisture buildup, which can lead to mold growth and structural damage. Ask about intake vents and exhaust vents.
- What installation method do you use? Nailing patterns vary by shingle type. Ensure they follow the manufacturer’s recommendations to avoid issues like shingles blowing off in high winds.
- How does your choice of materials affect the warranty? Some materials may void warranties if not installed correctly. Make sure their workmanship warranty covers both labor and materials.
Questions about timeline and project management
The timeline for your roofing project is crucial to plan around. Ask about the start date, typical work hours, and potential weather delays.
When can you start? Make sure their schedule aligns with yours. A reputable contractor should be able to give you a firm start date.
What are your typical work hours? Ensure they respect your daily schedule and that of your neighbors. Most contractors work from 8 am to 5 pm, but it’s always good to confirm.
Who will be my point of contact during the project? Having a dedicated person ensures clear communication throughout the project. Also, ask about their availability for addressing any concerns or changes you might have.
Safety, Permits, and Code Compliance
Clarify homeowner responsibilities for acquiring permits versus what the contractor handles. Confirm that the crew follows current local codes and will arrange required inspections. Ensure the plan includes safety measures to protect your property and neighbors.
Ask how site safety is managed and what practices will be followed for materials storage, ladder use, and debris containment. Verify who is responsible for any code-related corrections if issues arise after installation.
Permits and inspection checkpoints
Use this checklist once you’ve decided to hire a contractor. It helps ensure all necessary permits are secured and inspections are scheduled.
- Check if permit is required: Roofing jobs over a certain size or value may need one. Your contractor should know.
- Verify your contractor obtains the permit: Don’t assume they will. Ask for proof before work begins.
- Know what inspections to expect: These typically include footing, framing, and final inspections. Expect 3-4 checks in total.
- Confirm your contractor schedules inspections: They should do this. If not, you might face delays or rework.
- Attend inspections if possible: It’s your property; show up to ensure everything is up to code.
- Check for final sign-off: Once the last inspection passes, get a letter of completion from the building department.
- Understand what happens if you skip this: Without permits and inspections, your roof might not meet codes. This could lead to fines or rework.
- Know local rules on DIY work: Some areas allow homeowners to pull permits for their own projects. Check with your building department.
Quick rule: Always verify your contractor obtains necessary permits and schedules inspections. It’s your responsibility to ensure this happens.
Jobsite safety and neighbor considerations
Your contractor should follow these common safety practices to keep your jobsite secure and minimize disruption to neighbors.
Fall protection: Ensure workers use harnesses, guardrails, or other fall prevention measures at heights above 6 feet. This is required by OSHA.
Debris containment: Contractors should have a plan for containing debris, like tarps or barriers, to prevent it from scattering onto your property or neighbors’.
Staging, parking, and roofing debris on adjacent properties: Your contractor should communicate with neighbors about any temporary disruptions. They may need to stage equipment or park vehicles nearby. Ensure they respect your neighbors’ property and clean up any debris promptly.
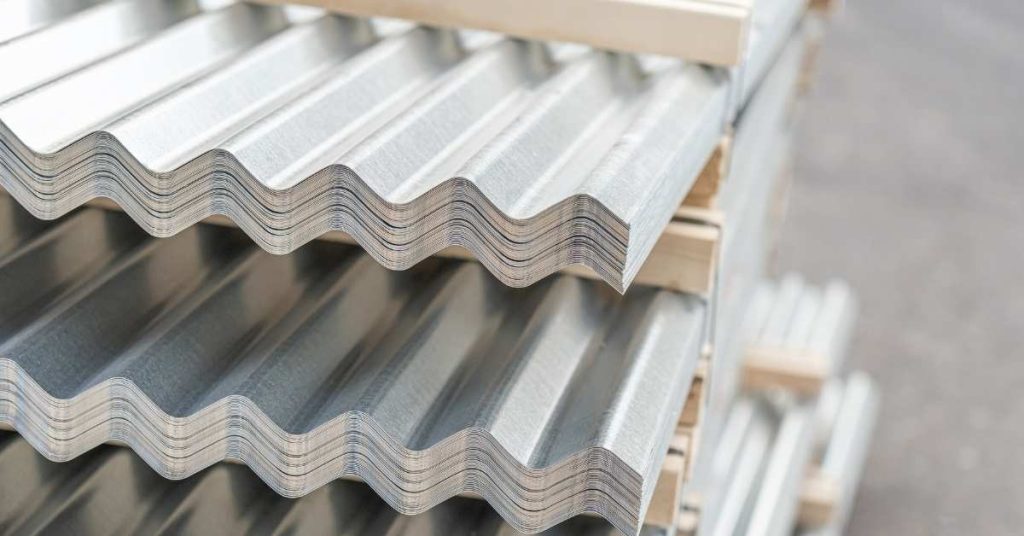
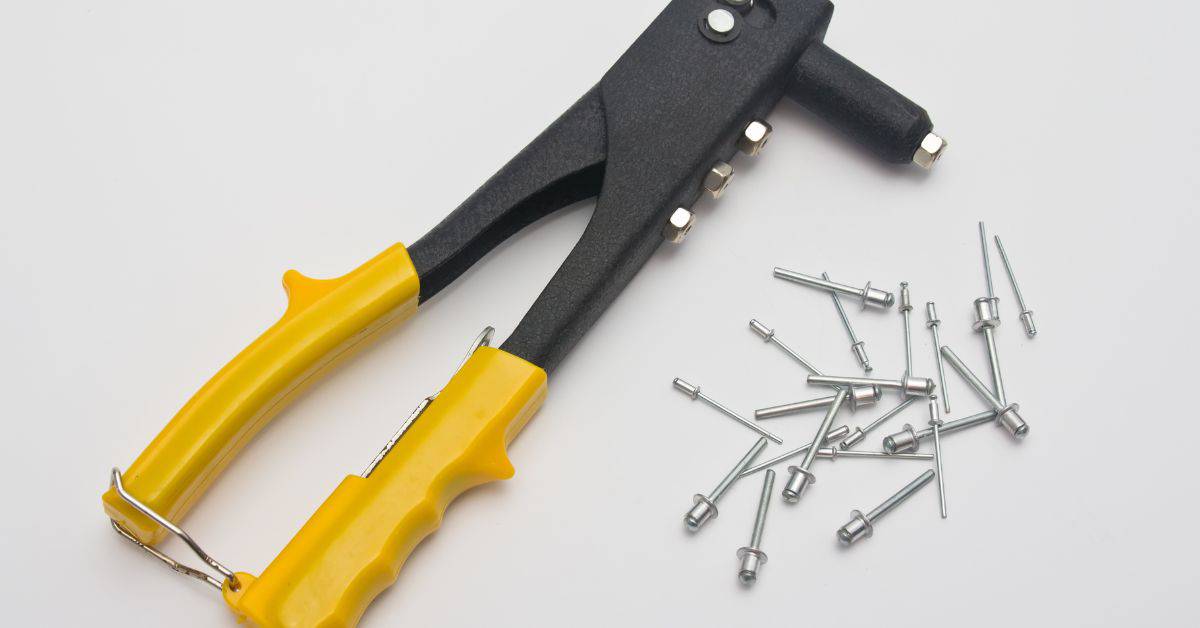
Tools, Materials Checklist and Material Specs
Work with a homeowner-friendly checklist of common roofing materials and tools used on typical jobs. Note what tools and equipment the contractor should bring and what you may need to provide. Use the checklist to verify your project scope matches what is being installed.
Ask for basic material specs and lifespan expectations for common roof types such as asphalt, metal, and tile. Do not rely on memory alone; verify with product data sheets or manufacturer instructions when possible.
Visual checkpoints for material quality
Before any work begins, inspect delivered materials and installed components to ensure they match your estimate.
- Shingle condition: Check for cracks, missing tabs, or broken seals. These can lead to leaks if not caught early.
- Brand markings: Ensure they match the brand specified in your contract. Counterfeit materials are common and inferior.
- Flashing type: Verify it’s the right material (e.g., metal, rubber) and condition for your roof design.
- Underlayment: Inspect for tears or punctures that could compromise its protective layer.
- Nails/screws: Check they’re the correct size and type (e.g., corrosion-resistant, proper length) as specified.
- Drip edge: Ensure it’s installed to protect your roof edges from water damage.
- Ventilation: Confirm vents are present and functioning to prevent moisture buildup.
- Ice dam protection: If applicable, check for proper installation to prevent ice dams and leaks.
Quick rule: Regular visual checks help catch issues early, saving you money and hassle in the long run.
Eco and energy considerations
Consider these factors to improve your roof’s energy performance and reduce environmental impact.
- Cool roofs: Ask about reflective or cool roofing options that can lower your home’s temperature and energy bills.
- Reflective coatings: Consider applying a reflective coating to your existing roof to improve its energy efficiency.
- Recycling old materials: Inquire if the contractor recycles or disposes of old roofing materials responsibly.
- Solar panels: If interested, ask about integrating solar panels into your new roof design.
- Roof color: Lighter colors reflect more heat and can help keep your home cooler.
- Insulation: Ensure your contractor considers proper insulation underlayment to maximize energy efficiency.
Quick rule: Small eco-friendly choices add up. Make sure your roofing project contributes positively to the environment and your energy bills.
Aftercare, Maintenance and Dispute Resolution
Plan post-installation checks and routine maintenance tasks you should perform, and know how to document issues if they arise. Establish a process for reporting concerns to the contractor and tracking responses. Set expectations for follow-up visits if needed.
Learn the stepwise dispute resolution options, including contacting the contractor, escalating to the manufacturer, or filing a complaint with the licensing board. Keep records of all communication and agreements to support any resolution process.
Maintenance schedule and DIY checks
Keep your roof in top shape with a simple maintenance schedule. Here’s what you can do:
Spring: Inspect for winter damage. Check for missing or damaged shingles, and clear gutters of debris.
Summer: Keep an eye on your roof during hot weather. Extreme heat can cause shingles to curl or crack. Trim tree branches that overhang the roof to prevent damage from falling leaves or limbs.
Fall: Prepare for winter. Clean gutters again, and ensure all vents are clear of debris. Consider applying a protective coating to your roof if it’s prone to ice dams.
Winter: Keep snow from building up on the roof. Remove heavy snow with a roof rake, being careful not to damage shingles.
How to handle complaints or warranty claims
If you find issues after your roof is installed, follow these steps:
1. Document: Take photos and videos of the problem. Keep records of any communication with your contractor.
2. Communicate: Contact your contractor promptly. Clearly explain the issue and send them photos or videos. Give them a reasonable timeframe to address the problem, usually 30 days.
3. Escalate (if necessary): If the contractor doesn’t respond or fix the issue, contact the manufacturer next. They may have additional warranty provisions. If that fails, file a complaint with your local licensing board.
4. Mediation: If you can’t resolve the dispute through communication, consider mediation. This involves a neutral third party helping both sides reach an agreement.
Conclusion
Vetting a roofing contractor is not optional. Do it right and your roof stays durable, looks good, and your family stays safe.
First, verify licensing, insurance, and credentials; get written estimates from at least three contractors and compare scope, materials, and warranties; check references and past work; ensure permits are pulled and code requirements met; review each contractor’s safety plan and site protection, and set a clear payment plan tied to milestones; insist on a written contract that spells out materials specs, timelines, and what happens if changes are needed.
A few common mistakes to avoid: rushing the process, skipping the written contract, or ignoring safety on the job site. Always verify the estimate aligns with the actual scope and do not sign until you understand who handles inspections, permits, and code compliance. Practice safe work by keeping a defined work area, using fall protection where required, and testing any new materials or fixes in a small area before full installation.
If the job sounds larger than a simple repair, or the contractor resists providing documents, timelines, or a clear safety plan, call in a professional sooner rather than later—your roof is a system, and the cost of a bad job can creep up fast. Stay deliberate, stay safe, and you’ll get a roof that lasts and looks right.
FAQ
What should I ask to verify a contractor’s past work and references?
Ask for recent job sites you can visit or photos of completed roofs. Call or visit those clients if they’re willing, and ask about on-time performance, cleanup, and how issues were handled.
How do I discuss warranties and materials without guessing?
Get the exact warranty terms in writing for both labor and materials. Ask how long the coverage lasts, what it covers, and who administers claims if something goes wrong.
What questions help me understand the project plan and safety?
Ask for a clear outline of the work sequence, daily milestones, and site safety practices. Confirm what weather or site conditions would trigger delays and how they’ll protect your property.
How should I handle changes or potential extra work?
Require written change orders for any extra work or price changes. Ask how changes affect the timeline and who approves the extra work before it starts.