
Introduction
Tile underlayment is the layer between the subfloor and the tile that helps smooth the surface and support the tile. If something goes wrong, you’ll see loose spots, cracking, or uneven grout. In this article I’ll walk you through how to spot problems and handle basic fixes.
Fixing issues starts with a solid, clean, and dry surface and choosing the right adhesive for your setup. Follow manufacturer instructions and local rules for prep, bonding, and curing, and don’t guess. If unsure, check labels, instructions, and safety notes before you start.
Key takeaways
- Thoroughly inspect substrate for cracks, moisture, and movement before underlayment installation.
- Choose underlayment type based on use, floor finish, and moisture exposure.
- Address visible failures promptly: replace damaged boards, clean debris, and reseat panels.
- Follow manufacturer instructions for trowel size, adhesive, and curing times.
- Ventilate work area and wear eye protection and gloves during repairs.
- Document symptoms by symptom and correct diagnosis before applying targeted repairs.
Table of Contents
- Introduction
- Key takeaways
- Quick Overview: What Underlayment Is and Why It Matters
- Common Failures and Their Visible Symptoms
- Diagnosing the Problem: Step-by-Step Inspection Checklist
- Fixes by Symptom: Targeted Repair Approaches
- Fixes by Underlayment Type
- Tools and Materials Checklist
- Material Specs and Standards Explained (What to Check)
- Prevention and Best-Practice Installation Checklist
- Conclusion
- FAQ
Quick Overview: What Underlayment Is and Why It Matters
Tile underlayment sits between the subfloor and your tile. It helps spread load and reduce stress on the tile surface. It also contributes to moisture management and movement control in the floor assembly.
When underlayment fails, you may see cracked tiles, loose patches, or grout failures. You might notice hidden movement or damp spots that indicate hidden issues. Understanding its role sets up better diagnose and repair decisions.
Common underlayment types and when to use them
Underlayments come in various forms, each serving a specific purpose. Here are the most common:
Cement Backer Boards: Ideal for walls and floors where you need a rigid surface. They’re great for areas with high moisture like bathrooms and showers.
Uncoupling Membranes: These flexible sheets prevent cracks in the tile from transferring to the substrate below. Use them on concrete slabs or plywood subfloors.
Plywood Subfloors: A good choice for floors where you need a solid, flat surface. They’re often used in new construction or when replacing old flooring.
Self-Levelers: These liquid compounds create a smooth, even surface. Use them to level out uneven subfloors before tiling.
How underlayment affects tile longevity
Proper underlayment is crucial for long-lasting tiles. Here’s why:
The right underlayment provides a solid base for your tiles to adhere to, preventing delamination, where tiles start to lift off.
It also helps control movement. Tiles can crack if the surface beneath them moves too much. Underlayment absorbs this movement, protecting your tiles.
Moreover, underlayment plays a role in waterproofing. It prevents moisture from seeping through to the substrate below, which could lead to mold and structural damage.
Common Failures and Their Visible Symptoms
Cracked tiles and hollow sounds when tapping often point to a failed underlayment bond or movement. Visible grout gaps or cracking can also signal substrate or membrane problems. Keep an eye out for discoloration that suggests moisture intrusion.
Telegraphing, where patterns show through the tile, indicates substrate irregularities. Mold or musty odors can accompany moisture issues behind the underlayment. Movement symptoms may appear after temperature or load changes.
Cracking and grout separation
If your tiles are cracking and grout is separating, it’s a sign of movement beneath the surface. This could be due to insufficient support or substrate movement.
Insufficient support means your underlayment wasn’t thick enough or properly reinforced. Substrate movement happens when the base layer shifts, often because it wasn’t prepared correctly.
Fix: Identify and address the cause of movement. If it’s insufficient support, you might need to remove tiles, add more underlayment, and reinstall. For substrate movement, prepare the surface better before starting again.
Hollow-sounding or loose tiles
When you tap on your tiles and they sound hollow, or if they feel loose, it’s a sign of trouble beneath. This could be due to voids (empty spaces) in the adhesive, poor coverage, or delamination (the underlayment peeling off).
Voids happen when there isn’t enough adhesive or it wasn’t spread evenly. Poor coverage means you didn’t use enough underlayment. Delamination occurs if the underlayment wasn’t properly adhered to the substrate.
Fix: For voids, remove the loose tiles, fill in the gaps with more adhesive, and reinstall. If it’s poor coverage or delamination, remove all affected underlayment, prepare the surface again, and reinstall with proper coverage and adhesion.
Moisture-related damage and mold
If you’re seeing water stains, warping, or mold on your tiles, it’s a sign of moisture trapped beneath. This could be due to missing waterproofing, hydrostatic pressure (water pushing through from below), or poor ventilation.
Missing waterproofing means the underlayment wasn’t properly sealed. Hydrostatic pressure can happen in areas with high water tables. Poor ventilation traps moisture and doesn’t allow it to escape.
Fix: Identify and address the source of moisture. If it’s missing waterproofing, apply a suitable sealer. For hydrostatic pressure, you might need professional help to install a drainage system. Improve ventilation by ensuring there are no obstructions in vents or exhaust fans.
Diagnosing the Problem: Step-by-Step Inspection Checklist
Start with a visual survey of the entire area and note any irregularities in tile and grout. Tap suspect tiles to judge if there is a hollow sound and focus on softened edges. Remove a small, non-critical tile to inspect the underlayment condition.
Check substrate flatness and look for moisture or damage behind the tile. Document movement patterns and any prior repair attempts. Cross-check product specs and installation notes from labels or manufacturer instructions before proceeding.
Step-by-Step Process
Before you start, ensure safety by turning off power to the area and wearing appropriate gear. This checklist helps you find problems efficiently.
- Preparation: Gather tools – trowel, utility knife, pry bar, moisture meter, hygrometer, tape measure, and a hammer.
- Start at the edges: Check tiles along walls and floors for any movement or lifting.
- Inspect grout lines: Look for cracks or missing pieces. If present, it might indicate underlying issues.
- Visual check (next section): Scan the entire area for visible signs of trouble.
- Tapping test (next section): Tap tiles with a hammer to listen for hollow sounds or loose edges.
- Pry test (next section): Gently pry up suspect tiles to check adhesive and substrate condition.
- Moisture testing: Use a moisture meter and hygrometer. Compare readings with manufacturer limits for your underlayment type.
- Measure subfloor: Ensure it’s level and structurally sound. Any dips or warping could cause problems later.
- Final check: After testing, clean up the area and make notes on any issues found.
Quick rule: Always start from one corner and work your way across to avoid missing spots or confusing results.
Visual and Tactile Checkpoints
Before you touch anything, use this visual checklist to spot potential problems quickly.
- Hairline fractures: Tiny cracks in tiles or grout can indicate underlying issues. If left untreated, they’ll grow and cause more damage.
- Stains: Discoloration on tiles or grout might suggest moisture intrusion or mold growth beneath the surface.
- Lippage: Uneven tile edges can lead to tripping hazards and grout failures. Check for any high or low spots.
- Wavy or bowed tiles: These could indicate a weak subfloor or underlayment that’s not supporting the weight of the tiles properly.
- Missing grout: Gaps in grout lines allow moisture to penetrate and cause damage. If present, fill them immediately.
- Crumbly grout: Grout that crumbles easily when touched suggests it’s not properly adhered or has been damaged by water intrusion.
- Warped tiles: Tiles that are no longer flat might indicate a problem with the underlayment or subfloor beneath them.
Quick rule: If you spot any of these issues, don’t ignore them. Address them promptly to prevent further damage.
Sound, Tap, and Pry Tests
These hands-on tests help you confirm suspicions raised by visual checks or find hidden problems.
- Hammer tap test: Gently tap tiles with a hammer. A hollow sound indicates loose edges or adhesive failure beneath the tile.
- Pry test (edges): Use a pry bar to carefully lift up suspect tiles at their edges. If they come up easily, there’s likely an issue with the adhesive or substrate.
- Pry test (center): Pry up tiles in the center as well. If they’re loose here too, it suggests a problem with the subfloor or underlayment.
- Listen for movement: While prying, listen for any creaking or popping sounds that might indicate structural issues beneath the surface.
Quick rule: Be careful when prying up tiles. You don’t want to damage them further or cause injury.
Moisture and Substrate Testing Guidance
Before you install new underlayment or tiles, ensure the substrate is dry and sound. Here’s how to test.
- Moisture meter: Use it on both the subfloor and underlayment. Compare readings with manufacturer limits for your specific materials.
- Hygrometer: Measure relative humidity levels in the room. Ideal conditions are between 35-60% RH.
- Check subfloor level: Ensure it’s flat and even using a straight edge or level tool. Any dips or warping could cause problems later.
- Inspect for rot or damage: Look for signs of water damage, mold, or structural issues in the subfloor and underlayment.
Quick rule: Always follow manufacturer guidelines when interpreting moisture test results. What’s acceptable for one material might not be for another.
Fixes by Symptom: Targeted Repair Approaches
For localized cracks or loose tiles, consider spot replacements and reseating with appropriate adhesive and backer support. If the underlayment shows minor damage, patch or level, ensuring compatibility with the tile system. Reserve full replacement for widespread failures.
Temporary fixes may bridge short-term needs, but plan for proper repair to restore long-term performance. Note when to pause and refer to manufacturer guidance or local codes for the repair path.
Repairing isolated hollow tiles and voids
First, mark the loose tile. Remove it carefully to avoid damaging surrounding ones.
Check beneath: If you find a void or missing mortar, clean the area. Apply new thinset mortar, trowel it smooth, and let it set. Reinstall the tile, using a suitable adhesive like mastic or thin-set.
If the substrate is uneven, use a leveling compound before re-tiling. For larger voids, consider installing backer-board first.
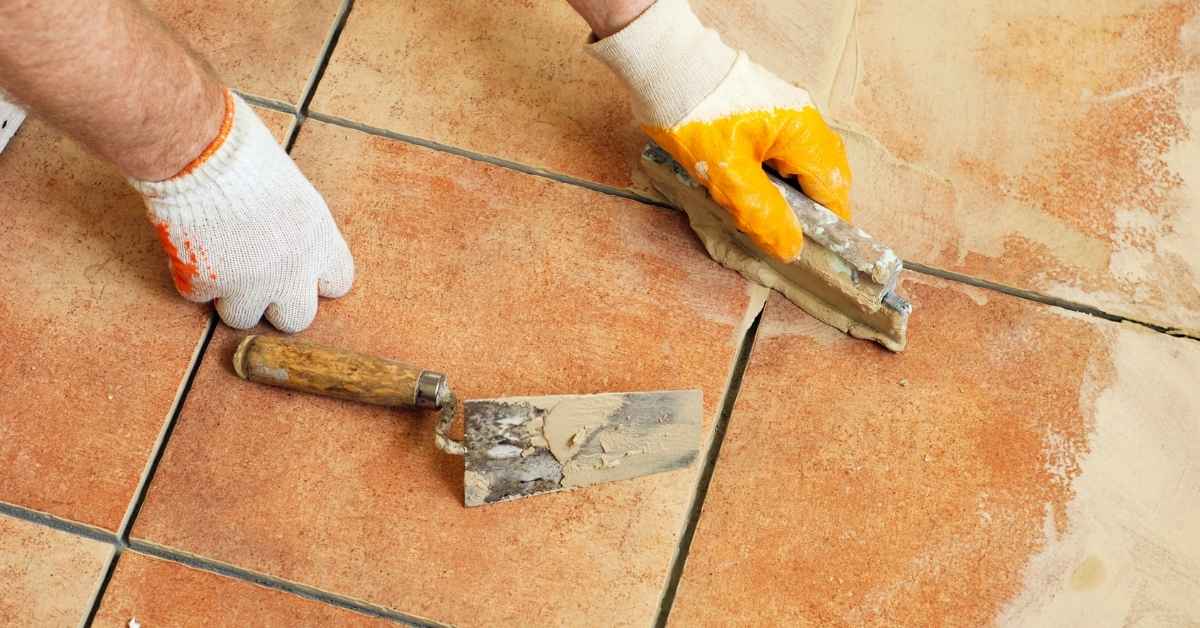
Addressing cracked tiles and grout lines
Start by removing the cracked grout using a grout saw or oscillating tool. Clean the area thoroughly.
Inspect for movement: If tiles are cracked due to underlying issues, address those first (e.g., fix structural problems, level substrate). Then re-grout, using sanded grout for wider joints.
If only a few tiles are cracked, remove and replace them. Ensure the new tile is properly bedded and grouted.
Treating moisture-damaged areas
First, dry out the area completely. Remove any damaged underlayment and tiles.
If mold is present, treat it using a suitable cleaner or solution. Ensure you wear appropriate protective gear.
Replace the underlayment with a moisture-resistant option like cement board. Re-establish waterproofing using a membrane or paint. Re-tile the area, ensuring proper ventilation to prevent future moisture buildup.
Fixes by Underlayment Type
Cement board repairs typically involve cleaning, re-fastening, and applying patch materials that suit the board and tile system. For uncoupling membranes, follow the membrane manufacturer’s patching or replacement protocol and ensure the new layer is properly bonded. Plywood subfloors require careful assessment of glue, fasteners, and leveling prior to re-installation.
Always verify compatibility with the chosen tile, adhesive, and membrane system. Check product data sheets, label instructions, and local requirements before starting repairs for each substrate type.
Cement backer board problems and solutions
If your cement backer board is damaged, don’t try to patch it. Replace the entire panel. Here’s how:
Step 1: Remove surrounding tiles carefully using a grout saw or oscillating tool.
Step 2: Cut out the damaged panel with a utility knife and pry it off.
Step 3: Install a new panel, securing it with screws every 6 inches. Ensure you’re using the correct mud/set procedure under your tiles.
Uncoupling membrane issues and remediation
Failed seams or adhesion in your uncoupling membrane can lead to tile problems. Here’s how to fix it:
Step 1: Inspect the membrane for any visible damage, especially at seams.
Step 2: For partial repairs, use a membrane patch kit to fill in holes or cracks. For full replacement, remove all tiles and the old membrane.
Step 3: Install new membrane sheets, overlapping seams by at least 2 inches. Secure with staples or nails every 4-6 inches.
Plywood and structural subfloor repairs
Before tiling, ensure your plywood subfloor is solid. Here’s how to fix common issues:
Step 1: Reinforce joists by sistering if necessary – attach a new piece of lumber alongside the existing joist.
Step 2: If you have rotten plywood sheets, replace them entirely. Cut out the damaged area and install a new sheet, securing it with screws every 6 inches.
Step 3: Before tiling, ensure your subfloor is clean, dry, and flat. Use a level to check for any low spots that need filling.
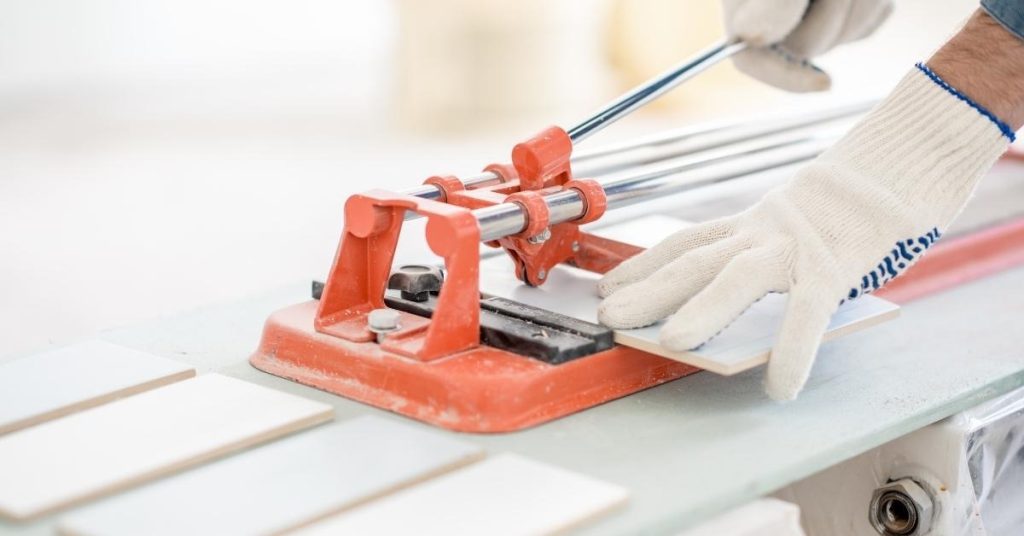
Tools and Materials Checklist
Assemble a basic set of hand tools, a level, and protective gear before you start. Have recommended adhesives, mortars, and patch compounds on hand that match the underlayment type. Include membranes or fasteners as required by the substrate and product specs.
Keep moisture meters, tapping guides, and cleaning supplies ready for the inspection and repair work. Refer to product labels and manufacturer instructions to confirm use and cure times, and check any local code requirements as needed.
Essential Tools and Safety Equipment
Before you start any underlayment repair, ensure you have the right tools and safety gear. This checklist helps you stay prepared.
- Drill: For cutting and installing screws. Use a drill with variable speed for better control.
- Drill bits: Have a set of masonry, wood, and metal bits to tackle different materials.
- Jigsaw or utility knife: For cutting backer board, plywood, or membranes. Keep blades sharp for clean cuts.
- Tapping hammer: To check for hollow tiles and voids. A light tap can save you from big repairs later.
- Level: Ensure your underlayment is flat to prevent tile lippage or cracking.
- Gloves: Protect your hands from cuts, splinters, and chemicals. Choose work gloves suitable for the task at hand.
- Eye protection: Safety glasses or goggles shield your eyes from debris and chemicals.
- Knee pads: Comfortable knees mean longer working time. Protect your joints for better ergonomics.
Quick rule: Always check your tools before starting. A dull blade or dead battery can slow down your progress.
Materials, Adhesives, and Consumables
Having the right materials ensures a strong bond between your tile and underlayment. This checklist helps you gather everything needed.
- Thinset mortar: For bonding tiles to backer board or plywood. Check compatibility with your tile type.
- Mastic: For bonding uncoupling membranes to the substrate. Ensure it’s suitable for your membrane type.
- Primer: To seal and prepare surfaces before applying adhesives or membranes. Choose a primer that matches your adhesive.
- Patch material: For filling voids, cracks, or low spots in the underlayment. Use a patching compound suitable for your substrate.
- Sealant: To fill grout lines and prevent moisture intrusion. Choose a flexible, waterproof sealant.
- Fasteners: Screws or nails to secure backer board, plywood, or membranes. Use fasteners suitable for your substrate and underlayment type.
- Tile spacers: To maintain even grout lines during installation. Choose spacers that match your tile size and grout joint width.
Quick rule: Always check product compatibility with your tile, substrate, and underlayment type to avoid adhesion issues or moisture problems.
Material Specs and Standards Explained (What to Check)
Look for bond strength, movement accommodation, and waterproofing classifications on the product label or data sheet. Understand how the underlayment is rated for your expected load and moisture exposure. Cross-check installation instructions from the manufacturer.
Verify that the chosen underlayment and adhesive are compatible with both the substrate and tile. If anything is unclear, consult the product data sheet, label, or local code guidance to confirm requirements before proceeding.
What to Read on the Product Label and Tech Sheet
Before purchasing any underlayment, make sure you’re getting a quality product that suits your needs. Here’s a checklist to help you.
- Warranty: Check for manufacturer warranties. They should cover at least 5 years for residential use and include coverage for moisture damage.
- Adhesion Method: Ensure the product adheres well to your existing substrate. Confirm it’s compatible with your current surface (e.g., concrete, plywood).
- Allowable Substrates: Verify that your specific substrate is listed as acceptable by the manufacturer.
- Bond Strength: Look for products with high bond strength to prevent delamination.
- Waterproofing Classification: Ensure it’s suitable for your intended use (e.g., Class 1 for areas at risk of moisture).
- Installation Instructions: Review these to ensure you have the right tools and can follow the steps correctly.
- Deflection Limits: Check if it meets local code requirements for deflection limits.
- Moisture Resistance: Ensure it’s resistant enough for your specific application (e.g., high moisture areas).
- Thickness: Confirm it’s thick enough to provide adequate support and protection.
Quick rule: Always double-check with the manufacturer if you’re unsure about any aspect of their product.
Working with Local Codes and Manufacturer Limits
Local building codes and manufacturer guidelines can vary. Here’s how to ensure you’re following the right rules.
- Local Building Code: Contact your local building department to obtain a copy of the International Residential Code (IRC) or other applicable code book. Check sections related to tile installation and underlayment.
- Moisture Barrier Requirements: Ensure the product meets local moisture barrier requirements, especially in areas prone to high humidity or flooding.
- Deflection Limits: Verify that the product complies with local deflection limits for your specific substrate and tile installation.
- Manufacturer Guidelines: Always follow manufacturer guidelines for installation, as they may have additional requirements not covered by local codes.
- Tile Installation Standards: Familiarize yourself with the Tile Council of North America (TCNA) Handbook for Ceramic Tile Installation to ensure you’re following industry best practices.
- Substrate Preparation: Check manufacturer guidelines for substrate preparation. Some products may require specific surface treatments or primers.
- Tile Weight Limits: Ensure the underlayment can support the weight of your chosen tile and grout.
- Fire Resistance Ratings: If required, ensure the product meets local fire resistance ratings.
Quick rule: Always consult both local codes and manufacturer guidelines to avoid costly mistakes.
Prevention and Best-Practice Installation Checklist
Prepare the substrate thoroughly, ensuring it is clean, dry, and flat before laying any underlayment. Perform flatness checks and address high spots or dips. Plan joints and waterproofing according to the system you are using.
Follow best practices for fasteners, adhesives, and seam treatment. Before you tile, review the manufacturer instructions and any local rules to avoid common failures in the future.
Preparing the subfloor and layout planning
Use this checklist before laying your underlayment to ensure a solid foundation for your concrete floor. Follow these steps after preparing your subgrade but before installing moisture barriers.
- Clean subfloor: Remove all dust, dirt, and debris from the surface using a broom or shop vacuum. A clean subfloor ensures better adhesion of underlayment and concrete.
- Check level: Use a long straight edge (e.g., 10′ level) to ensure your subfloor is level within 3/16″ in 10 feet. If not, address high or low spots before proceeding.
- Inspect for damage: Look for cracks, holes, or other defects. Repair as needed to prevent underlayment and concrete from failing prematurely.
- Check moisture content: Test your subfloor’s moisture content using a calcium chloride test kit (follow manufacturer instructions). Concrete should not be poured on subfloors with moisture levels exceeding 3 lbs/1000 sq.ft./24 hrs.
- Plan joint locations: Determine where control joints will be placed, typically every 8-15 feet apart. Mark these locations to ensure proper spacing during concrete placement.
- Mark expansion joint locations: Identify areas where expansion joints are needed, such as at changes in direction or temperature. Mark these spots for underlayment and concrete installation.
- Check load-bearing capacity: Ensure your subfloor can support the weight of wet concrete (around 150 lbs/cu.ft.). Consult structural engineer’s report if unsure.
- Install moisture barrier (if needed): If required, install a moisture barrier membrane or vapor retarder according to manufacturer instructions before laying underlayment.
Quick rule: Always follow local building codes and consult with professionals if you’re unsure about any aspect of your concrete floor installation.
Fastening, joints, and movement control
Use this checklist before you start laying your concrete to ensure a strong, durable finish that won’t crack or crumble over time.
- Check Fastener Spacing: Ensure fasteners (like rebar or wire mesh) are spaced no more than 12″ apart. Too far and the slab can sag or crack.
- Inspect Joint Layout: Verify joints are laid out as planned, at least every 10′ for typical residential slabs. Skipping this can cause random cracking.
- Use Expansion Joints: Install expansion joint material (like backer rod or foam) in control joints to prevent water and debris from entering. Without it, joints can clog and crack.
- Check Joint Width: Ensure joints are at least 1/4″ wide for typical residential slabs. Too narrow and they won’t accommodate movement properly.
- Stagger Joints: Make sure joints in adjacent slabs do not line up directly. Aligned joints can cause excessive cracking under pressure.
- Check Concrete Slump: Ensure your concrete mix has the correct slump (around 3-5″ for typical residential work). Too dry and it won’t compact properly; too wet and it can segregate or crack.
- Inspect Formwork: Check forms are level, square, and securely fastened. Poor formwork can lead to uneven slabs and excessive cracking.
- Verify Subgrade Preparation: Ensure your subgrade is well-compacted, free of debris, and properly moisture-conditioned (check with local rules). A poor subgrade can cause slab settlement and cracking.
Quick rule: Always remember: proper planning, layout, and execution are key to preventing costly rework. Don’t rush through these steps; they’re the foundation of a successful pour.
Waterproofing and transitions
Use this checklist before installing your underlayment to ensure a waterproof barrier and proper transitions between different surfaces.
- Check membrane dimensions: Ensure the liquid-applied or sheet membrane you’ve chosen is wide enough to cover the entire subfloor without overlaps. Verify this by measuring the subfloor width and comparing it to the membrane’s width.
- Inspect penetrations: Identify all penetrations (pipes, wires, etc.) before applying the membrane. Ensure they’re clean, dry, and ready for sealing.
- Select appropriate sealant: Choose a sealant compatible with your membrane and penetration materials (e.g., metal, plastic, or wood). Check the product label for compatibility.
- Seal penetrations: Apply sealant around each penetration following the manufacturer’s instructions. Ensure it’s well-bonded to both the penetration and the surrounding membrane.
- Check transition details: Verify that transitions between different surfaces (e.g., concrete to wood) are properly planned. Check local building codes for specific requirements.
- Prepare transition areas: Clean and prime transition areas before applying the membrane or sealant. This ensures a strong bond and prevents delamination.
- Install transition strips: If using transition strips, ensure they’re wide enough to cover the joint between surfaces and are securely fastened following the manufacturer’s instructions.
- Inspect membrane seams: Check that all membrane seams are properly bonded with tape or liquid seam sealer. Ensure there are no gaps or overlaps.
Quick rule: Always inspect and prepare surfaces before applying membranes or sealants to prevent costly rework due to improper adhesion or water intrusion.
Conclusion
Getting this right protects safety, durability, and the look of the finished floor. When you fix underlayment properly, you avoid costly damage and a failure you’ll see every time you walk in the room.
Start by confirming the underlayment type and its condition, then inspect seams and fasteners, test for moisture and structural soundness, plan fixes by the symptom you see, gather the right tools and materials, and follow the relevant standards as you work step by step in a logical order.
Avoid rushing over damp patches, skipping the moisture test, or ignoring the manufacturer specs and installation guidelines. Don’t work with live wiring or in a space with poor ventilation; always shut off power where needed, wear gloves, and test a small area first before committing to a full repair. These simple safety checks save you from real damage and costly mistakes.
If the problem is widespread, if you discover persistent moisture, or if the underlayment involves complex types or embedded flashing, consider bringing in a pro instead of pushing ahead alone. Stay practical, follow the steps you’ve learned, and you’ll land a durable, safe tile setup that lasts. Plan, test, and proceed with confidence.
FAQ
What are the most common warning signs of underlayment failure?
Tiles sounding hollow, cracking, or loose edges are red flags. You might also see feathered grout joints, patches of dampness, or staining on the surface. If you notice rising moisture from below, stop and check the underlayment condition.
How do I verify I have the right underlayment for tile and subfloor?
Check the label on the underlayment and follow the manufacturer’s instructions. Match the product to your tile type, substrate, and environment. If in doubt, consult the label or contact the manufacturer and your local supplier.
What steps should I take before removing and replacing underlayment?
Identify and stop any moisture source first. Protect surrounding areas and plan a clean removal to minimize damage to the subfloor. Keep receipts or notes from the manufacturer for the replacement product.
When should I consider replacing the entire underlayment rather than patching?
If damage covers a large area, there’s persistent moisture intrusion, or the substrate is delaminating, replacing the underlayment is usually the safer path. Follow manufacturer instructions for removal and installation, and verify compatibility with your tile and adhesive system.