
Introduction
Salt should not be used on concrete because it can damage the surface over time. It can draw moisture, cause scaling, and lead to pitting in some mixes. Before you apply anything, check your product label and follow local guidelines.
If you must de-ice, choose alternatives and follow the product instructions for your situation. Regardless, keep salt away from freshly poured or sealed concrete and plan for proper sealing or maintenance. Ask in-store staff or a professional what is appropriate for your mix and environment.
Key takeaways
- De-icers can accelerate salt damage; minimize application on pervious, high-traffic surfaces.
- Use sand or traction mats for grip; salts are unnecessary for traction.
- Wash exposed concrete after snow events to dilute residues promptly and protect runoff.
- Choose de-icers labeled safe for concrete and follow manufacturer instructions.
- Regular maintenance includes sealing and inspecting cracks from salts and runoff.
- Wear gloves and avoid skin contact with de-icers during application.
Table of Contents
- Introduction
- Key takeaways
- How De-Icing Salt Works on Ice and Concrete
- Common Salts Used and Their Relative Risks to Concrete
- How Salt Actually Damages Concrete (Mechanisms)
- Signs and Visual Checkpoints of Salt-Related Damage
- Preventive Design and Maintenance Strategies to Minimize Harm
- Safer De-Icing and Traction Alternatives
- How to Remove Salt Stains and Remediate Affected Concrete
- Environmental, Pet, and Landscaping Impacts to Consider
- Conclusion
- FAQ
How De-Icing Salt Works on Ice and Concrete
De-icing salts lower the freezing point of water, which helps melt ice. This chemical action happens wherever salt contacts liquid or slushy water. On concrete, that moisture sits on and in the surface and begins to interact with the cement matrix.
As meltwater refreezes, it can push against tiny pores and surface layers. This repeated cycle is what starts to loosen the topmost concrete and opens pathways for further damage. Always check the product label or supplier instructions for specifics on the salt you’re using.
Salt’s action on ice and meltwater
When you spread salt on icy surfaces, it starts to dissolve into the meltwater. This is what makes it an effective de-icer.
The dissolved salt lowers the freezing point of water. That means ice melts faster at temperatures where it would normally freeze solid.
But remember, this process only works when there’s some liquid water present. If the surface is bone-dry or too cold, salt won’t do much good.
Immediate vs. cumulative effects on concrete
Salt works quickly to melt ice and snow, making it a popular choice for clearing walkways and driveways. But its short-term benefits come with long-term costs.
Each time you apply salt, it starts to break down the concrete’s surface. This happens because salt is hygroscopic – it attracts moisture and holds it against the concrete, leading to repeated wetting and drying cycles.
The result? Concrete becomes more porous over time, making it less durable and more susceptible to damage from future freeze-thaw cycles. So while salt might seem like a quick fix, it’s actually causing long-term harm to your concrete surfaces.
Common Salts Used and Their Relative Risks to Concrete
Rock salt is the most common option and tends to be the least expensive. It can be harsh on aged or cracked concrete. Other chlorides, like calcium and magnesium chloride, work at lower temperatures but may cause more chemical interaction with the surface.
Potassium-based blends and organic de-icers are marketed as milder alternatives, yet effectiveness and impact vary by product. Review manufacturer guidance and local recommendations to choose a safer option for your slab. Verify with product data sheets for any concrete compatibility notes.
Sodium chloride (rock salt)
Rock salt, also known as sodium chloride, is the most common de-icer due to its low cost and wide availability. It’s effective at low temperatures but it’s tough on concrete.
Here’s why:
- Corrosion: Rock salt can cause corrosion of steel reinforcement in concrete, weakening the structure over time.
- Scaling: It can also cause surface scaling, making the concrete rough and unsightly.
- Freeze-thaw damage: When water seeps into pores and then freezes, it expands and can break off pieces of concrete.
Calcium and magnesium chlorides
Calcium chloride and magnesium chloride are more expensive than rock salt but work faster at lower temperatures. They’re often used in colder regions.
While they melt ice quicker, they can cause even more damage to concrete:
- Faster corrosion: These salts speed up the corrosion process of steel reinforcement.
- Greater penetration: They penetrate deeper into concrete, causing more extensive damage.
Organic and blended alternatives
Newer organic blends and other alternatives like calcium magnesium acetate (CMA) or potassium acetate are kinder to concrete. They’re more expensive but have lower environmental impact.
Their benefits include:
- Lower corrosivity: These alternatives cause less corrosion of steel reinforcement.
- Better for the environment: They’re less toxic to plants and animals, making them a greener choice.
How Salt Actually Damages Concrete (Mechanisms)
Salt accelerates freeze-thaw damage by promoting moisture movement in and out of the concrete. This increases the number and size of capillary pores over time. Visible cracking and spalling can follow from repeated cycles.
Salt also contributes to surface scaling and dusting as the outer layer loses cohesion. Reinforcement corrosion can be accelerated if chlorides reach embedded steel. For specifics, consult the product guidance and local building codes when planning repairs.
Freeze-thaw and scaling
Salt lowers the freezing point of water. When it’s on your concrete, here’s what happens:
1. Water seeps into tiny cracks in the concrete.
2. When temperatures drop, that water freezes, expanding and widening those cracks.
3. As temperatures rise again, the ice melts, leaving bigger gaps behind. This cycle repeats, causing more damage each time – it’s called freeze-thaw cycling.
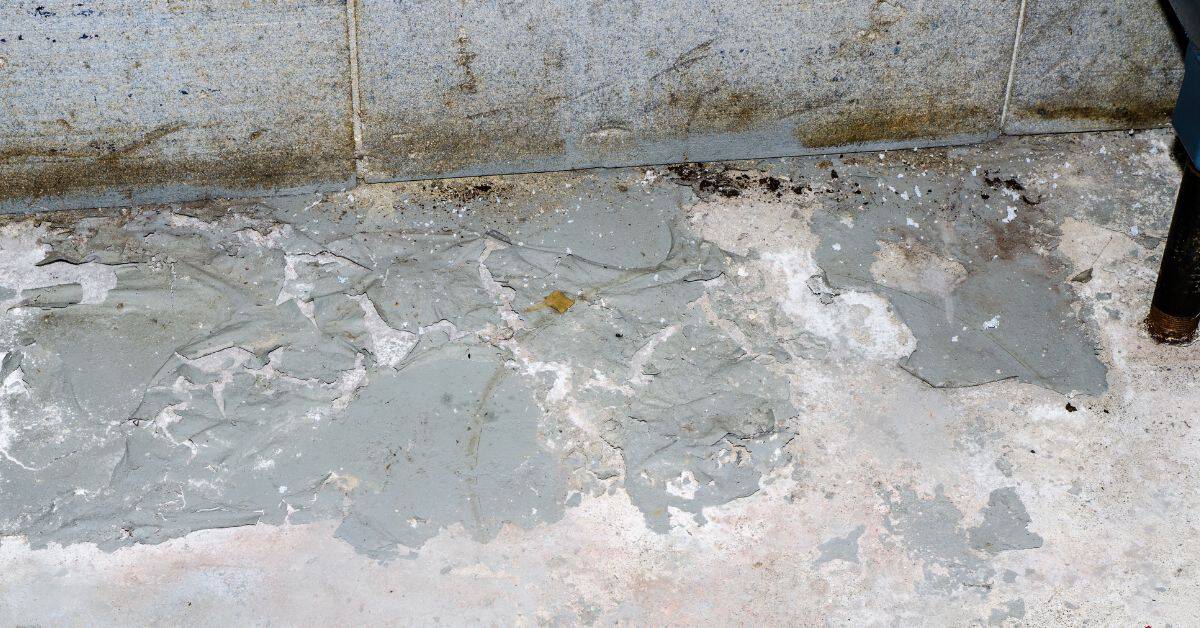
The surface of your concrete starts to flake off in layers, like peeling paint. That’s scaling, and it exposes fresh concrete to even more damage.
Corrosion of embedded steel and spalling
Concrete usually protects the steel reinforcement inside it. But when salt’s involved, things go wrong:
1. Chloride ions from the salt penetrate deep into the concrete.
2. They reach the steel, causing it to corrode (rust). This weakens the steel and creates pressure inside the concrete.
3. That pressure causes pieces of the concrete surface to pop off, leaving holes or gaps – that’s spalling. It exposes more steel to moisture and air, speeding up corrosion and weakening your structure.
Signs and Visual Checkpoints of Salt-Related Damage
Look for flaking or chipped edges along walkways and steps. Uneven texture or a powdery surface is another telltale sign. Sticky or damp spots after mild weather can indicate ongoing salt activity.
Feel for increased roughness or graininess underfoot, which suggests surface wear. Small cracks that widen with freeze-thaw cycles are common early indicators. Use product labels or a contractor’s inspection note to confirm the cause.
Surface symptoms to watch for
Before you start any repairs or maintenance on your concrete surfaces, use this checklist to identify signs of salt-related damage. This will help you address the issues effectively and prevent costly rework.
- Flaking: Check for small pieces of concrete breaking off from the surface. Tap suspected areas gently with a hammer; if it sounds hollow, there’s likely delamination underneath.
- White salt deposits: Look for white, powdery or crystalline substances on the surface. A simple wipe test can confirm their presence – they should leave a residue on a damp cloth.
- Pitting: Inspect for small holes or indentations in the concrete surface. Use a flashlight at an angle to highlight these imperfections, which may not be visible under direct light.
- Discoloration: Check for stains, patches of different colors, or a general graying of the concrete. Compare suspect areas with unaffected ones to confirm discoloration.
- Cracking: Inspect for hairline cracks or larger fissures. Use a mirror on a stick to check hard-to-reach areas and ensure cracks aren’t hidden from view.
- Spalling: Look for small pieces of concrete breaking off at the edge, exposing the aggregate beneath. This is often caused by freeze-thaw cycles and salt intrusion.
- Efflorescence: Check for a white, powdery substance on the surface that appears to be “blooming” out from cracks or joints. This is typically a sign of excess moisture and potential salt damage.
- Popouts: Inspect for small, round areas where the concrete has popped out, leaving a depression. These are often caused by air pockets or improper curing and can be exacerbated by salt intrusion.
Quick rule: If you notice any of these symptoms, don’t just focus on the surface. Salt-related damage typically indicates deeper issues that need to be addressed for lasting repairs.
Structural warning signs
Use this checklist when inspecting your concrete surfaces for signs of salt-related damage. If you notice any of these issues, it’s time to take a closer look or consult a professional.
- Cracking around joints: Check if cracks are wider than 1/8″ (3mm) and extend deep into the concrete. Use a screwdriver or chisel to gently probe the crack’s depth.
- Exposed aggregate: Look for areas where the top layer of cement has flaked off, exposing the coarse aggregate beneath. This could indicate deeper damage.
- Crumbling edges: Inspect corners and edges for signs of crumbling or chipping. Tap these areas gently with a hammer; if it sounds hollow, there might be a void inside.
- Uneven settling: Measure the concrete surface with a straight edge and level to check for uneven settling or sagging. Any significant variations warrant further investigation.
- Popping sounds: Listen for popping or cracking sounds when the temperature changes, especially in cold weather. This could indicate salt expansion inside the concrete.
- Delamination: Check for areas where the concrete surface seems to be peeling away from the underlying structure. Press on these areas; if they feel spongy, there might be a problem.
- Salt efflorescence: Look for white, powdery deposits on the concrete surface. This is a sign that salt has migrated to the surface and could indicate deeper issues.
- Widespread cracking: If cracks are widespread and numerous, it might be a sign of structural issues caused by salt damage. Check if these cracks follow patterns or seem to radiate from a central point.
Quick rule: If you notice any of these signs in combination with each other, or if they cover more than 10% of the concrete surface, it’s time to call a professional for an evaluation. Catching these issues early can prevent expensive repairs down the road.
Preventive Design and Maintenance Strategies to Minimize Harm
Choose concrete mixes and curing practices with durability in mind, especially for exterior surfaces. Adequate air-entraining admixtures can improve freeze-thaw resistance. Consider design tweaks that promote drainage away from slabs.
Maintain clean surfaces and promptly remove any salt deposits when practical. Regular sealing and timely repairs of cracks reduce the pathways for salt intrusion. Check with the concrete supplier or local standards for recommended practices.
Best practices for new and existing concrete
When pouring new concrete, follow these best practices to improve its durability against salt damage:
Use high-quality materials. Opt for Type III cement or use fly ash in your mix. These enhance concrete’s resistance to freezing and thawing.
Cure properly. Keep the surface moist for at least 7 days after pouring. This allows the concrete to gain maximum strength.
For existing slabs, check for cracks. Seal them promptly to prevent saltwater intrusion.
Sealers, coatings, and joint care
Protect your concrete with these surface treatments and maintenance practices:
Apply sealers. Use a quality concrete sealer to block moisture and salt penetration. Apply it according to the manufacturer’s instructions.
Consider protective coatings. For high-risk areas, consider using a membrane or overlay that provides additional protection against de-icing salts.
Maintain joints. Keep expansion and control joints clean and free of debris. Fill them with a flexible joint filler to prevent saltwater intrusion.
Safer De-Icing and Traction Alternatives
Use traction aids like sand or grit to provide grip without chemical interaction. Where de-icers are necessary, opt for products labeled as concrete-friendly and follow application guidelines. Apply only as directed and avoid piling product on the surface.
Consider indirect approaches such as improving runoff and using heated mats or snow removal before ice forms. Review environmental and pet-related notes on the product label and local guidance for safe use.
Abrasives and traction materials (sand, grit)
Choosing the right material for traction is crucial to prevent damage. Sand and grit are popular choices, but they’re not one-size-fits-all.
- Sand: Use on steps and walkways. Look for clean, coarse sand. Avoid fine sand as it can clog joints and cause cracking.
- Grit: Ideal for driveways and large areas. Choose angular grit for better traction. Avoid rounded grit as it doesn’t bond well with concrete.
- Walnut shells: A eco-friendly alternative. Use in high-traffic areas. Avoid using too much, as excess can stain concrete.
- Aluminum oxide: Great for industrial settings. High traction but can be slippery when wet. Not recommended for residential use due to cost and potential damage.
- Cinders: Cheap and effective in large quantities. Avoid using too much, as excess can cause cracking and staining.
Chemical alternatives and organic blends
Less corrosive chemicals and organic blends are safer for concrete. Always read product labels and follow manufacturer guidance.
Acetates, like calcium magnesium acetate (CMA), are less damaging than chlorides but more expensive. They’re effective down to -25°F (-32°C).
Glycol-based products are non-corrosive and effective in extreme cold. However, they can be slippery when wet and may stain concrete if not rinsed off.
Organic blends, like those made from beet juice or potato waste, are eco-friendly and less damaging than salt. They’re effective down to 0°F (-18°C) but can be more expensive.
Mechanical and timing solutions (shoveling, heated mats)
Preventing ice buildup is often the best strategy. Timely snow removal and mechanical aids can help.
Shoveling: Regularly remove snow to prevent it from turning into ice. Use a plastic shovel to avoid damaging concrete edges.
Snowblowers: Great for large areas. Choose one with rubber blades to avoid damaging concrete. Be careful not to blow snow onto walkways, creating more work.
Heated mats: Ideal for high-traffic areas like steps and entrances. They melt ice on contact but can be expensive to install and operate.
How to Remove Salt Stains and Remediate Affected Concrete
Begin with a thorough rinse to remove surface residues. A mild detergent and a stiff brush can help lift deposits from the surface. Do not scrub aggressively on delicate finishes or old repairs.
If staining persists, follow up with a concrete-safe cleaner and consider professional sealing after the area dries. For structural concerns, document damage and consult a contractor about patching or resurfacing options. Always verify product instructions before use.
Step-by-Step Cleaning Process
Follow this clear, numbered sequence to remove salt stains and remediate affected concrete safely and effectively.
- Prepare the area: Clear debris, wear gloves, goggles, and old clothes. Tape off nearby surfaces.
- Wet the surface: Use a garden hose to dampen the concrete. This helps control dust and prevents salt from spreading.
- Scrub gently: Apply a mixture of water and mild detergent or a commercial cleaner designed for concrete. Use a stiff-bristled brush, working in small sections.
- Rinse thoroughly: Use clean water to rinse off the cleaning solution. Ensure no residue remains.
- Inspect and touch up: Check for any damaged areas. If necessary, apply a concrete sealer or perform minor repairs as outlined below.
Cleaning and neutralizing salt deposits
Efflorescence and salt crusts can be safely removed using these methods, preventing damage to concrete and plants.
For light deposits, use a solution of water and mild detergent. Apply with a soft-bristled brush or cloth, then rinse thoroughly.
For heavier deposits: Use a mixture of muriatic acid (5%) and water (20 parts water to 1 part acid). Apply, let it sit for 10-15 minutes, then scrub gently. Rinse well. Always wear protective gear when handling chemicals.
To neutralize the acid after use, apply a solution of baking soda (1 cup per gallon of water) and rinse again.
Repair options: patching, resurfacing, replacement
Choose the right repair method based on the extent of damage. Patching and resurfacing can restore minor issues, while major damage may require replacement.
Patching: Use a concrete patching compound to fill small cracks or holes. Apply according to instructions, let it cure, then seal.
Resurfacing: For larger areas with minor damage, use a concrete resurfacer. It provides a new surface layer, hiding imperfections and protecting the underlying concrete.
Replacement: If the concrete is severely damaged (e.g., spalling, delamination), replacement may be necessary. Remove the old concrete, prepare the base, and pour new concrete following best practices.
Tools and materials checklist
Use this list to gather everything needed for cleaning and common minor repairs. Always check product instructions before use.
- Cleaning: Gloves, goggles, old clothes, tape, garden hose, stiff-bristled brush, mild detergent or commercial cleaner, muriatic acid (optional), baking soda.
- Repair: Concrete patching compound, concrete resurfacer, trowel, putty knife, safety glasses, ear protection (for grinding).
- Safety: Work gloves, safety glasses or goggles, dust mask, ear protection.
Quick rule: Always check product instructions and safety guidelines before use to ensure proper handling and application.
Environmental, Pet, and Landscaping Impacts to Consider
Salt can move beyond the slab into soil and nearby plant beds, affecting root health and soil structure. Runoff may carry chlorides toward lawns and waterways. Keep this in mind when choosing where and how to apply de-icers.
Pet safety matters too; some salts are more irritating if licked or walked on with paws. Mitigation steps include applying minimal amounts, rinsing pets’ paws after outdoor time, and guiding runoff away from sensitive areas by design. Check labels for environmental warnings and local regulations.
Effects on vegetation and soil health
Salt can wreak havoc on your plants and soil. It alters the chemical balance of the soil, making it harder for plants to absorb water and nutrients. This stress can cause yellowing leaves, stunted growth, or even death.
Buffer zones are key. Keep salt away from plant beds by at least 10 feet. Use alternative de-icers like sand or calcium magnesium acetate (CMA) in these areas.
Salt also accumulates over time. Test your soil’s pH annually. If it drops below 7, consider adding lime to raise the pH and neutralize salt buildup.
Pet-safe practices and cleanup
Salt can irritate pets’ paws and cause serious health issues if ingested. Here’s how to protect your furry friends:
Wipe their paws after they’ve been outside. Use a damp cloth or pet wipe to remove any salt residue.
Keep pet entrances clear of salt. Use non-salt alternatives like sand or gravel in these areas.
Clean up any salt spills around your home’s entrance. Regularly sweep and rinse the area with fresh water to minimize exposure.
Conclusion
Protecting concrete from salt damage is about safety, longevity, and keeping the look intact. Stay disciplined with avoidance, early checks, and smart choices so you don’t pay for repairs later.
Check in this order: inspect for any existing salt staining or surface damage; choose safer de-icing options and apply only as directed; keep traffic off treated areas until they dry; sweep or rinse after use to remove residue; when in doubt, test a small area first and document your results before wide-scale use.
Avoid common mistakes like over-applying salt, using the cheapest option without researching its concrete impact, and ignoring signs of flaking, spalling, or pitting. Always follow product directions, wear gloves and eye protection, and keep pets and kids away from treated zones until the surface is dry. If you see deep cracks, crumbling edges, or repeated staining despite precautions, stop and consider professional help rather than pushing forward.
If the project involves significant changes to drainage, surface finish, or frequent de-icing needs, call a pro to assess design and maintenance plans. Stay practical, stay safe, and you’ll keep your concrete solid and clean for years to come.
FAQ
Is there anything on a de-icing salt label I should look for to avoid damaging my concrete?
Yes. Read the manufacturer instructions and product label. Look for recommended uses, any cautions about concrete surfaces, and whether the product has additives that can harm concrete or metal components.
Should I use sand or grit instead of salt for traction, and will that help protect the concrete?
Traction aids like sand or grit can help without melting ice, which reduces chemical exposure. They don’t de-ice, so you’ll still need a safe plan for ice control. Use them in combination with proper timing and safe de-icers only when needed.
When is it safe to apply de-icers on concrete that’s been recently poured or still curing?
Never apply chemical de-icers to fresh or partially cured concrete. Always follow the concrete’s cure state and the product label. If in doubt, wait and consult the instructions before using any product.
How can I spot early salt damage while I’m clearing sidewalks or driveways?
Look for a chalky or powdery residue, small cracks near joints, or flaking where salt has penetrated. Rinse with water, monitor closely, and remove the de-icer if you see any adverse changes. If damage appears, reassess your approach and consult the product guidance.