
Introduction
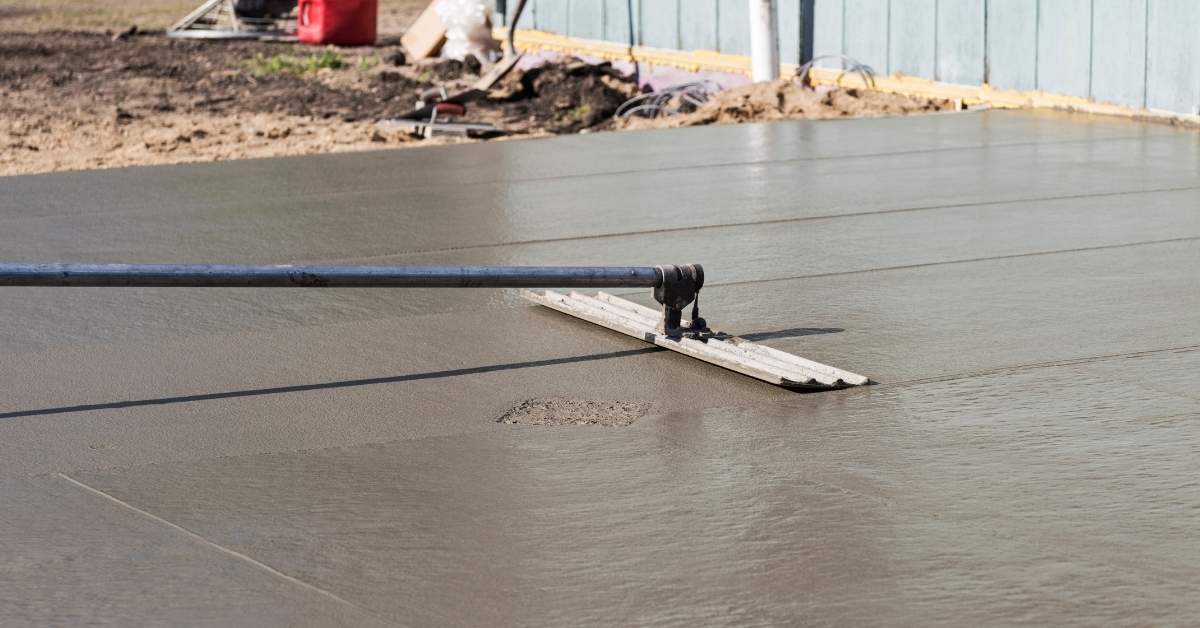
Grinding high spots on a concrete slab is the process of leveling protrusions to bring the surface flat and even.
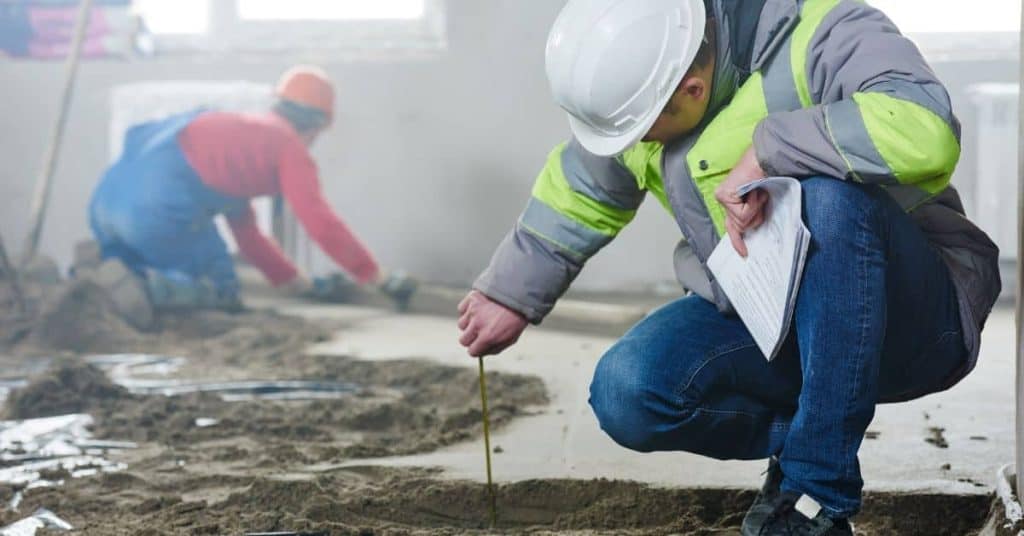
High spots can come from uneven finishing, hard trowel lines, or settling, and identifying them requires a simple run-over with a straightedge or level. Work calmly, plan for dust control and choose the right tooling for the job.
Choose appropriate grinding tools such as diamond cup wheels or grinding discs and verify compatibility with your grinder by checking the tool label and manufacturer instructions. Set up dust control with a HEPA-equipped vacuum and use damp cleanup to manage debris, while keeping the area as ventilated as possible. Proceed with a light, even pass, move in small sections, and frequently re-check level with a straightedge to ensure you’re staying on track.
Key takeaways
- Assess slab high spots with a straightedge or flat ruler and light scoring.
- Choose between diamond cup wheels and planetary grinders for effective flattening.
- Plan dust control by local ventilation, containment methods, and vacuum-equipped tools.
- Wear eye protection, respirator, hearing protection, and sturdy non-slip footwear consistently.
- Mark high spots with temporary guidelines before grinding to stay focused.
- If surfaces crook or delaminate, switch to a scarifier or planer.
Table of Contents
- Introduction
- Key takeaways
- Why High Spots Occur on Concrete Slabs
- Identifying and Measuring High Spots
- Tools and Materials Checklist
- Pre-Job Planning and Site Prep
- Step-by-Step Grinding Procedure for High Spots
- Dust Control Techniques During Grinding
- Safety Protocols and Operator Best Practices
- When to Use a Scarifier or Planer Instead of Grinding; Costs and Troubleshooting
- Conclusion
- FAQ
Why High Spots Occur on Concrete Slabs
Localized raised areas on a slab come from a mix of finishing choices, settlement patterns, and where the slab rests on the subgrade. Poor planning, uneven overlay thickness, and post-pour repairs all contribute to high spots over time. Substrate moisture and traffic patterns also steer where these bumps develop.
Watch for how equipment footprint, joint layout, and access routes influence the growth of raised areas. Document evidence with photos, notes, and simple measurements to avoid guessing about causes. This helps plan grinding, dust control, and restoration work with a clear path forward.
Common formation mechanisms
High spots on concrete slabs often result from finishing and placement errors. Here are some typical scenarios:
Trowel marks: Over-troweling or improper troweling technique can leave visible ridges.
Bull-floating ridges: Inadequate bull-floating can leave behind small, raised areas.
Cold joints and localized curing differences: Discontinuities in placement or variations in curing can cause localized high spots.
How material and scheduling choices contribute
Material choices and scheduling play a significant role in the formation of high spots. Here’s how:
- Mix design: Incorrect mix proportions can lead to weak bond or cracking. Always follow recommended mix designs.
- Aggregate segregation: Inadequate mixing or transportation can cause aggregates to segregate, resulting in uneven surface. Ensure proper mixing and transportation methods.
- Finishing timing: Finishing too early or late can leave high spots. Follow recommended finishing times.
- Patching or overlays: Inadequate preparation or application of patches or overlays can cause raised areas. Ensure proper surface preparation and application.
- Overlay thickness variation: Uneven overlay application can result in high spots. Maintain consistent overlay thickness.
Identifying and Measuring High Spots
A high spot is any area that visually appears raised beyond a defined DIY tolerance, with practicality guiding what you measure. Use simple checks to determine if a section needs grinding or a wider approach. When in doubt, consider a professional survey for precise levelness.
Practical locating methods include visual cues, straightedges, and spot probing from a consistent reference plane. Keep notes and photos of elevated areas and map them before grinding. If measurements and visual checks disagree, plan for a professional assessment.
Visual checkpoints and simple field tools
Before you start grinding, use these simple methods to locate high spots. They’re quick and easy, perfect for most DIY projects.
- Straightedge test: Use a 2×4 or aluminum straightedge to check for high spots. Place it on the slab and look for gaps.
- Chalk lines: Mark high spots with chalk so you know where to grind.
- String level: Stretch a string taut along the slab’s surface. High spots will be visible where the string dips.
- Long level or laser level: Use these tools to check for levelness and identify high areas.
- Avoid skipping: Missing high spots can lead to uneven grinding and wasted effort.
Quick rule: If you’re unsure, double-check with another method. Better safe than sorry!
When to use precision measuring (and what to check)
Sometimes, you need accurate readings. Here’s when and how to take them.
- Manufacturer tolerances: Check the manufacturer’s specs for flatness/levelness tolerances.
- Large areas: For slabs over 1000 sq ft, use a laser level or digital level for precise readings.
- Complex geometry: For irregular shapes or multiple slab sections, precision measuring ensures even grinding.
- Avoid skipping: Inaccurate measurements can lead to improper grinding and wasted material.
Quick rule: If in doubt, consult a professional surveyor. Precise readings ensure the best results.
Tools and Materials Checklist
Clarify what counts as a high spot and how tool selection shifts with different slab conditions, like new pours or existing coatings. Define the scope for the project to guide the gear list. Rental vs purchase decisions hinge on how often you’ll use the setup.
Tools include grinders with appropriate disc configurations, and both corded and cordless options. Add accessories, dust collection gear, PPE, and consumables that suit the planned passes. Check compatibility and maintenance needs on the label or manual before buying or renting.
Grinder types and cutting/grinding tooling
Choose the right grinder for your job. Here’s a checklist to help you.
- Planetary/Ride-on grinders: Ideal for large areas with consistent high spots. Check disc size (7-11 inches) and power source (corded vs cordless).
- Dual-disc machines: Great for flat surfaces and wide areas. Ensure discs are secure and compatible.
- Handheld angle grinders: Perfect for small jobs and tight spaces. Check disc size and RPM range (3,000-12,000).
- Diamond cup wheels: Use for concrete grinding. Check bond type (metal or resin) and grit size.
- Metal-bond tooling: Aggressive for tough high spots. Ensure RPM range matches tool.
- Variable speed control: Essential for controlling grinding aggressiveness.
- Disc sizes (7-11 inches): Standard for DIY setups. Check compatibility with your grinder.
- Suitable RPM ranges: 3,000-12,000 RPM typical. Check tool and disc recommendations.
Quick rule: Match tool aggressiveness to the defect’s size and type for best results.
Dust control gear and PPE
Protect yourself and your workspace from dust. Here’s what you need.
- HEPA-rated vacuums: Capture 99.97% of particles. Check airflow rate (CFM) and filter type.
- Water-feed options: Reduce dust with wet grinding. Check compatibility with your grinder.
- Respirators: Protect against silica dust. Choose P100 or better, half-face or full-face.
- Eye protection: Safety glasses or goggles. Ensure they fit well and are compatible with your respirator.
- Hearing protection: Earplugs or earmuffs. Check noise reduction rating (NRR).
- Skin coverage: Long sleeves, gloves, and long pants to protect against dust and debris.
- Floor protection: Drop cloths or plastic sheeting to contain dust.
- Ventilation: Ensure proper airflow in your workspace. Use fans if needed.
Quick rule: Always use appropriate PPE and dust control measures to protect yourself and your workspace.
Material specs and compatibility
Check tool and material specifications for a smooth grinding job. Here’s what to consider.
- Tool manufacturer recommendations: Follow their guidelines for disc selection, RPM range, and grinding techniques.
- Concrete/overlay material specs: Check compressive strength, moisture content, and aggregate size.
- Bond type (metal or resin): Choose based on tool recommendation and job requirements. Metal is more aggressive, resin is more flexible.
- Grit size: Coarse (24-36) for initial grinding, semi-fine (60-120) for finishing. Check manufacturer recommendations.
- Disc thickness: Thinner discs (e.g., 5/32 inch) are more flexible, thicker ones (e.g., 1/4 inch) are more durable.
- Disc diameter: Standard sizes range from 4 to 12 inches. Check compatibility with your grinder.
- Suitable RPM ranges: Follow tool and disc recommendations for optimal performance.
- Grinding techniques: Check manufacturer guidelines for best practices, such as grinding direction and pressure.
Quick rule: Always check tool and material specifications to select the right bond type, grit size, and disc thickness for your job.
Pre-Job Planning and Site Prep
Begin by outlining the work scope, safety boundaries, and the grinders to be used. Check dust-control capability, PPE, and edge work limits to protect fragile substrates. Establish a plan that keeps everyone informed and safe from start to finish.
Assess the site with a containment plan that limits fugitive dust and protects adjacent surfaces. Map exits and HVAC zones, then set up barriers and plastic to create a controlled zone. Confirm electrical readiness and dust-extractor compatibility before you start cutting or grinding.
Containment and traffic control
Setting up a contained work zone is crucial to keep dust from spreading. Use plastic sheeting or rigid barriers to seal off the area.
Seal doors with tape or temporary door seals to prevent dust from escaping into other rooms. This also helps to maintain negative pressure inside your work zone.
Post signs at entry points warning of grinding activities and potential hazards. This keeps unauthorized personnel out and ensures everyone’s safety.
Power, ventilation, and waste handling checks
Before you start grinding, ensure your electrical supply can handle the load. Check receptacles, GFCI protection, and circuit capacity.
Ventilation is key for dust control. Route extraction hoses to capture dust at the source. Use a dust extractor with a compatible filter and check airflow performance.
Plan for waste handling. Collect slurry or dust in approved containers. Check local regulations for disposal methods. Have backup power options ready in case of interruptions.
Step-by-Step Grinding Procedure for High Spots
Start with a conservative, test-grind approach to map the highest deviations. Use a straightedge or leveling tool to locate the worst areas before full grinding. Keep the initial passes light and cautious.
Follow a methodical workflow with progressive material removal and careful blending around high spots. Mark target zones and perform regular checks to verify flatness after each pass. Tackle edges and corners with attention to maintain uniformity and avoid gouges.
Step-by-Step Process
The following steps guide you through the grinding process to remove high spots safely and effectively.
- Preparation: Inspect the slab, mark high spots with chalk, and set up safety barriers. Ensure your grinder is in good working order and fitted with a suitable disc.
- Safety first: Wear appropriate PPE including safety glasses, ear protection, gloves, and steel-toed boots. Use dust control measures like water suppression or a vacuum system.
- Main work: Start with light passes over marked high spots using the grinder at a slow speed (around 3000-4000 RPM).
- Check progress: After each pass, use a straightedge or leveling laser to verify flatness. Mark any remaining high spots.
- Cleanup and final check: Once all high spots are ground down, clean the area thoroughly. Perform a final inspection with your straightedge to ensure the slab is now flat.
Test cut and progressive removal strategy
Begin by making a light pass over the highest spots to understand how the material responds. This initial test cut helps prevent aggressive grinding that could damage the slab.
Start slow: Use a low disc speed (around 2000-3000 RPM) and apply minimal pressure during this first pass.
After the test cut, inspect the area with your straightedge. If high spots remain, increase the grinder’s speed and apply slightly more pressure for subsequent passes. Always monitor flatness after each pass to avoid over-grinding.
Blending and feathering to match surrounding surface
To minimize visible transitions, taper the edges of corrected areas by gradually reducing grinding pressure as you move towards the surrounding flat surface.
Feathering: For corners or near walls, use a smaller grinder disc (e.g., 4-inch) to make controlled, light passes. Work from the high spot outwards, blending into the existing slab.
Avoid creating new low spots by maintaining consistent pressure and speed while grinding. Regularly check your progress with a straightedge to ensure you’re not over-grinding or under-grinding any areas.
Dust Control Techniques During Grinding
Compare wet grinding and dry grinding with HEPA extraction, noting setup complexity and dust output. Wet methods tend to produce slurry that needs proper disposal and management. Dry methods rely on robust dust collection and containment around the work area.
Indoors vs outdoors changes the approach; moisture control and ventilation play key roles. Use appropriate PPE, monitor exposure, and document compliance with local regulations. Choose vacuums, hoses, and water management that suit your grinder and space.
Wet grinding and slurry management
Wet grinding uses water to reduce airborne dust. It’s like a fine mist that coats the surface, binding dust particles together.
Slurry, the mixture of water and concrete dust, is collected in a pan or trough. Use a slurry pump to transfer it to a container for disposal.
Wet grinding is preferable when working outdoors, as it keeps dust levels low and prevents dry dust from becoming airborne. It’s also great for indoor jobs where water won’t damage the surrounding area.
Dry grinding with HEPA extraction
Dry grinding with HEPA extraction uses a vacuum to collect dust at the source. The vacuum must be HEPA-rated, meaning it filters out 99.97% of particles.
Connect your grinder and vacuum using a sealed connection hose. This ensures no dust escapes into the air. For indoor jobs, set up containment barriers to prevent dust from spreading.
Dry grinding with HEPA extraction is ideal for indoor jobs where water could cause damage or create slip hazards. It’s also useful when working in tight spaces where wet slurry can’t be easily managed.
Safety Protocols and Operator Best Practices
Perform a hazard assessment focused on surface conditions, substrate integrity, and coatings. Identify controls to limit dust exposure, kick-back, and hazards around edges. Assign a competent operator and provide clear on-site briefing.
List required PPE and explain the rationale for each item based on tool size and dust plan. Include machine guarding, lockout procedures, and safe starting practices. Outline debris and slurry handling, cleanup sequencing, and a quick on-site reference checklist.
Respiratory protection and silica awareness
Grinding concrete produces harmful silica dust. You need a respirator that filters these particles.
Choose a respirator with an N95 or P100 filter, suitable for your tool’s RPM and dust output. Fit testing is crucial to ensure it seals properly.
Follow local rules for workplace air monitoring and clearance checks after grinding. Regularly inspect your respirator and replace filters as needed.
Machine operation and ergonomics
Safely starting and stopping grinders prevents injuries. Ensure the machine is off, unplugged, and the blade has stopped before touching it.
For walk-behind units, maintain a steady pace to keep control. Avoid sudden stops or starts that could cause kickback.
With handheld tools, keep your hands behind the tool’s center of gravity. Rotate operators regularly to prevent fatigue and reduce risks.
When to Use a Scarifier or Planer Instead of Grinding; Costs and Troubleshooting
Set clear criteria for choosing between a grinder and a scarifier or planer when faced with severe high spots or hard toppings. Evaluate surface texture, removal speed, and potential for surface damage. Decide based on the current condition and desired finish.
Compare outcomes in terms of leveling speed, finish quality, and risk of gouging. Consider initial tool costs, consumables, and overall job duration for typical slabs. Use a simple decision flow to know when to escalate to heavier equipment and what to watch for during the process.
Decision criteria: severity, surface type, and finish required
When deciding between grinding, scarifying, or planing, consider these factors:
Severity of high spots: Grinders excel at minor to moderate high spots. For severe high spots (over 1/4″ thick), opt for a scarifier or planer.
Surface texture: Grinders smooth surfaces, but may not remove deep textures. For textured surfaces, use a scarifier to remove material without damaging the underlying slab.
Hard toppings and finish quality: Grinders struggle with hard toppings like epoxy or urethane. Planers can handle these, but may leave a rougher finish. Scarifiers provide a better finish for recoating.
Common mistakes, fixes, and cost considerations
Here are common pitfalls to avoid:
- Over-cutting: Be patient. Remove material gradually to prevent gouging.
- Inadequate dust control: Always use dust control. It’s safer and keeps the work area clean.
- Wrong tooling: Use the right tool for the job. Don’t try to grind severe high spots with a grinder.
- Coverage gaps: Overlap passes to ensure no areas are missed.
- Wrong disc grit: Choose discs based on material type and removal depth.
When estimating costs, consider:
– Rental vs purchase of tools
– Labor time
– Consumables like discs or blades
– Maintenance and repair
Conclusion
Safety first is non negotiable. Grinding high spots properly protects the slab, reduces trip hazards, and keeps the finished surface durable and visually even.
Make sure you have the right tool with dust collection, plan the order of passes, mark and measure the spots, test on a small area, wear eye and respiratory protection, grind in shallow, even passes, keep the surface dry and clean, and recheck the surface and level after each pass.
A few mistakes kill the job fast: gouging or grinding too aggressively, skipping dust control and containment, not checking edges or transitions where you’ll edge up to walls, and rushing to finish without verifying depth and flatness. never rush a repair and follow good safety rules, including using guards, PPE, and proper ventilation.
If the slab shows large level differences, cracks, or rebar exposure, call a professional instead of pushing on alone. When it makes sense to proceed, stay methodical, document the results as you go, and finish with a solid, uniform surface you can trust. You’ve got this—stick to the plan and stay safe.
FAQ
What causes high spots on a concrete floor after pour or finishing?
High spots usually come from uneven troweling, settling, or improper smoothing of the surface. Variations in finish depth and subsurface inconsistencies can also create raised areas. Check your slab’s grind or pour notes and inspect for inconsistent toppings or form ringing.
How do I identify and locate high spots on a slab?
Use a straight edge or long level to scan the floor with the slab dry. Mark any area that rocks the straight edge or creates gaps under it. Note the locations and how large the deviations appear to guide grinding progress.
What are the best tools for grinding down high spots as a DIYer?
A quality hand-held concrete grinder with a diamond cup wheel is a common choice. Start with a coarse wheel and remove material evenly, then blend with finer wheels. Always follow the tool maker’s instructions and maintain a steady, controlled pass.
What are common mistakes to avoid when grinding high spots?
Don’t rush and stay in one spot too long; it can gouge the slab. Avoid grinding too deep without checking the overall level, which can create low spots elsewhere. Don’t skip dust control or PPE—dust exposure matters for health and cleanup.
When should I use a scarifier instead of a grinder, and how do I decide?
A scarifier clears thick high spots or coatings faster than a grinder, but it leaves a rougher finish. If the high spot is deep or there’s heavy scuffing, a scarifier may be better—follow with a grinder to finish. Check the manufacturer’s guidance and test a small area first before a full pass.