

Introduction
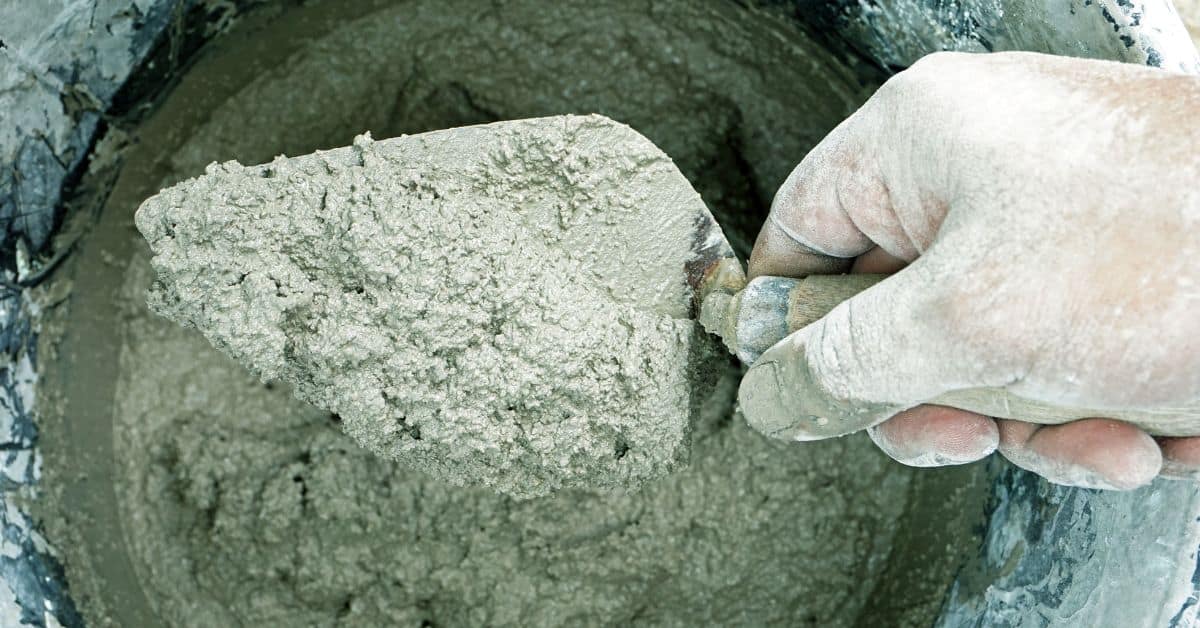
Concrete screeding on small slabs means using a straightedge to level and strike off excess concrete so the surface is flat and consistent. It’s a hands-on process where the straightedge choice and your technique matter more than fancy tools, and if a spec matters you should check the product label or local rules. Good screeding reduces future problems like uneven finishes, drainage issues, or difficulty installing finishes.
Pick a straightedge that fits the slab size, is stiff enough to span the form edges, and matches your budget and comfort—aluminum, magnesium, or a simple 2x board are common options, but check manufacturer guidance for any powered or manufactured tool. After screeding use simple checks—visual sightlines, a short straightedge, or a feeler method—and follow the concrete’s set time and weather conditions to get the best result.
Key takeaways
- Verify slab flatness matters early; plan formwork and screed route for level surfaces.
- Choose straightedges based on length, weight, and material to suit small slabs.
- Keep straightedge clean and free of debris to avoid creating lows.
- Check final surface with both stringline reference and direct feel for planarity.
- Record and interpret basic tolerances with on-site checks before concrete cures.
- Wear eye protection and follow safe handling; avoid tripping hazards on wet slabs.
Table of Contents
- Introduction
- Key takeaways
- Why Slab Flatness and Levelness Matter for Small Jobs
- Planning and Prep Before You Screed a Small Slab
- Choosing the Right Straightedge for Small Slabs
- Practical Screeding Techniques for Small Slabs Using Straightedges
- How to Check Flatness and Levelness on-Site (Quick to Advanced)
- Industry Specs, Tolerances, and Interpreting Test Results
- Cost, Productivity, Common Mistakes, and Safety
- Conclusion
- FAQ
Why Slab Flatness and Levelness Matter for Small Jobs
Flatness and levelness control how a small slab will accept finish work and stand up over time; uneven surfaces make polishing, tile setting, and thin-floor coverings much harder to install and finish. For small pours the effects are immediate — drainage, water pooling, edge telegraphing, and localized wear show up fast and often force rework.
Distinguish flatness (local surface variation across short distances) from levelness (overall slope or grade) and check both early so you can correct the screed profile before the slab hardens. Use simple straightedge checks and visual cues in the first measurement window, and consider a quick laser or reference fixture if results are marginal; documenting findings reduces wasted materials and labor when a fix is needed.
Defining flatness (FF) vs levelness (FL)
Flatness and levelness are two crucial aspects of a concrete slab’s quality, but they’re not the same thing.
Flatness, or FF, refers to how much your slab’s surface undulates locally. It’s about small-scale waviness, bumps, or dips that can affect finishes and use.
Levelness, or FL, is about the overall slope of your slab. It’s the big-picture view, ensuring water drains properly and there are no major high or low spots.
Both matter for performance. FF affects how your floor looks and feels underfoot. FL impacts drainage, durability, and downstream processes like polishing or tile installation.
How poor flatness impacts finishes and use
If your slab’s not flat enough, you’ll face issues down the line. Here are some common consequences:
First off, increased grinding. To get a smooth finish, you’ll have to grind more material off, wasting time and money.
Next, uneven coatings. Paint or sealers won’t apply evenly, leaving visible lines or patches. Tiles might not lay flat, leading to cracking or lifting.
You could also end up with trip hazards. Even small bumps can cause trips and falls. And if water doesn’t drain properly, it can pool, leading to slippery surfaces and potential damage from standing water.
Planning and Prep Before You Screed a Small Slab
Good screeding starts long before concrete arrives: compact and verify the subbase, set and brace formwork true to line, lay out control joints, and confirm the concrete mix meets the job’s finish and aggregate limits. Check product labels or the mix data sheet for slump behavior and max aggregate size, and plan ambient protection based on temperature, wind, and humidity.
Assign who verifies tolerances and when — pre-pour form checks, mid-pour elevation checks, and an early-set inspection — and confirm target flatness/levelness from the contract documents or engineer before placing. Use a concise checklist for cleaning the subgrade, confirming compaction, verifying form clearance, and protecting the surface so the crew can sign off and avoid last-minute changes.
Tools and materials checklist
Before you start screeding, make sure you have all the necessary tools on-site. This list will help you ensure a smooth process.
- Straightedges: 2x4s or 1x6s for small slabs, and longer straightedges for larger areas.
- Stakes/Rails: To support straightedges and maintain elevation.
- Levels: Torpedo levels to check flatness and alignment.
- Bullfloat: For initial leveling and consolidating concrete.
- Edging tools: To create clean, sharp edges along forms.
- Trowels: For final finishing after screeding.
- Gloves: Protect your hands from concrete and debris.
- Safety gear: Include hard hats, safety glasses, and steel-toed boots.
- Optional precision tools (rent if needed): Laser levels or digital levels for high-precision work.
Quick rule: Having the right tools on-site ensures a smooth, efficient screeding process. Don’t skip this step to avoid rework and delays.
Layout, guides, and reference elevations
Setting up proper layout and references is crucial for maintaining consistent elevation during screeding. Here’s how to do it:
Set screed rails/stakes/stringlines: Install these along the edges of your slab to guide your straightedges and maintain alignment.
Establish reference points: Use benchmarks or known elevations around your site to set your initial elevation. This could be a door sill, a known high spot, or even a laser level set at a specific height.
Check and adjust: Regularly check your layout during the screeding process. Adjust as needed to maintain consistent elevation across your slab.
Choosing the Right Straightedge for Small Slabs
Select a straightedge that matches slab size and crew strength: lightweight aluminum or magnesium for easy handling, and stiffer steel for the most accurate, repeatable readings where torsional rigidity matters. Decide between single longer bars or multiple shorter pieces based on edge-to-edge reach and whether you need rolling versus stationary screeding for your pour pattern.
Consider edge profile, handle ergonomics, locking joints, and how the tool shelters the slab edge during use, and check the manufacturer instructions and warranty for stated tolerances and care requirements. Before you use a tool in the field, run a quick flatness test on a known straight surface and follow a short maintenance checklist — cleaning, joint checks, and a visual alignment check — so readings stay reliable.
Material and profile options (aluminum, magnesium, wood, composite)
The material of your straightedge affects its durability, weight, stiffness, and cost. Choose wisely to match your job size and finish expectations.
- Aluminum: Lightweight, affordable, but less stiff than steel. Ideal for small crews and tight budgets. Look for 6061-T6 aluminum with anodized finish for better durability.
- Magnesium: Lighter than aluminum, stiffer, and more expensive. Good for larger slabs where weight is a concern. Check for high-grade magnesium alloys like AZ31B-O.
- Wood: Cheap, flexible, and heavy. Not recommended for precision work due to warping and moisture absorption.
- Composite: Lightweight, stiff, and durable. More expensive than aluminum but offers better performance. Check for fiber-reinforced polymer (FRP) composites.
- Steel: Heavy, rigid, and durable. Best for large slabs and heavy-duty work. Look for high-carbon steel with a protective coating to prevent rust.
Length, stiffness, and weight: picking the best size
A straightedge that spans your slab width without excessive flex is crucial for a flat finish. For small slabs, 6–10 ft (2–3 m) is common but verify based on your slab geometry.
Longer straightedges can reach across wider slabs but may be harder to handle and control. Shorter ones are lighter and easier to maneuver but might require multiple passes.
Rule of thumb: The straightedge should be at least 1/3 the length of your slab’s shorter dimension for best results.
Consider your crew’s capability too. A longer, heavier straightedge may need more manpower to operate effectively.
Handle types, straightedge accessories, and powered options
Comfortable handles make screeding easier. Choose from fixed, adjustable, or telescopic handles based on your needs.
Screed rails or dollies: These help guide the straightedge along the forms, ensuring a consistent finish. Use them when possible for better results.
For larger slabs or faster work, consider powered options:
Vibrating screeds: These use vibrations to consolidate concrete and improve leveling. They’re ideal for large slabs but require more skill to operate.
Telescoping screeds: These extend to reach wider slabs, reducing the need for multiple passes. They can be heavy, so consider your crew’s capability.
Practical Screeding Techniques for Small Slabs Using Straightedges
Choose single-pass strike-off when bleed water is minimal and the slab thickness and finish allow a one-time pass; use multi-pass techniques when the mix bleeds more or you need finer control over elevation. Time the strike-off to the bleed cycle and initial set; pulling a straightedge too early or too late creates voids or excessive compaction.
Set up temporary rails or edge supports where needed, clamp them true to grade, and assign crew roles: one operator pulls the straightedge, another flags highs/lows and preps touch-up mixes. Keep tools clean, check alignment frequently, and perform interim straightedge checks during the work so you can touch up low spots or re-screed short sections before the slab firms up.
Strike-off methods: pull, roll, and pull-back
The key to a smooth strike-off is the right motion. Here’s how:
Pull: Start at one end of your straightedge. Pull it towards you in a steady, smooth motion. Keep it flat on the concrete.
Roll: Once you’ve pulled it about halfway across, start rolling it slightly from side to side. This helps level out any small high spots and ensures a smooth finish.
Pull-back: At the end of your stroke, pull the straightedge back towards you again for a few inches. This helps remove any excess concrete and prevents tear-out.
Using guide rails and hand-holds effectively
Guide rails help maintain consistent elevation. Here’s how to use them:
Position your edge rails first, level with your desired slab thickness. Secure them with stakes or clamps.
Place screed rails on top of the edge rails. Space them evenly for support. Adjust their height to match your desired slab thickness.
Use hand-holds to maintain a consistent grip and pressure while screeding. Keep your hands shoulder-width apart for stability.
Finishing passes and when to bullfloat or trowel
The initial strike-off is just the start. Here’s how to finish:
Bullfloat: Once the bleed water has disappeared, use a bull float to smooth out any remaining imperfections. Work in overlapping strokes.
Trowel: After the concrete has started to set (initial set), switch to a trowel. Use it to smooth out any final high spots and give your slab a uniform finish. Be careful not to over-trowel, as this can cause discoloration.
The key is to watch for visual cues – when the bleed water disappears, it’s time to bullfloat. When the concrete starts to set, it’s time to trowel.
How to Check Flatness and Levelness on-Site (Quick to Advanced)
Start with a quick visual sweep to mark obvious high and low areas, take baseline photos, and establish a repeatable grid or pattern for measurements so results are comparable across time. Use a short straightedge or 12–24 inch rule with wet-line or feeler checks for rapid assessment, and record gaps and locations to guide immediate corrections.
When more precision is needed, step up to dual straightedge methods, 3- or 4-point references, or a basic floor laser to quantify deviations and decide whether grinding or filling is required. For the highest accuracy use digital levels or floor-mapping instruments, but always log measurements, environmental conditions, and corrective actions so test data supports decisions and handoffs to the next trade.
Step-by-Step Process
This step-by-step guide will walk you through checking flatness and levelness on-site, from preparation to final checks.
- Gather your tools: You’ll need a straight edge (at least 6 feet long), a level, a measuring tape, and safety gear like gloves and eye protection. Why it matters: Having the right tools ensures accurate readings and safe working conditions.
- Inspect the surface: Check for any major defects, cracks, or debris. Remove any large objects that could interfere with your measurements. Check: A clean, clear surface ready for testing.
- Set up your straight edge: Place it on the concrete, spanning at least two support points (like joists or beams). Ensure it’s level and secure. Check: The straight edge should be level and stable.
- Check flatness: Run a level along the straight edge. Look for any gaps between the level and the surface. Measure these gaps; they should not exceed 3/16″ in 10 feet for most residential work. Why it matters: Flatness ensures proper drainage and prevents standing water, which can lead to damage.
- Check levelness: Place a level on the concrete surface. Check both directions (lengthwise and widthwise). The bubble should be centered in the vial. Why it matters: Levelness ensures proper drainage and prevents water from pooling, which can cause damage or create tripping hazards.
- Check for high spots: Use a straight edge to find any high points on the surface. If you find one, mark it with a piece of chalk. Why it matters: High spots can cause water to pool and lead to damage over time.
- Recheck after curing (if applicable): For newly poured concrete, wait at least 72 hours before checking flatness and levelness again. This allows the concrete to cure properly. Why it matters: Concrete continues to settle and harden during the curing process.
- Document your findings: Record your measurements and observations for future reference or to share with professionals if needed. Check: A clear, legible record of your findings.
Pro tip: Always double-check your measurements from different angles and points on the surface to ensure accuracy.
Straightedge + feeler gauge method (quick field check)
Grab your straightedge – a long, level piece of wood or metal. Place it on the slab, spanning across the area you want to check.
Check base compaction. If the subgrade isn’t solid, your slab won’t be either. Use a feeler gauge or a thin shim to probe gaps between the straightedge and the slab.
Mark high spots with chalk or a pencil. Record low spots too – you’ll need this info for patching later. If gaps are more than 3mm (1/8″), you’ve got issues. Check local rules, but generally, that’s too much variation for a flat slab.
Stringlines, spirit levels, and optical/laser levels
After your quick flatness check with a straightedge, it’s time to bring out the big guns. Stringlines and levels help you verify overall slope and catch localized deviations.
Stringlines are your first line of defense against sloppy slopes. Stretch one between two points at finished grade height. Walk along it, checking with a feeler gauge. If you’re off more than a few millimeters, adjust your base compaction or grading.
Now, spirit levels come into play for localized checks. Use them to ensure forms are plumb and level before pouring. For larger areas, consider optical or laser levels. They speed up layout and verification, but they’re no replacement for good old-fashioned stringlines and spirit levels.
Digital tools and professional testing options
For more precise readings, consider using digital inclinometers or altimeters. These tools provide quick, accurate measurements:
- Inclinometer: Measures slope angles to ensure your surface is level. Use it after checking base compaction and before pouring concrete.
- Altimeter: Measures height differences. It’s useful for checking flatness across large areas or between different sections of a slab.
Before relying on advanced tests, always check project specifications. If you need high-precision results, consider hiring a professional service:
- Profilometer: Provides detailed, precise flatness and levelness data. It’s ideal for acceptance testing or troubleshooting issues.
- Plate test: Measures the stiffness of concrete. This test is useful when checking the strength of your slab after it’s been poured.
Remember, even with these tools, you’re only as good as your prep work. Always ensure your base is well-compacted and level before pouring.
Industry Specs, Tolerances, and Interpreting Test Results
Project acceptance depends on the contract documents and applicable standards, so confirm which set of tolerances governs the slab — residential, commercial, or polished floor criteria can differ. Don’t guess at pass/fail values; verify the required limits with the engineer, the specifications, or the referenced standards listed in the project paperwork.
Read straightedge and instrument output in the context of those agreed tolerances: convert measured gaps or instrument readings into actionable items and decide whether to accept, correct, or escalate out-of-spec areas. Assign who records tests, when checks happen during the screed sequence, and how results are communicated in site files, RFIs, or sign-off records so everyone understands next steps.
Typical expectations for small residential vs commercial slabs
Residential and commercial concrete slabs have different flatness and levelness expectations. Residential work is often more forgiving, while commercial or polished surfaces require tighter control.
Residential: Expect F-numbers around 50-100 and L-numbers around 30-60. These are allowable deviations in inches per foot of slab length.
Commercial/Polished: Here, F-numbers can be as low as 25-50 and L-numbers 15-30. Tighter tolerances mean more precise screeding is needed.
Always consult the project spec to confirm exact expectations for your slab and finish.
Deciding remedial action: grind, patch, or reproportion pour
If test results show deviations from specs, you’ll need to decide on corrective action. Consider these factors:
Finish type: Grinding may be necessary for polished surfaces but not for rough textures.
Cost: Patching or reproportioning the pour can be cheaper than grinding, but it might not fix severe issues.
Schedule: Reproportioning a pour takes time. If you’re on a tight schedule, patching or grinding might be better options.
Consult with your project engineer to weigh these factors and decide the best course of action.
Cost, Productivity, Common Mistakes, and Safety
Balance upfront tool costs with productivity: hand tools are cheap and portable but slower, while mechanized screeds increase output and may justify rental or purchase depending on job frequency. Compare lifecycle costs like maintenance and fuel, and budget for inspections and any likely corrective work to avoid surprises.
Watch for common errors — wrong tool length, dragging fresh concrete, skipping joint layout, or failing to calibrate equipment — and use routine straightedge checks to catch problems early. Maintain PPE, follow tool-specific safety steps for powered equipment, and set simple emergency and lockout procedures so safety and quality checks happen together.
Cost vs productivity: manual straightedges vs mechanized screeds
Manual straightedges are cheaper to acquire, but they require more labor time and skilled workers. Mechanized screeds can speed up the process, reducing cycle time by half or more. However, they come with rental costs, fuel expenses, and maintenance needs.
Manual: Initial cost is low, but labor time is high. Skilled crew required for consistent results. Suitable for small, occasional jobs or tight budgets.
Mechanized: Rental costs vary, typically $200-$500 per day. Fuel and maintenance add to the total cost of ownership. Ideal for larger slabs or frequent use, reducing labor time significantly.
Common mistakes to avoid on small slabs
Avoid these common pitfalls to ensure flatness and prevent rework. Small slabs can be tricky, but with the right techniques, you’ll get it right.
- Poor rail setup: Inconsistent spacing or height leads to uneven screeding. Use accurate measurements and level rails.
- Screeding too early: Waiting for bleed water to dissipate ensures a stronger, more stable slab. Screed too soon, risk rework.
- Flexible straightedge: Using a warped or flexible straightedge results in an uneven surface. Inspect and calibrate your tools before use.
- Skipping checks: Regular flatness checks prevent overworking concrete and ensure quality. Use feeler gauges or digital tools to verify levelness.
Learn from these mistakes, plan ahead, and double-check your work for the best results.
Safety and ergonomics during screeding and testing
Prioritize safety to prevent injuries. Follow these guidelines for a secure work environment.
PPE: Wear appropriate personal protective equipment, including safety glasses, gloves, and steel-toed boots. Protect yourself from falling objects and sharp edges.
Safe lifting: Use proper lifting techniques to avoid back injuries when handling tools or materials. Lift with your legs, not your back.
Power tool operation: Follow manufacturer guidelines for powered screeds and other tools. Be aware of electrical or gas hazards. Always use the emergency stop function if needed.
Conclusion
A flat, well-leveled slab is safer to use, more durable, and looks right with less guesswork. Start with solid prep and smart tool choice, and you’ll cut risk and save time on the job.
Safety first means plan thoroughly, test a small area first, and protect yourself from dust, sharps, and wet concrete. Check the prep and formwork, then pick the right straightedge, confirm tool height and alignment, screed in small passes keeping the edge wet, check flatness and levelness as you go using a straightedge and a level, fill any low spots and re-screed as needed, and finally cure and protect the surface to lock in the results. check early and often to catch issues before they become costly mistakes.
Common mistakes to avoid include using the wrong length or type of straightedge for the slab, rushing the screed without keeping the edge clean and wet, and skipping the final checks or early testing of tolerances. Avoid bad practices by following the planned sequence, keeping tools clean and aligned, and never screeding over a surface you haven’t tested for flatness and levelness. If you’re unsure about tolerances, test results, or how to adjust during the job, pause and recheck the plan rather than forcing a fix, and remember the safety rules above.
When the slab is small but the edges are irregular, or you hit stubborn high or low spots that you can’t dial in with simple passes, consider bringing in a pro who can verify formwork, leveling, and curing strategy. With solid prep, careful tool selection, and steady technique, you’ll finish with a smooth, durable surface and the confidence to move on to the next project. avoid costly rework and keep moving forward.
FAQ
Why is concrete flatness important on small slabs, and how does it affect finish and durability?
Flatness keeps joints from telegraphing through and reduces high spots that can trap screed marks. A flat slab is easier to finish and will wear more evenly over time. Inspect early and fix obvious warp or crown before it hardens.
What straightedge tools work best for small slabs, and how do I choose them?
Use a straightedge long enough to span the section you’re screeding and light enough to move freely. Look for robust edges, smooth faces, and a good grip. Avoid wobbly or bent tools and check the tool for flat, true edges before starting.
How can I check slab flatness effectively during and after screeding?
Run the straightedge across the surface and note high and low spots. Use a simple string or level reference across key points to verify level edges. Recheck after the concrete starts to set but before it hardens too much to adjust.
What common mistakes reduce screeding quality on small slabs, and how can I avoid them?
Avoid overworking the surface, which pulls too much laitance or creates high spots. Don’t rush the pour or screed with a tool that’s not clean or properly sided. Set up clear reference lines and work in systematic passes to keep consistency.