
Introduction
Radon barrier and sub-slab venting are methods to prevent radon gas from entering a new slab by managing soil gases under the concrete.
This article covers practical, DIY-friendly approaches you can consider during a new slab pour. You’ll need to test the site and follow local rules to know what level of mitigation is right for you.
Common DIY-friendly options include installing a basic radon barrier and planning for a sub-slab vent path, with attention to proper sealing and airflow. Learn the differences between passive and active depressurization and what to verify on product labels and installation instructions. Budget for materials and labor, compare DIY feasibility against professional install, and always check local requirements before proceeding.
Key takeaways
- Test radon to local thresholds; verify actionable levels per jurisdiction and manufacturer.
- Active vs passive systems: passive relies on natural pressure; active uses a fan when needed.
- Plan a DIY membrane properly under slab, ensure overlap and seal penetrations.
- Follow safety protocols; turn off utilities when working near slabs and membranes.
- Sub-slab venting options: determine if passive stacks suffice or if a fan is required.
- DIY vs pro: cost and effectiveness vary; consider professional evaluation for complex soils.
Table of Contents
- Introduction
- Key takeaways
- Why Radon Matters: Health Risks and Regulatory Benchmarks
- Overview of Mitigation Strategies: Active Vs. Passive Systems
- Planning a DIY Radon Barrier Under a New Slab
- How to Install a Radon Membrane and Seal Penetrations (DIY-Friendly Steps)
- Installing Sub-Slab Venting: Passive Stacks Vs. Fan-Powered Ssd (DIY Options)
- Sealing Slab Joints and Interior Air Pathways
- Comparing Costs, Effectiveness, and Energy Impacts
- Safety, Common DIY Mistakes, and When to Hire a Pro
- Conclusion
- FAQ
Why Radon Matters: Health Risks and Regulatory Benchmarks
Radon is a colorless, odorless gas that can accumulate beneath a newly poured slab. It travels through soil and enters spaces where ventilation is limited, and exposure can accumulate over time. Understanding its behavior helps you plan for a safer, longer-lasting building envelope.
Health implications are primarily linked to lung cancer risk, with certain populations being more affected. Rather than alarm, focus on realistic mitigation strategies and routine testing as part of your build. Local guidelines and testing recommendations vary, so check with the appropriate authority and refer to official product data sheets or manufacturer instructions for specifics.
Health effects and exposure pathways
Radon is a colorless, odorless gas that seeps up from the soil into your home. It’s formed by the natural breakdown of uranium in rocks and soil. Under a new slab, it can accumulate because concrete is porous.
Exposure to radon over time increases lung cancer risk. This isn’t just about smokers; non-smokers are also at risk. The more you’re exposed, the higher your chances of developing lung cancer.
Radon enters homes through cracks in foundations, gaps around service pipes, and even through porous concrete slabs. It’s often unseen, making it crucial to test for it.
Testing basics and action levels
Radon testing is straightforward but needs time. There are two main types: short-term (2-7 days) and long-term (90 days or more). Short-term tests give a quick snapshot, while long-term tests provide a better average.
The EPA recommends fixing your home if the radon level is 4 picocuries per liter (pCi/L) or higher. This is not a ‘safe’ level; it’s just an action level. Some states have lower recommended levels.
Before building, test for radon in the soil where you’ll pour your slab. After construction, do another test to get a post-construction baseline. Always follow local guidelines and testing recommendations.
Overview of Mitigation Strategies: Active Vs. Passive Systems
Active systems use sub-slab depressurization with a fan to draw gas away from living spaces, while passive measures rely on barriers, seals, and natural venting. Each approach has distinct configurations and practical implications under a new slab. Consider how your site conditions and future plans shape the choice.
Passive measures typically require careful sealing and barrier placement, with lower ongoing energy use but potentially less certainty in high-risk scenarios. Active systems offer stronger control but add equipment, maintenance, and energy considerations. Use vetted guidelines and local rules to determine the best fit for your project and region.
Active sub-slab depressurization (SSD)
Active SSD systems work by creating a vacuum under your new slab to prevent radon gas from entering your home. Here’s how:
The system consists of a fan, piping, and a collection point called a sump. The fan sucks air out of the sump, drawing radon-laden soil gas with it. This gas is then vented outside, away from living spaces.
SSD is recommended when you have high indoor radon potential, porous sub-slab concrete pours, or existing high readings. It’s more reliable but also more complex and costly to install than passive systems.
Operational impacts: SSD uses electricity, so there’s a small energy cost. Proper installation minimizes backdraft risk, drawing air in instead of pushing radon out.
Passive barriers and ventilation
Passive systems rely on natural pressure differences to keep radon out. They’re simpler and cheaper but less reliable than active systems.
Membrane barriers: These are plastic sheets laid under your slab, sealing off the path for radon gas. They work best when the seal is tight and the slab is new.
Perimeter vents: These are small pipes around the perimeter of your foundation that allow soil gas to escape naturally. They’re useful in areas with low radon potential or when you can’t use a barrier.
Natural ventilation: This relies on air moving through your home’s cracks and gaps, diluting indoor radon levels. It’s not recommended as a primary mitigation strategy due to its unpredictability.
Planning a DIY Radon Barrier Under a New Slab
Set clear goals for barrier integrity and compatibility with your slab design and insulation. Define how the barrier will be installed, how seams will be treated, and what inspections you must pass before pouring. Keep the plan aligned with local permits and code expectations as you scope the work.
Material selection hinges on barrier type, seam methods, and how you will anchor to rebar or integrate with future systems. Prepare for site prep like moisture control and drainage coordination, and map out how trades will coordinate to protect the barrier during construction.
Design considerations and code/permit checks
The first step in planning your DIY radon barrier is understanding what your local building codes require. You’ll need to verify clearances, ensure compatibility with other systems like insulation or radiant floor heating, and consult with inspectors or engineers if needed.
Check for required membrane thickness, seam overlap rules, and any specific installation guidelines. Radon barriers should be continuous and cover the entire slab area to be effective. Ensure you understand how to handle penetrations like plumbing pipes or electrical conduit.
Confirm that your design allows for proper venting. This might involve trenching or creating channels for future vent pathways. Always consult with local authorities having jurisdiction (AHJs) to ensure compliance.
Tools, materials, and material specs
Before you start, gather these tools and materials for your DIY radon barrier installation:
- Radon-rated vapor barrier membrane: 6-10 mil thickness, Class A fire rating. Check local codes for specific requirements.
- Tape: Use a compatible tape to seal seams and overlaps. Get enough for the entire job.
- Adhesive: For anchoring the membrane to rebar or other surfaces. Follow manufacturer’s instructions for application.
- Pipe penetration kits: To create airtight seals around plumbing pipes, electrical conduit, and other penetrations.
- Tape measure: Essential for accurate measurement and cutting of the membrane.
- Utility knife or scissors: For cutting the membrane to size.
- Strapping or clamps: To secure the membrane in place until it’s anchored to the rebar.
- Optional: Membrane welder: For creating seamless welds instead of taped seams. Rental prices vary, but it can save time and labor.
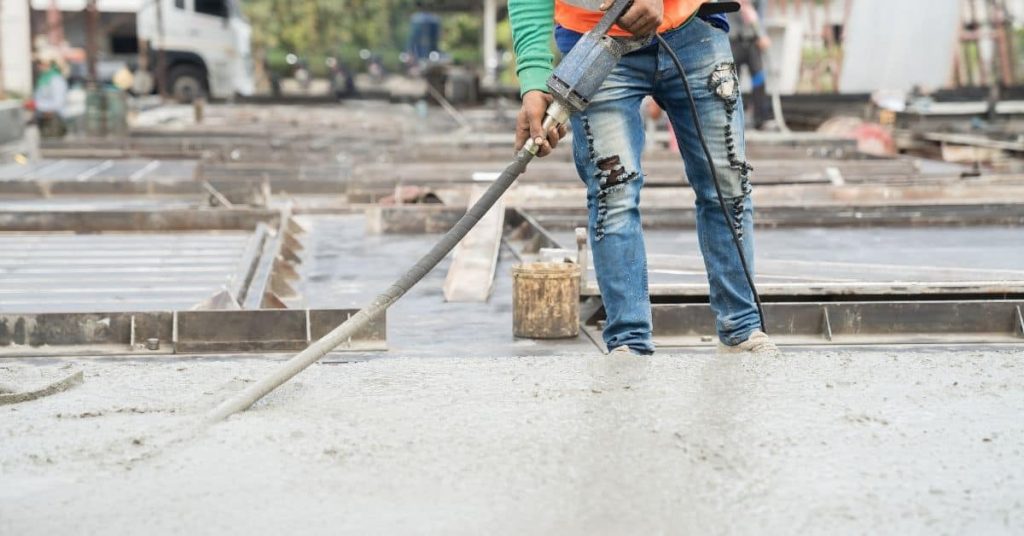
How to Install a Radon Membrane and Seal Penetrations (DIY-Friendly Steps)
Follow an installation sequence that ensures full-area coverage, correct orientation, and seam integrity with compatible tape or sealants. Treat every seam as critical, and verify overlap and continuous coverage before moving on. Penetrations must be sealed with approved products to keep leaks from forming around conduits or pipes.
Protect the membrane during the pour by keeping it clean and unpunctured, using protective boards as needed, and avoiding traffic that could damage it. Inspectors will look for clean seams, sealed penetrations, and proper protection, so keep visual records and a simple checklist handy.
Step-by-Step Installation Process
Follow these practical steps to install a radon membrane and seal penetrations, ensuring a DIY-friendly and effective barrier.
- Prepare the sub-slab area: Ensure it’s clean, flat, and free of debris. Check for any obstructions or irregularities.
- Lay the membrane: Roll out the radon membrane across the entire sub-slab area, ensuring proper orientation with the printed side facing up.
- Overlap seams: Overlap adjacent sheets by at least 6 inches to create a continuous barrier. Use a straight edge to ensure even overlap.
- Tape seams: Apply compatible, rated tape or mastic along each seam, pressing firmly to seal. Ensure the tape covers the entire width of the overlap.
- Seal penetrations: Use approved sealants or gaskets to seal around plumbing, electrical conduits, and sump lines. Maintain clearances as per manufacturer’s instructions to prevent leaks or punctures.
- Protect the membrane: Cover the membrane with geotextile fabric or rigid boards to protect it from damage during concrete placement. Ensure no contractors step on or puncture the membrane.
- Final check: Before pouring, perform a visual inspection of all seams, penetrations, and edges to ensure proper installation and no punctures.
Seaming, taping, and penetration details
Proper seam overlap and sealing are crucial for an effective radon barrier. Use approved tapes or mastics to maintain integrity.
Seam Overlap: Overlapping seams by at least 6 inches creates a continuous barrier that prevents radon gas from migrating through gaps. Ensure the overlap is even and consistent across the entire sub-slab area.
Taping/Sealing: Use butyl tape or concrete-friendly tape/mastic to seal seams. Apply the tape along the entire width of the overlap, pressing firmly to ensure a tight seal. Some tapes may require priming before application; follow manufacturer’s instructions.
Penetration Seals: Seal around pipes, conduits, and sump lines using approved gaskets or sealants. Maintain clearances as per manufacturer’s instructions to prevent leaks or punctures at penetrations. Ensure all seals are tight and free from gaps or cracks.
Protecting the barrier during and after the pour
Temporary protection of the radon membrane is essential to prevent damage during concrete placement. Follow these guidelines for effective protection.
Before Pour: Cover the membrane with geotextile fabric or rigid boards to protect it from concrete spillage, tools, and foot traffic. Ensure the protective layer extends beyond the edges of the membrane to provide full coverage.
During Pour: Keep the membrane clean and free from punctures by preventing direct contact with concrete. Place reinforcement as needed, ensuring it does not rest directly on the membrane. Monitor the pour process to ensure no damage occurs.
After Pour: Once the concrete has cured, perform a visual inspection of the membrane to ensure no punctures or damage have occurred during the pouring process. If any damage is found, repair immediately to maintain the integrity of the radon barrier.

Installing Sub-Slab Venting: Passive Stacks Vs. Fan-Powered Ssd (DIY Options)
Decide between a passive venting approach and a plan that allows future conversion to a fan-powered system. Consider climate, soil conditions, and how you want to handle future maintenance and potential upgrades. This choice influences how you route vents and plan exterior terminations during the build.
Describe how to route vent stacks during pour, including pipe sizing, vertical runs, and exterior terminations. For future activation, outline fittings and rough wiring needs, then detail practical steps for installing under/through the slab without creating cold bridges or leaks.
Passive stack placement and sizing
When routing passive vent stacks, consider these principles:
Typical Routing: Run pipes from the slab’s center to avoid creating pressure gradients. Keep them 10 feet apart.
Avoid Re-entry Points: Ensure stacks don’t re-enter the house to prevent backdrafts. Seal any gaps with caulk or foam.
Freezing Concerns: Use 4-inch Schedule 40 PVC pipe for durability and size it to handle expected airflow. Insulate exterior runs in cold climates.
Upgrading to an active fan later
Design your passive system with future fan installation in mind:
Accessible Location: Place the fan near the slab’s center, accessible from outside. This lets you install a fan without digging up the slab.
Conduit and Mounting: Run 1/2-inch conduit from the fan location to your main electrical panel. Include a junction box for easy fan installation later.
Fan Selection: Consult with professionals before choosing a fan. They’ll help you pick one sized right for your slab’s volume and air changes per hour (ACH) needs.
Sealing Slab Joints and Interior Air Pathways
Identify all joints and penetrations, then plan the sealing sequence and prioritize likely leak paths. Establish a logical order that minimizes future fixes and keeps work within a realistic DIY scope. Document key joints for reference and inspection.
Explore material options that tolerate moisture and temperature changes, such as polyurethane or silicone, and note compatibility with other slab materials. Include surface preparation steps, curing guidance, and a maintenance plan to keep seals performing over time.
Common leak locations and visual inspection checklist
Before sealing, inspect your slab for potential leaks. Use this checklist to identify common trouble spots.
- Cracks: Look for hairline cracks or gaps where air can enter. Check with a mirror or flashlight to see if they go deep.
- Cold joints: These are construction joints that didn’t cure properly. Tap them gently; hollow sounds indicate a leak.
- Utility chases: Pipes, wires, and ducts can create pathways for air. Inspect each penetration.
- Sumps: Check sump pits for cracks or gaps around the lid. Ensure the pump is functioning.
- Control joints: These are intentional cuts to control cracking. Make sure they’re sealed and not too wide.
- Expansion joints: These allow the slab to move. Ensure they’re filled and not leaking.
- Penetrations: Inspect every pipe, conduit, or duct penetration for gaps.
- Corners: Check corners where walls meet the floor. Air can leak through tiny gaps.
Quick rule: Regular inspections help catch leaks early, preventing costly repairs and health risks from radon intrusion.
Long-term durability and maintenance of seals
Maintaining your sealants is crucial for long-lasting protection against radon intrusion. Here’s how to keep them in tip-top shape.
Use high-quality, compatible sealants designed for concrete slabs. Silicone or polyurethane caulks are good choices. Re-caulk every 5-7 years, depending on traffic and climate conditions.
Inspect your seals annually. Look for cracks, gaps, or signs of deterioration. Use a flashlight to check hard-to-reach areas. If you find any issues, repair them promptly using the same type of sealant.
If you notice persistent leaks or extensive damage, it’s time to call a professional. They have specialized equipment and expertise to diagnose and fix problems efficiently.
Comparing Costs, Effectiveness, and Energy Impacts
Outline the three main options—barrier-only, passive venting, and active SSD—in terms of scope and practical feasibility for a DIY project. Tie in how these choices influence labor needs and potential material choices. Use local quotes to refine your plan and budget.
Discuss how effectiveness can vary with soil and climate, and how energy or ventilation needs may shift based on system type. Provide a decision framework and a checklist to verify warranties, code compliance, and installation considerations before committing to a path.
Typical cost components and what affects price
Installing a radon barrier and sub-slab venting involves several material and labor costs. Here’s what you can expect:
The main materials are:
– Radon membrane: $0.50 – $2 per sq ft
– Sealants: $10 – $30 per tube
– Pipes (for venting): $1 – $5 per ft
– Vents and fans: $50 – $300 each
Labor can vary widely depending on your DIY skills and local contractors. Expect to pay:
– Barrier-only: $2 – $6 per sq ft (DIY: $0 – $1)
– Passive venting: $3 – $8 per sq ft (DIY: $1 – $3)
– Active SSD: $5 – $10 per sq ft (DIY: $2 – $5)
Factors affecting price: Membrane quality, site preparation, pipe runs, fan type. Get multiple estimates to compare.
Performance expectations and when to re-test
After installation, it’s crucial to test your system’s effectiveness. Here’s how:
Wait at least 24 hours after the pour before testing. Then, perform a post-construction radon test. Aim for a reduction of at least 50% compared to pre-installation levels.
Ideal results are below 4 pCi/L, but even a 2 pCi/L reduction significantly improves indoor air quality. Retest every two years or after any major changes to your home’s structure.
Safety, Common DIY Mistakes, and When to Hire a Pro
Lay out safety foundations, including confined-space awareness, PPE, and how to manage electrical aspects for future venting equipment. Highlight monitoring needs when working under a slab or near energized components. Follow a cautious approach to reduce risk.
Explain common mistakes like gaps in seams, unsealed penetrations, or improper vent terminations, and describe how these impact radon performance. Outline clear red flags that suggest bringing in a licensed professional, and provide quick checklists to assess readiness and permit requirements.
Preventing backdrafting and re-entrainment
Backdrafting occurs when radon gas is pulled back into the house through gaps in your vent termination. Re-entrainment happens when outdoor air gets sucked back into the slab, reducing the effectiveness of your system.
To prevent these issues:
– Ensure your vent pipe extends at least 10 inches above the roof or 2 feet above any opening within 10 feet. This prevents backdrafting.
– Place the termination point away from windows, doors, and other openings to minimize re-entrainment.
Final testing, documentation, and warranty tips
After installation, it’s crucial to test your system’s performance. Keep records for future reference or inspections.
Here’s what you should do:
– Conduct a post-installation radon test to ensure your system is working properly. If the results are above 4 pCi/L, consider upgrading to an active fan.
– Maintain installation records and warranties from suppliers. This is especially important if you plan on selling your home in the future.
Conclusion
Protecting your home from radon starts with a solid, well-planned barrier and venting plan that keeps occupants safe, avoids chili-pepper surprises under the slab, and preserves the structure’s durability and appearance. Do the work with a clear sequence, test as you go, and stop if you see anything leaking or misaligned.
You can think of the next steps as a practical checklist: choose a durable radon-membrane system appropriate for a new slab, map all penetrations and joints before you pour, seal every seam and penetration with a proper sealant, install the barrier and any required sub-slab components in the right order, route passive stacks or plan for a fan-powered option if needed, then verify the system with a controlled test in a small area and finally monitor and document energy impacts and maintenance.
Common mistakes to avoid are skimping on joints and penetrations, skipping a thorough leak test, and ignoring the need for ongoing checks after the slab cures. Safety rules are simple: test early and often, follow the manufacturer’s guidance for membranes and sealants, keep ventilation paths clear of debris, and don’t bury or damage components during framing or finish work. If you’re uncertain about structural implications, electrical considerations for fans, or complex vent routing, hire a pro instead of pushing on solo. Stay disciplined, stay safe, and you’ll have a reliable barrier that protects health without sacrificing performance or budget. safety first, test early, avoid costly mistakes.
FAQ
Can I rely on radon test results to decide if I need a barrier or venting system?
Yes, testing is what tells you if radon levels are a concern. Use a reputable test method and follow the kit or lab instructions. If in doubt, compare results to the thresholds your local area uses and check the test’s documentation for accuracy and duration.
What’s the difference between sub-slab depressurization and other mitigation options, and can I DIY?
Sub-slab depressurization is a common approach that pulls gas from beneath the slab. There are passive and active versions; passive relies on flow, active uses a fan. For DIY, stick to methods and configurations described by the membrane and venting products and avoid unverified hacks that bypass manufacturer recommendations.
How will radon reduction affect energy use in my home?
Radon systems can change how air moves through the house, which may affect energy use. Consider how sealing and ventilation choices interact with your heating and cooling, and check product labels for any notes on energy impact or operating costs.
What safety steps should I follow when working under a slab or installing venting components?
Work safely around confined spaces and avoid creating tripping or collapse risks. Always follow product instructions, use proper PPE, and never seal openings or penetrations in ways that trap gas or prevent proper venting without a tested plan from the membrane manufacturer or installer guidance.