
Introduction
To prevent flashing over patches, use the right primer and time the finish coat carefully.
The guide walks you through choosing primers compatible with common patch materials and explains the curing window before applying the finish.
You’ll learn practical steps, tips, and rules of thumb to reduce sheen changes, blistering, or color shifts as you go.
Key takeaways
- Identify moisture sources and patch failures before priming to prevent flashing.
- Fully cure patches and test for rigidity to avoid prime-induced flashing.
- Choose low- or water-based primers tuned for drywall patches and humidity.
- Schedule finish coat after primer moisture set and even film formation.
- Sand between coats with fine grit to reduce primer flashing risk.
- Avoid glazing and skipped scuffing corners that exacerbate flashing on patches.
Table of Contents
- Introduction
- Key takeaways
- Why flashing happens over drywall patches
- Assessing patch readiness before priming
- Cleaning and prep techniques that prevent flashing
- Primer types and which to use for patches
- Primer selection based on humidity and climate
- Application methods for primers on patched walls
- Timing the finish coat after priming patched areas
- Finish coat techniques to minimize flashing
- Sanding, scuffing, and scuff-primer steps between coats
- Common mistakes that cause flashing and how to avoid them
- Troubleshooting flashing after paint is applied
- Tools, materials checklist and budget comparison
- Safety, ventilation, and long-term durability considerations
- Conclusion
- FAQ
Why flashing happens over drywall patches
Flashing over drywall patches happens when patched material and the original wall don’t behave the same under light. Patches use joint compound, skim coat, or plaster that have different porosity, absorption rates, and binder content, so the topcoat interacts with them differently and dries with varying sheen. That mismatch shows up after priming and painting as halos, blotchy color, or uneven gloss where the patch meets the surrounding wall, even though the color may look fine up close without light on it.
The key is understanding how surface prep and material choices drive that effect. Patch edges left sharp or feathered improperly, dust, oils, or other contaminants, and under- or over-sanding all amplify glare and create visible reflections that reveal prep flaws. Primer compatibility and sealer choice can either harmonize the patch with the rest of the wall or exaggerate the difference, so you don’t crouch under lights and wonder what went wrong. Plan for porosity balance and binder compatibility before you apply the finish coat, and be prepared to adjust timing or use a compatible primer to minimize flashing and achieve a more uniform look under real room lighting.
Porosity and absorption differences
The main reason you see flashing over drywall patches is because of how different materials absorb primer and paint. When you patch a hole with new drywall paper, it’s like putting in a sponge that soaks up more moisture than the old, painted surface around it. This difference causes the paint to look darker or lighter on top of the patch.
Joint compound is another culprit here. It might seem dry and smooth, but it still holds onto primer and paint differently compared to the surrounding areas. Even if you’ve sanded down a previous repair job well, that area will likely drink in more moisture from your primer or paint than the rest of the wall.
Old paint also plays a role. If there’s any old paint left around the patch, it’s already been primed and painted multiple times. This means it has less porosity and won’t absorb as much new paint compared to fresh drywall paper. So when you apply primer or paint over this mix of materials—new patches, joint compound, and old paint—you’ll see flashing because each surface reacts differently.
Surface contaminants and adhesion failures
Before you slap on that primer, make sure the surface is squeaky clean. Any dust, oils from your fingers, or leftover drywall compound can cause your paint to peel off like a bad band-aid. It’s not just about looks; it’s about making sure your patch job holds up over time.
Check for any greasy spots, especially around electrical outlets and switches where you might have touched the wall while working. Wipe these areas down with a degreaser or rubbing alcohol to ensure nothing interferes with the paint’s grip on the surface. If you skip this step, your primer will look patchy and won’t stick properly.
Also, be extra careful around any patched holes where compound might have squeezed out. Use a scraper or sandpaper to remove excess material before priming. A smooth, clean surface is key to avoiding adhesion issues later on. Don’t rush this part; it’s the foundation for your entire paint job.
Assessing patch readiness before priming
Before you prime, confirm the patch is truly ready: it’s dry, has no tack, and shows no dark spots or sheen that signal lingering moisture. Check the cure time against the product specs and your room humidity so you aren’t sealing in a bad patch. Use a moisture meter or RH test where applicable, perform a light sand to knock down high spots and feather the edges, then recheck for a smooth, uniform surface free of ridges or gouges that could telegraph through the primer.
Inspect for defects like cracks, debonded patches, voids, or efflorescence, and address every issue before priming to avoid flashing and patch failure once the primer goes on. Make sure patch and primer manufacturers’ cure intervals line up; never prime a patch that hasn’t reached its stated cure time, and only prime when your moisture readings meet the primer’s tolerance. Taking the time to do this right saves you from rework, ensures better adhesion, keeps moisture and contaminants from flashing, and gives you a predictable finish and long-lasting repair.
Dryness and cure time checks
Before you start priming, make sure your patch is dry and has cured enough. Don’t rush this step; it’s crucial for the longevity of your repair work. For most joint compounds, wait at least 24 hours after application before even thinking about touching or testing.
To check if it’s ready, use a simple touch test: If you can press your finger into the compound without leaving an impression, it’s probably dry enough to proceed. But don’t rely on just this; also consider the humidity and temperature in your area. High moisture levels can slow down drying times significantly.
Remember, if you’re unsure or rushed, wait a bit longer. It’s better to be safe than sorry when it comes to patching concrete. Rushing through these steps can lead to weak repairs that won’t hold up over time.
Visual and tactile inspection points
Use this checklist to ensure your concrete patch is ready for priming. Quick checks before you start can save time and money.
- Feathered edges: Inspect where the patch meets existing concrete. Edges should be smooth, blending seamlessly with the original surface. If not, re-sand to feather out any rough spots. Skip this, and your patch will stand out like a sore thumb.
- Ridges or bumps: Look for raised areas that don’t match the surrounding concrete’s texture. Smooth them down with sandpaper or a grinder if needed. Ignoring these can cause water to pool on the patch, leading to future damage.
- Grit consistency: Check that the surface is uniformly gritty from sanding. Any smooth patches will prevent proper bonding of primer and paint. Re-sand any overly smooth areas. This step ensures your finish looks professional and lasts longer.
- Surface cleanliness: Wipe down the patch area to remove dust, dirt, or oils. A clean surface is crucial for adhesion. Use a damp cloth if necessary. Dirt can prevent primer from sticking properly, causing failure later on.
- No cracks visible: Look closely at your repair work for any hairline cracks that might have formed during curing. Fill these with patching compound before priming. Cracks will only get worse and lead to bigger problems if ignored now.
- No standing water: Make sure the surface is completely dry, especially after a rain or dewy morning. Dampness can prevent proper bonding of primer. Dry thoroughly with fans or wait for it to air-dry naturally. Refer back to your earlier checks on dryness and cure time.
- No loose debris: Sweep away any small particles that might interfere with the primer’s adhesion. Loose material can cause uneven coverage and poor bonding. This is a simple step but crucial for good results.
- Smooth transition to old concrete: Ensure there are no abrupt changes in texture or color between your patch and existing surfaces. This smoothness helps with overall aesthetics and durability. Re-sand if necessary. A rough edge here can lead to a weak spot that fails over time.
- No sharp edges: Check for any sharp corners where the patch meets other materials or the original concrete. Smooth these out to avoid future wear points. Sharp edges can cause premature failure of your repair work.
- No visible holes or gaps: Fill in any small voids or cracks that might have appeared during curing with a suitable filler before priming. This ensures a solid base for the primer and finish coat. Holes left unfilled can weaken the overall structure of your repair.
- Uniform color tone: Ensure there is no stark contrast between patch and original concrete. A slight difference is okay, but major discrepancies should be addressed with additional sanding or tinted patch compound. Mismatched colors will stand out and look unprofessional.
Quick rule: If it looks right and feels smooth to the touch, you’re probably ready to prime.
Cleaning and prep techniques that prevent flashing
- Assess the patch area and surrounding surfaces for moisture, contamination, and texture consistency before any priming or patching.
- Wipe the surface with a damp microfiber cloth as described later in the “Best wipe-down” section, ensuring it is only slightly damp and not dripping. Allow the surface to air-dry quickly if needed.
- Check base compaction by applying light pressure with a finger or the edge of a trowel on the patched area and nearby surfaces. If you feel softness or movement, address the foundation first to prevent future failures.
- Vacuum or wipe away residual dust after the initial wipe-down to prevent trapping dust beneath primer or finish coats.
- Test moisture content using a simple moisture meter or a calibrated finger-tip test in a hidden area of the patch. Do not prime or finish if elevated moisture is detected; allow more drying time or correct the source of moisture.
- Ensure there is no oily film or solvent residue on the surface. If contamination is suspected, repeat the wipe-down with a clean microfiber cloth and, if needed, use a mild degreasing solution recommended for concrete or patched surfaces.
- Proceed with primer only after the surface proves stable, dry, and compatible with the chosen patch material. Keep a small, controlled test patch to confirm primer adhesion and curing behavior before full application.
Best wipe-down method after sanding
After you’ve sanded your concrete, the best way to clean it up is with a damp microfiber cloth. This isn’t just about getting rid of dust; it’s crucial for preventing flashing later on. Don’t overdo it—just dampen the cloth enough so it’s slightly wet but not dripping.
Timing is key here. Do your wipe-down right after sanding while the surface is still clean and free from new debris. If you wait too long, dust can settle back onto the concrete, ruining all your hard work. And remember, a tack cloth might seem quick, but it leaves behind residue that could cause issues down the line.
One final tip: Always check base compaction before starting any prep work to avoid having to redo everything later because of an unstable foundation. This saves time and keeps your project on track.
Dealing with grease, smoke, and contaminants
When you’ve got grease, oil, or smoke residue on your concrete surface, it’s crucial to clean thoroughly before proceeding. Use a degreaser or trisodium phosphate (TSP) solution for tough jobs; water alone won’t cut it. Mix TSP with warm water and scrub the area vigorously.
After cleaning, rinse everything out well—don’t skimp on this step. A quick rinse can leave behind residue that will cause problems later. Make sure to check your base compaction before you start any new work; a weak foundation means all your efforts are wasted.
If you’re dealing with smoke damage from fires, use specialized fire restoration products designed for concrete surfaces. These products break down soot and other residues more effectively than standard cleaners. Always wear protective gear when handling these chemicals to avoid skin irritation or breathing issues.
Primer types and which to use for patches
Different patch sizes and substrates call for different primers. For tiny cosmetic patches on smooth drywall, a drywall or PVA primer often works fine, while medium to large patches or porous surfaces benefit from stain-blocking or shellac primers. On slick or non-porous surfaces, an adhesion primer helps the patch cling and finish coats lay down evenly.
- Assess the patch: determine patch size, substrate (drywall, concrete, plaster, painted surface), and whether tannins, moisture, odors, or stains are a risk.
- Clean and prep the area: remove dust, debris, and loose material. Lightly sand glossy surfaces to a dull finish. Wipe with a damp cloth and let dry completely.
- Choose primer type based on assessment: for tiny patches on smooth drywall use PVA; for larger or porous patches, or stain concerns use stain-blocking or shellac primers; for slick non-porous surfaces, select an adhesion primer.
- Test primer compatibility: apply a small amount of the chosen primer to a hidden section or patch edge and verify adhesion and drying behavior before full application.
- Apply primer to patched areas: use the primer recommended for the patch size and substrate, following label directions for coverage and technique. Feather edges to blend with surrounding surface.
- Allow proper dry time and cure: let the primer dry completely per the product’s instructions, then inspect for moisture or tackiness. If blotchy or uneven, sand lightly and re-prime the affected area.
- Re-prime if necessary after patch drying: if the patch shows through after the first coat, apply a second coat or switch primer type if recommended by the manufacturer.
- Proceed with finish coats: once the primer is fully cured, apply your finish coats in the recommended sequence and drying times, ensuring the surface remains clean and dust-free between coats.
Plan ahead by matching primer family to the job: use stain-blocking or shellac where tannins, moisture, or mildew threaten finish quality; use adhesion primers on slick concrete or painted surfaces. Surface prep and compatibility matter most—clean, dust-free, and properly dry patches and substrates prevent peels and flashing, and they dictate re-priming needs after patch drying. In mixed or concrete-drywall jobs, size the patch and pick the primer to suit the substrate, then time the finish coats to cure well and avoid early paint failure.
PVA vs. acrylic drywall primers
When it comes to new drywall, reach for the PVA primer. It’s cheap and seals up those paper fibers so paint goes on smoother. But if you’re patching holes or dealing with high-traffic areas, switch to an acrylic primer. Acrylics are tougher and better at hiding imperfections.
Remember, PVA is great for new walls but it’s not durable enough for repairs. If you skip the acrylic on patches, you’ll regret it later when that spot starts showing through your paint job. Take a minute to decide based on what you’re working with—new wall or fix-up—and pick the right primer.
Shellac and stain-blocking primers for problem spots
If you’re dealing with stubborn stains, tannin bleed from wood, or lingering odors, shellac primer is your go-to. It seals in these issues better than most other types of primer.
Oil-based stain-blocking primers are also effective for tough jobs. They work well on surfaces that have been painted with glossy finishes or where there’s a risk of bleed-through from underlying materials like wood or concrete. Remember, if you’re patching up old walls, always check the base compaction before applying any primer.
Avoid using water-based primers for these issues; they won’t do the job as effectively. Stick with shellac or oil-based options to ensure your paint job lasts and looks great.
Primer selection based on humidity and climate
Primer choice changes with humidity and climate. High humidity, cold, or hot conditions slow drying and film cure, so you must read product data sheets, watch the dew point, and adjust time and method accordingly. Water-based primers work better in milder conditions, oil-based or shellac primers excel where you need stain-blocking and sealing, especially on patch areas or porous surfaces. Porosity and recent patches matter—fresh concrete, patched joints, and drywall over concrete call for different primers to ensure solid adhesion of the finish.
This matters on the job because it helps you avoid glossing, peeling, or blotchy finish coats when weather swings happen. You’ll save time and material by matching primer chemistry to the climate: coastal humidity, temperate indoor work, or extreme heat and cold each call for specific tweaks, longer or shorter tack times, and airflow controls. Do quick checks on moisture, adhesion in patched spots, and watch for signs of flash-drying before you prime, so the finish coat sticks and looks right once it’s on.
High-humidity recommendations
In high-humidity areas, you need to pick a primer that dries fast and sticks well. Go for acrylic primers, they dry quicker than oil-based ones and won’t get waterlogged. Avoid applying primer when the humidity is over 80% or the temperature drops below 50°F (10°C). These conditions can mess up your cure.
Check base compaction before you start priming. If it’s not solid, moisture will seep through and ruin your work. Also, make sure there’s good airflow around the area to help with drying times. Don’t rush; let each coat dry thoroughly before moving on.
If you’re dealing with a lot of humidity, consider using a dehumidifier or waiting for drier weather. It might slow down your project but it’ll save you from costly mistakes later on. Remember, a good foundation is key to any successful concrete job.
Cold-weather priming tips
In cold weather, always check your primer can for the minimum temperature limit. Don’t even think about starting if it’s too chilly outside—your materials won’t work right and you’ll waste a day.
Acclimate your space before you start. If you’re working indoors, make sure the room is warm enough for at least 24 hours before priming. This isn’t just about comfort; it’s about getting that primer to stick properly.
When temperatures are low, base materials can be brittle and less forgiving. Check base compaction and ensure everything is solid before you prime. A weak foundation means wasted effort later on.
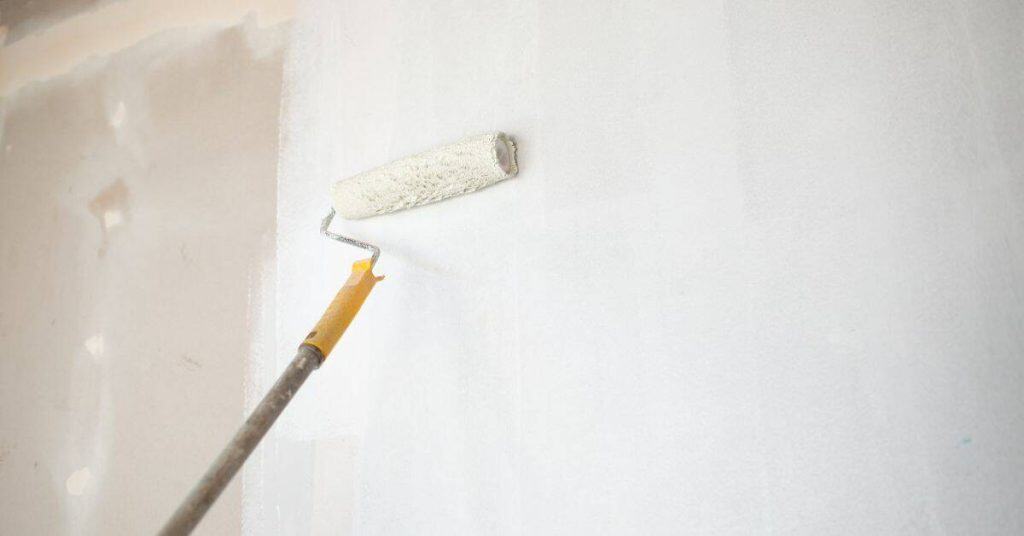
Application methods for primers on patched walls
Choose a primer suited to patched walls—bonding primers, acrylic/latex, or shellac sealers based on substrate and finish coat—because adhesion, stain blocking, and feathered-edge visibility hinge on this choice. Roll with a medium-nap roller (3/8″–1/2″) for even laydown, avoid heavy passes over the patch, and backroll with light, overlapping strokes to smooth transitions into the surrounding texture. Use a narrow brush to outline the patch, feather the primer into adjacent textures, and either cross-brush or circle at the boundary to blend any texture differences. Match nap size to room texture (orange peel, skip trowel, or smooth) and adjust spraying distance and pattern to avoid over- or under-priming.
Document backrolling and cross-tacking steps to prevent lap marks on textured walls, and plan for drying and recoat windows by tracking ambient temperature, humidity, and guide timing between coats. This matters because a uniform base prevents finish-coat flaws like sheen shifts or dull spots, and it speeds up real-world progress by reducing touch-ups. When you check for even coverage, look for feathered edges, pinholes, and missed zones under oblique light, and be prepared to apply a second light-pass primer if needed to guarantee a solid, ready-to-coat surface.
Rollers and nap recommendations
For smooth walls, stick with a 1/4-inch nap roller. It’ll give you a nice even coat without leaving any stipple marks on your patched areas. If you’re dealing with textured walls, bump up to a 3/8-inch or 1/2-inch nap. This will help the primer fill in those nooks and crannies but be careful not to overdo it.
Avoid using too thick of a roller on patches. A heavy nap can leave you with stipple marks that stand out like sore thumbs. Instead, go back over your patched spots with a smaller roller or brush to smooth things out without disturbing the patch work.
Spray vs. brush touch-ups
When it comes to applying primer on patched walls, choosing between spray and brush depends on the situation. For blended coverage over large areas, go with a spray can. It gives you an even coat without streaks or lap marks. But for edges, corners, or small repairs where precision is key, use a brush.
Avoid spraying in tight spots; it’s hard to control and wastes primer. Instead, cut in around the edges with a brush first before you spray the main area. This way, you get clean lines without over-spray issues.
Remember, if your repair is small or intricate, stick to brushing. It might take longer but gives better coverage for those tricky spots where blending isn’t as critical.
Timing the finish coat after priming patched areas
When you finish the patch, choose a primer based on patch type: cementitious patches dry faster, while epoxy or acrylic patching compounds need longer cure times. For common primers under typical DIY conditions, plan for water-based primers to be tack-free in about 2–4 hours and fully dry in 24 hours; oil/solvent-based primers tack up in 6–8 hours and dry to finish in 24–48 hours. If humidity is high or temperatures are cool, add 1–2 days of wait, and if it’s hot and dry, you can shorten the window but test first. Cementitious patches usually need 24–48 hours before priming, epoxy/acrylic patches 48–72 hours, and large or poorly ventilated spaces may push these times out further.
Use practical tests before topcoating: perform a tack-free check, moisture/adhesion checks, and a tape test on the prime coat, then recheck re-adhesion after waiting intervals. Compare primer options: bonding primers good for adhesion on patched areas, stain-blocking/shellac primers helpful where stains or odors exist, and water-based vs oil-based formulations affecting finish compatibility and cure speed. Plan finish coat timing by primer and patch material, with separate ranges for indoor spaces and poorly ventilated or large patches. On the day of priming, surface prep, correct primer thickness, and quick re-checks after intervals matter; delay the finish coat if tests fail or temperatures remain unfavorable.
How long to wait: realistic timelines
After priming patched areas, you need to give the primer time to dry and bond properly. For water-based primers, aim for a minimum of 2 hours but ideally 4-6 hours. Oil-based primers take longer; shoot for at least 8 hours, with 12-24 hours being optimal.
Don’t rush this step. If you apply the finish coat too soon, it can lead to poor adhesion and patch areas that look like they’re bubbling or peeling later on. Take your time and check that the primer is fully dry before moving forward.
Remember, these times are guidelines. Weather conditions like humidity can affect drying times, so be flexible and patient. If you’re unsure, it’s better to wait a bit longer than risk messing up your whole project.
Simple readiness tests before finish coat
Before you lay down that final layer of concrete, make sure the primer is ready. The tack test is a quick way to check if it’s dry enough. Just touch the surface; it should feel slightly sticky but not wet. If your finger leaves a visible mark, wait longer.
The solvent rub test helps too. Dip a rag in some mineral spirits and rub the primed area. The primer shouldn’t come off easily on the rag. If it does, you’re still waiting too long.
Lastly, give it a visual once-over. Look for any shiny spots or unevenness that might indicate wet areas. These need more time to dry before you can finish coat over them.
Finish coat techniques to minimize flashing
The goal is to hide flash lines by feathering patch edges, using thin, even coats, and keeping a consistent sheen across the repaired area, which means controlling texture and light reflection as you work, and you should plan for the finish under typical room lighting conditions. Feather the edges into the surrounding paint with careful sanding and a soft edge taper, taking care with sanding grit and masking, so you don’t end up with a hard line at cut-ins, and follow this with a quick visual check under the same light. Use multiple thin coats rather than one thick layer and let each coat dry fully before the next, measuring humidity and temperature to avoid halos, and this helps you avoid flash ghosts.
This matters because feathered edges and a matched sheen prevent glare and visible repairs, making the repair disappear from a normal viewing distance. Plan finish coat sequencing—primer, sealer, then 2-3 thin coats with adequate drying time—to avoid rushing with a single thick layer, and align your plan with the room’s lighting. Test sheen on a sample area, adjust roller pattern and pressure, and keep a quick inspection checklist to catch flash lines before cures, so you can fix any mismatches now rather than live with them.
Matching sheen and blending strategies
To avoid flashing, pick a finish coat with the same sheen as your base. If you’re unsure, take samples to a paint store for matching. Once you’ve got the right stuff, apply thin coats evenly. Go slow and check often—don’t rush.
Avoid overworking or applying too much pressure when rolling or brushing; it can change how light reflects off the surface. Keep your eye on edges and corners where patches meet old paint. If you see a difference in texture or shine, stop and fix before moving on.
When to use glaze or mist coats
Before you hit your concrete with a full finish coat, it’s crucial to equalize sheen differences. This means if some parts of the slab look dull and others shiny, you need to smooth things out. A quick way is by applying a glaze or mist coat.
Mist coats are great for minor issues. They’re thin and help blend small areas that might be slightly different in color or texture. Just make sure the base is well-compacted before you start, or your finish will look patchy.
A glaze coat, on the other hand, is better for bigger differences across larger sections of concrete. It’s thicker and can really help even out sheen discrepancies. But be careful not to overdo it; too much glaze can lead to a sticky surface that won’t dry properly.
Sanding, scuffing, and scuff-primer steps between coats
Before you even think about the finish, assess patch edges for height consistency, feather them smooth, and select a light sanding grit (typically 320-400 between coats) to create a seamless transition without revealing the patch boundaries or showing a ridged edge. Sand between coats with feathered, light abrasion using even strokes and a steady tempo, avoid deep grooves or gouging into patch edges, and follow the existing texture so the new coat blends naturally. Then scuff the surrounding area lightly to create a mechanical bond for the next coat, taking care not to gouge or expose patch lines as you prepare the surface.
Cleanliness matters most; remove dust thoroughly with a tack cloth or vacuum, then wipe the surface to leave a truly dust-free plane that will help primer bite and finish smoothness. Follow clear timing and environmental guidelines: observe the recoat window, drying times, and conditions such as temperature and humidity, and run a quick readiness checklist to ensure the surface is ready for the finish. If patch edges still show after scuffing, use a light skim coat or additional primer, then re-sand if needed and verify the surface is flat and even before applying the topcoat.
Grit choices and hand vs. pole sanding
When you’re smoothing primer, stick to grits between 120 and 220. Anything coarser can damage the surface and leave marks that won’t go away with paint. For small areas or tight corners, use a sanding block. It gives you control and helps keep things smooth.
For larger jobs, grab a pole sander to save your back and speed up the work. But be careful not to overdo it—too much sanding can wear down the primer too thin or create uneven spots. Always check base compaction before you start so you don’t end up with loose material under your finish coat.
Remember, scuff-primer is all about creating a rough surface for better paint adhesion. Don’t go overboard; just enough to break the smoothness of the primer without digging into it. This way, you’ll get a nice, even finish that lasts.
Dust removal after sanding
After you finish sanding, the first thing to do is remove all that dust. If you don’t get rid of it, your next coat will show those little marks through the paint like a map on your wall—no bueno. Use a vacuum with a brush attachment or a HEPA filter for the best results.
Once you’ve got most of the dust out, give everything a quick wipe down with tack cloths or damp rags to catch any leftover bits. Make sure no corners are missed because even small specks can cause issues later on.
Remember, if you’re working in an area where there’s still construction going on, check base compaction before starting your next coat. Moving equipment and foot traffic can stir up dust that might settle back onto your freshly sanded surface.
Common mistakes that cause flashing and how to avoid them
Common mistakes that cause flashing on patched concrete start long before you roll on paint, and they bite you later in gloss, adhesion, and longevity. Skipping a thorough wipe-down lets dust, oil, and efflorescence trap adhesion; using the wrong primer for patch material creates a porosity mismatch; and applying finish coats too soon seals in moisture and traps solvents, making glossy halos flash. Fix these by doing a clean, dry surface, selecting a primer that matches both concrete and patch material, and waiting the recommended re-wait and cure times before the next coat.
This matters because flashing wrecks finish durability, highlights mistakes, and wastes time and materials on a DIY job. Follow a practical preventive routine: test moisture, hold temperature and humidity to spec, check patch level and porosity, run a small test patch, and verify adhesion before committing to full coats. If flashing appears after primer or finish, re-clean, re-prime with the correct products, extend cure times, and perform a quick tack-and-check before proceeding.
Over-priming or under-priming issues
Over-priming can be a real headache. When you saturate your patch with primer, it doesn’t just soak up the primer; it also soaks up water and moisture from the air. This means that when you pour concrete over it, the excess moisture will delay setting time and weaken the bond between the new concrete and the old surface. To avoid this, make sure to apply a thin, even coat of primer.
On the flip side, under-priming leaves your patch vulnerable. Without enough primer, you won’t get that crucial chemical reaction needed for a strong bond. Concrete will stick like it’s on ice if there’s no proper adhesion. To fix this, always test the surface to see how much primer is necessary and apply accordingly.
In both cases, check base compaction before you start priming. A solid foundation means your patch has a fighting chance from day one. If you’re unsure about the condition of your base, take time to prep it properly—no shortcuts here.
Ignoring feathered edges and texture mismatch
Feathering the edges of your concrete pour is crucial for a seamless look. If you skip this step, you’ll end up with visible lines where new concrete meets old, making your work look amateurish. To avoid this, take time to feather out the edges smoothly.
If you notice texture mismatch between old and new concrete, it’s not just about looks; it can lead to water pooling and cracking over time. To fix a bad feather edge or texture issue, you might need to re-feather by hand or skim-coat with a thin layer of fresh concrete. Make sure the new material matches the existing surface as closely as possible.
When redoing edges, always check base compaction and ensure it’s level before applying any new concrete. This will prevent future issues like cracking and uneven wear.
Troubleshooting flashing after paint is applied
Flashing after paint is a sign you didn’t fix the underlying cause, so start by diagnosing whether moisture intrusion, sheen mismatch, or patchy coverage is driving pigment migration or primer failure. Do a quick pre-recoat check: verify surface dryness with a meter, abrade glossy areas, clean dust and oil, and repair patches before you touch the wall again. If flashing is visible, follow a strict sequence: re-sand the affected zones to uniform abrasion, re-prime only those zones with a compatible stain-blocking or bonding primer, and apply mist coats to even out absorption before the final coat.
This matters because proper sequencing and target repairs save you time and money by preventing repeat failures and color or sheen mismatch after topcoats. It also helps you set realistic recoat windows and avoid overloading patches, which can trap moisture or cause new flash later. Use these steps to decide when to repaint the entire wall: persistent flashing after fixes, big color or sheen inconsistencies, or a large area that wouldn’t respond to spot fixes; then match primer and finish across old and new paint to prevent new flash and deliver a durable, uniform look.
Fixing small isolated flashes
When you spot a few small areas where the paint isn’t sticking right, don’t panic. First, scuff up the surface with sandpaper or a wire brush to break that smooth seal and let new paint grab hold. Then give it a good clean with mineral spirits or a degreaser.
Prime those spots before you put on your final coat. A thin layer of primer will help the finish stick better, especially if there’s any moisture or oil under that flash area. Once primed, apply a light touch of paint over it to blend in with the rest of the surface.
If you’re dealing with stubborn flashes, check base compaction and make sure your concrete is dry before you start painting again. Rushing through these steps can lead to more flashing issues down the road.
When a full repaint is the only solution
If you’ve got flashing all over your wall, not just in one spot, it’s time to think about repainting the whole thing. Don’t try to fix this with touch-ups or patches; that’ll look worse than the flashing. You need to strip off the old paint and start fresh.
Before you dive into a full repaint, check base compaction. If your foundation isn’t solid, no amount of painting will stop the wall from moving and causing more flashing issues down the road. Fixing that first can save you a lot of headache later on.
A full repaint means extra work but better results in the long run. It’s not just about covering up mistakes; it’s about ensuring your paint job lasts and looks great for years to come. If you’re unsure, it might be worth hiring a pro to give you an honest opinion before diving into such a big project.
Tools, materials checklist and budget comparison
This H2 gives a practical DIY tools and materials checklist to prevent flashing on patched concrete, plus a side-by-side budget tier that compares economy, mid, and pro options for cost vs. durability. Include rollers and brushes, bonding and stain-blocking primers, patch compounds, sanding supplies, masking materials, mixing containers, and essential safety gear like gloves, goggles, and a respirator. It also lays out a quick decision framework for upgrading tools or primers based on patch size, porosity, and finish timing.
Preparation and safety drive the results, so clean surfaces, dust removal, moisture checks, and proper curing before priming are nonnegotiable. The primer and patching guidance covers which products work best on concrete patches, expected drying and recoat windows, how to time finish coats, and the compatibility with sealers or paints to avoid adhesion failure. Use the three budget tiers to guide buying: economy for small or low porosity patches, mid for moderate porosity and larger patches, pro for high porosity, tight deadlines, or finish quality that shows the job off, plus a simple decision matrix for when to upgrade tools or primers based on patch size, porosity, and schedule pressures.
Essential tools and consumables
This checklist helps you verify that all necessary items are ready for your patch-to-paint project. Use it before starting any work to avoid costly mistakes.
- Concrete mixer: Check capacity matches job size; confirm no leaks or damage. What goes wrong: Inadequate mixing leads to poor concrete quality.
- Trowel and float set: Ensure tools are clean, sharp, and in good condition. Confirm by testing on a small patch of concrete. What goes wrong: Dull tools create an uneven surface.
- Level and straightedge: Verify accuracy with a known flat surface; check for any nicks or bends. What goes wrong: Misaligned patches look amateurish.
- Masonry saw: Confirm blade is sharp, properly installed, and suitable for concrete cutting. What goes wrong: Dull blades waste time and effort.
- Paint brushes and rollers: Inspect for wear; test by rolling out a small patch to ensure even coverage. What goes wrong: Old or damaged tools lead to poor paint application.
- Safety gear: Check that all items (gloves, goggles, mask) fit properly and are in good condition. What goes wrong: Neglecting safety leads to injuries.
- Concrete patch mix: Verify correct type for your project; check expiration date. What goes wrong: Using the wrong mix can compromise structural integrity.
- Sand and gravel: Confirm quantities match job requirements, free of debris or contaminants. What goes wrong: Insufficient materials lead to delays.
- Paint primer and finish coats: Ensure correct type for concrete; check coverage per gallon. What goes wrong: Poor quality paint fails quickly.
Quick rule: Always double-check your tools before starting work to save time and money later.
Cost vs. performance primer comparison
This checklist helps you pick the right primer for your project based on cost and durability.
- Economy latex primer: Check if it covers well with one coat. Confirm by applying a small test patch to see coverage and drying time. Skip at risk of needing multiple coats.
- Mid-range acrylic primer: Ensure it bonds well to concrete. Test on a small area, wait 24 hours, then try to scratch the surface; if it doesn’t come off easily, it’s good. Skip and you may need to re-prime.
- Premium specialty primer: Verify its resistance to moisture. Apply in a damp environment and check for bubbling or peeling after 24 hours. Skip if unsure about moisture issues.
- Drying time: Confirm the primer dries within manufacturer’s specs. Check by timing drying from wet to touch-dry state. Poor drying can lead to poor paint adhesion.
- VOC content: Low VOC primers are better for indoor use; check label. Ensure it meets your project needs. High VOC can cause health issues indoors.
- Coverage area: Check the coverage per gallon as stated on the container. Apply a test coat and measure how much you used. Misjudging coverage leads to extra costs.
- Pot life: Confirm if mixed primer remains usable for at least 4 hours. Stir well, then check consistency after several hours. If too short, may waste material.
- Application method: Ensure it’s suitable for your tools (brush, roller, sprayer). Test on a small area to confirm compatibility. Incompatible methods lead to poor results.
Quick rule: Always test primer in a small area first before full application.
Safety, ventilation, and long-term durability considerations
Ventilation, PPE, and primer choice drive long-term durability. Good airflow shortens off-gassing and helps primers and finishes cure properly, reducing future cracks and stains. Use low-VOC options when possible and plan safe disposal for rags and cans.
Wear the right respirators for sanding and painting, check fit, and upgrade cartridges if fumes are strong. Primer selection affects adhesion and stain resistance, so choose bonding or stain-blocking primers and follow curing temps and humidity; dispose oily materials per local rules.
Personal protective equipment and ventilation
When sanding or priming, wear a mask to avoid breathing in dust and chemicals. A N95 respirator is your best bet; it filters out fine particles that can damage your lungs. Don’t skimp on this gear.
Eyes are another critical area. Safety glasses with side shields or goggles will protect them from flying debris during sanding. No excuses, wear eye protection.
To keep the air breathable while working indoors, open windows and use fans to push contaminated air out. If possible, run an exhaust fan in the room you’re working in. Don’t forget to check that your work area is well-ventilated before starting any job involving chemicals or dust.
Long-term maintenance and warranties
Picking the right primer and finish is crucial for your concrete’s longevity. Use a good quality primer that matches your base material to prevent cracking and peeling down the line. Don’t skimp on this step; it’s where you lay the foundation for durability.
When choosing finishes, go with options like epoxy or urethane coatings if you want something tough and long-lasting. These materials are more expensive upfront but save money in maintenance over time. Always check manufacturer warranties before buying—some products offer better coverage than others, which can be a lifesaver when issues arise.
Maintaining your concrete isn’t just about looks; it’s about preserving its structural integrity. Regular inspections for cracks and chips are key to catching problems early. If you notice any issues, address them promptly with the right materials to avoid bigger headaches later on.

Conclusion
Getting the primer and finish timing right is the key to a durable, clean look where patches meet the wall. Do it safely, test first, and you’ll prevent flashing from ever becoming a costly mystery.
Check the patch by cleaning it, letting it dry, and already inspecting for any sheen or texture that looks off, then choose a primer based on humidity and climate and apply it in even, full coats. If you’re unsure, start with a small test area, dry thoroughly, then proceed in the same manner across the patch; ventilate well and wear a mask during sanding and priming.
Common mistakes to avoid are using the wrong primer for a patch, skipping the cleaning and roughing steps, and rushing the finish coat before the primer fully cures. Keep safety first: ventilate, protect your floors, and don’t over-wet the surface or linger with sanding dust. If you notice persistent flashing after a test coat or the patch is large or damp, pause and reassess rather than forcing a quick finish.
If the patch is extensive, moisture issues persist, or you’re unsure about the underlying drywall condition, consider bringing in a pro to confirm the patch readiness and primer strategy. With careful steps and steady timing, you’ll finish strong and keep moisture, cracking, and color mismatch at bay—you’ve got this. Stay safe, stay methodical, and keep the finish coat looking flawless.
FAQ
What primers work best over patches before the finish coat?
Use a bonding primer designed for the patch material and surface you patched. Let it dry completely before you apply the finish coat.
How long should I wait after priming before the finish coat?
Wait until the primer is dry to the touch and not tacky. Check the label for the recommended recoat window and stick to it.
What causes flashing over patches and how can I prevent it?
Patches that are too thick, not properly sanded, or primed with the wrong product can flash. Keep patches thin, sand smooth, and use the correct primer for the surface.
Any tips for finish coat timing with temperature and moisture?
Work with the room dry and within the primer’s temperature range. If the air is humid or cold, delay finishing to prevent poor adhesion and flashing.