

Introduction
Roller stipple flashing is when the roller texture shows through the flashing material. That happens if the coat is too thin, not well mixed, or not given proper time to set. You’ll see the pattern in the field rather than a clean, smooth finish.
To reduce it, apply a more even coat and backroll or use a roller with the right nap for the material you’re using. Follow the product label for drying times and climate notes, and consider testing a small area first. If needed, prime or use a compatible material and adjust technique until the texture is less visible.
Key takeaways
- Select a medium-nap roller and compatible primer to reduce texture transfer.
- Ensure surface is clean, dry, and properly sealed before painting to prevent stipple.
- Avoid overworking the paint; use consistent, light strokes to minimize texture.
- Control environmental factors like humidity and temperature during and after painting.
- Test a small area and inspect under lighting before proceeding.
- Wear eye protection and mask when sanding or patching to prevent dust.
Table of Contents
- Introduction
- Key takeaways
- What Roller Stipple Flashing Is
- Primary Causes of Roller Texture Showing
- Surface and Substrate Factors
- Choosing Paint, Primer, and Roller Correctly
- Application Techniques to Minimize Roller Stipple
- Environmental and Drying Considerations
- Testing, Troubleshooting, and Visual Checkpoints
- Repair, Prevention, and When to Call a Pro
- Conclusion
- FAQ
What Roller Stipple Flashing Is
Roller stipple refers to the textured pattern left by a roller when paint is applied. It can look like a random dabbed surface rather than a smooth coat. Over time, the texture may stand out as flashing due to changes in sheen, absorption, or lighting angles.
Understand that stipple becomes flashing when the texture catches light differently or when the substrate soaks in unevenly. This section defines the terms and sets up how texture and finish interact on a wall. The goal is to recognize what you’re seeing before you start troubleshooting.
Stipple vs flashing: definitions and interaction
Let’s clear up two terms you’ll hear a lot – stipple and flashing. Stipple is the physical texture left by your roller on the surface. It’s those tiny little peaks and valleys you see when you look close.
Flashing, on the other hand, isn’t about touch but sight. It’s when light hits those tiny peaks or valleys and reflects back differently, making them stand out more than they should. It’s like when you’re trying to hide a small scratch on your car with a marker – it only makes it more noticeable.
Here’s the kicker: stipple can cause flashing, and flashing can make stipple look worse. They work together to make those roller marks pop out at you.
How human perception and lighting reveal defects
Ever noticed how some things only seem to stand out when the light hits them just right? That’s what happens with roller stipple flashing. Our eyes are like little cameras, and they pick up on those tiny differences in texture or sheen.
Think about it – when you’re looking at a wall from one angle, everything might look fine. But as soon as you move, or the sun moves, bam! there’s that roller mark, staring right back at you. It’s like when you think you’ve found the perfect hiding spot for your Christmas presents, but then your kid walks in from a different angle and spots them.
Lighting plays a big part too. Direct sunlight can make those tiny peaks and valleys cast shadows, making them look bigger than they are. And if your paint has a sheen to it, well, that just makes things worse. It’s like looking at a shiny surface – you see every little imperfection.
Primary Causes of Roller Texture Showing
Texture visibility often comes from how the product is applied. Overloading the roller or rolling too quickly can create raised patterns. Inconsistent pressure or improper overlap can also emphasize stipple rather than blend it away.
Material choices and substrate conditions matter as well. Uneven paint film, incompatible primers, or a porous surface can reveal texture more clearly. This section groups issues into application, material, and substrate categories for targeted checks.
Roller and Application Technique Errors
Mastering the roller’s dance is key to a smooth finish. Here are common mistakes to avoid:
- Overloading: Too much paint makes your roller sag, leaving heavy marks.
- Varying pressure: Heavy or light strokes create visible differences in coverage.
- Inconsistent stroke direction: Going every which way confuses the eye and reveals texture.
- Failure to back-roll: Not rolling over dried areas leaves them looking different from freshly rolled ones.
Keep your roller evenly loaded, apply consistent pressure, maintain a pattern, and always back-roll for best results.
Paint System and Compatibility Issues
The paint system’s harmony is crucial to hide roller marks. Here’s what can go wrong:
Primer/paint mismatch: An incompatible primer can cause the topcoat to flash, revealing texture.
Differing sheen levels: High-gloss over low-sheen or vice versa highlights every little imperfection.
Low-hide paints: Some paints just don’t cover well enough to hide roller marks. Always test your paint system before committing.
Surface and Substrate Factors
Absorbency of the underlying surface plays a big role in texture visibility. Highly absorbent areas can pull moisture from the film and reveal stipple as it dries. Patchy repairs or joint compounds can also show through a finish if not leveled properly.
Previous coatings and levels of bonding matter too. Differences in sheen between layers or poorly prepped surfaces can create uneven texture. Focus your prep on smoothing transitions and sealing high-absorbency zones.
Preparing the substrate to minimize show-through
The key to reducing roller stipple flash is a smooth, even surface. Start by cleaning your walls thoroughly. Remove any dirt, grease, or old paint.
Sanding is next. Use 120-grit sandpaper to lightly sand the entire surface. This helps to smooth out minor imperfections and provides better adhesion for your primer.
If you’ve patched any areas, feather the edges with a damp sponge or sanding block. This blends the patch into the surrounding wall, reducing texture contrast. Spot-prime these areas afterwards to seal them and prevent tannin bleed.
Visual checkpoints before painting
Before you start rolling on that fresh coat, use this checklist to ensure your surface is ready. The best time to do this is after all prep work but before priming.
- Raking light: Check for any imperfections using a strong, directional light source. This helps reveal texture and other issues you might miss with normal lighting.
- Touch check: Run your hand over the surface to feel for any rough spots or raised areas that need more sanding.
- Mark weak spots: Use a pencil to mark any areas where you find texture, holes, or other defects. This helps you keep track of what needs extra attention.
- Check previous coatings: Ensure all old paint is removed and there are no flaking or peeling areas.
- Inspect patched areas: Make sure they’re well-sanded, primed, and blend with the surrounding wall.
- Look for nail holes: Fill any you find to prevent texture from showing through.
- Check for moisture: Ensure there’s no dampness or mold, which can cause issues later on.
- Verify primer adhesion: After priming, gently run your hand over the surface. If it feels smooth and dry, you’re good to go.
Quick rule: If in doubt, sand and prime again. It’s easier to fix now than after painting.
Choosing Paint, Primer, and Roller Correctly
Use a coherent system where primer, paint, and roller are compatible and designed to work together. A good trio helps mask texture and reduces the chance of flashing. Check that the roller nap is appropriate for the surface texture and paint type you’re using.
Read product labels and manufacturer instructions to confirm coverages and recommended primers. If you’re unsure, verify with the label, datasheet, or local pro shop before mixing or applying. This keeps your finish the way you want it to look.
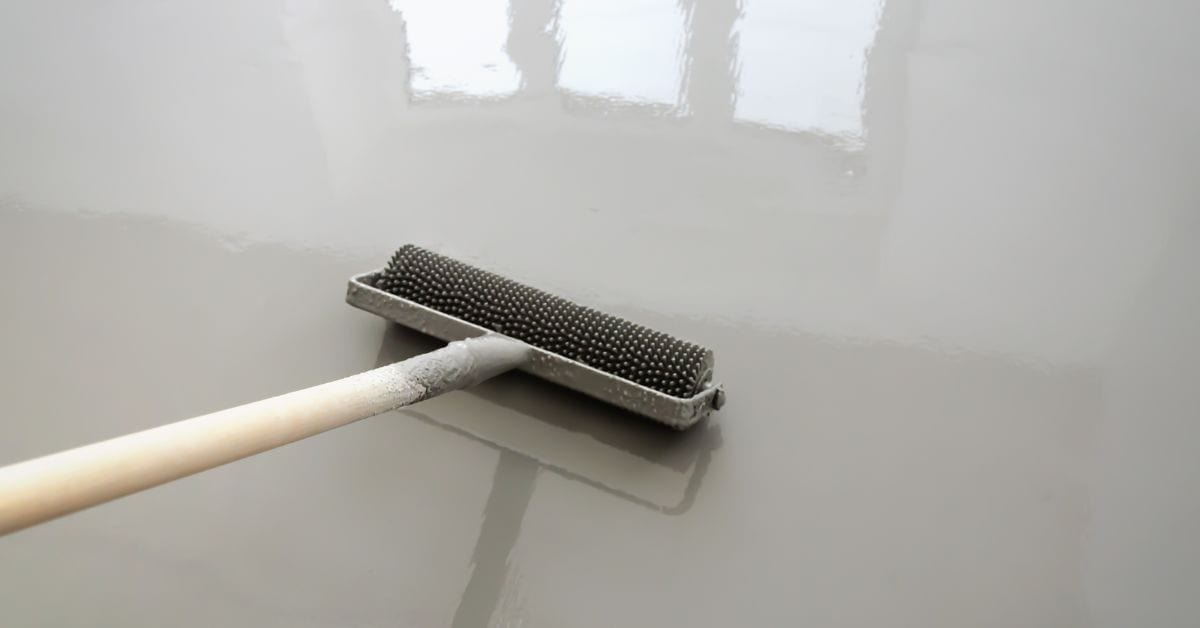
Roller Nap Selection Guidance
Choosing the right roller nap is crucial to minimize texture show-through. The nap, or pile height, should match your surface’s texture and paint type.
For smooth surfaces, use a short nap (1/4″ to 3/8″) roller. This works well with flat and eggshell paints.
On lightly textured surfaces like drywall or lightly sanded wood, opt for a medium nap (3/8″ to 1/2″) roller. It’s great with satin and semi-gloss paints.
For heavily textured surfaces, use a long nap (3/4″ to 1-1/2″) roller. This works best with high-hide paints and stains.
Primer Selection and Blocking Flashing
A good primer can make all the difference in reducing roller stipple. Choose based on your substrate’s needs.
For new or bare surfaces, use a high-build, stain-blocking primer. This evens out absorption and prevents tannins from bleeding through. Apply two coats for best results.
On previously painted surfaces, opt for a high-hide primer. It helps to even out color differences and reduces the appearance of texture. One coat should suffice, but you can apply a second if needed.
Always follow manufacturer recommendations for application and drying times. This ensures your primer performs as expected before applying paint.
Application Techniques to Minimize Roller Stipple
Load the roller with an even amount of paint and avoid squeezing extra on the edge. Work in consistent strokes with steady pressure to prevent piling or skipping. Maintain slightly overlapping passes to blend edges.
Keep a steady pace and avoid stopping mid-wall where texture can set unevenly. Use light cross-rolling to even out the film and reduce visible stipple as it dries. Document your method so you can repeat it on similar panels.
Loading, pressure, and stroke patterns
Consistency is key when rolling paint. Start by loading your roller evenly.
Apply even pressure across the entire roller cover to ensure an even distribution of paint.
Use a consistent stroke pattern. Cross-rolling or using light finishing passes can help smooth out any visible texture from the roller. Try not to roll over the same area twice with full pressure, as this can exacerbate stipple.
Establishing and maintaining a wet edge
Maintaining a wet edge is crucial to prevent lap marks, which can highlight roller stipple.
Work in manageable panel sizes. This could be 3′ x 4′, or whatever size you’re comfortable with. It’s easier to maintain a wet edge over smaller areas.
Time your strokes carefully. As soon as you’ve rolled out one panel, start the next one while the first is still wet. This helps blend the edges and prevents sheen differences that can reveal stipple.
Environmental and Drying Considerations
Temperature and humidity influence how paint levels and dries, which affects texture visibility. Sudden changes in airflow can cause dust or particles to settle into the film. Watch for conditions that slow or speed up drying unexpectedly.
Ensure you have adequate ventilation and avoid large temperature swings during application and drying. These checks help prevent uneven sheen and flashing that makes stipple more noticeable. Adjust on-site conditions within safe, reasonable ranges as needed.
Controlling Site Conditions
Keeping your workspace under control is key to minimizing roller stipple. Here’s how:
Ventilation: Good airflow helps paint dry evenly. Open windows, use fans, but avoid drafts.
Temperature & Humidity: Stabilize these as much as possible. Ideal range is 65-80°F (18-27°C) and 40-70% humidity. Check product labels for specific guidance.
Before you start, check drying times. Some paints take longer to level than others. Plan your work accordingly.
Adjusting Technique for Fast or Slow Drying
Paint’s drying speed can affect roller stipple. Here’s how to adapt:
Fast-drying paints: These can show texture quickly. Speed up your work, use a smaller nap roller, and apply thin coats.
Slow-drying conditions: Prolonged drying can lead to excessive leveling. Consider using a larger nap roller for better coverage in fewer coats. Always follow manufacturer’s thinning guidance.
Remember, these are just guidelines. Every paint and situation is unique. Always check product labels and adjust as needed.
Testing, Troubleshooting, and Visual Checkpoints
Use low-risk tests to diagnose texture sources, such as a small patch or sample board. Observe how the texture responds to light and angle changes. Look for differences between fresh and cured film to identify problem areas.
Differentiate issues by checking the substrate, primer, and paint properties. If texture remains after adjustments, consult the product instructions or label for troubleshooting steps. Use clear benchmarks to guide your next steps.
Test patch and sample board method
Use this method before painting the entire wall to check for roller stipple. It’s quick, easy, and helps avoid costly mistakes.
- Prepare test patches: Apply paint on scrap wood or an inconspicuous area using your chosen roller and technique.
- Use different nap lengths: Test with various roller naps to see which works best for your surface.
- Vary pressure: Light, medium, or heavy – test all pressures to find the sweet spot.
- Change stroke patterns: Try ‘W’ or ‘M’ patterns, long strokes, or short ones. See what minimizes stipple.
- Test primer: Apply your chosen primer before painting test patches to see if it helps reduce show-through.
- Check in different lighting: Inspect patches under various lights (natural, artificial) to see how stipple appears.
- Evaluate at different angles: Check patches from straight on and at an angle. Stipple can look worse or better depending on the view.
- Avoid skipping this step: Without testing, you might commit to a technique that causes roller stipple across your entire wall.
Quick rule: Always test before committing. It’s the best way to avoid roller stipple surprises.
Diagnosing causes from pattern clues
Look for these patterns on your wall to diagnose what’s causing roller stipple. It’ll help you fix the issue quickly and effectively.
- Directional banding: If you see stripes running in one direction, it might be due to inconsistent pressure or stroke pattern.
- Isolated patches: If stipple is only in certain areas, the substrate might be absorbing paint differently there. Check for moisture or contamination.
- Sheen shifts: If some areas look glossier or matte than others, it could indicate inconsistent paint application or a problem with your paint chemistry.
- Uniform stipple: If the entire wall has an even, fine stipple, it might be due to using the wrong roller nap length for your surface.
- Large, visible strokes: If you can see individual roller strokes, you’re applying too much paint or not maintaining a wet edge.
Quick rule: Understanding these patterns helps you pinpoint the cause of roller stipple. Once you know what’s causing it, you can fix it.
Repair, Prevention, and When to Call a Pro
For simple fixes, spot repairs or a light recoat can often address surface texture without a full redo. Plan for proper surface prep and a compatible system to prevent recurrence. Consider a staged approach if the issue spans a large area.
If problems persist, escalate to a professional review to determine if a full recoat or substrate treatment is needed. Having a DIY toolkit ready and knowing your limits helps you make a safe, informed decision. This section outlines the decision points for when to bring in a pro.
Spot repair and recoat tactics
For small areas, spot repairs can save time and paint. But for larger sections or persistent issues, a full recoat might be the better choice.
Small area repairs: Lightly sand the affected area to remove any loose paint. Feather the edges with your sandpaper to blend it into the existing wall. Prime the spot using a small roller or brush, then blend in the touch-up paint using a similar technique.
Full recoat: If you’re dealing with multiple areas of stipple flashing or if the current coat is old and peeling, it’s safer to recoat the entire panel or room. This ensures even coverage and prevents further issues down the line.
Tools and materials checklist
Before you start, make sure you have all the necessary tools and materials to tackle roller stipple flashing effectively. Use this checklist as a guide.
- Rollers: Choose rollers with the right nap length for your surface (see earlier sections).
- Brushes: A small angled brush for cutting in edges and touching up spots.
- Primer: A high-quality primer to seal the surface and prevent further flashing. Use a primer blocker if necessary (see earlier sections).
- Finish paint: Choose a suitable finish paint for your surface and desired look.
- Masking supplies: Painter’s tape, drop cloths, and plastic sheets to protect areas you don’t want to paint.
- Lighting: Adequate lighting is crucial for seeing stipple flashing and ensuring even coverage. Use work lights or natural light if possible.
- Testing materials: A test patch or sample board to check your chosen paint’s performance before committing to the entire surface.
- Safety gear: Gloves, goggles, and a dust mask for sanding and painting tasks.
Quick rule: Always double-check your materials and tools before starting. Missing something crucial can lead to poor results or wasted time.
Conclusion
Getting a smooth, durable finish matters for safety, appearance, and long life. Stay focused on proper materials, correct technique, and careful testing so you won’t waste time or money on fixes later.
Test a small patch to confirm adhesion and texture, then verify the substrate is sound and dry before committing to the full job. Use the right primer and roller for the surface, apply with steady, consistent pressure, and monitor drying conditions. Do a final check after curing to catch any issues early and correct them while the coating is still workable. Test a small patch and keep safety front and center throughout the process.
Common mistakes to avoid include using the wrong paint or roller for the substrate, skipping the test area, and overworking or underworking the texture. Don’t rush the setup or safety steps, ventilate well, wear proper protective gear, and keep ladders stable. If you encounter persistent texture or signs of flashing that you can’t safely resolve, it’s time to call a pro for a proper assessment and repair.
FAQ
Why does the roller texture sometimes show through the finish, even after multiple coats?
The texture can show if the paint or primer isn’t sealing the underlying substrate well. It can also happen if the roller marks were pressed too hard or if the coating isn’t compatible with the surface. Check the product labels and manufacturer instructions for recommended primers and roller naps.
What should I inspect on the surface before repainting to reduce texture visibility?
Make sure the surface is clean, dry, and free of loose material. Sand rough spots lightly to smooth the textures, then wipe away dust. Look for any failed patches and address them per product directions.
How can I choose the right roller and technique to minimize stipple?
Use a roller with a nap recommended for the coating and surface type. Roll with even, light pressure and avoid overworking the finish in one spot. If in doubt, follow the coating label’s guidance on roller type and technique.
What steps should I take if texture still shows after applying the first new coat?
Allow the coating to dry as directed, then assess. If texture remains, you may need a compatible primer or a second coat, applied with the proper technique. Verify compatibility and any recoat windows on the product label or instructions.