

Introduction
Skim coating over painted plaster requires testing adhesion first to know if the surface will hold the skim. Start by making sure the painted layer is sound, clean, and free of wax, flaking paint, or dust, and plan any necessary surface preparation before you proceed. This quick check helps you decide whether to go with the skim as-is or adjust the prep plan for better results.
Tools for testing adhesion are simple: a utility knife or scraper for a light scratch, and a stiff brush to probe the edge. Use a controlled scratch test on small, inconspicuous spots to see if the top coat and plaster move together, and note any loose fibers or powder. Signs of weak adhesion include peeling, flaking, powdering, or hollow sounds when you tap, so reassess prep or follow manufacturer instructions if you notice them.
Key takeaways
- Test a small patch to gauge adhesion before full skim coating.
- Gather tools: scraper, utility knife, adhesive tester, masking tape, brushes, and safety gear.
- Prepare painted plaster by cleaning, dusting, and leveling high spots with gentle sanding.
- Perform scratch test areas to reveal weak bonding or flaking under coating.
- Identify signs of weak adhesion: peeling edges, soft material, or powdering under skim.
- Follow corrective treatments based on results and respect manufacturer and code guidance.
Table of Contents
- Introduction
- Key takeaways
- Why Adhesion Testing Matters Before Skim Coating
- Tools and Materials Checklist for Adhesion Testing and Skim Coating
- Preparing Painted Plaster for Accurate Adhesion Testing
- Practical Adhesion Tests: Methods and How to Perform Them
- Preparing Corrective Treatments Based on Test Results
- Correct Skim-Coating Techniques for Painted Plaster
- Common Issues, Troubleshooting, and How to Fix Failures
- Safety Precautions and Dust Management During Testing and Skim Coating
- Conclusion
- FAQ
Why Adhesion Testing Matters Before Skim Coating
Adhesion testing is a prerequisite for skim coating on painted plaster because it helps predict where failure might occur. Skim coats can delaminate, crack, or show an uneven finish if the surface isn’t ready. Quick results from simple tests guide the prep steps you should take before you commit to coating.
The condition of the painted plaster—peeling, flaking, old paint layers, or signs of moisture—directly influences adhesion risk and how skimmable the surface will be. Visual cues and simple checks tell you whether cleaning, etching, or priming is needed, or whether the substrate may require a different approach. A practical decision flow helps you decide when to prep, replace, or proceed with caution based on test outcomes.
Consequences of poor adhesion
Skipping adhesion tests before skim coating can lead to costly failures. Here’s what happens:
Delamination: The new coat peels off in sheets, exposing the old paint and leaving you with more work than when you started.
Bubbling: Moisture trapped under the skim coat causes bubbles to form. These eventually burst, ruining your finish and creating an uneven surface.
Cracking: Stress from poor adhesion causes the skim coat to crack, making it look old and worn before its time.
When testing is essential vs. optional
Adhesion tests are not always necessary, but they’re crucial in certain situations:
Essential: Always test if you’re dealing with glossy paint, unknown paint types, old plaster, or previously patched areas. These surfaces can hide surprises that’ll cause your skim coat to fail.
Optional: You might get away without testing on fresh, flat-painted surfaces in good condition. But remember, it’s better to be safe than sorry – a quick test takes minutes and could save you hours of rework.
Tools and Materials Checklist for Adhesion Testing and Skim Coating
This section defines what success looks like for the adhesion test and for a small trial skim patch. You’ll know you’re on the right track when test results indicate a solid bond and a cohesive skim patch that mirrors the surface below.
Safety gear, workspace setup, and PPE are essential, along with a complete tools list for scoring, scraping, and applying patches. Gather skim coat materials, primers if recommended, patch material, attachment slurry, mixing cups, spreaders, tapes, and cleaning rags to keep the process orderly and contained.
Adhesion test-specific tools
Before you start any adhesion testing or skim coating work, make sure you have all the right tools and materials. This checklist will help you ensure you’re prepared.
- Adhesive Tape: Check tape’s adhesive strength and width (usually 2″ wide) to ensure it can effectively test adhesion. What goes wrong if you skip this: Insufficient adhesion testing may lead to premature failure of the skim coat.
- Scraper: Ensure your scraper is clean, sharp, and sturdy enough to remove the tape without damaging the surface. Check its blade length to match your test area.
- pH Test Kit: Verify kit’s accuracy by checking expiration date and performing a test on distilled water (should read 7).
- Small Grinder/Sanding Blocks: Inspect for proper functioning, check grit size (60-120) to avoid damaging the surface.
- Primer for Test Patches: Check primer’s compatibility with your substrate and skim coat material. Ensure it’s well-mixed and within its usable life.
Quick rule: Always test a small, hidden area first to ensure compatibility of materials and accuracy of tools.
Skim-coating materials and PPE
Before you start skim coating, make sure you have all the necessary materials and personal protective equipment (PPE) to ensure a smooth process and your safety.
- Joint Compound: Check label for type – lightweight or all-purpose. Ensure it’s suitable for your wall surface (drywall, plaster, etc.).
- Bonding Primer: Verify it’s compatible with your joint compound and wall surface. Read manufacturer instructions to ensure proper application.
- Mixing Tools: Inspect your mixing paddle and drill. Ensure they’re clean, in good condition, and the right size for your bucket.
- Trowels/Knives: Check trowel sizes – 6″ or 12″ for application, 10″ or 14″ for embedding. Knife should be sharp and suitable for cutting compound.
- Dust Mask: Ensure it’s rated for fine particles (e.g., N95). Check fit by wearing it and speaking – you shouldn’t hear your voice.
- Gloves: Inspect for tears or holes. They should be comfortable but durable enough to protect hands from compound and debris.
- Eye Protection: Goggles or safety glasses with side shields are essential. Check they fit well and provide adequate coverage.
- Drop Cloths/Tarp: Ensure they’re large enough to cover the area you’ll be working on, protecting floors from compound drips.
Quick rule: Always double-check your materials and PPE before starting. Skipping this can lead to poor results, wasted product, or safety hazards.
Preparing Painted Plaster for Accurate Adhesion Testing
Begin by assessing the painted plaster surface to gauge baseline adhesion risk. Look for paint type, gloss level, and any moisture or staining issues that could affect test results.
Cleaning removal work should thoroughly clear dust and grease, and any loose or peeling paint needs to come off. Lightly abrading glossy areas helps create a surface profile that reflects real skim coat adhesion conditions.
Surface cleaning and contamination checks
Start by removing any loose dirt, dust, or debris with a soft-bristle brush. Use a vacuum to ensure no residue remains.
For grease or nicotine stains, use a degreasing detergent. Apply it, let it sit for 10-15 minutes, then scrub gently and rinse clean. Always follow safety guidelines when using chemicals.
Mold can be present but not visible. If you suspect mold, use a black light to check. If found, treat with a mold-killing solution before proceeding.
Never mix cleaning products. Always test on a small area first to ensure no adverse reactions occur.
Identifying and treating problem paint types
Glossy paints can cause adhesion issues. Lightly sand glossy areas with fine-grit sandpaper to create a profile for better adhesion.
Oil-based paints require special attention. If testing shows poor adhesion, consider spot-priming these areas with an oil-based primer before skim coating.
Powdery or chalky paint indicates poor adhesion already. In this case, the entire surface should be sanded down to a stable layer and primed before proceeding.
Always test a small area first when treating problem paint types to ensure your method works as expected.
Practical Adhesion Tests: Methods and How to Perform Them
Each adhesion test has a purpose and informs whether you proceed with skim coating. Decide based on the test outcomes whether surface prep or alternative approaches are needed.
Prepare the test area with clean surfaces and appropriate temperature and humidity conditions before testing. Follow the steps for tape, scrape, primer-bond, and test skim patch methods, then interpret the results to guide your next moves.
Tape (adhesion) test procedure and interpretation
The tape test is a simple yet effective way to check adhesion. Use painter’s tape, at least 2″ wide.
1. Clean the surface. 2. Apply tape in a cross-hatch pattern, pressing firmly. 3. Let it sit for 30 minutes. 4. Pull off quickly at a 90° angle. If paint stays on, adhesion is good.
Pass: No paint removal. Fail: Significant paint lifting.
Scratch/scrape and pull tests
Scraping reveals substrate bond strength. Use a sharp tool, like a razor blade or scraper.
1. Score the surface lightly in a cross-hatch pattern. 2. Apply light pressure, pulling at a 45° angle. 3. Check for flaking or lifting.
Acceptable: Minimal flaking at scored lines. Unacceptable: Paint lifts off easily without scoring.
Test skim patch (best indicator)
A small skim patch is the best way to test adhesion and finish quality. Prepare a 6″ x 6″ area, clean and primed.
1. Apply skim coat as you would for full application. 2. Let it dry/cure according to product instructions (usually 24-72 hours).
3. Inspect for cracks, bubbles, or delamination. Gently press and tap the area to check adhesion.

Preparing Corrective Treatments Based on Test Results
Test results map to specific corrective actions such as sanding, re-keys, primers, or material removal. Use the outcomes to choose the right preparation path before applying a full skim coat.
Define clear surface prep requirements tied to each outcome, including achieving a dust-free surface, adequate mechanical key, and acceptable substrate condition. A practical treatment matrix helps you sequence steps and choose suitable products and safety practices.
When to Sand or Abrade versus Remove Paint
If your adhesion tests show poor key, but the surface is structurally sound, sanding might be enough. Use a fine-grit sandpaper (120-150) to degloss and create a mechanical key.
When to remove paint:
If you find hairline cracks, delamination, or the tape test fails, full removal is best. Paint can hide underlying issues. Use a paint remover or stripper for thorough cleaning.
Primer and Bonding Solutions: Selection and Application
Choose your primer based on the test results:
– Acrylic bonding primers: Good for most cases. They promote adhesion and seal the surface.
– PVA: Use if you’re applying a gypsum-based skim coat. It improves adhesion and prevents suction.
– Specialty adhesion promoters: Reserve these for tough cases, like when dealing with unknown or incompatible paints.
Apply primers using a paintbrush or roller, following the manufacturer’s instructions. Ensure even coverage and allow proper drying time before skim coating.
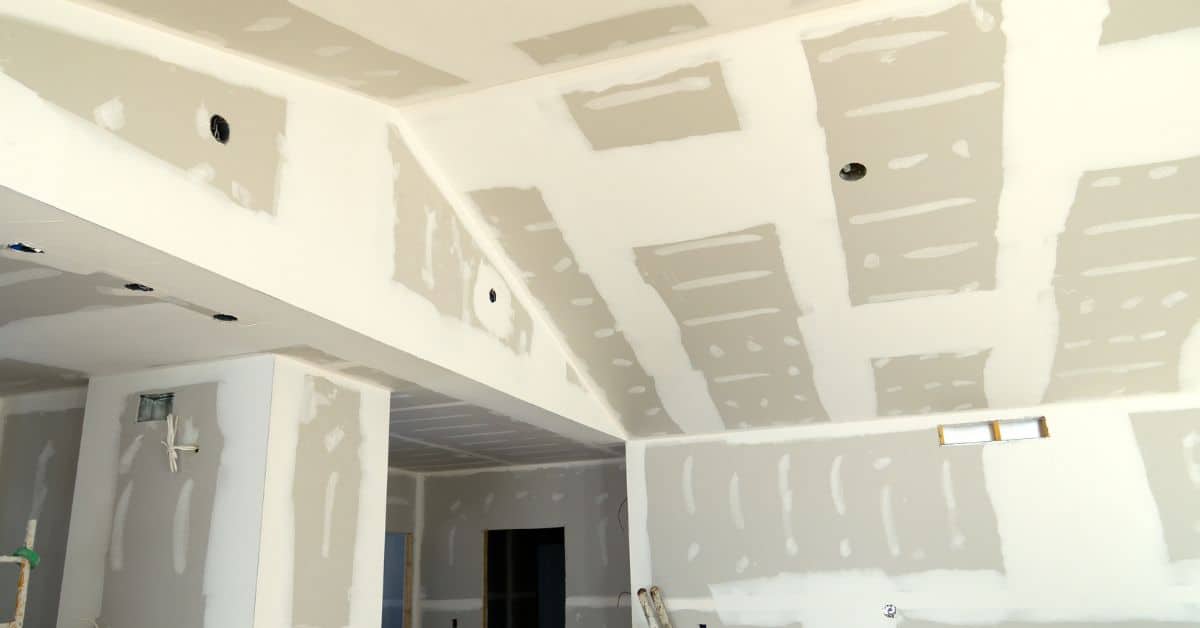
Correct Skim-Coating Techniques for Painted Plaster
Start with a recap of the surface readiness based on adhesion tests and paint removal as needed. Ensure the surface key is strong enough for the skim coat by using a bonding primer if required.
Mixing, consistency, and batch control are important for a smooth finish. Apply thin coats with the chosen tool, and plan for careful layering and edge handling to minimize marks and ridges.
Mixing, consistency, and trowel technique
The key to a successful skim coat lies in the mix. Use a Portland cement-based or polymer-modified mix for best results.
Mix water with your chosen compound at a ratio of 4:1 (water to powder). Stir until you achieve a smooth, lump-free consistency – like thick cream. Consistency is crucial; too thin and it won’t stick, too thick and it won’t spread.
Feather edges with a trowel to avoid ridges. Hold your trowel at a 45-degree angle for best results. This helps reduce shrinkage and lines on the final coat.
Layering and cure time management
Apply skim coats in thin layers – around 1-2mm thick per pass. Thinner coats dry faster, reduce shrinkage, and minimize the risk of cracking.
Allow each coat to dry completely before applying the next one. This usually takes about 24 hours but can vary depending on humidity and temperature. Sand lightly between coats with fine-grit sandpaper (120-150 grit) to remove any high spots or imperfections.
For edges and transitions, use a wider trowel to feather the skim coat into the existing surface. This helps avoid ridges and ensures a smooth finish.
Common Issues, Troubleshooting, and How to Fix Failures
Typical issues include blistering, cracking, visible seams, and peeling paint, which signal underlying problems that need addressing. Identify root causes quickly so you can target the right remedy.
Follow a practical troubleshooting workflow: ensure surface readiness, perform an adhesion check, manage moisture and temperature, and verify product compatibility. Use targeted fixes and retest as needed to confirm readiness for re-coating.
Diagnosing post-application failures
If you’re seeing issues after applying your skim coat, first check if it’s an adhesion problem. Use the adhesion tests you’ve learned earlier.
Moisture can cause blistering or cracking. Check for dampness behind the failed area. Efflorescence – those white salt deposits – might be a sign of moisture too.
Improper mixing or air bubbles can lead to pinholes and weak spots. Recheck your mixing techniques. Temperature and humidity swings can also cause problems, so keep an eye on those factors.
If it’s none of these, the substrate might be moving or settling. That’s a bigger issue that could need professional help.
Repair steps for failed areas
First, remove all failed skim coat material. Use a scraper or chisel to get it off cleanly.
Re-prepare the area. Clean, dry, and abrade the surface just like you did before your first application. Then, re-test adhesion using the methods you’ve learned.
Once you’re sure the surface is ready, apply a corrective treatment. This could be a bonding primer or a mist coat to improve adhesion. Follow the manufacturer’s instructions for these products.
After applying the corrective treatment, let it cure as directed. Then, re-skim the area, following your original skim coating techniques. Keep an eye on this area during curing and recoating to ensure no further issues arise.
Safety Precautions and Dust Management During Testing and Skim Coating
Health risks from dust, old paint, and contaminants rise with sanding and coating work. Understanding these risks helps you plan protective steps upfront.
Wear appropriate PPE and maintain good ventilation while containing and cleaning up dust. Use safe disposal practices for removed material and waste, and follow local guidelines for hazardous materials when present.
Lead Paint and Older Plaster Considerations
If your home was built before 1978, there’s a chance it contains lead paint. Do not assume your home is safe without testing.
Recognize possible lead paint by its peeling, chipping, or chalky appearance. Professionals should test and abate if present. Until then, keep the area clean and undisturbed to prevent dust.
Wear a P100 respirator when working around suspected lead paint. Wash hands and clothes separately after work. Follow local regulations for safe disposal of lead-contaminated materials.
Dust Control and Ventilation Strategies
Minimize airborne dust by wetting surfaces before sanding or grinding. Use a HEPA vacuum to clean up immediately after testing.
Create negative pressure in the work area using a fan facing outwards. This helps contain dust and prevents it from spreading to other parts of your home.
Never use regular vacuums, as they can’t filter out fine particles and may disperse them further.
Consider renting or purchasing a PAPR (Powered Air Purifying Respirator) for added protection when working with large areas or heavy dust generation.

Conclusion
You should move forward with confidence because a solid adhesion test protects your skin coat, your walls, and your budget. A careful, staged approach stops mistakes before they ruin the finish or trap you with costly repairs.
Check the area by verifying paint condition, mounting a small test patch, documenting the results, and then choosing a skim coat plan based on what the tests show. Start with a clean, dust-free spot, follow the test steps in order, measure adhesion where indicated, and only proceed to full skim coating after the test results are solid and repeatable. Protect your eyes, lungs, and surroundings, and work in a well‑ventilated space with dust control in place.
Avoid rushing the prep, skip on‑the‑fly shortcuts, and don’t skip safety gear or proper cleanup. Common mistakes are ignoring overly loose paint, skipping patch testing, and mismatching primer or skim coat preparations. Remember to keep test patches small, work in stages, and cleanly seal or dispose of waste. If tests show uncertain or weak adhesion, revisit surface preparation, choose a compatible corrective treatment, and don’t keep coating over a problem. If in doubt, or if the plaster is blocked by failure, call in a qualified professional to prevent damage and save time and money in the long run.
Proceed with the plan only when you’ve confirmed strong test results, and treat the project as a stepwise process you can stop and reassess at any point. Stay safety‑minded, document each step, and keep aiming for a durable, good looking finish that lasts.
FAQ
What surface prep steps help ensure reliable adhesion testing and skim coating?
Make sure the painted plaster surface is clean and free of loose chalk, grease, and dust. Lightly roughen glossy areas with a sanding pad and wipe with a damp rag before testing. If anything looks flaky, remove the loose material and re-clean before testing again.
What tools do I really need to perform adhesion testing?
Have a scraper, sharp utility knife, utility brushes, a stiff bristle brush, and a clean cloth. A putty knife or small trowel helps with patch work later. For the actual tests, use a simple scratch or peel method and document what happens.
How do I perform a basic scratch test to gauge adhesion?
Use a blunt but sharp-edged tool to lightly scratch the surface in a small area, watching how easily the skim coat would lift or crumble. If the top layer comes off with minimal effort and reveals the underlying paint, you likely have weak adhesion. If the coat stays put, you may have better adhesion but still check other spots.
How can I identify signs of weak adhesion and what should I do about patching?
Look for peeling edges, flaking, powdery dust, or sections that lift with simple touch. For patches, remove suspect areas, clean the exposed plaster, and apply a compatible bonding primer or bonding agent per manufacturer instructions before reapplying skim coat. If you’re unsure about compatibility, check the product label or datasheet for patching guidance.