

Introduction
Creating a two-tone concrete border involves careful planning and precise execution. Understanding the timeline is crucial for ensuring a successful outcome.
This guide walks you through each step, from preparation to sealing, with an emphasis on how long each task takes, helping you plan your project efficiently.
For the full guide, see How to Create a Two-Tone Concrete Border: Tape Lines, Saw Cuts, and Sealing Strategy.
The Complete Timeline: From Preparation to Finishing Touches
Creating a two-tone concrete border requires careful planning and precise execution. Understanding the timeline is crucial for ensuring a successful outcome. This guide walks you through each step, from preparation to sealing, with an emphasis on how long each task takes, helping you plan your project efficiently.
- Preparation (1-2 days): Cleaning, repairing cracks, and degreasing the concrete surface.
- Layout and Taping (30 minutes – 1 hour): Marking out the border lines and applying tape with sharp edges.
- Saw Cutting (2-4 hours): Making precise cuts along taped borders to separate colors without chipping. The timing of this step is critical, as it should be done when the surface is set but not fully cured.
- Color Application and Drying (1-3 days): Applying color treatments or stains, allowing them to cure according to manufacturer instructions.
- Removal and Replacement (Poured Border) (2-4 hours): If creating a contrasting border by removal and replacement, plan for slump, edge support, and matching entrance flushness.
- Sealing (1-3 days): Applying a sealer appropriate for your finish, following drying and application guidance on the product label. Ensure compatibility with two-tone finishes and reapplication cycles.
- Final Inspection and Finishing Touches (30 minutes – 1 hour): Checking your work, verifying layout marks are square, tape lines are firmly pressed, saw-cut depth and timing match, and addressing any troubleshooting issues.
Key takeaways
The preparation stage is crucial as it sets the foundation for the entire project. Taking the time to clean, repair, and degrease the concrete surface ensures that your two-tone border will look its best and last for years to come.
- Plan design: confirm border width, color contrast, and edge transitions before starting.
- Tape-line technique: apply painter’s tape with crisp edges across the saw line for clean separation.
- Saw-cut timing: wait until surface is set but not fully cured to avoid chipping.
- Removal-and-replacement: plan for slump, edge support, and matching entrance flushness.
- Sealing strategy: verify compatibility of sealer with two-tone finishes and reapplication cycles.
- Safety: wear eye protection, gloves, and watch for dust during grinding and cutting.
Table of Contents
- Introduction
- Key takeaways
- Project Planning and Design Choices
- Tools and Materials Checklist
- Surface Preparation and Layout Marking
- Tape-Line Techniques for Painted or Stained Two-Tone Borders
- Saw-Cut Strategy: Timing, Depth, and Pattern Planning
- Creating a Contrasting Border by Removal and Replacement (Poured Border)
- Sealing Strategy and Compatibility with Two-Tone Finishes
- Quality Checks, Troubleshooting, and Finishing Touches
- Conclusion
- FAQ
Project Planning and Design Choices
Deciding between staining, a colored overlay, or pouring a separate border begins with your performance goals and site constraints. Consider durability, how the border will be used, and whether the look needs to be integral or surface-applied.
Budget, existing slab condition, and available labor skills will steer the method you pick; some choices are cheaper up front but require more maintenance. Check product labels and manufacturer instructions for compatibility with your chosen technique and any substrate limitations.
Choosing the two-tone method (stain, overlay, or separate pour)
Each two-tone concrete border technique has its pros and cons. Let’s dive into each:
Staining is cost-effective and easy to apply. It’s great for existing driveways or patios where you want a quick update. However, it won’t change the texture of the surface and may not last as long as other methods.
Colored overlay provides a textured finish and better durability than stain. It’s ideal when you want to transform an old surface or create a new one with a consistent look. But, it’s more expensive and labor-intensive than staining.
Separate poured border offers the most durable option, perfect for high-traffic areas like driveways. It allows for different textures and colors but is the priciest and most time-consuming method.
Determining border width, pattern, and contrast level
The width of your border should complement the size of your space. For small areas, a narrow border works best (2-4 inches). Larger spaces can handle wider borders (6-12 inches).
Patterns can add visual interest. Consider geometric shapes, curves, or even inlays for a custom look.
Contrast is key to making your border pop. Dark surfaces need lighter borders; light surfaces need darker ones. But don’t go overboard – too much contrast can be jarring.
Permits, codes, and local climate considerations
Before you start, check with your local building department. Some areas require permits for concrete work.
Climate plays a big role in material choice. In cold regions, use freeze-thaw resistant materials. In sunny areas, consider UV-resistant options to prevent fading.
Also, think about drainage. Ensure water doesn’t pool on your new border – it can cause cracking over time.
Tools and Materials Checklist
Gather layout and measuring tools, quality tape and masking materials, and the consumables you’ll use for color application and sealing before you start. Include saw blades, cutting equipment, bonding agents, and suitable sealers along with safety gear.
Organize finishing tools such as trowels, edgers, floats, and applicator pads as optional items depending on the chosen finish. Verify equipment and material specs on product data sheets to match slab thickness and site conditions.
Cutting and edging tools
Before you start cutting or edging your concrete, make sure you have the right tools and safety gear. This checklist will help you verify everything you need.
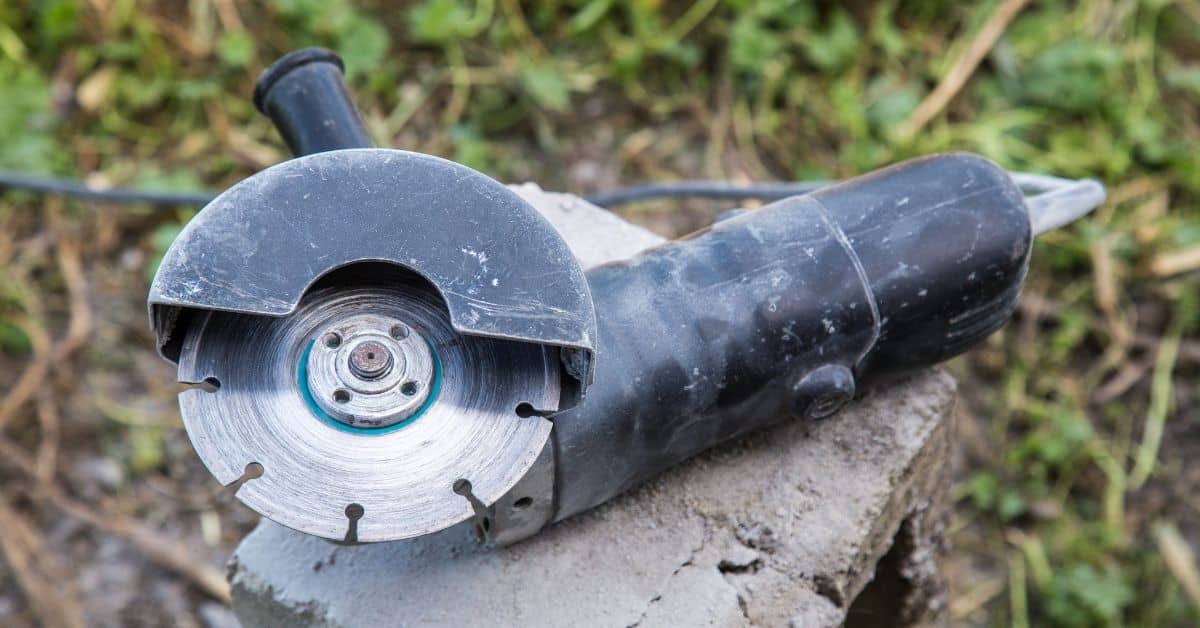
- Circular Saw: Check blade type (diamond or abrasive) and condition. Ensure it’s in good working order with no cracks or missing teeth.
- Blades: Verify they’re designed for concrete cutting, not metal or wood. Check the label to ensure they match your saw’s size and arbor hole.
- Wet Saw: If using, confirm it has a steady water supply to prevent dust and keep blade cool.
- Grinder: Ensure it’s a 4.5″ or 7″ angle grinder with diamond cup wheel for concrete grinding.
- Safety Glasses: Check they’re rated for impact protection (ANSI Z87.1+).
- Ear Protection: Ensure it’s suitable for the noise levels generated by your tools.
- Dust Mask or Respirator: Confirm it provides adequate protection against silica dust (N95 or P100 rating).
- Work Gloves: Check they provide a good grip and protect hands from cuts and vibrations.
Quick rule: Always wear all safety gear when cutting or grinding concrete to prevent injuries and exposure to harmful dust.
Taping, masking, and surface-prep supplies
Use this checklist before you start mixing concrete to ensure crisp lines, good adhesion, and a professional finish.
- Concrete tape (minimum 2-inch width): Check the tape’s grade on the label. Use a heavy-duty, all-weather tape for long-lasting results.
- Masking film: Ensure it’s low-tack to prevent damaging the surface when removed. Check if it’s suitable for concrete use.
- Concrete cleaner: Verify it’s a degreaser and removes all dirt, grease, and efflorescence from the surface.
- Concrete etchant (optional): If using, ensure it’s a mild acid-based etchant to improve adhesion without damaging the surface. Check local rules for disposal.
- Scrub brush or broom: Ensure it’s stiff enough to clean the surface effectively but not so hard that it damages the concrete.
- Sponge or squeegee: For applying cleaner and etchant evenly. Check if it’s suitable for the chosen chemicals.
- Measuring tape: To ensure straight lines and even spacing of control joints.
- Pencil: For marking lines before taping.
Quick rule: Always clean, dry, and prep the surface before applying tape. Skipping this step can lead to tape lifting, poor adhesion, and a messy finish.
Colorants, patching compounds, and sealers
Use this checklist before starting any coloration or sealing work on your concrete. It’ll help you ensure you’ve got the right materials and that they’re in good condition.
- Check colorant type: Confirm if you’re using acrylic stains, oxide pigments, or overlays. Each has different application methods and effects.
- Verify color match: Always check the color against your sample or desired shade. Hold it up to natural light for an accurate comparison.
- Inspect patching compound: Ensure it’s suitable for your repair type (e.g., hairline cracks, spalls). Check its consistency; it should be smooth and lump-free.
- Check sealer category: Consider film-forming or penetrative sealers. Film-forming provides a surface layer, while penetrative soaks into the concrete.
- Confirm sealer type: Within these categories, check if it’s water-based, solvent-based, or oil-based. Each has different application and drying times.
- Check sealers’ compatibility: Ensure your chosen sealer is compatible with your colorant and patching compound to avoid adverse reactions.
- Inspect packaging: Check for any damage or leaks. Also, ensure the product hasn’t exceeded its shelf life as it may not perform optimally.
- Check application temperatures: Most products have ideal temperature ranges for application. Check your specific products’ labels to avoid applying in extreme conditions.
Quick rule: Always follow manufacturer instructions and local rules. They know their product best, and local codes ensure safety and compliance.
Surface Preparation and Layout Marking
Thorough cleaning and repairing hairline cracks or spalls is essential before any taping, cutting, or color work to ensure adhesion and a clean edge. Remove contaminants, loose material, and previous sealers that can interfere with new products.
Mark the layout lines precisely with durable markers, chalk, or layout paint and confirm dimensions at multiple points to avoid cumulative error. If a manufacturer provides substrate prep instructions, follow those for adhesion and longevity.
Cleaning, crack repair, and leveling
Start by removing any dirt, debris, or contaminants from the concrete surface. A stiff-bristled broom and a pressure washer can help with this.
Active cracks should be filled using an appropriate patching compound. For dormant cracks, use a flexible sealant to prevent water intrusion.
Test the surface for levelness. Use a 4-foot straight edge and a level to ensure consistency. If necessary, apply a self-leveling compound to achieve a smooth finish.
Establishing control lines and reference points
Begin by snapping chalk lines along the edges of your border. This will serve as a guide for your saw cuts.
Transfer dimensions from your layout plan to the concrete using a measuring tape and a pencil. Mark endpoints clearly.
Use a laser level or a string line to ensure your lines are straight and true. Double-check your measurements to avoid mistakes.
Visual checkpoints and mock-up area
Before you start taping and cutting, create a small mock-up of your border in an inconspicuous area. This will allow you to verify color contrast and edge detail.
- Test stain colors: Apply both colors side by side to ensure they provide the desired contrast.
- Check tape adhesion: Ensure the tape adheres well to the surface to prevent bleed-under.
- Verify edge detail: Make sure your saw cuts are clean and straight.
- Confirm border width: Measure twice to ensure you’re happy with the size of your border.
- Test sealant application: Apply a test patch of sealer to check for any adverse reactions with your chosen stain or overlay.
- Check for pitting or discoloration: Ensure there are no unexpected results from your chosen methods.
- Examine edge definition: Make sure the border stands out clearly against the main slab.
- Review overall aesthetic: Step back and assess if the mock-up meets your expectations.
Quick rule: If something doesn’t look right in the mock-up, don’t be afraid to adjust your plan before committing to the full border.
Tape-Line Techniques for Painted or Stained Two-Tone Borders
Proper tape-line work starts with a clean, dry surface and the right tape compatible with the paint or stain you’ll use; adhesion and edge-sealing are the keys to crisp lines. Press the tape down firmly and consider a skim coat or primer at the edge for very porous surfaces.
Mask progressively and remove tape at the recommended time per product guidance to prevent pulling fresh color. When in doubt, check the product label for dwell times and adhesion notes to avoid lift or bleed.
Tape selection and adhesion strategies
Choosing the right tape is crucial for a crisp two-tone border. Use painter’s tape with a strong adhesive, suitable for your surface texture.
Check solvent compatibility to prevent reactions with your sealer or stain. For textured surfaces, use a low-tack tape to avoid pulling off tiny particles when removed.
To prevent bleed-under, press down firmly along the tape’s edge using a putty knife or finger. This ensures good adhesion and seals out liquids.
Edge burnishing and feathering methods
Press down firmly along the tape’s edge to burnish it, ensuring good adhesion and preventing bleed.
For a clean split, use a thin primer or feathered transition. Apply a light coat of primer along the tape’s edge, blending it outwards. This helps seal the surface and reduces paint/stain seepage.
Alternatively, you can feather your stain or paint application by diluting the colorant with water or reducer at the edges, creating a soft transition between the two tones.
Removing tape and touch-up protocol
Wait until your paint or stain is fully cured before removing the tape. This usually takes 24-48 hours, but check your product’s drying time.
Gently pull the tape off at a 45-degree angle to avoid pulling off any dried paint or stain. If you encounter resistance, use a razor blade to score along the edge and lift it off.
Perform precise touch-ups using a small artist’s brush or toothpick. Dip into your colorant and gently fill in any gaps or imperfections left by tape removal. Allow the touch-up to dry, then apply a sealant if desired.
Saw-Cut Strategy: Timing, Depth, and Pattern Planning
Plan saw cuts based on whether they are control joints or decorative edges, and schedule cutting at the proper slab age—verify timing with manufacturer instructions or local practices. Choose blade type for the material and finish you need, and keep a consistent depth relative to slab thickness.
Lay out patterns first to ensure cuts complement the two-tone border and existing joints; use a guide or straightedge for accuracy. If you’re unsure of blade selection or cutting depth, consult blade specifications and cutting guides.
Control joints vs. decorative saw reliefs
Alright, listen up. We’ve got two types of cuts here – control joints and decorative saw reliefs. Both serve different purposes, so let’s get ’em straight.
Control Joints – These are your structural cuts. They’re made to control where the concrete cracks naturally. You want these when you’ve got a big pour or an expansive slab. Timing’s crucial here; make ’em before the concrete starts setting, around 2-4 hours after pouring.
Decorative Saw Reliefs – Now, these are just for looks. They give your flatwork some character, break up those big slabs into smaller, more manageable sections. You can make these later, once the concrete’s gained some strength, around 12-24 hours after pouring.
Saw timing and sequencing
Timing your saw cuts right is crucial to keep your concrete looking good and lasting long. Here’s what you need to do:
Wait for the right time. Saw too early, and you’ll have weak edges that can crumble or spall. Too late, and you might crack your concrete. Check your mix design and local conditions, but typically saw when the surface is firm, usually around 24-72 hours after pouring.
Here’s a simple sequence to follow:
- Let your slab cure for at least 24 hours. This gives it time to set and gain some strength.
- Check the surface. It should be firm, not soft or mushy. If you’re unsure, try the “thumb test” – press your thumb into the concrete; if it leaves a clear imprint, wait longer.
- Once the surface is ready, go ahead and make your saw cuts. Remember to keep them straight and deep enough (usually about 1/4 to 3/8 inch) to control cracking.
Cutting depth, blade choice, and straightness techniques
The first thing you need to check is your slab’s thickness. It’s usually around 4″ for driveways and patios, but verify it before you start. Now, let’s talk about cutting depth.
You want to cut about 1/3 to 1/2 of the slab’s depth. So, if your slab is 4″, aim for a cut that’s around 1.5″ to 2″ deep. This gives you room for reinforcement and keeps your cuts from being too weak.
Next up, blade choice. You’ll need a diamond blade designed for concrete. Check the label – it should say ‘dry’ or ‘wet/dry’. Wet blades last longer and reduce dust. Now, pick one that’s thick enough for your cut depth. A good range is 1/8″ to 3/16″.
Finally, straightness. You’ve got a few options here. Some folks use 2x4s as guides, but I prefer aluminum rails. They’re more accurate and don’t warp like wood. Whatever you choose, make sure it’s long enough to span your cut. And remember, keep your saw level. No tilting – that’ll mess up your cuts.
Creating a Contrasting Border by Removal and Replacement (Poured Border)
Cutting out an edge strip and pouring a contrasting border requires clean saw-cut edges, solid edge forms, and a bonding strategy between old and new concrete. Prepare the substrate by cleaning and roughening the existing edge and apply the appropriate bonding agent per its instructions.
Build forms to the final profile and pour with consistent consolidation and finishing that ties into the adjacent slab. Check manufacturer directions for curing and any additives before mixing and placing new concrete.
Preparing cut edge and bonding to existing slab
First, clean the cut edge of your existing concrete. Use a wire brush or grinder to roughen up the face, removing any smooth layer that could hinder bonding.
Keying is crucial here. You want to create a mechanical bond between the old and new concrete. A rough surface provides more area for the new concrete to grip onto.
Next, apply a bonding agent like an epoxy primer or a latex-fortified acrylic adhesive. This will help the new border stick to the existing slab, preventing delamination. Follow the manufacturer’s instructions for application and drying times.
Mix selection and color integration
Choose a concrete mix that matches or complements your existing slab’s strength. You don’t want the border to be weaker than the main slab.
For color, you have two options: use a colored mix or add pigment to your gray mix. If using a colored mix, ensure it’s compatible with your existing slab. For pigments, start with small amounts and adjust until you get the desired shade.
Consistency is key. Make sure your new border matches the main slab in texture and finish. Use the same aggregate size and type as your original pour.
Finishing and texturing the new border
Timing is everything when it comes to finishing concrete. Start by troweling the surface smooth as soon as it’s firm enough to walk on, usually within 15-30 minutes of pouring.
For a broom finish, use a stiff-bristled broom and sweep in one direction while the concrete is still plastic. For patterns, use stamps or textured mats immediately after troweling.
Remember, your border should either match or intentionally contrast with the main slab. If you’re unsure, create a mock-up area first to test different finishes.
Sealing Strategy and Compatibility with Two-Tone Finishes
Choose between penetrating and film-forming sealers based on how they interact with color and the sheen you want; film-formers often change surface appearance more than penetrants. Consider exposure, slip resistance, and maintenance when selecting sealer type and gloss level.
Test the sealer in an inconspicuous area to verify compatibility and final appearance with both the base slab and border material. Follow manufacturer instructions for application conditions and recoat windows to ensure proper performance.
Choosing the right sealer and sheen
When it comes to sealing your two-tone concrete border, you’ve got options. Let’s break down three common types:
Penetrating sealers, like silane or siloxane, soak into the concrete. They don’t change the color much but can enhance saturation. They’re slippery when wet, though.
Acrylic sealers sit on top of the surface. They offer some color enhancement and are less slippery than penetrating types. But they may yellow over time.
Polyurethane or epoxy sealers provide high gloss and durability. They can darken colors and show imperfections, so use them wisely.
Application methods and environmental constraints
Applying sealers isn’t rocket science. Here’s how:
Use a roller, sprayer, or squeegee. Each has its pros, so choose based on your border size and complexity.
Check the temp: Sealers need 50-90°F (10-32°C) to cure right. Too cold, they won’t dry. Too hot, they’ll dry too fast.
Watch the humidity: Low humidity can cause sealers to dry too quickly and leave a white residue. High humidity slows drying but usually doesn’t cause issues.
Curing times, recoat windows, and long-term maintenance
Sealers need time to cure. Here’s what to expect:
Light use after 24 hours. But wait 7 days before heavy traffic or exposure to water.
Re-coating: Apply additional coats within the manufacturer’s recommended window, usually 1-3 days apart.
Maintenance: Inspect your border annually. Clean off dirt and debris with a mild detergent. Touch up any damaged areas as needed.
Quality Checks, Troubleshooting, and Finishing Touches
Inspect for common problems like color bleed, spalling along edges, uneven color absorption, and joint failures, and document where they occur to plan fixes. Use diagnostic checks such as adhesion tests and close visual inspections to pinpoint causes.
Remedies may include localized grinding, patching, resealing, or re-masking and repainting; choose the least invasive fix that restores appearance and performance. For final touches, consider edge treatments, expansion joint caps, or accent grooves that enhance the two-tone effect without compromising function.
Visual checkpoints for assessing line crispness and color uniformity
Before applying the sealer, use this checklist to ensure your two-tone border looks sharp and uniform.
- Edge Sharpness: Check if the saw cuts are clean. Chipped edges can ruin the look.
- Color Transition: Ensure there’s no bleeding or mixing of colors at the border line. This could happen due to improper taping or uneven pouring.
- Surface Defects: Look for any cracks, holes, or other imperfections that might have formed during curing.
- Tape Residue: Make sure all tape is removed and no residue remains. This can affect the final finish.
- Uneven Color: Check if the color is consistent throughout both tones. Inconsistencies may indicate improper mixing or application.
- Joint Spacing: Ensure joints are evenly spaced to prevent cracking due to slab movement.
- Saw Cut Depth: Verify that saw cuts are deep enough to create a clear distinction between the two tones. Insufficient depth can lead to a blurred line.
- Sealer Compatibility: Confirm that your chosen sealer is compatible with both concrete colors and types.
Quick rule: A thorough visual inspection before sealing ensures your two-tone border looks its best for years to come.
Common problems and corrective actions
Here are some common issues you might encounter and their solutions:
Tape Bleed: If the tape bled color into your concrete, you can try to remove it with a scraper or light sanding before sealing. For severe cases, consider stripping off the top layer of concrete and reapplying.
Saw-Chipped Edges: To fix chipped edges, use a concrete repair kit to fill in the gaps. Allow it to cure, then lightly sand and clean the area before sealing.
Sealer Incompatibility: If your sealer isn’t compatible with one of the colors, you may see discoloration or poor adhesion. The best fix is to remove the old sealer (using a suitable stripper) and apply a new, compatible product.
Joint Failure: If joints are cracking or not performing as expected, consider installing joint covers or using a more flexible sealer to accommodate slab movement.
Protective details and long-term care tips
To maintain your two-tone border’s appearance and longevity, consider these protective measures:
Joint Covers: Install joint covers to protect joints from debris and water intrusion. This helps prevent cracking and maintains the clean look of your border.
Bead Installation: Apply a bead of sealer along the edge of your border where it meets the existing slab. This creates an extra barrier against moisture and prevents delamination.
Periodic Resealing: Every 3-5 years, inspect your border for signs of wear or damage. If necessary, strip off the old sealer (using a suitable stripper), clean the surface, and apply a new coat to maintain protection and enhance appearance.
Regular Cleaning: Keep your border clean by sweeping away debris and hosing it down periodically. This helps prevent staining and maintains the two-tone contrast.
Conclusion
Finish strong by sticking to a plan that prioritizes safety, durability, and a clean, professional look. The two-tone border should read as intentional design, not a rushed patch, so protect nearby surfaces and test your methods on a small area before committing to the whole run.
Check your work as you go: verify layout marks are square, tape lines are firmly pressed, saw-cut depth and timing match your plan, and the sealing compatibility is tested with a sample so you know the finish will hold. Move in a logical sequence: finalize design and measurements, prepare and mark carefully, apply tape or carve the border, perform the saw-cut or removal/replacement as planned, then seal and cure. If any step feels uncertain, pause and recheck the plan before proceeding.
Common mistakes to avoid include rushing the layout or tape work, skipping a small-area test, and applying sealer over incompatible finishes. Always keep surfaces clean, use the right protective gear, and follow manufacturer guidance for cleaners and sealers. Remember: Safety first, test small areas, and measure twice, cut once.
If the border involves complex patterns, large pours, or uncertain substrate conditions, don’t push past what you can confidently handle. A pro can save time, costs, and rework by ensuring the plan is sound and the materials perform as intended. Stay patient, stay methodical, and you’ll finish with a border that looks sharp and lasts. You’ve got this—take the next practical step and keep the project moving forward.
FAQ
What should I check before choosing tape-line vs saw-cut for the two-tone border?
Choose based on the look you want and how clean the edge must be. Check the manufacturer instructions for any limits on depth, resin mix, and curing stage before you cut or tape. If in doubt, ask the product label or local supplier for the right guidance.
What if the two tones start to bleed or feather before sealing?
Stop and wait for the surface to be ready as the sealer and topcoat require proper curing. Make sure the area is clean, dry, and free of dust, then touch up with appropriate masking and compatible sealer after confirming manufacturer guidance. If needed, reseal only after the border has fully cured per product instructions.
How can I keep the edge sharp when removing tape or finishing a poured border?
Press the tape down firmly to prevent bleed. Peel the tape back slowly, at a shallow angle, after the sealer or coating has set but before full cure if allowed by the product. If the edge looks rounded, plan a light touch-up with the proper applicator and compatible product following label directions.
What maintenance or touch-ups are acceptable after the border is sealed?
Clean with products recommended by the sealer maker. For minor chips or wear, use a compatible patch or apply a small amount of sealant in the affected spot, following the manufacturer’s instructions. Always verify compatibility with the two-tone finishes and re-seal as required.