
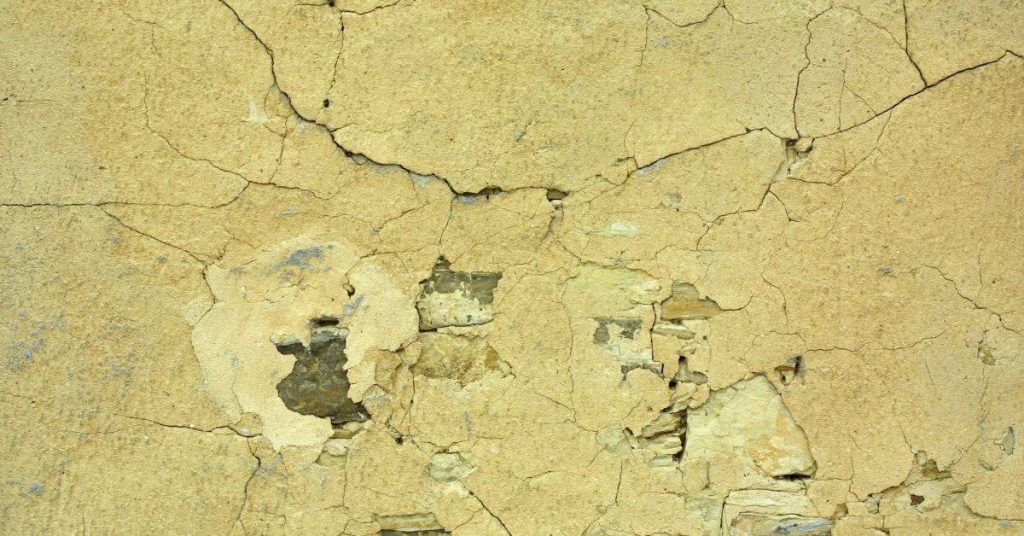
Introduction
Embarking on a concrete patching project? Understanding the timeline is crucial to ensure your repair lasts. This guide walks you through each step, from preparation to final curing, so you can complete your thin-layer patching job efficiently and effectively.
Before you start, set aside enough time for each phase. Rushing through steps can lead to poor bonding, cracking, or other issues that compromise the longevity of your repair.
For the full guide, see Concrete Patching in Thin Layers: Polymer Mods, Lift Limits, and Curing Between Coats.
The Concrete Patching Timeline: From Prep to Finish
Concrete patching in thin layers follows a specific timeline to ensure each lift bonds properly and develops sufficient strength before the next layer is applied. Here’s a step-by-step breakdown of the process, including approximate time frames for each stage:
- Substrate Assessment & Surface Preparation (1-2 hours): Inspect the substrate for soundness, remove any loose material, and roughen the surface to enhance bonding.
- Mixing Materials (30 minutes – 1 hour): Follow manufacturer instructions to mix your polymer-modified mortar. Ensure you have enough material for each lift, mixing small batches at a time to avoid differential setting.
- Application (1-2 hours per lift): Apply the patch material in thin lifts, typically no more than ¼ inch thick. Use a trowel or other appropriate tool to spread and level the material, feathering edges to blend with the existing surface.
- Curing Between Coats (1-7 days per lift): Allow each lift to cure according to the manufacturer’s recommendations before applying the next layer. This time frame can vary depending on temperature, humidity, and other factors.
- Final Curing (7-28 days): After the final lift has been applied, allow it to cure completely following the manufacturer’s guidelines. This step is crucial for developing the patch’s full strength and durability.
By following this timeline and dedicating sufficient time to each stage, you’ll create a strong, lasting repair that blends seamlessly with your existing concrete surface.
Key takeaways
The preparation phase significantly impacts the overall timeline. Taking the time to properly assess and prepare the substrate ensures better bonding and reduces the risk of delamination, which could add additional steps and time to your project down the line.
- Thin-layer patches require proper substrate prep and clean, dust-free surfaces.
- Polymer modifiers alter work time, slump, and adhesion, altering patch behavior.
- Assess substrate integrity and moisture before any thin-layer patching.
- Mix batches to small, workable portions to avoid differential setting.
- Plan lift limits and feather edges to blend without ridges.
- Cure between coats per label; keep moisture away and wear PPE.
- Check flatness, embed air voids, and verify cure by visual indicators.
Table of Contents
- Introduction
- Key takeaways
- Why Thin-Layer Patching Is a Distinct Technique
- Polymer Modifications: Types, Benefits, and How They Change Behavior
- Substrate Assessment and Surface Preparation for Thin Layers
- Mixing and Application Techniques for Thin-Layer Patches
- Lift Limits, Layering Strategy, and When to Build up Vs Feather
- Curing and Recoat Strategy Between Coats
- Quality Checkpoints, Testing, and Visual Indicators of Success or Failure
- Tools, Materials Checklist, Specs Explained, and Safety Notes
- Conclusion
- FAQ
Why Thin-Layer Patching Is a Distinct Technique
Thin-layer patching focuses on restoring surface soundness and profile without replacing large volumes of concrete, so the goals and constraints differ from deep-fill or full-depth repairs.
Use thin lifts when the substrate is structurally sound and the defect is shallow; for larger loss, verify manufacturer guidance and consider deep-fill techniques, removal, or substrate repair before proceeding.
Performance objectives and expected longevity
Thin-layer patching aims to restore functionality, not just appearance. Expect these goals:
Bond: Thin layers bond well to existing concrete. They fill minor cracks, preventing water intrusion.
Wear resistance: While thin, they’re tough. Expect 5-10 years of service life in moderate traffic areas.
Crack control: They don’t control major cracks. Use for hairline cracks and small spalls.
Common use cases and failure modes
Thin-layer patching shines in these scenarios:
Surface repairs: Fixing minor damage, like small cracks or spalls.
Ramps & overlays: Improving surface texture for better traction. Expect 3-5 years in high-traffic areas.
Failure modes to watch out for:
Moisture: Prolonged exposure can weaken the patch.
Inadequate preparation: Poor cleaning, priming, or bonding leads to delamination.
Overloading: Thin layers aren’t meant for heavy loads. Avoid using in high-stress areas without proper design.
Polymer Modifications: Types, Benefits, and How They Change Behavior
Polymer modifiers such as latex, acrylic, and styrene-butadiene are added to cementitious mixes to improve adhesion, flexibility, and water resistance; each class behaves differently in adhesion and shrinkage control.
Check the product data sheet or label for the specific modifier used and follow manufacturer instructions, because dosing and handling determine how much flexibility and reduction in cracking you’ll actually get.
How polymers are used (liquid admixtures vs preblends)
Polymers can be added to your concrete mix in two main ways: as liquid admixtures or preblended with cement. Both methods have their pros and cons, affecting workability and strength.
Liquid Admixtures: These are added during mixing, allowing for better control over the amount used. They can improve workability, but too much may reduce strength. Overuse is common among DIYers.
Preblended Polymers: These come pre-mixed with cement, ensuring the right ratio. However, you can’t adjust the polymer content once mixed. Preblends offer consistent results but may be less flexible.
What to check on product datasheets
Before buying, review these key specs on the product datasheet to ensure you’re getting the right polymer for your job.
- Polymer Dosage: Check recommended options (e.g., 5%, 10%) and choose based on patch thickness and needed performance.
- Mixing Ratios: Ensure the product’s mixing ratio aligns with your cement and water amounts to avoid strength issues.
- Performance Claims: Compare stated improvements in adhesion, flexibility, etc., to match your needs.
- Curing Time: Check if it matches your schedule. Some polymers require longer curing times.
- Compatibility: Ensure the polymer is compatible with other mix components (e.g., aggregates) to prevent failures.
- Shelf Life: Confirm the product’s shelf life, especially for preblends, to avoid wasted materials.
- Handling and Storage: Check storage conditions and safety precautions before purchase.
- Technical Data Sheet (TDS) & Safety Data Sheet (SDS): Always review these for detailed information and safety guidelines.
Quick rule: Always compare multiple products’ datasheets to find the best fit for your specific job.
Substrate Assessment and Surface Preparation for Thin Layers
Inspect the slab for delamination, rust, contamination, oil, and loose material; sound substrate and proper roughness are essential for a thin-layer bond to work.
Preparation generally includes removing contaminants, achieving profile by mechanical methods, and pre-wetting or priming as the product instructions require—confirm the method on the product label or technical literature.
Visual and simple mechanical checks before repair
The first step is to check the soundness of your concrete. Grab a hammer, it’s time for some quick tests.
Hammer sounding: Tap on the concrete with your hammer. Listen for a clear, solid ‘clang’. If it sounds dull or hollow, you’ve got unsound concrete.
Visual delamination signs: Look for any flaking, peeling, or powdering. These are signs of weak bond between layers.
Pull or scrape tests: Use a chisel to scrape the surface. If chunks come off easily, your concrete is too weak for thin-layer patching.
Cleaning and profiling techniques
Before you start patching, you need a clean, rough surface. Here’s how to prep it right.
Pressure washing: For light dirt and stains, use a pressure washer with a wide-angle nozzle (40°). Keep the nozzle moving to avoid damaging the concrete.
Mechanical grinding: For tougher jobs, rent a mechanical grinder. It’ll remove old paint, glue, or other contaminants. Go slow and steady, following the contour of the surface.
Shotblasting: This is for pros only. It’s aggressive but effective in removing laitance (that weak top layer) and preparing the surface for thin-layer patching.
The rougher your profile, the better the bond between old and new concrete. But be careful – too aggressive a profile can lead to delamination if you’re applying very thin layers.
Mixing and Application Techniques for Thin-Layer Patches
Mix to a lump-free, user-friendly consistency that will stick to the wall without sagging; use the blend and water limits shown on the bag or data sheet to avoid overwatering and reduced strength.
Apply with a steel trowel or grout bag in thin, even passes, pressing to achieve contact and working out air; follow the manufacturer’s placement guidance for best bond and minimum shrinkage.
Proper mixing sequence and consistency cues
First off, grab your cement, sand, and aggregate. The mix ratio’s usually around 1:2:4 or 1:3:5 by volume. But remember, check the product label for specifics.
Now, dump these into a clean mixing tub or wheelbarrow. Start with the dry materials first – cement, then sand, and finally aggregate. This way you won’t have any clumps of pure cement causing trouble later on.
Next up, it’s time for water. But hold your horses! Don’t just pour it all in at once. Start slow, add a bit, mix it in, then check the consistency. You’re aiming for a smooth, workable paste – not too wet, not too dry.
If you’re using polymer modifiers to boost strength and flexibility, now’s the time to incorporate them. Follow the manufacturer’s instructions on how much to add. Once added, mix it in thoroughly until it’s evenly distributed throughout the patch material.
The consistency should be like peanut butter – easy to spread but not runny. If it’s too dry, add more water a little at a time. Too wet? Add some dry materials and mix well. Keep checking and adjusting until you get it right.
Tools and trowel techniques for thin coats
First, gather your tools: a straight edge trowel (3/8″ to 1/2″ wide), a magnesium or aluminum float (4′ to 6′ long), and optionally, a squeegee for large areas. Check your product label for recommended tool types.
Now, let’s apply that mixed patch material:
- Start with a thin layer: Aim for 1/8″ to 3/16″. Any thicker and you risk cracking or delamination.
- Use the straight edge trowel to spread the mix evenly, working it into any low spots. Check base compaction before applying; patch won’t stick to loose material.
- Next, use the float to smooth and consolidate the patch. Hold it at a 45° angle, moving it in long, steady strokes. This helps remove air pockets and ensures even thickness.
- For large areas, follow up with a squeegee to ensure a consistent, thin layer. Again, check your product label for specific recommendations.
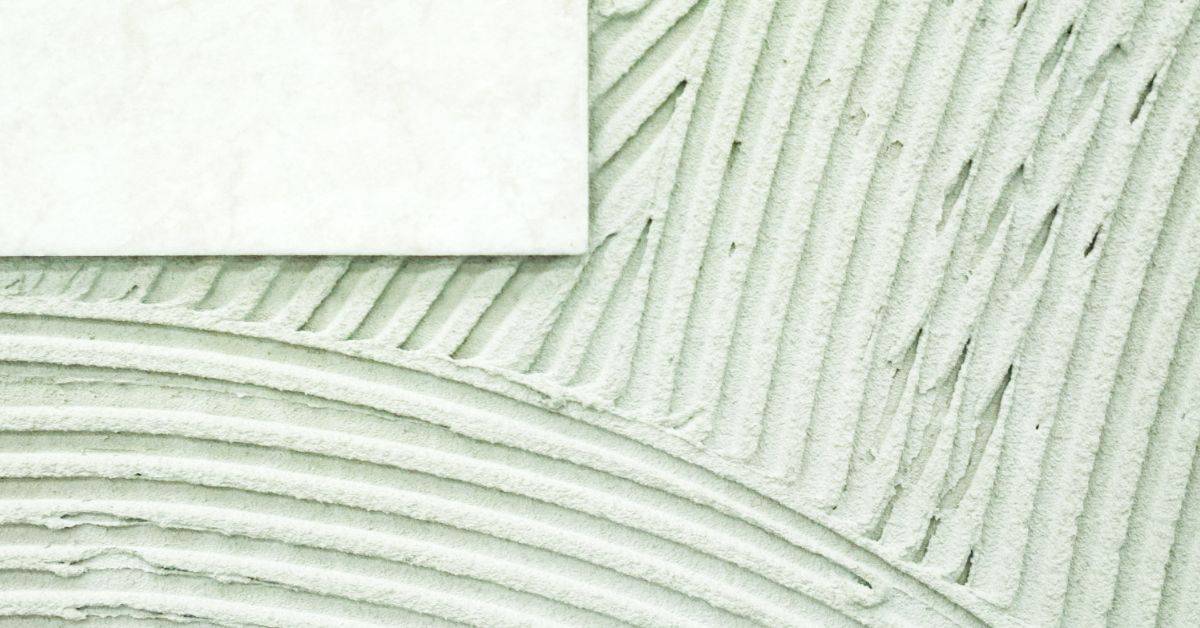
Lift Limits, Layering Strategy, and When to Build up Vs Feather
Lift limits are set by the material maker and refer to the maximum thickness per pass that will cure properly and avoid sag or excessive shrinkage; always verify that limit on the technical data sheet.
Plan multiple lifts when the total depth exceeds that limit, feather to adjacent surfaces only when the product permits, and choose a different repair approach if structural depth or reinforcement exposure requires full-depth work.
Principles for deciding layer thickness and number of lifts
The key to successful thin-layer patching is understanding that each lift should be as thick as a credit card, around 1/8″ to 1/4″.
Remember, adhesion is crucial. Thinner layers stick better than thicker ones.
Also, control heat and curing time. Too much heat too fast can crack your patch. Follow the product TDS for cure times.
Use mechanical keys like profiling or sandblasting to improve adhesion. But don’t go overboard; you want a slight profile, not a deep one.
Techniques for transitioning to thicker patches safely
When going from thin layers to thicker patches, don’t just guess. Here are some methods:
Forming: Use formwork to control the shape and size of your patch.
Use aggregate-filled mortars. They’re stronger and less likely to crack than plain cement mixes.
Consider a staged build. Start thin, let it cure, then add more layers until you reach your desired thickness.
Curing and Recoat Strategy Between Coats
Curing controls final properties in thin polymer-modified patches, so use the curing method recommended by the manufacturer—wet cure, membrane, or controlled drying—based on the product guidance.
Look for visual and tactile indicators (surface set, lack of tackiness) and follow the listed recoat window on the product data sheet; if unsure, check the label or contact the maker before overcoating.
How to judge readiness for next coat without relying on set times
Set times are a good starting point, but they’re not foolproof. Here’s how to check if your patch is truly ready:
Tack level: Gently press a clean trowel onto the surface. If it sticks slightly and pulls away cleanly, it’s at the right tackiness for recoating.
Moisture content: Use a simple moisture meter or check visually – if the surface is dry to touch but still has some sheen, it’s ready. Always verify with your product’s datasheet.
Also look for visual cues: No cracks, no powdering off, and a consistent color indicate a sound patch ready for recoating.
Methods to ensure intercoat bond (mechanical and chemical)
Strong interlayer adhesion is key. Here are methods to promote it:
Bond/slurry coats: Apply a thin, rich-in-cement coat before the next lift. This provides extra cement for bonding.
Primers: Use specifically designed primers that create a chemical bond with your patch material. Follow manufacturer’s instructions.
Mechanical roughening: For thicker layers or poor adhesion, lightly roughen the surface with a brush or broom before recoating. This increases surface area for better mechanical bonding.
Quality Checkpoints, Testing, and Visual Indicators of Success or Failure
Run simple checks like surface hardness, bond pull tests if available, and visual inspection for cracks, blistering, or discoloration to confirm a successful repair.
If you observe delamination, rapid shrinkage cracking, or poor adhesion, stop and review substrate prep, mix, and cure steps against the product instructions and consider removing and redoing the layer if necessary.
Visual checkpoints during and after application
Use this checklist while applying and after curing to ensure your thin-layer patch is setting up properly.
- Uniform texture: Patch should have a consistent, smooth appearance. Blisters or rough spots: Indicate poor bonding or trapped air.
- Absence of blisters: No bubbles forming on the surface. Presence of blisters: Indicates trapped air or moisture.
- Shrinkage cracking: No cracks forming as patch cures. Cracking: Shows weak bond or excessive shrinkage.
- Consistent color change: Patch turns a consistent shade of gray as it cures. Irregular color: Suggests inconsistent curing or bonding.
- Edge bonding: Edges stick well to the substrate. Edges lifting: Indicates poor bond at edges.
- Level surface: Patch is smooth and level with surrounding concrete. Uneven surface: Shows improper application or settling.
- No efflorescence: No white powdery residue forming on the surface. Efflorescence: Suggests moisture migration or poor curing.
- Consistent finish: Patch has a uniform appearance throughout. Inconsistent finish: Indicates variable curing or application.
Quick rule: If any of these visual checks fail, recheck your application and curing process.
Simple field tests and when to call for lab/contractor tests
These basic tests help confirm the quality of your patch. Use them before escalating to more complex lab tests.
- Adhesion spot check: Gently scratch the surface with a coin or screwdriver. Powdering: Shows weak bond; call for pull-off test.
- Hammer sound: Tap patch and surrounding concrete. Dull vs. ringing: Dull sound indicates weak patch; consider lab tests.
- Moisture meter: Check moisture content before and after curing. Inconsistent readings: Suggests poor curing or bonding.
- Rebound hammer: Test patch hardness compared to surrounding concrete. Significant difference: Indicates weak patch; consider lab tests.
- Pull-off test (if available): Measure bond strength by pulling off a small disc. Weak bond: Results may warrant lab analysis or contractor involvement.
Quick rule: If these field tests raise concerns, don’t hesitate to call for professional lab tests or contractor advice.
Tools, Materials Checklist, Specs Explained, and Safety Notes
Gather basic tools—trowels, floats, mixing bucket, mechanical mixer, scrubbers, and PPE—and verify material attributes on the bag or data sheet such as recommended thickness, water limits, and compatibility with polymers.
Follow standard safety practices: eye protection, gloves, dust control, and ventilation; for any unclear product limitations or hazards consult the manufacturer SDS or technical literature before starting.
Tools and consumables checklist
Before you start your thin-layer patching project, ensure you have all the necessary tools and consumables at hand.
- Trowels: 1/4″ to 1/2″ for applying thin coats. Check they’re in good condition with no cracks or bends.
- Gloves: Disposable gloves to protect your hands from concrete and chemicals.
- Safety glasses: To protect your eyes from debris and splashes.
- Ear protection: For using power tools like mixers or grinders.
- Concrete mixer: A portable, electric mixer for small batches. Check it’s in working order.
- Wheelbarrow: To transport mixed concrete to the patch area.
- Tape measure: To ensure you’re applying consistent layer thickness.
- Level: To check your patch is even and smooth.
- Hose with nozzle: To keep the work area clean and wet down dust.
Quick rule: Having the right tools ensures a smoother, more efficient job. Don’t skip checking them before you start.
Material specs to verify and safety precautions
Before using any materials, always check their specifications and safety guidelines.
- Concrete mix: Check the recommended use and temperature limits on the TDS. Wrong mix can lead to weak patches.
- Polymer-modified concrete: Verify the polymer content on the TDS. Too little may not provide desired strength, too much could cause curing issues.
- Safety Data Sheet (SDS): Consult it for handling, storage, and disposal instructions of all materials used.
- Dust control: Keep the work area wet to minimize dust. Inhaling concrete dust can cause health issues.
- Ventilation: Ensure adequate ventilation in enclosed spaces to prevent the buildup of harmful fumes.
- Personal Protective Equipment (PPE): Wear appropriate PPE as advised on the SDS. This could include gloves, goggles, or a respirator.
- Fire safety: Keep flammable materials away from heat sources and sparks that may occur during grinding or cutting.
- Waste disposal: Follow local regulations for disposing of concrete waste. Improper disposal can lead to fines or environmental damage.
Quick rule: Always verify material specs and follow safety guidelines to protect yourself and the environment.
Conclusion
Thin-layer patching works when you respect the limits, test as you go, and keep safety at the center. The goal is a durable repair that looks right and resists future damage, not a rush job that fails at the first freeze or load.
First, verify the substrate, choose the right polymer modifier, mix correctly, and keep the patch within the specified lift limits. Prepare thoroughly, apply in thin coats, cure between coats, and test adhesion and surface quality before moving on. After each step, document the result and adjust your plan if something looks off. If you’re unsure about what you’re seeing or the patch starts to lift, stop and re-check the prep, mix, and cure instructions rather than forcing a repair that won’t last.
Common mistakes to avoid are skipping proper surface prep, using too much water in the mix, and rushing through curing without adequate protection. Always wear appropriate PPE, work in a ventilated area, and keep patches out of direct wetting or freezing conditions during cure. Do small tests on a discreet area first, and respect the cure times between coats; if you see peeling, cracking, or dull adhesion, halt work and reassess the approach.
If the project involves uncertain substrate conditions, unusual structural load, or repeated water exposure, consider bringing in a pro. When in doubt, err on the side of conservative patching and safer testing. Stay methodical, stay safe, and you’ll finish with a patch that endures and looks right.
FAQ
What are the telltale signs you should stop patching in thin layers and move to a different approach?
If the patching keeps cracking, sinking, or delaminating after cure, stop and reassess. Look for excessive movement in the substrate or moisture bleeding through the patch. Check the product label and manufacturer instructions for allowable substrates and curing conditions.
How should I choose a polymer modifier for thin-layer patches?
Pick a polymer that matches the patching product’s recommendations for your concrete type and environmental conditions. Read the label for cure time, compatibility with cement, and substrate preparation. When in doubt, ask the supplier or check the manufacturer instructions for your specific patch mix.
What is the safest way to cure between coats on a DIY slab?
Follow the product’s recoat window and keep the surface protected from rapid moisture loss or direct sun. Maintain a stable temperature and avoid exposing the patch to rain or freeze-thaw cycles during curing. If you’re unsure about the windows, check the label or datasheet for guidance.
What practical checks should I do before applying a second or final coat?
Make sure the first coat is fully set enough to support another layer without pinholes. Inspect for uniform texture, a light sheen, and no active moisture or surface laitance. If any doubt remains, refer to the manufacturer instructions or product label for recoat readiness indicators.