
Introduction
Removing tile grout means pulling out the old cement-like filler between tiles so the joints are clean and ready for new grout. Do the work with safety in mind, using eye protection and a dust mask, and work slowly to avoid chipping adjacent tiles. Check the area for loose tiles and plan to protect nearby surfaces before you start.
After you remove the grout, clean the joints and surrounding tile surfaces thoroughly to remove dust and debris. Prepare for the new grout by ensuring the joints are dry and the area is free of old residue. Gather the tools and materials you’ll need, such as a grout removal tool, a stiff brush, a damp sponge, and the appropriate grout for your tile system, and verify that your chosen product matches the tile and installation requirements.
Key takeaways
- Wear eye protection and gloves when removing old grout to avoid chips.
- Use a grout removal tool carefully to prevent tile and substrate damage.
- Shovel or vacuum debris frequently to keep work area clear before regrouting.
- Clean joints with a damp sponge after removal to improve adhesion.
- Check substrate flatness and cleanliness before applying thin-set and new tile.
- Follow manufacturer instructions for grout and thin-set compatibility with tiles.
- Dispose of waste properly and protect finished surfaces during cleanup.
Table of Contents
- Introduction
- Key takeaways
- Quick Overview and When to Remove Grout
- Safety and Prep Checklist
- Tools and Materials You’ll Need
- Step-by-Step: Removing Old Grout Safely and Effectively
- Clean-up and Surface Preparation Before Regrouting or Retiling
- How to Install Thin-Set and Set New Tile (If Replacing Tile)
- Grouting the Joints: Materials and Method
- Post-Grouting Maintenance and Troubleshooting
- Conclusion
- FAQ
Quick Overview and When to Remove Grout
Grout removal is needed when damage goes beyond cleaning or recoloring. Common reasons include visible cracks, heavy discoloration, mold or efflorescence, and a plan to retiling or change tile color. Understand the difference between removing grout and simpler remedies so you choose the right path for your project.
Start with a lightweight assessment to decide if removal is necessary. Look at grout age and type, joint width and depth, tile substrate, and any visible movement or moisture signs. Use a quick flow: visual check, a small odor or mildew test, moisture behind accessible areas, and then decide whether regrouting or full removal fits your goals and constraints.
Signs grout needs removal
Grout is the first line of defense against moisture and dirt. When it fails, you’ll see visible signs that it’s time for replacement rather than cleaning.
Cracking and crumbling are clear indicators. If grout crumbles under slight pressure, it’s beyond saving.
Mold penetration is another red flag. If mold has taken hold, deep cleaning might not be enough to stop its spread. Loose tiles can also signal damaged grout – if tiles wobble or move when you step on them, the grout may have failed.
Failed sealant around the edges of tiles is a sign that water is getting in and damaging the grout. If you notice any of these signs, it’s time to remove the old grout and start fresh.
Alternatives to full removal
Before you grab your grout saw, consider if there are simpler solutions. Removing grout is a messy job that can lead to damaged tiles if not done carefully.
Grout recoloring is an option if the grout is still in good condition but has discolored over time. This involves applying a new layer of color to the existing grout, giving your tile work a fresh look without the hassle of removal and replacement.
Deep cleaning can also extend the life of your grout. If it’s just looking dull or stained, a thorough cleaning might be all you need. Use a grout cleaner specifically designed for your type of grout to avoid damaging it.
Resealing is another alternative. If your grout is still in good condition but water is getting through, applying a new sealant can help prevent further damage. However, if the grout is cracked or crumbling, resealing won’t help – you’ll need to remove and replace it.
Safety and Prep Checklist
Put on PPE before you touch grout: safety glasses or a face shield, a dust mask or respirator, sturdy gloves, and hearing protection when using power tools. Ensure your workspace is protected with plastic, drop cloths, and barriers to contain dust. Ventilate the area to keep dust and fumes down as you work.
Take electrical and plumbing precautions seriously: turn off power to the work area and unplug tools, and shut off nearby circuits if water exposure is likely. Avoid power tools near exposed plumbing and know shutoffs in advance. Set up a containment plan for debris and keep a clear path to prevent trips.
PPE and protective measures
Before you start removing grout, ensure you’re well-protected. This checklist helps prevent injuries and exposure to harmful dust.
- Eye protection: Wear safety glasses or a full-face shield to protect your eyes from debris and dust.
- Respiratory protection: Use an N95 or P100 respirator, not just a dust mask. These ratings filter out 95% (N95) or 99.97% (P100) of particles.
- Gloves: Wear sturdy gloves to protect your hands from sharp edges and chemicals.
- Knee protection: If you’re working on a hard floor, consider knee pads for comfort.
- Hearing protection: Use earplugs or earmuffs when using power tools to prevent hearing damage.
- Check local codes: Before using power tools, ensure you’re following local regulations and safety guidelines.
Quick rule: Always prioritize your safety. If you’re unsure about any aspect of protection, consult a professional or local resources.
Preparing the area
Before diving into grout removal, prepare the workspace to minimize dust and debris spread. This checklist helps keep your project clean and organized.
- Remove fixtures: Take down any light fixtures, towel bars, or other hardware that could get in the way or be damaged by debris.
- Cover surfaces: Use plastic sheeting or drop cloths to protect floors and adjacent rooms from dust. Tape them securely in place.
- Tape off transitions: Seal off doorways, vents, and other openings with tape to prevent dust from spreading.
- Clear loose items: Remove any decorative items, plants, or other loose objects that could be damaged by debris or dust.
Quick rule: A well-prepared workspace makes grout removal easier and cleaner. Don’t skip these steps; they’ll save you time and effort in the long run.
Tools and Materials You’ll Need
Core hand tools include a grout saw or manual removal knife, carbide tipped blades for oscillating tools, a utility knife, and stiff putty knives. You’ll want a suitable power tool setup for tougher joints, plus a dust mask and safety glasses. Have a versatile toolkit ready for both removal and initial cleanup.
For removal and repair, stock cementitious and epoxy grout options, matched color shades, and any primer or sealant a project may require. Include backer rod or caulk for movement joints, and a sealant appropriate to the chosen grout type. Keep cleanup supplies like a damp sponge, microfiber cloths, a bucket, and a vacuum handy.
Tools for grout removal and tile removal
Choose the right tools to make your job easier and safer.
- Grout saw: Cuts through grout lines quickly. Use a deep-cut blade for wider joints.
- Oscillating multi-tool with grout blades: Versatile, can handle narrow to wide joints. Use a carbide-tipped blade for tougher grout.
- Rotary tool (Dremel): Great for tight spots and small areas. Use a grout removal attachment.
- Chisel and hammer: Manual method, good for small sections or where power tools aren’t feasible. Use a cold chisel and tap gently.
- Utility knife: For scoring initial cuts in wider joints before using other tools. Use a sharp blade.
Materials for repair and finishing
Selecting the right materials ensures a durable, long-lasting result.
- Thin-set: Used to adhere new tiles. Choose one with good bond strength and flexibility.
- Grout: Available in sanded (for wider joints) and unsanded (for narrow joints). Match the color to your tile.
- Sealant: Protects grout from moisture and stains. Use a silicone-based sealant for shower areas.
- Grout float: Spreads grout evenly over tiles. Choose one with a comfortable handle.
- Notched trowel: Applies thin-set or adhesive. Select the right notch size (1/4″ to 3/8″ for most tiles).
Step-by-Step: Removing Old Grout Safely and Effectively
Map out a logical sequence from prep and safety checks to tool choice, removal steps, edge work, and final cleanup. Start with protecting adjacent surfaces and establishing dust control, then pick hand tools or power tools based on grout width and substrate. Keep moisture considerations in mind as you proceed.
Choose between hand scraping and powered removal, using carbide or diamond blades for efficiency. Work in small increments, especially near tile edges, to minimize chipping. Maintain an even depth just beyond the grout line to avoid exposing substrate or loosening tiles.
Step-by-Step Cleaning Process
The following steps guide you through removing old grout safely, effectively, and in a practical sequence.
- Preparation: Put on safety gear (gloves, goggles, ear protection), mask off adjacent surfaces, and lay down drop cloths. Ensure proper ventilation to control dust.
- Inspect tiles: Check for loose or damaged tiles that may need repair before grout removal. Mark any problem areas.
- Select tools: Choose hand tools (scraper, grout saw) if grout is soft and narrow, or power tools (oscillating tool, rotary tool) for harder, wider grout.
- Remove grout: Work in small sections, using a back-and-forth motion with your chosen tool. Keep the tool at a consistent angle to avoid damaging tiles.
- Edge work: Be extra careful along tile edges to prevent chipping or gouging. Use a 45-degree angle and light pressure.
- Depth control: Remove grout just beyond the grout line, into the substrate, but be cautious not to go too deep and damage the subfloor.
- Cool down & inspect: Pause every 10-15 minutes for dust cooling and tool rest. Inspect tiles for any signs of damage or adhesive exposure.
- Clean up: Once finished, vacuum up loose grout, wipe surfaces clean, and remove masking tape. Inspect the area one last time before proceeding with repairs or reinstallation.
Using a Grout Saw or Scraper (Manual Method)
The manual method is ideal for narrow, soft grout lines and helps maintain control over dust.
Hold the grout saw or scraper at a 45-degree angle to the tile surface. Apply light pressure and use a back-and-forth motion to remove grout.
Work in small sections – about 6-12 inches at a time – to control dust and avoid fatigue. Keep the tool moving consistently to prevent gouging or chipping tiles.
Be gentle around edges – reduce pressure when working near tile corners to prevent damage. If grout is stubborn, try using a diamond-tipped scraper for better cutting power.
Using Power Tools (Oscillating Tool/Rotary) Safely
Power tools can speed up grout removal but require careful handling to prevent damage.
- Blade selection: Choose a carbide or diamond blade designed for grout removal. These blades cut through grout quickly and last longer than standard blades.
- Speed settings: Start at the lowest speed setting, then increase as needed. Faster speeds can cause the tool to jump and damage tiles.
- Steady control: Apply steady, even pressure while keeping the tool flat against the surface. Use both hands for better control.
- Avoid edges: Be extra careful along tile edges. Keep the blade away from corners to prevent chipping or gouging.
- Prevent overheating: Pause every 5-10 minutes to let the tool cool down and prevent it from overheating, which can damage the motor or cause kickback.
- Optional tools: Consider renting a wet/dry vacuum to collect dust while working. This reduces mess and helps keep grout from clogging your tool.
- Price cue: Oscillating tools typically range from $50-$150, while rotary tools are around $20-$60. Rentals are available for about $15-$30 per day.
Clean-up and Surface Preparation Before Regrouting or Retiling
Ensure the substrate is clean, flat, and sound before moving to regrouting or retiling. Identify any areas needing patching, leveling, or moisture testing so you don’t trap problems under new work. Plan your repair sequence around substrate condition first.
Remove all loose dust and debris, then vacuum thoroughly and damp-mop as needed. Inspect for cracks, hollow-sounding tiles, and moisture issues, and verify the substrate is dry before applying patching compounds. Prepare with the right primer or bonding agent if required by the surface.
Removing old thin-set and leveling substrate
Start by removing any loose dust and debris with a broom. Then, use a scraper or chisel to chip away old thin-set. Work in small sections, checking for hollow spots or uneven areas that need attention.
Chiseling technique: Hold the chisel at a 45-degree angle and tap gently with a hammer. Be careful not to damage the substrate. If you encounter hollow spots, mark them for later repair.
For high spots or uneven areas, use a leveling compound. Follow the manufacturer’s instructions, applying thin layers and allowing each to dry before sanding lightly. Recheck levels after each step.
Final cleaning and moisture check
After removing old thin-set and leveling the substrate, thoroughly clean the area. Use a vacuum to remove any remaining dust or debris. Then, wipe the surface with a damp cloth to ensure no residue is left behind.
Drying time: Allow the substrate to dry completely before proceeding. This could take anywhere from a few hours to a full day, depending on humidity levels.
Before applying thin-set or grout, test the substrate for moisture. Use a moisture meter if available, or perform a simple test by taping a plastic sheet over the area and checking for condensation after 24 hours. If there’s no condensation, the surface is likely dry enough to proceed.
How to Install Thin-Set and Set New Tile (If Replacing Tile)
Weigh the choice between pre-mixed and powdered thin-set, noting how each suits kitchen or bathroom environments. Consider substrate compatibility, moisture barriers, and crack isolation as you plan the install. Make sure you’re comfortable with the chosen method before starting.
Use the correct notch trowel size and mix consistency, and maintain working time to avoid gaps. Back-butter tiles and use spacers to prevent lippage, placing each tile with even pressure. Allow proper cure time and follow project-specific sequencing to protect the bond.
Step-by-Step Installation Process
This section guides you through the practical steps of installing thin-set and setting new tile, ensuring a solid foundation for your project.
- Preparation: Wear safety gear (gloves, goggles) and lay drop cloths. Ensure the area is well-ventilated.
- Substrate Check: Inspect the surface for dips, high spots, or moisture issues. Address any problems before proceeding.
- Mix Thin-Set: Follow package instructions for mixing powdered thin-set. Pre-mixed options are convenient but may have a shorter working time.
- Apply Thin-Set: Using a notched trowel, spread the thin-set evenly over the surface, ensuring full coverage and avoiding air pockets.
- Tile Placement: Starting from the center, lay tiles following your layout plan. Use spacers for even grout lines and tap gently to set the tile firmly in place.
- Leveling Check: Ensure all tiles are level using a straight edge or laser level. Adjust any high spots before thin-set cures.
- Clean Up: Remove excess thin-set from tile surfaces immediately to prevent bonding issues during curing.
- Curing Time: Allow the thin-set to cure according to manufacturer’s instructions before grouting to ensure a strong bond and prevent movement.
Applying thin-set and using a notched trowel
Choosing the right trowel notch size is crucial for proper thin-set application. For common 12″ x 12″ tiles, use a 1/4″ x 3/8″ V-notch trowel. Larger tiles may require a larger notch.
Mix thin-set according to package instructions, ensuring it reaches the consistency of peanut butter. Scoop up thin-set with the trowel and spread it over the surface using the straight edge.
Next, use the notched side of the trowel to comb through the thin-set, creating grooves that help anchor the tile and prevent air pockets. Work quickly to avoid letting the thin-set set before tiling.
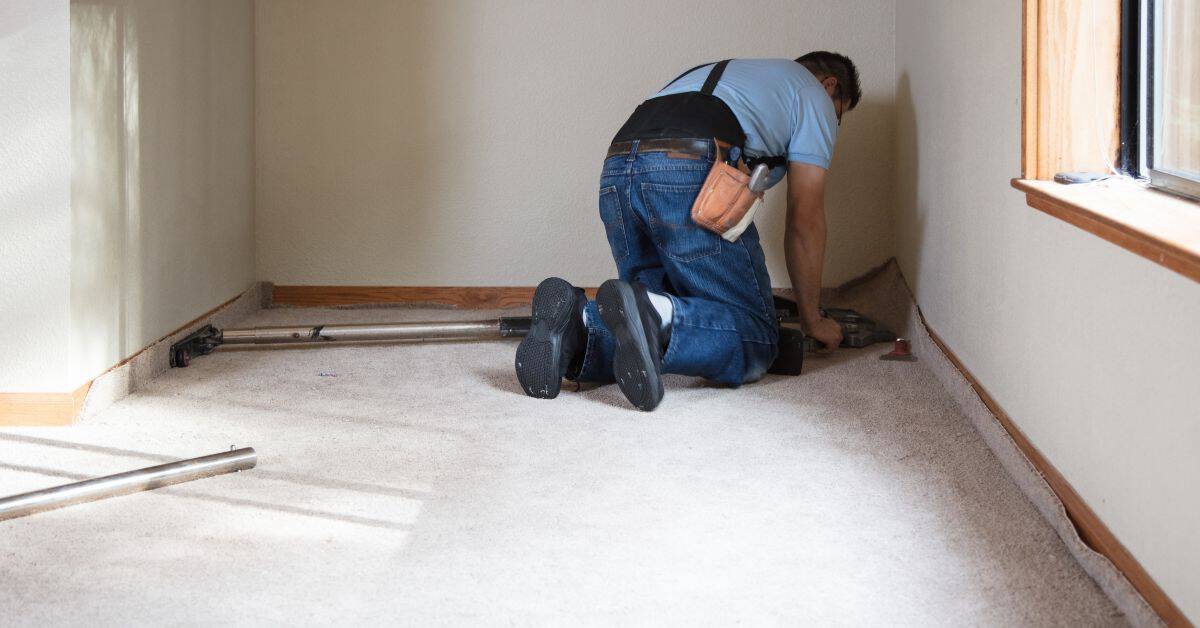
Placing and leveling tile
Start placing tiles from the center of the room, working outwards. This helps minimize waste and ensures a balanced layout.
Use spacers to maintain even grout lines between tiles. Tap gently on the tile with a rubber mallet or your hand to ensure it’s firmly set in the thin-set.
Check each tile for level using a straight edge or laser level. If necessary, adjust the position of the tile before the thin-set cures. Ensure all tiles are level and flush with one another to prevent lippage during grouting.
Grouting the Joints: Materials and Method
Decide on grout type and color upfront, weighing cementitious options against epoxy for durability and stain resistance. Choose a color that blends or contrasts with the tile as your project goals dictate. Check labeling or manufacturer’s guidance for compatibility with your substrate.
Whether you use premixed or powder grout, follow the mixing instructions closely and achieve a uniform consistency. Apply with a grout float at a shallow angle, then push the grout into joints fully and avoid bridging. Afterward, wipe haze promptly and plan for proper drying and sealing if you’re using cementitious grout.
Filling joints and finishing
Start by holding your grout float at a 45-degree angle to the tile surface. This allows you to press the float firmly against the tiles on both sides of the joint, ensuring full contact.
Using a firm, steady motion, push the float diagonally across the joints, working in small sections. This helps to pack the grout into the joints and prevent bridging. For deeper joints, use a larger notched trowel or a special deep joint float.
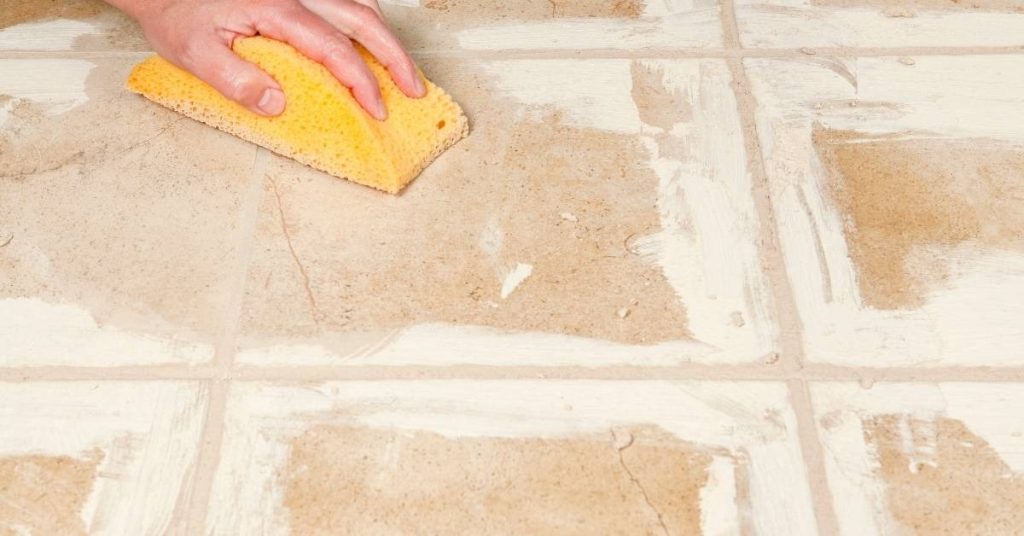
Once you’ve filled all the joints, let the grout set for a few minutes until it starts to lose its shine. Then, using a damp sponge, wipe diagonally across the tiles to remove excess grout and smooth out any rough spots. Be sure not to wipe too hard or you’ll pull grout from the joints.
Cleaning haze and final wipe-down
Immediately after filling and finishing the joints, start cleaning off any surface grout with a damp sponge. Work diagonally to avoid spreading grout back into the joints.
Timing is key here: wait about 10-15 minutes before your first wipe to allow the grout to set slightly and prevent pulling it out of the joints. Then, let it sit for another 10-15 minutes before doing a final wipe to remove any haze.
For the final wipe, use a clean, damp sponge with clear water only. Wipe diagonally again, using multiple passes if necessary to remove all haze without damaging the fresh grout. Be sure your sponge is well-wrung out to avoid spreading grout around or creating streaks.
Post-Grouting Maintenance and Troubleshooting
Set up a sealing schedule that matches the grout type and room conditions, noting cure times and resealing frequency. Choose penetrating sealers for longevity or film-forming sealers if you want a surface gloss. Read product labels to confirm suitability for your grout and environment.
Watch for common issues like shrinkage, cracks, color mismatch, or mold recurrence. Use practical repair steps for cracks, consider recoloring or tinted sealers for color adjustments, and follow guidelines to prevent future problems. Plan cleaning windows and maintenance routines that protect the new grout over time.
When to seal and how often to maintain
Seal your grout after it’s fully cured, usually 72 hours after installation. Before sealing, ensure the grout is clean, dry, and free of any haze or residue.
Apply a penetrating sealer for best results. It’ll protect against moisture and stains without changing the grout’s appearance. Re-seal every 3-5 years, depending on traffic and usage.
Regular cleaning helps maintain your grout. A mild detergent solution is usually sufficient. Avoid harsh chemicals that can damage or discolor the grout.
Fixing common mistakes
Mistakes happen, but here’s how to avoid and fix them:
- Chipped tiles: Remove loose pieces carefully. Apply a tile adhesive, press the piece back in place, and let it cure.
- Uneven grout lines: Use a damp sponge or grout float to even out the grout. Wipe away excess as you go.
- Grout that crumbles: This could be due to improper mixing or curing. If it’s localized, remove and replace the affected area.
- Stubborn haze: Use a grout haze remover or a mixture of water and muriatic acid (1 part acid to 5 parts water). Always test on a small area first.
If mistakes are extensive, it might be best to call a professional. They have the tools and experience to tackle bigger issues.
Conclusion
Handle grout removal with focus: done right, it protects the tile, the substrate, and the look of the room while keeping you safe and productive.
Start with a simple, real-world checklist: inspect for moisture or loose tiles, protect adjoining surfaces, assemble your tools and safety gear, remove old grout in controlled passes, clean the joints, test fit any replacement tiles or plan, mix and apply thin-set properly, then grout and let it cure before any sealing or use. Do these steps in the order that mirrors your space, and test a small area if you’re unsure.
Common mistakes to avoid are rushing, over-reaming or chiseling too deep, and skipping test patches or safety gear. Don’t cut corners with power tools or aggressive solvents, and always wear eye protection, gloves, and a dust mask. Verify moisture and substrate stability before you set new tile, and follow the manufacturer guidance for thin-set and grout mixes to prevent failure down the line.
If you find loose backing, extensive water damage, or tiles that won’t stay secure after initial attempts, call a pro. When your walls, floor, or substrate show significant signs of trouble, professional help saves time and costly repairs. Stay methodical, stay safe, and you’ll finish with a solid, durable result you can be proud of.
FAQ
What safe methods exist for removing grout without damaging tiles?
Use hand tools designed for grout removal and work slowly along the joints. Avoid large grinders or pressure setups that can chip tile edges. Check manufacturer instructions on any tool you’re using and stop if you see crown tiles loosen.
How should I clean and prepare the area after grout removal?
Sweep or vacuum up dust and debris first. Wipe down the area with a damp cloth to remove remaining dust before resealing or regrouting. Make sure the surface is dry and free of loose particles before you proceed.
What tools and products should I have for cleaning grout residue and prepping for regrouting?
Have a stiff brush, a sponge, mild cleaner, and a separate scraper for stubborn residue. Use products that are labeled safe for your tile and grout type. Always check the label or instructions for contact time and rinsing requirements.
What are common mistakes that cause tile damage during grout removal?
Digging into the grout too aggressively or using overly aggressive blades can nick tile edges. Not protecting adjacent tiles or misjudging the depth of removal can lead to damaged substrate. If in doubt, test in a small area first and follow product guidance.