
Introduction
You can achieve a clean chamfer on concrete slab edges without specialty forms.
This approach helps prevent chipping, speeds up form setup, and yields a professional finish.
The guide walks you through practical steps, tips, and common-sense rules of thumb to form sharp, consistent edges.
Key takeaways
- Plan chamfer width and depth to match slab thickness and finish.
- Ripped wood chamfer method yields sharp edges without specialty forms.
- Beveled nailer technique provides adjustable chamfer without bulky molds or forms.
- Keep form edges square during pour with consistent support and alignment.
- Protect chamfer while curing using plastic sheeting and light curing controls.
- Retroactive chamfering requires careful scoring, grinder control, and edge re-seating.
Table of Contents
- Introduction
- Key takeaways
- What is a chamfer and why slab-edge chamfers matter
- Planning and layout before the pour
- Materials and simple form options (no specialty plastic forms)
- Tools and materials checklist
- Step-by-step: Forming a clean chamfer on fresh concrete (method A: ripped wood chamfer)
- Alternative fresh-concrete method: beveled nailer / 1x chamfer strip technique
- Finishing techniques to protect and refine the chamfer
- Retroactive chamfering: working on hardened concrete
- Fastener and removal details: avoid blowouts and swelling
- Troubleshooting common problems and fixes
- Long-term durability and detailing for exposed/architectural edges
- Cost, time comparison and when to buy specialty chamfer strips
- Weather, curing, and environmental considerations that affect chamfers
- Safety protocols and best practices
- Visual signs and examples to look for
- Conclusion
- FAQ
What is a chamfer and why slab-edge chamfers matter
A chamfer in concrete edging is a straight, beveled edge created by trimming the corner at a consistent angle, usually around 45 degrees, to produce a clean transition rather than a sharp square edge. It differs from a fillet, which rounds into a curve, and from a bevel, which may skew the edge slightly; common chamfer sizes range from 1/4 inch to 3/4 inch (6–20 mm) and are often achieved with temporary chamfer strips or edge forms. Functionally it reduces chipping, eases maintenance and cleaning, improves water shedding to minimize pooling, and, aesthetically, yields a crisp architectural line that pairs well with coatings and various formwork.
Choose sizing guidance by slab use: interior high-traffic floors may benefit from modest chamfers while exterior or exposed edges can tolerate deeper cuts that align with thickness and coating plans. Practical methods include temporary chamfer strips, plastic edge forms, or careful forming techniques, with quick checks for uniformity: consistent angle along the edge, no gaps, and alignment with adjacent surfaces. On-site verification should also flag common pitfalls such as over-chamfer, mismatched forms, or hidden gaps that can compromise water shedding, durability, or finish, so plan edges before pours and verify with a straightedge and level.
Chamfer dimensions and naming conventions
Chamfers are usually specified by the distance along the face and the cut depth: common sizes on slab edges are 1/4″, 3/8″, 1/2″ and 3/4″. Those numbers tell you how far the cut runs across the face. Smaller sizes are subtle; larger ones are more visible and change the profile of the slab.
Bevel angle matters, but most slab-edge chamfers are cut close to 45° because it’s simple and predictable. A shallower angle gives a longer, softer line; a steeper angle shortens the face and feels more abrupt. Match the angle and size to the slab thickness and appearance you want.
Practical note: larger chamfers reduce corner strength slightly and are easier to chip during handling. Use smaller chamfers where strength and traffic are a concern; go bigger where the look and water shedding are priorities.
When a chamfer is preferable to a fillet or eased edge
Choose a chamfer when you want a crisp, architectural edge that still sheds water and resists chipping better than a sharp corner. Chamfers read as a deliberate, straight line on a slab and are easier to form on-site than a perfect rounded edge.
Use a fillet (rounded concave) or eased edge when you need to soften contact points for safety or to prevent edge damage from heavy traffic. Fillets concentrate less stress and are more forgiving in high-impact spots.
Quick rule: pick chamfers for a clean, structural look and easier finishing; pick eased/rounded edges where comfort, safety, or maximum durability under impact matters.
Planning and layout before the pour
Planning chamfer size, location, and edge treatment early sets a consistent finish and avoids last-minute fit issues by aligning with finish grade, joint spacing, and load expectations. Map the formwork sequence so chamfer strips and edge forms line up with the planned screed path, and determine clearance for removal and concrete flow around edges as well as accommodating thickened edges and perimeter drainage. Build a simple cut list with chamfer strip types, lengths, quantities, fasteners, foam plugs or spacers, and extra material for waste; create a lightweight layout template that shows edge lines, corner radii, form ties, reference marks, pour direction, and a starting point to keep chamfer runs straight, with color codes or a legend to speed setup.
Pre-pour checks save rework: verify rebar, control joints, drains, vapor barriers, and insulation won’t clash with chamfer placement, and confirm the plan for form removal and curing. The practical sequencing notes help you pour in the right order, keep chamfer edges true, and prevent stepping over finished edges during screed passes. With a clear plan for forms, tools, and timing, a DIY crew can deliver a cleaner edge, fewer rejects, and better alignment with finish grade and joint requirements.
Site layout checklist and cut list template
Walk the slab area with a tape and marker before you cut a thing. Note board stock (1x4s or 2x4s for chamfers), chamfer lengths, corner pieces, and fasteners. Mark the control joints, expansion gaps, and any embedded items so your chamfers won’t clash with them.
Create a simple cut list: list each chamfer run, its length, board width, and quantity. Add an allowance for waste (10–15%). Keep one column for fasteners — type and count — and another for installation order. A printed list on the foreman’s clipboard saves trips and confusion.
Tip: pre-cut and label every piece with its location (A1, B2, etc.). Lay them out on the ground in the sequence you’ll install to check fit before the pour crew arrives.
Sequencing with pour crew and finishers
Talk to the crew before the truck shows. Agree who is doing strike-off and when you’ll install the chamfers. In most cases you set chamfers and forms first, then the crew pours and screeds against them. Leave the final edge finishing to the finishers until the concrete has been struck off and is ready for tooling.
Install chamfers so they don’t obstruct the screed path or a bullfloat. If a section needs hand strike-off, have the chamfer positioned but not permanently fastened so finishers can tweak alignment. Once screeding is done and bleed water is gone, lock chamfers in place for edge tooling.
Note: coordinate timing for joint cutting and final edging. Avoid installing permanent chamfers that force finishers to rework edges — that costs time and looks sloppy.
Materials and simple form options (no specialty plastic forms)
Practical DIY form options include ripped lumber, beveled nailers, plywood, OSB blocks, and 1x stock, all without specialty plastic forms. Each option creates a distinct edge and chamfer profile, with different impact on finish quality and cost. Ripped lumber and 1x stock are inexpensive and widely available, but edges can vary and may require extra smoothing. Beveled nailers help create cleaner chamfers with predictable alignment, while plywood and OSB blocks offer flat, reusable surfaces and modest wear. Reuse potential and durability vary by material, as coatings and edge treatment influence finish quality and the number of uses you can squeeze from a setup.
Reuse potential is highest for plywood and OSB blocks, which tolerate multiple pours with careful edging and protection. Finish quality hinges on edge sharpness and how you protect against mortar bleed, so include edging-stripping methods and edge guards to minimize chips. Plan chamfer width, use appropriate fasteners, and verify alignment often to maintain straight edges; consider screws or adhesive for added stability in DIY slabs. This practical guide helps you choose based on slab size, exposure, and reuse intent, balancing upfront cost, labor, and achievable finish without specialty forms.
Using ripped lumber and beveled boards
Rip a common 2x down the middle or to the thickness you need and use the cut edge as your chamfer. For a neat look aim for 3/4″ to 1-1/4″ finished width on the chamfer piece; thinner strips flex and tear out, thicker strips read as a straight stock instead of a chamfer.
Pay attention to grain direction and how worn the boards are. Quarter-sawn or straighter grain cuts cleaner and sands to a smoother finish. Old, checked or splintered lumber needs extra sanding and fill to look good.
Installation is simple: toe-nail or screw the ripped strip with the bevel facing out, then backfill the seam and sand. You get a solid edge without specialty forms, and the strips are easy to reuse if you keep them straight and undamaged.
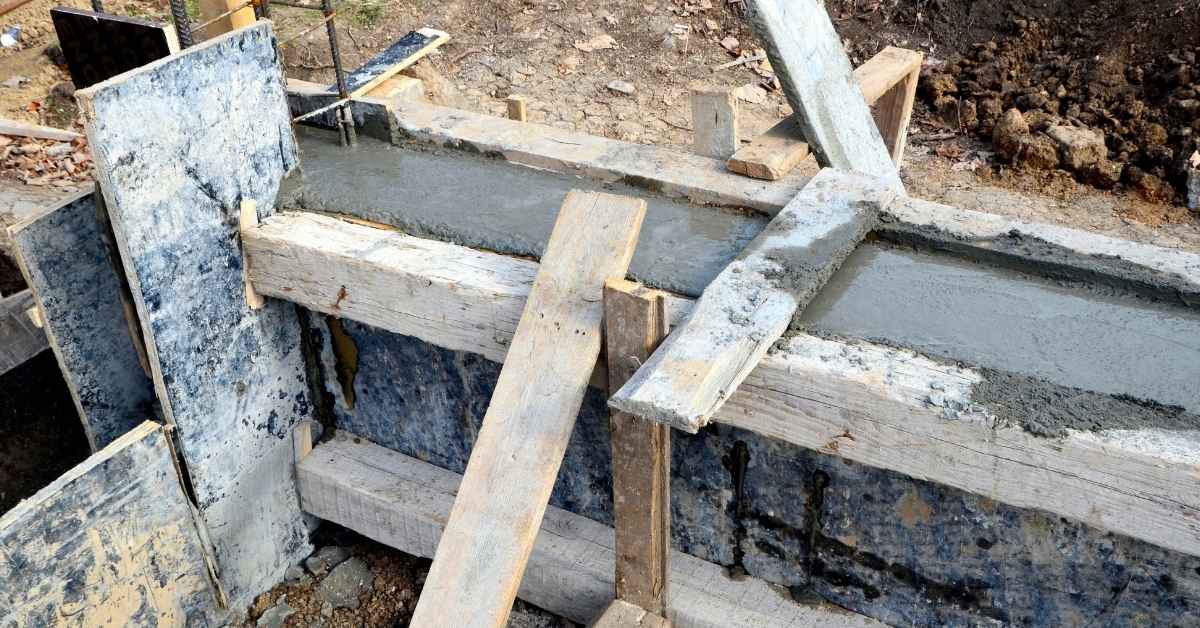
Creating a chamfer with blocking and a beveled stop
Make a temporary stop by nailing short blocks to the form face at the desired chamfer offset, then screw a beveled nailer across the blocks to act as the mold. Set the angle to match the profile you want and fasten everything tight so it won’t shift under concrete pressure.
Use consistent block spacing and shim under the nailer as needed to keep the line straight. The beveled stop gives repeatable results and is easy to adjust for different chamfer sizes without buying molded strips.
Strip it off after the pour, clean and flip if undamaged, and you can reuse the nailer and blocks on the next job. It’s cheap, robust, and great for one-off or small pours where molded forms don’t make sense.
Tools and materials checklist
Tools and materials are organized into essential hand tools, consumables, PPE, and optional power tools for retrofit work. Core hand tools include a circular saw, framing square, nail gun, hammer, jointer, edger, and precise measuring tools, each playing a role in cutting, marking, edge setup, and alignment to form chamfered slab edges. Consumables and PPE cover fasteners, sealant or adhesive, wood shims, angle brackets if needed, plus gloves, eye and ear protection, a dust mask, and knee pads, with typical quantities for common slabs. Optional power tools—compact saws, battery-powered tools, a router with a chamfer bit, an oscillating multi-tool, and an impact driver—add on-site retrofit efficiency when needed.
Material compatibility and selection are addressed with chamfer strips, edge forms, or reveal strips and quick checks for edge straightness, chamfer width, and surface finish goals. The section also covers safety, handling, and workflow from marking to forming, emphasizing safe blade storage, PPE readiness, and a clear setup sequence to prevent miscuts or edge gaps. A concise, printable quick-dial checklist provides a 5-step on-site routine and approximate quantities to guide practical, jobsite decisions without slowing progress.
Fasteners, adhesives, and temporary anchors
Use common framing nails and wood screws for primary holds. For temporary chamfers and formwork, 10d and 16d nails or #10 wood screws give reliable shear and pullout resistance without splitting the stock.
Apply a construction-grade polyurethane or acrylic adhesive along mating faces to cut vibration and stop small gaps leaking slurry. For critical joints and corners, a few 1 1/4″ staples or brads help hold profiles while the adhesive grabs.
For anchoring to substrates during a retrofit, use wedge anchors or concrete screws sized to the load and embedment depth. Mark and pre-drill, then tighten to manufacturer torque; if you need to remove anchors later, use temporary through-bolts with locknuts so you can back them out cleanly.
PPE and dust-control equipment for finishing and retrofit
Concrete grinding and routing kicks up a ton of silica dust. Protect yourself and control the dust at the source — it saves your lungs and the cleanup time.
- Respirator (P3/HEPA) Use a P3 or NIOSH-rated P100 respirator when grinding or cutting hardened concrete. Fit it every time and replace filters per hours used. If you don’t own one, rental shops stock disposable and reusable units for a day or week.
- Safety glasses Wraparound impact-rated glasses protect from chips and slurry. Choose ANSI Z87.1-rated lenses for full compliance. Keep a spare pair on site; lenses get scratched fast.
- Hearing protection Use earmuffs or plugs rated at least 25–30 dB for grinders and saws. High-decibel jobs need both plugs and muffs. Always put them on before firing up power tools.
- Dust shroud for grinders A shroud connects directly to the grinder and captures most dust at the source. Match the shroud to the grinder model and use with a HEPA vacuum. Renting shrouds is common and keeps upfront costs down.
- HEPA vacuum Use a HEPA-rated vacuum with an industrial adapter for grinding tools. These units trap silica and prevent re-release. Expect to rent for big jobs or buy units in the $300–$1,200 range depending on capacity.
- Protective gloves Cut- and abrasion-resistant gloves for handling tools and rebars. Choose nitrile or leather with reinforced palms. Change gloves if they get saturated with slurry.
- Disposable suits Lightweight coveralls reduce cleanup and stop dust getting into clothing. Use them during heavy grinding and swap out before leaving the site. They’re cheap and worth it for retrofit cleanup control.
Step-by-step: Forming a clean chamfer on fresh concrete (method A: ripped wood chamfer)
Forming a clean chamfer on fresh concrete starts with selecting a practical chamfer size and rabbet depth—typically about 1/2″ to 3/4″ of bevel depending on slab thickness and the desired finish—and ripping straight lumber to the correct thickness so edges remain smooth and squared for a consistent bevel. Then, attach the ripped boards to the existing perimeter form, align them true, and secure with appropriate fasteners and bracing so the chamfer holds its shape through the pour, with careful spacing and checks to prevent gaps or movement.
This approach matters for first-time framers because it creates a crisp, durable edge that won’t require heavy finishing later, while guiding pour technique to avoid overflow into the chamfer and preventing damage during vibration and consolidation. It also sets up straightforward finishing near the edge and simplifies form removal once the concrete has gained sufficient strength. By following disciplined ripping, attaching, and pour practices—plus timely demolding and light touch-ups—you minimize common pitfalls and achieve a professional-looking chamfer that lasts.
Step-by-Step Cleaning Process
These steps take you from prep to final check so the ripped wood chamfer leaves a clean, crisp edge. Follow them in order and keep checks simple.
- Put on PPE and inspect forms and base. Safety first and a stable form prevents blowouts. Check that forms are solid and level before you touch the wood chamfer.
- Cut and sand the chamfer board to size and angle. A clean cut seats better and prevents concrete seepage. Test-fit the board against the form so it sits flush and straight.
- Fasten the chamfer board to the form with screws or nails at regular intervals. Even spacing keeps the chamfer from bowing under pressure. Run your hand along the board to confirm it’s tight to the form.
- Place temporary blocks or wedges behind the chamfer where needed. They hold the chamfer during vibration and when concrete hits it. Tap them slightly after a trial strike to ensure resistance.
- Pour concrete carefully, keeping flow steady along the edge. A controlled pour reduces voids and blowouts at the chamfer. Watch the concrete line — it should come up cleanly against the board.
- Consolidate with a small vibrator or tamp near the chamfer area. Proper consolidation drives paste into the corner for a sharp edge. Listen for consistent vibration and look for concrete settling without gaps.
- Strike off and screed the surface, keeping tools away from the chamfer face. Controlled strikes avoid nicking the board or overworking the edge. The line should stay straight and the edge crisp after each pass.
- Float and tool the edge to the desired finish once bleed water drops. That sets the final profile and removes small ridges. Run a finger or small tool along the chamfer to confirm a smooth 45° edge.
- Remove temporary blocks and strip the chamfer board at the right time for the mix and weather. Pull too early and you risk chipping; too late and wood sticks. Check the concrete strength by touch and a light tap before stripping.
Cutting and checking the profile
Cut the ripped board to match the chamfer size you want: common widths are 3/4″, 1″, and 1-1/2″ for standard 45° edges. Set your table saw or circular saw fence so the blade removes the correct angle and width in one pass.
After cutting, sand the cut face so it seats cleanly against the form. A rough face traps paste and causes a ragged edge; a smooth face gives a crisp line. Test-fit the board with a square at several points—place the square on the slab face and check that the chamfer board lines up exactly with the 45° corner.
If the fit gaps at any point, plane or sand the high spots, not the low. Repeat test-fits until the board sits flat and doesn’t rock; that tells you the profile will produce a consistent chamfer.
Attachment, alignment, and bracing during pour
Screw or nail the chamfer board every 6–12 inches depending on board thickness and expected vibration. Closer spacing for thin stock prevents bowing. Use countersunk screws so heads don’t interfere with clean removal later.
Place small temporary blocks or wedges at the bottom and top ends of the chamfer every 12–18 inches to resist pressure from the wet mix. These blocks take the shear load and keep the board flush with the form. Check alignment by running a straightedge along the form face; the chamfer should track perfectly with no gaps.
During pour, keep an eye on the board as concrete approaches and use a helper to steady it if needed. If you vibrate nearby, hold the board steady and inspect for movement between pours. A quick visual and hand check after each lift ensures the chamfer stays true and you won’t be chasing a bowed edge later.
Finishing the freshly formed chamfer
Work the concrete against the chamfer board with a small float or edging tool while the paste is still plastic. That consolidates the paste into the corner and removes small voids. Keep strokes light and parallel to the edge to avoid rounding off the profile.
Use a wood or plastic edger for the last pass to sharpen the 45° edge if needed. A single, confident pass beats multiple noisy strokes that blur the corner. If minor imperfections remain, a clean trowel or a grout sponge after initial set can tidy them without damaging the form.
Timing is key: finish before bleed water disappears but after the surface supports your tool. Watch the surface sheen and test with a fingertip; when the surface resists plastic deformation, you’re ready for the final tooling and the crisp edge will hold.
Alternative fresh-concrete method: beveled nailer / 1x chamfer strip technique
The beveled nailer, or 1x chamfer strip, is a pre-beveled stock that nails directly to the form, producing a clean chamfer edge instead of the bulkier reveal that traditional edge forms create. It differs by using a bevel cut along the pour face, allowing the form to sit flush and eliminating much of the blocking required for standard perimeter forms, which speeds setup and reduces waste. This approach is particularly DIY-friendly and advantageous when quick installation, tight edge definition, and easy form removal matter for small pours or slabs with tight tolerances.
Materials and prep include pre-beveled 1x stock (pine, fir, or marine plywood variants), cut angles around 45 degrees or a custom bevel to suit edge dimensions, and fasteners such as stainless nails or deck screws plus a light release sealant compatible with the form. For cutting and bevel details, plan on clean 45-degree chamfers or slightly steeper profiles that resist chipping, and pre-bevel the stock before installation to avoid snagging concrete and glazing the edge. Installation workflow and finishing cover fastening to the form with proper spacing to maintain a tight edge, pour timing and removal considerations, plus cleanup steps like removing form ties carefully, applying release agents, and inspecting the cured bevel for consistency.
Quick-build beveled nailer template
Cut a 1x (or scrap 3/4″) board with a single long bevel along one edge. Set your circular saw fence to produce roughly a 45° bevel that gives a 3/8″ to 1/2″ chamfer at the concrete face — that profile works for most pours.
Mark screw locations every 10–12″ along the board. Fasten the beveled nailer to the form with two screws or nails at each mark so it won’t twist when concrete hits it. Place extra fasteners within 6″ of each end to hold tight against end pressure.
Tip: make one template, then clamp it to other boards and copy the bevel and screw pattern for repeatable parts. Cuts and spacing that worked on one form will save time across the job.
When to choose this method over ripped full boards
Use the beveled nailer when you need speed and economy. It’s fast to cut from 1x stock or scrap and nails right to the form, so you avoid extra blocking and setup time.
Be aware of the trade-offs. The finish can be a touch rougher than a full ripped, precision-milled board. The thin nailer is also harder to reuse after a few pours; it can split or deform where nails hold it to the form.
Bottom line: pick this for quick jobs and tight budgets. For high-end exposed finishes or when you need long-term reuse, invest the extra time in ripped full boards.
Finishing techniques to protect and refine the chamfer
A finishing sequence for chamfers starts with careful jointing and edging to define the bevel, then progresses to concise concave shaping and finally light hand trowel touch-ups. Use the right tools in the right order—jointers and edgers to establish the bevel, concave tools to refine the edge, and a hand trowel for subtle smoothing—while maintaining chamfer geometry and minimizing visible tool marks. Set blade sizes, angles, and temper so you neither overwork nor undercut the edge, and keep a steady pace with controlled pressure to preserve the bevel’s profile throughout the process.
This approach matters on a DIY jobsite because it translates to a cleaner, more durable edge that cameras and surfaces notice, not a rushed, uneven bevel. Feathering transitions into the main slab surface prevents flat spots or ridges and reduces the chance of chipping during curing. You’ll also learn practical tweaks to prevent sharp tool marks, manage curing cues, and adapt finishing depth or profile for different slabs without compromising edge quality.
Curing, jointing, and protecting formed chamfers
Start curing as soon as the surface can take a light touch. Use a spray-on curing compound or wet burlap to keep moisture in. Avoid heavy water on the chamfer edge that can wash fines out and soften the profile.
Place control joints back from the chamfer whenever possible so loads and shrinkage don’t concentrate at the edge. If a joint must cross a chamfer, make it a clean saw or formed joint and keep the gap even to prevent cracking at the profile.
Protect the freshly cured chamfer from traffic and form damage with temporary barriers or boards. For small details, a thin strip of foam or felt works well. Remove protection only after the concrete reaches working strength to avoid nicks.
Tip: Mark the chamfer line so trades know where not to lean heavy tools or ladders during curing.
Touch-up and patching for minor defects
Patch chips and voids with a pre-mixed grout, thin patch, or cementitious repair mortar. Mix to a kneadable consistency and apply in thin layers to avoid shrinkage. Press material into the defect and work it past the chamfer edge.
Feather the repair out onto the surrounding surface so the line of repair disappears. Use a damp sponge or small trowel to blend edges while the patch is still workable. Keep movements light to avoid flattening the chamfer profile.
For color match, add a small amount of cement pigment or use the same cementitious system the slab used. After the patch cures, lightly blend with a hand edger or rub with a fine abrasive if needed to remove any tool marks.
Tip: Repair as soon as you spot defects. Small fixes are easier to hide than large rework later.
Retroactive chamfering: working on hardened concrete
Retroactive chamfering after concrete has cured involves carefully beveling edges with grinders, router systems, or handheld saws when a built‑in formwork gap, edge defect, or functional requirement would otherwise compromise safety or appearance, and only after you confirm surface integrity, absence of dangerous micro-cracking, and that cutting will not affect reinforcement. Use this approach when the slab surface is sound, the edge needs a uniform bevel, and the project benefits from avoiding new formwork, with dust control, blade or bit selection, RPM ranges, and securing the slab or work area to keep accidental movement to a minimum.
With the right plan, you can select the tool, set the correct depth and width, protect adjacent surfaces, and follow a steady, heat‑controlled sequence to produce a smooth edge while avoiding micro‑cracking, ragged burrs, or edge spalling, using a guide, jig, or staging to maintain consistent bevel along the entire length. This matters on job sites and in workshops because it reduces demolition time, minimizes material waste, improves edge longevity, helps you meet finish standards, and protects nearby finishes and substrates from chips or dust, while providing clear decision points for dust collection, PPE, water suppression when feasible, and post‑cut checks.
Tools and blades for hardened chamfering
Pick the right tool and blade and the cut goes smooth. Below are practical options for retro chamfers, with notes on specs, rentals and jobsite tips.
- Diamond cup wheel Removes concrete quickly and creates flat angles. Use 4″–7″ wheels with medium grit for control. Wear ear and dust protection; these are inexpensive to buy but heavy to use—rent larger sizes if you have big areas.
- Segmented turbo cup Faster material removal on rough surfaces. Choose bonded segments rated for concrete and run at manufacturer RPM. They chatter on edges—steady pressure and light passes avoid kickback.
- Concrete router system Cuts crisp, repeatable chamfers with profile bits. Use carbide or diamond-tipped bits sized to the chamfer width. These give the cleanest finish but cost more; consider renting for one-off jobs.
- Hand-held concrete saw Good for deep or long chamfers where grinders struggle. Use a diamond blade designed for dry cutting and control depth in passes. These can be rented daily; expect to pay more for hydraulic or petrol models.
- Angle grinder Handy for small repairs and tight spots. Fit with a 4″ diamond cup or segmented blade and run at medium speed. Don’t force the tool—small grinders heat quickly and blades wear fast.
- Dust collection shroud Captures most airborne dust at the source. Match the shroud to the tool model and use a vacuum rated for concrete dust. A HEPA-equipped vac is worth renting for indoor work to avoid respirable silica fines.
- Water suppression Cuts dust drastically and cools blades. Use only with tools rated for wet cutting and manage slurry cleanup. Not always practical indoors, but excellent outside where drainage is available.
- Vacuum with HEPA Keeps the site clean and compliant with silica rules. Look for industrial M-class or H-class vacuums sized to tool CFM. These are often rented; buying makes sense if you do frequent concrete work.
When to accept a retrofit vs. plan for forming at pour time
Retrofit chamfering saves time when you’re fixing mistakes or updating an existing slab. It costs less than ripping out forms, but it adds labor, dust control and a different finish texture compared with formed chamfers.
Forming at pour time gives the cleanest, sharpest edge and minimal correction work later. If the project is new, tight details, long runs or architectural finishes are needed, planning for form chamfers is worth the upfront time and material cost.
Accept a retrofit when aesthetics are secondary, the chamfer is limited in length, or budget and schedule don’t allow re-forming. Use router systems or diamond tools and a good dust plan to get the best result when you choose retrofit.

Fastener and removal details: avoid blowouts and swelling
Use a grid or staggered fastener pattern tied to slab thickness, anticipated load, and edge conditions, specifying maximum center-to-center spacing, corner tie-ins, and guard patterns that minimize edge blowouts while accommodating chamfer and edge-form accessories. Incorporate temporary shims and spacers at strategic points to control form tightness, prevent edge swelling, maintain plumb and true edge dimensions during concrete pour, and allow early adjustment if settling occurs. Plan edge protection during the pour by selecting fasteners, washers, edge boards, chamfer strips, or protective sleeves, and lay out a removal timing strategy that preserves the edge integrity as the concrete cures.
A disciplined sequence and inspection routine helps catch signs of blowouts or swelling early, guiding adjustments without compromising the edge, and forming a concise post-pour checklist for moisture, temperature, and form condition. Using corrosion-resistant screws or bolts, compatible chamfer/edge-form accessories, and careful spacing tolerances ensures the edge remains true through form removal, curing, and any subsequent backfilling or finishing operations.
Timing for form removal and handling of sacrificial forms
Don’t yank forms off as soon as the surface looks hard. For small slabs and warm weather the concrete will reach initial set in a few hours, but the safe window to remove full-height forms is typically between 24 and 72 hours, depending on temperature, mix and slab thickness.
Thicker slabs and cool, damp conditions push you toward the longer end. If you rely on sacrificial forms (strips meant to break away), leave them in until the edge has enough strength to resist chipping — premature removal causes spalling and blowouts.
When in doubt, wait longer or score a sacrificial form and remove it carefully with wedges. You can always trim a little later; you can’t fix a torn edge on site without grinding and patching.
Preventing wood swelling and edge distortion
Keep your formwork dry. Seal or prime the face of plywood and dimensional lumber that contacts wet concrete. A simple coat of exterior primer, form oil, or even a bit of waterproofing compound stops the wood from absorbing water and changing shape.
Use non-absorbent blocking where you need consistent thickness at the edge. Plastic or coated shims and foam strips reduce trapping water between the form and the slab. Avoid configurations that create water pockets against the board—those are where swelling and edge distortion start.
Tighten fasteners and check alignment after the first few hours. If boards begin to cup or bow, replace them with sealed pieces before the concrete hardens fully. A straight, stable form equals a clean, crisp edge.
Troubleshooting common problems and fixes
Ragged edges, honeycombing, blowouts, excessive rounding, and overworked edges each have distinct signs and causes, and this section maps practical fixes to those issues. The key is to match vibration, form alignment, and timing to control tear-out, air pockets, and edge rounding, with targeted remedies like chamfered edges, proper consolidation, and adjusted finishing pressure. Practical fixes include aligning forms to prevent edge misfit, using edge forms or chamfer strips, improving vibration depth and duration, and timing finishing so the top surface supports the edge without squashing it.
Beyond fixing current pours, pre-pour checks on moisture, aggregate distribution, form tightness, and vibration plan help prevent repeats. Understanding how each defect arises lets a DIYer choose the right tools, slumps, and finishing tempo, reducing call-backs and material waste while keeping edges crisp. A quick on-site edge finish test before final set or curing oversight saves time by catching issues early and guiding adjustments for the next pour.
Fixes for honeycombing and voids at the edge
First, clear loose debris and expose sound concrete. Small voids respond well to hand-packed micro-mortar; dampen the area, tack coat with bonding agent, then pack tight in layers. Work quickly so the patch bonds and consolidates.
For deeper or pressurized voids use pressure grout or an injectable repair mix to force material into the honeycombed zones. Follow manufacturer directions for pump pressure and bleed time to avoid creating new voids.
If the edge is badly spalled or recurring, cut back to a clean square edge and cast a small replacement section or install a formed stainless/galvanized edge. That gives long-term durability instead of repeated touch-ups. Use proper cure and seal to finish.
Repair workflow for ragged or undersized chamfers
Start by grinding or chipping the ragged area to expose sound concrete and create a uniform surface. Remove dust and apply a bonding agent so the new material adheres. Keep the work area dry or lightly damp, depending on the product used.
Form a small cast-in patch with a wooden or foam chamfer form and use a high-strength micro-mortar to rebuild the profile. Pack the mix tight, strike flush, and finish to match the original chamfer radius. For a hidden correction, install a metal or hardwood trim fastened into sound concrete before patching.
If the chamfer is a recurring problem from formwork, consider replacing or shimming forms next pour. A neat form setup saves time on repairs. Use light curing and protect from traffic until the patch reaches strength.
Long-term durability and detailing for exposed/architectural edges
Exposed or architectural edges are a primary source of long-term spalling risk, and chamfered or hardened edge profiles help slow moisture ingress, reduce freeze‑thaw cycles, and guide finishing quality for durable aesthetics. Detail reinforcement strategy near edges: precise placement of edge reinforcing bars and dowels, adequate cover depths, and the interaction of these choices with non-specialty formwork to minimize voids and edge cracking. Specify edge profiles and treatments—chamfer width, radius versus bevel, and protective coatings—alongside clear cover requirements, choosing epoxy‑coated or galvanized rebar as needed to balance durability, corrosion resistance, and constructability. For long‑term performance, select chamfer methods and edge profiles based on exposure: use a tighter, closed chamfer or small-radius edge in high‑traffic or freeze‑thaw environments, and plan for adequate curing and protection during the first winter to minimize early cracking. Include guidance on how different chamfer methods (radius, bevel, or flat chamfer) hold up under freeze‑thaw, abrasion, and coating compatibility, and outline a clear maintenance/repair plan for degraded edges before cracks propagate.
Practical formwork alignment, curing, and concrete placement steps reduce early-age spalling and support clean architectural edges over time by preserving cover, controlling vibration, and avoiding segregation near exposed faces. Maintenance cues and lifecycle considerations—environment exposure, traffic loads, weather cycles, and repair options—offer a realistic plan for inspection, touch‑ups, and durable edge maintenance without resorting to specialty forms, including cost-effective repair options. By understanding edge detailing interactions and following disciplined sequencing, a DIY or jobsite reader can implement durable edges from the pour, monitor performance, and execute timely repairs to preserve the finish, with practical checks the crew can use daily on site.
Edge reinforcement and cover considerations
Keep the main reinforcement set back from the chamfer line. That way the concrete at the very edge can take the first hit without exposing rebar. I like to keep at least one clear cover dimension between the rebar and the finished edge—more on exposed faces where freeze/thaw or traffic is expected.
Use small edge bars or a continuous perimeter bar tied to the main mat. Bent bars or hairpins that wrap into the slab add resistance to spalling at corners. Wire mesh alone is fine for shrinkage control, but put the mesh slightly below the face rather than right at the chamfer.
Increase cover or add a hardened edge profile where chips matter most. As mentioned earlier, detailing the edge and placing reinforcement properly are the simplest ways to avoid long‑term edge damage. A little extra concrete thickness at the edge saves touch‑ups later.
Sealers, coatings, and maintenance to preserve a clean edge
Apply a breathable water‑repellent sealer once the concrete has cured. I prefer silane/siloxane products for exposed edges—they repel water without trapping moisture. Keep clear film coatings away from high‑contact edges unless you want a gloss finish that will scuff. When choosing coatings, verify compatibility with the sealer and reinforcement (epoxy‑ or urethane‑based coatings often pair well with epoxy or galvanized rebar). For harsh climates, select a sealer with higher abrasion resistance and UV stability, and plan for more frequent reapplication in sun/traffic exposed areas.
Inspect edges yearly. Look for early hairlines, rust stains, or loss of sealant. Reseal every 3–7 years depending on exposure and product. Small chips should be patched early to stop water getting to the reinforcement. For chipped or degraded chamfer edges, implement a targeted repair: clean the area, remove loose material, and repair with an appropriate patching material (epoxy mortar for structural edges, or a polymer‑modified concrete repair mix for non‑structural edges). Re‑profile the edge if necessary to restore the intended chamfer, then reseal after curing.
Repair steps for chipped or degraded chamfer edges in detail:
- Identify extent of damage and determine if edge is structural or cosmetic.
- Clean the damaged area with a stiff brush; remove loose concrete and dust; damp‑tack the surface.
- Choose repair material: epoxy mortar for structural edge repair or a polymer‑modified concrete patch for cosmetic edges; mix per manufacturer instructions to achieve the right consistency and bonding.
- Apply patch material to restore the chamfer profile; finish to match the adjacent edge, ensuring a smooth transition to avoid sharp corners that can trap moisture.
- Cure per product instructions; protect from rapid drying and direct sun initially.
- Reapply protective sealer/coating after the patch has fully cured and edge color/finish matches surrounding concrete.
Clean gently before reapplying any coating. Use a mild pressure wash and let the surface dry. Regular, simple maintenance keeps the edge crisp and avoids heavy repairs later.
Cost, time comparison and when to buy specialty chamfer strips
The cost/time triangle for chamfering edges breaks down into three practical paths: DIY wood chamfering with quick setup and lower material costs but more labor, plastic chamfer strips that sit in the mid‑range price and are easier to install and reuse, and sacrificial EPS forms that carry a higher upfront price but can be reused across many projects while protecting the edge during casting. Expect approximate per‑square‑foot costs with typical waste factors to vary by edge length, surface area, and waste from measuring, cutting, and alignment, so small, medium, and large slabs each benefit from proportional strip choices and occasional trimming. For planning, consider the rationale of long runs versus tight corners and how learning curve, cut accuracy, and rework potential influence overall timing and budget.
In practice, small projects may justify DIY wood or flexible EPS forms for quick turnarounds, while medium projects often gain from mid‑range plastic strips to reduce install time and ensure consistent chamfer angles, and large slabs typically justify plastic or sacrificial solutions when edge quality and repeatability matter across many edges. The timing impact comes from setup, material handling, cutting or shaping, securing, and any curing or acclimation steps that affect scheduling and workflow on site. Use this as a decision guide for choosing when to invest in specialty strips: long linear runs, where speed and repeatable angles matter, or scenarios demanding weather resistance, reuse potential, and more durable edge finishes.
Break-even scenarios: DIY vs. purchased strips
If you’re doing a single small run — a few edges on a weekend job — making your own wood chamfers or using a rasp and sanding block usually costs less. Time is the real currency: if your labor value is low and finish tolerance is loose, DIY wins.
Buy molded plastic strips once you hit repeat work. I look for two triggers: when you expect to reuse the same profile at least 5–10 times, and when your labor rate (or opportunity cost) is over about $25–35/hour. At that point the faster setup, consistent finish and less clean-up often pay back the upfront cost.
Also consider finish expectations. If the job demands tight, repeatable chamfers with minimal sanding, purchased strips save time and material waste even on moderate-sized projects.
Typical unit costs and reuse expectations
Plastic molded chamfer strips: expect about $2–$10 per linear foot depending on profile and material. They’re durable — you can often reuse them 10–50+ times if you don’t gouge them and you store them flat.
Wood templates: cheap per unit (often under $1/ft if you mill them yourself), but they wear faster. Realistically plan for 1–5 reuses before accuracy drifts or the edge needs replacing.
Sacrificial EPS forms: very low material cost per job (cents to a couple dollars per foot) but single-use or limited reuse. Use EPS when cost and speed matter more than long-term reuse; it’s great for one-off pours or templates that match a unique shape.
Quick rule: low volume and tight budget → DIY wood/EPS; recurring jobs and high finish tolerance → buy plastic strips.
Weather, curing, and environmental considerations that affect chamfers
Ambient conditions shape concrete behavior: cold or hot temperatures change setting time and finishing windows, while wind, humidity, and sun influence how chamfer edges form and hold their shape. Practical adjustments include controlling mix temperature, using accelerators or retarders as needed, and timing form trimming to protect chamfer integrity. For outdoor pours, establish a clear plan that accounts for temperature, humidity, wind, and dew point, and align curing methods to maintain edge moisture. Use pole- or ramp-style scheduling: check forecasts 48 hours in advance, and have curing supplies staged and ready. Also consider windbreaks and shaded placement to reduce premature drying, along with verifying dew point and choosing curing methods that slow moisture loss without delaying early strength gains.
This matters on the jobsite because slight shifts in weather can cause edge tearing, dusting, curling, or delayed cures that distort chamfer lines. By planning ahead—checking forecasts, scheduling pours for favorable temperature ranges, and documenting conditions—you can maintain edge quality and consistency. Implement post-pour routines like protective coverings, moisture management, and staged finishing to adapt to extremes from cold to hot or windy days, ensuring reliable chamfer results and safer, smoother workflows.
Cold-weather precautions for chamfers
When temperatures drop, the concrete around chamfers slows down and becomes vulnerable to freezing. Keep forms insulated with blankets or foam sheathing to hold heat where the edge detail is forming. Where practical, use insulated or double-walled form systems and position edges away from cold drafts.
Use a tested accelerating admixture or a hot-mix to speed set time when needed. Choose non-chloride accelerators for ease of placement and to avoid corrosion concerns in reinforced areas. That shortens the finishing window so you can get the chamfer shaped before the surface stiffens unevenly.
Delay stripping any chamfer forms until the concrete has gained enough strength and the risk of freeze damage is gone. If you must remove forms early, protect the exposed edge with insulated covers and avoid disturbing the joint. For indoor pours, ensure interior temperatures stay above 50°F (10°C) for at least 24–48 hours after placement or until initial set is achieved, whichever comes first.
Hot/dry weather finishing and curing tips
In hot, windy, or sunny conditions the surface around chamfers dries fast and can suffer plastic shrinkage. Keep the edge wet with fogging or misting while you work so the chamfer stays pliable for a clean tool finish. Increase protective shading and use desiccant mats or windbreaks as needed to slow evaporation.
After finishing, cover chamfers immediately with curing blankets or apply a curing compound to lock in moisture. Favor products labeled for concrete edge curing and apply according to the manufacturer’s coverage rate. Focus protection on the thin edge—if it dries first you’ll get microcracking even if the slab center stays moist.
Timing is key: start curing right after final shaping. That keeps the chamfer strong and prevents early crazing or edge dusting. In hot weather, shorten bleeding time by using appropriate retarders to reduce plastic-set cracking, then switch to a curing method that maintains surface humidity without delaying final strength.
Concrete curing options to consider (choose one or a combination based on site needs):
- White-pigmented or color-matched curing compounds that form a clear pinalkfilm, minimizing edge staining while preserving moisture
- Polyethylene or polyolefin curing blankets for overnight protection in cool or windy conditions
- Water-curing with misting and fogging for short durations, followed by a final curing compound
- moisture-retaining covers (6–10 mil plastic, burlap with moisture) for extended curing windows
- Indoors: controlled humidity chambers or adjustable HVAC-assisted curing where feasible
Safety protocols and best practices
These practices matter on a DIY or jobsite scale because they reduce injury risk, improve accuracy, and keep tools operating reliably under demanding conditions. Understanding LOTO and power-tool safety fosters better habits, saves time by preventing misfires and tool damage, and supports safer maintenance practices. Proper dust management and respirator selection, including fit testing and the use of NIOSH-approved respirators or PAPRs for grinding, paired with local exhaust or clean-air spaces and hygiene measures, protect workers from long-term health hazards and sustain productivity in dusty environments.
Respiratory protection and dust control during retrofit grinding
Concrete and masonry grinding throws a lot of fine dust. Don a fitted respirator—N95 at minimum for short, light work; P100 for prolonged or heavy grinding. If you already covered respirator basics earlier, follow that fit and seal guidance.
Control dust at the source. Use a grinder with a HEPA-rated vacuum or a dust shroud tied to a vacuum. For large areas, wet suppression will cut airborne dust dramatically; keep water management in mind to avoid slips or electrical hazards.
Change filters and cartridges on schedule and store respirators clean. If you rent a HEPA vac or shroud expect about $40–$120/day depending on capacity. These controls protect you and keep cleanup simpler.
Tool-specific safety tips (saws, nail guns, grinders)
Quick, practical checks before you start. Treat each tool like it can bite—inspect guards, blades, and fasteners first.
- Circular saw Check blade condition and tooth count for the cut. Use the correct bevel setting and depth. Clamp the work and keep the shoe flush; rental circulars run $15–$40/day.
- Track/table saw Verify anti-kickback, blade guard, and riving knife. Use the right blade for material to reduce binding. Always use a push stick on narrow cuts; decent portable models rent ~ $30/day.
- Nail gun Verify safety contact tip and correct pressure for fastener length. Use the manufacturer’s depth and pressure settings to avoid blow-through. Disconnect air and engage safety when walking or clearing jams; compressors often rent $25–$60/day.
- Angle grinder Use the correct wheel for metal or concrete and confirm guard orientation. Keep two-handed control and avoid binding. Fit a dust shroud and HEPA vacuum for concrete work; expect shrouds or vac combos for $50–$150/day.
- Reciprocating saw Choose the proper blade pitch for the material. Secure the work and let the blade reach speed before forcing the cut. Hold firm and watch for hidden nails or screws to prevent kickback.
- Lockout/tagout De-energize and tag the power source before maintenance or blade changes. Verify no stored energy remains. Simple lockout kits cost under $30 and save a hospital visit.
Visual signs and examples to look for
The key idea here is to map a short, repeatable visual sequence that anyone can spot in photos or quick sketches: check the layout and chamfer anchor, run a dry-fit or mock outline, perform a simple post-pour inspection, and verify the finishing cues. Expect to see visual anchors that show where the bevel sits relative to the form edge, including any deviation from misalignment or sealing gaps. Then confirm edge width and consistency with a mock-fit, followed by a quick after-set checklist that flags edge sharpness, uniform taper, and any bleed or wipe lines, ending with finish cues that read in photos.
This approach matters on DIY sites and job sites because it gives you a repeatable, camera-friendly method to assess quality before moving on. It helps you catch misalignment, inconsistent taper, and improper finishes early, saving rework and ensuring the chamfer reads cleanly in photos. Use the prescribed capture plan—top view along the length, close-ups at start, middle, and end, plus a before/after mock sketch—to demonstrate alignment, consistency, and final edge quality, and to communicate clear, actionable results to crews or clients.
What a “perfect” chamfer looks like at various stages
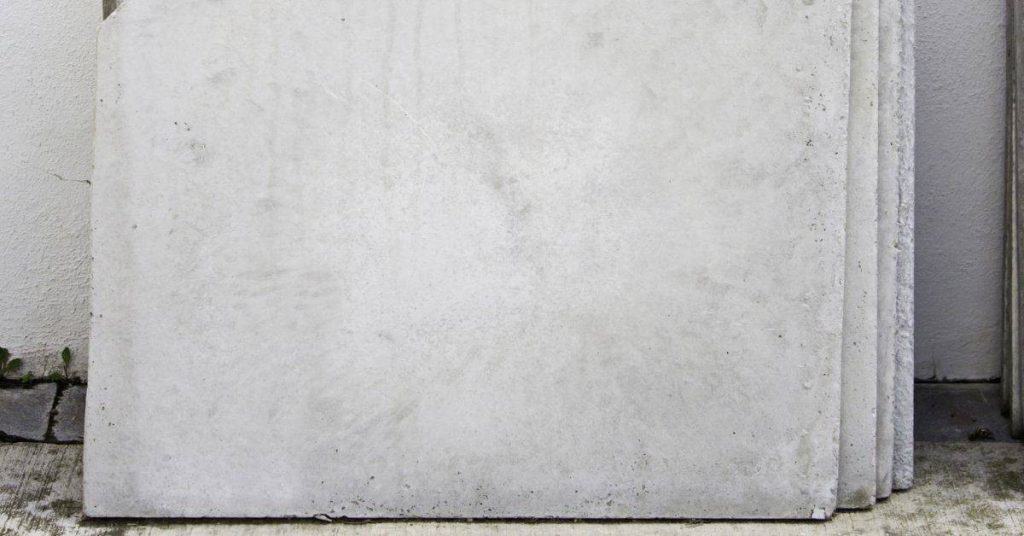
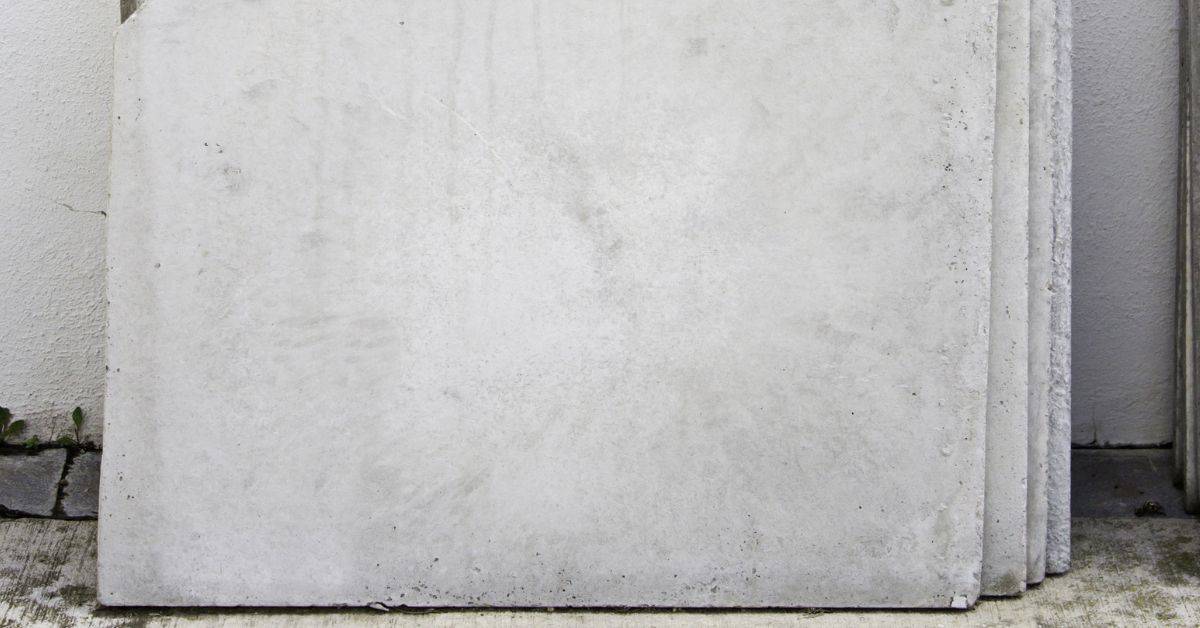
Fresh pour: the chamfer edge should read as a clean, continuous bevel with no sagging or excess paste. You want a uniform radius or straight bevel line, and the concrete should appear consolidated against the chamfer form—no large gaps or laitance pooling.
After set: the edge keeps its shape and shows no tears or feathering where the form meets the concrete. Small surface crumbs are normal, but avoid visible voids or stepped spots along the length. Sharpness should be consistent from end to end.
Cured: the chamfer holds the designed profile with no broken corners or spalls. Check for uniform color and texture; a few hairline shrinkage cracks are acceptable, but missing material or honeycombing at the bevel is not.
Quick on-site checklist for final QA before form removal
Walk the line and inspect edge straightness visually and by touch; look for continuous contact between form and concrete and for any spots where concrete pulled away. Confirm consolidation by checking for voids, rock pockets, or large entrapped air right at the chamfer.
Verify protection: surfaces that cured under blankets or plastic show more uniform finish—exposed spots should be checked for rapid drying damage. Remove loose form oil and debris so you can see the true edge condition.
Check anchors and embedded items: tap removable anchors and cut or grind ties flush only if the concrete has enough set. If there are signs of understrength or excessive tearing, leave forms on longer and re-check. Document any defects with a quick photo before stripping.
Conclusion
Getting a clean chamfer now saves you from costly fixes later and keeps the edge looking sharp, while protecting the edge from chipping and water intrusion. When you follow solid planning, careful form setup, and proper curing, you’ll end up with a durable, architectural edge that runs true from start to finish.
To lock this in, you can treat the work like a quick, practical checklist: confirm your layout and chamfer depth, build and secure a simple ripped-wood form or beveled strip, pour and strike the edge while the concrete is still workable, remove and inspect the form after the initial set, and finish with the right sealer or cure while avoiding moisture loss. Keep the chamfer consistent with the pour, test any new method in a small area first, and verify you’ve achieved a clean, uniform edge before moving on to the next section of the slab.
Common mistakes to avoid are overly tight fasteners that distort the form, setting the chamfer too deep or too shallow, and letting the concrete slump or tear as you strike the edge. Don’t rush curing or skip protection—keep a controlled environment and follow safe handling practices, especially with forms and sharp tools. If you’re uncertain about achieving a true chamfer on a large slab or dealing with retroactive work, it’s wise to pause and reassess before you commit further.
If the edge needs more attention than your setup can safely handle, or you’re tying into an architectural exposure with strict tolerances, call in a pro. For most DIY pours, you can finish confidently by sticking to tested methods, documenting your steps, and keeping safety a non‑negotiable rule. Stay steady, verify each move, and you’ll end up with a clean, durable chamfer that lasts.
FAQ
What is a chamfer edge and why does it matter?
A chamfer edge is a small bevel on the slab edge. It helps water run off, resists chipping, and looks cleaner than a square edge.
Can I form a chamfer without special forms?
What are the best methods to create a clean chamfer?
Score the edge with a straight edge, then pull a chamfer blade or a small trowel along a 45-degree guide. Keep the slab moist but not sloppy, and smooth the bevel with light passes of the trowel.
What mistakes should I avoid when forming chamfer edges?
Don’t rush and don’t shove the edge. Avoid deep or uneven bevels; they chip easily and look sloppy. Also, don’t hide a poor edge with too much finishing compound.