
Introduction
The slab-on-grade construction method is popular for its simplicity and cost-effectiveness. However, it’s crucial to understand where edge insulation helps and where it might cause issues.
This guide will walk you through the benefits and potential drawbacks of using edge insulation in your slab-on-grade project. Let’s dive right in!
Key takeaways
- Evaluate edge insulation location to minimize thermal bridging at slab perimeter.
- Consider alternatives like under-slab insulation or perimeter crawlspace for comfort.
- Ensure proper moisture management with drainage, damp-proofing, and vapor barriers at edges.
- Choose insulation with compatible boards, fasteners, and edge detailing to prevent gaps.
- Assess whole-assembly U-factor and thermal bridging to meet code requirements.
- Plan retrofit options carefully to avoid trapping moisture or compromising slab integrity.
Table of Contents
- Introduction
- Key takeaways
- Overview: What is slab-on-grade edge insulation?
- Why edge insulation helps: energy and comfort benefits
- When edge insulation causes trouble: common failure modes
- Design alternatives: edge insulation vs under-slab insulation vs perimeter crawlspace
- Material selection: choosing the right insulation for slab edges
- Thermal performance: R-values, thermal bridging, and whole-assembly U-factors
- Detailing and proper installation techniques
- Retrofit options for existing slab-on-grade homes
- Drainage, damp-proofing, and moisture management at the slab edge
- Building code, standards, and permit considerations
- Cost analysis and ROI: budgeting edge insulation projects
- Common mistakes and how to avoid them
- Durability, pests, and long-term maintenance
- Safety and environmental considerations during installation
- Tools, materials checklist and visual checkpoints for DIYers
- Case studies and real-world examples
- Decision checklist: When to use edge insulation and when not to
- Conclusion
- FAQ
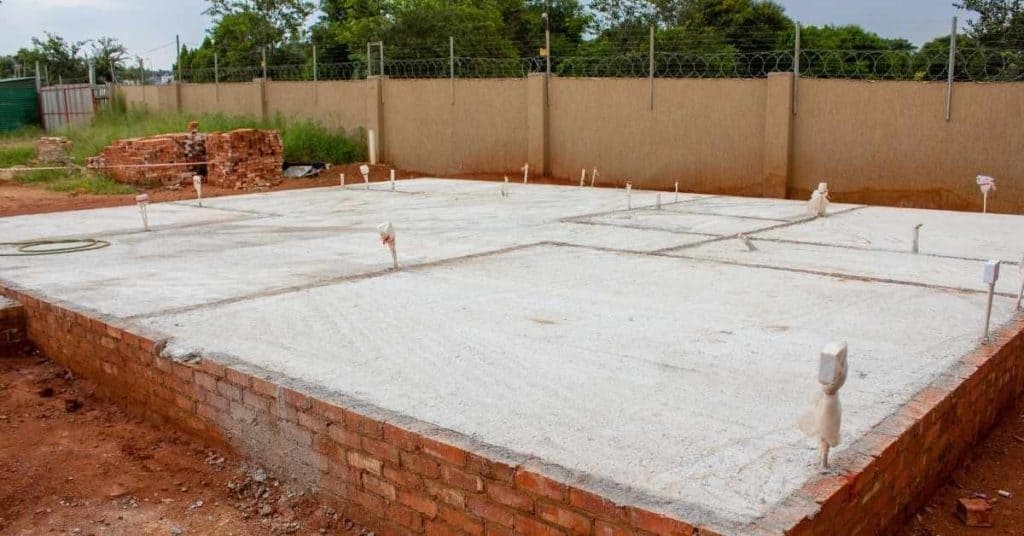
Overview: What is Slab-on-Grade Edge Insulation?
Slab-on-grade edge insulation is the material and detail that safeguards the outer perimeter of a concrete slab from heat loss, frost heave, and cold spots. Unlike under-slab or exterior wall insulation, it wraps around the slab’s edge to maintain warmth and minimize thermal bridging where the slab meets the ground. Common options include rigid extruded polystyrene (XPS) or polyisocyanurate boards placed on the foundation wall exterior, insulated concrete forms, or spray foams.
Edge insulation is crucial for reducing cold spots, enhancing comfort, and minimizing heat loss without creating moisture traps. Proper management of gaps, misalignment with formwork, improper adhesion, and continuous vapor barriers are essential. Plan for drainage, compatibility with concrete pours and soil conditions, and consult local codes or design guidelines for edge detailing.
Common Insulation Types for Slab Edges
- Rigid Foam: XPS and EPS are popular due to their durability and R-value. For instance, 2-inch-thick EPS offers an R-value of approximately 8.4 per inch.
- Polyisocyanurate (Polyiso): Providing around R-6.5 per inch, it’s more expensive but performs better than rigid foam.
- Mineral Wool: Suitable for damp conditions, it offers an R-value of roughly 4 per inch and provides some sound insulation.
- Insulated Concrete Forms (ICFs): Integrating insulation directly into the pouring process, ICFs are a complex but effective solution for new projects or major remodels.
Edge Insulation in Whole-Building Thermal Strategy
Think of your building’s thermal strategy as a three-legged stool: under-slab insulation, wall insulation, and HVAC sizing. Edge insulation is one leg but vital for efficiency. It seals drafts where walls meet the slab, keeping spaces cozy without overloading heating or air conditioning.
Edge insulation should complement under-slab and exterior wall materials. Inadequate concrete foundation thickness or improper installation techniques can undermine any insulation effort. Consult professionals if unsure about specifications to ensure proper balance of thermal integrity.
When edge insulation causes trouble: common failure modes
While edge insulation offers significant benefits, it can also lead to issues if not installed correctly or used inappropriately. Understanding these potential problems helps ensure a successful and safe installation.
Moisture management gone wrong
Improper moisture management is the most common cause of edge insulation failure. Too much moisture can lead to insulation degradation, mold growth, and structural damage. To avoid this:
- Ensure proper drainage around the slab perimeter.
- Use a suitable vapor retarder or barrier, depending on your climate and slab design.
- Consider using moisture-resistant insulation materials.
Inadequate installation or material choice
Poorly installed edge insulation can lead to air gaps, thermal bridging, and reduced effectiveness. To prevent this:
- Check base compaction before installing insulation.
- Use compatible insulation materials that won’t degrade concrete or affect slip resistance.
- Avoid using insulation types that aren’t suitable for your climate and slab design.
Cold spots and condensation
Even with edge insulation, cold spots and wall condensation can still occur if not designed properly. To mitigate these issues:
- Ensure your slab has adequate thickness and insulation.
- Consider using radiant floor heating to supplement edge insulation.
- Monitor indoor air quality and address any condensation concerns promptly.
When edge insulation causes trouble: common failure modes
Edge insulation, while beneficial for energy efficiency, can also create moisture and structural issues if not installed correctly. It traps humidity at the slab’s edge, leading to condensation, compromised vapor barriers, and potential pest intrusion through gaps or porous materials.
The devil is in the details: proper sealing of seams, overlaps, and termination points near slabs, footing walls, and drainage planes are crucial to prevent water migration into wall assemblies. Neglect these aspects, and you’ll face higher energy bills, wetter walls, and costly repairs down the line.
Moisture and capillary issues at the slab perimeter
Groundwater trapped at the slab edge can lead to wet basements or pooling under your house without proper ditch drains. Ensure soil compaction around the base is adequate to prevent moisture intrusion.
Insufficient detailing can result in wicking, where water moves from ground to wall and into building materials. This can cause freezing, expansion, or mold growth. Make sure edge insulation fits snugly but allows for water drainage.
The connection between slab edges and foundations must be watertight. Check seals and keep surfaces dry to prevent moisture intrusion. Prevention is always better than fixing problems later.
Structural and frost-heave interactions
Edge insulation can disrupt even freezing across the soil, leading to frost heaving. This causes frozen earth to expand and push up on your building’s foundation in cold climates. Ensure the base is well-compacted before pouring concrete to handle freeze-thaw cycles without cracking or shifting.
Monitor for signs of frost heave, such as cracks forming or small movements around doors and windows. Keep in mind that moisture issues near the slab edge can exacerbate freeze-thaw cycles, especially in clay-rich soils where moisture gets stuck and expands under freezing.
Design Alternatives: Edge Insulation vs. Under-Slab Insulation vs. Perimeter Crawlspace
When it comes to insulating your slab-on-grade foundation, you have several options that balance heat loss, moisture control, and cost. Each method has its pros and cons, so understanding their trade-offs is crucial for making an informed decision based on your climate and specific slab setup.
Edge Insulation
Edge insulation keeps the perimeter of your slab warm, often reducing heat loss paths. It’s typically easier to install than other methods but may not be as effective at preventing moisture from rising under the slab. To ensure optimal performance, seal edges properly and consider combining it with a shallow crawlspace for added moisture control.
Under-Slab Insulation
Under-slab insulation reduces heat loss directly at the slab level but can complicate pours during construction. It’s essential to install it with appropriate barriers to prevent vapor and moisture paths. This method offers good thermal performance but may require additional considerations for radon mitigation and humidity control.
Perimeter Crawlspace
A conditioned shallow crawlspace provides humidity control and cleaner temperatures at the floor level. However, it adds ongoing HVAC and maintenance considerations. To make the most of this method, ensure proper ventilation and consider using a dehumidifier to manage moisture levels effectively.
Pros and Cons Matrix (Thermal, Moisture, Cost, Constructability)
The following matrix helps you decide which insulation option best fits your home:
Edge Insulation
- Pros: Easier construction with fewer specialized materials, inexpensive compared to other methods for quick ROI.
- Cons: Possibility of thermal bridging reducing overall energy efficiency, risk of structural damage if not installed properly, requires ongoing maintenance to prevent mold and pests.
Under-Slab Insulation
- Pros: Better control over indoor air quality and moisture management, can be combined with other methods for enhanced performance.
- Cons: Complicates pours during construction, risks vapor and moisture paths if not installed correctly, may require additional considerations for radon mitigation and humidity control.
Perimeter Crawlspace
- Pros: Offers humidity control and cleaner temperatures at the floor level, can be combined with other methods for optimal results.
- Cons: Adds ongoing HVAC and maintenance considerations, requires proper ventilation to prevent moisture buildup.
Edge insulation is an ideal choice for quick fixes or cost-sensitive projects where immediate benefits outweigh long-term expenses. However, combining methods may be necessary to achieve the best overall results in certain situations.
Hybrid Strategies and When to Combine Methods
In some cases, using a combination of edge insulation, under-slab insulation, and perimeter crawlspace can provide the most effective solution. A solid approach is to use continuous edge insulation alongside full under-slab coverage. This combo tackles heat loss from the edges and keeps the entire slab warm.
Consider combining methods if:
- You have uneven ground or lots of rocks, in which case doing just under-slab may not be sufficient. Edge insulation plus a good under-slab layer will handle the mess and give you better results overall.
Before proceeding with any combination, ensure that your budget and materials costs are well-understood. Additionally, proper base compaction is crucial before laying any insulation to ensure optimal performance.
Material selection: choosing the right insulation for slab edges
Compressive strength and durability considerations
When selecting edge insulation, consider the slab’s long-term pressure. Ensure your base is solidly compacted; a weak base compromises edge integrity.
Durability is paramount. Opt for materials that withstand sustained loads without degrading. Prioritize ratings that align with project demands to avoid costly repairs later.
Creep, where material deforms under prolonged stress, poses risks to slab edges. Choose materials resistant to compressive loads and creep to prevent sinking or splitting over time.
Moisture tolerance and permeability impacts
When choosing insulation for your slab edges, prioritize permeability. Wet soil can delay concrete pouring by hindering the drying process. Thus, closed-cell foam is often preferred, as it resists water better than open-cell alternatives and mitigates moisture issues from wet soils.
Before laying down insulation, inspect soil conditions. If high moisture levels are present, address them: replace the wet soil or implement effective drainage solutions. Ignoring this step can undermine even the best insulation’s performance.
Excessive site moisture isn’t just an insulation concern; it impacts overall slab stability and long-term durability. While selecting moisture-resistant materials is crucial, ensure a dry base for optimal results. Regularly monitor soil conditions and adjust plans as needed.
Thermal performance: R-values, thermal bridging, and whole-assembly U-factors
Edge insulation R-values provide insight into a slab’s resistance to heat transfer. However, they must be considered in conjunction with the interior and exterior surfaces’ resistances. To obtain a meaningful whole-slab measure, area-weight the edge R-value with these surface resistances, using the perimeter-to-area ratio. This will help compute edge U-factors, which should account for common thermal bridges like rim joists, thickened edges, rebar, and slab-perimeter transitions.
To calculate edge performance, follow this method: combine interior/exterior surface resistances, add the edge insulation R-value, include any interior finishes, then convert to U = 1/R_total for the edge path. Remember that moisture control, vapor barriers, sub-slab conditions, and material degradation can impact the slab’s effective R/U over time. Use practical design tips and on-site checks to avoid overestimating performance and ensure a comfortable, durable, and affordable slab.
How to model edge effects in energy software
To accurately simulate edge effects, create a 2D barrier detail in your energy modeling software. This captures the real impact of corners and edges where heat leaks are common due to thinner insulation layers. Set up this element carefully, as it significantly influences the precision of your energy model.
Avoid relying solely on conservative rules-of-thumb for complex shapes at building intersections. Instead, invest time in detailed 3D models that reflect specific construction details of your project. These accurate representations ensure your R-values and whole-assembly U-factors closely match reality.
Always double-check your model for missing edge conditions, as oversights can significantly skew overall energy consumption estimates. Getting these details right upfront saves time on revisions later and maintains a trusted simulation of your building’s thermal performance over its life cycle.
Typical energy savings and payback examples
Addressing thermal bridges in your home’s edges can save you 10 to 15% annually on heating and cooling bills. In harsher climates, upgrading materials with high R-values can return your investment within five to seven years. Run calculations using energy modeling software, inputting current insulation levels, expected upgrades, and local utility prices for realistic savings estimates.
In moderate climates, aim for energy savings that cover expenses within three to five years. This quick payback keeps updates financially viable while providing immediate comfort improvements in your home.
Back to top ↑
Detailing and proper installation techniques
Edge insulation detailing safeguards the slab by encircling it with continuous insulation, tying into framing cleanly. It also addresses transitions at walls, slabs, and door thresholds, and seals joints to keep moisture out.
Select insulation materials and thickness based on R-values, planning installation order so foam resists UV damage during pours. Protect from sun and construction wear using membranes, boards, or netting, and seal all joints and penetrations for continuity. Effective edge detailing coordinates moisture barriers, grading, and a capillary break to prevent wicks, along with thorough prep, fasteners, and timely inspections.
Sequencing during concrete pour and finishing
Before pouring concrete, ensure the base is solid. Check base compaction to confirm it’s ready for wet concrete weight. Carefully place formwork around insulation to prevent damage.
During the pour, monitor where fresh concrete meets insulating materials. Use a rubber float or board to gently guide and protect these areas without damaging them. Avoid harsh movements that could cause shifting or cracks.
After initial finishing, address any uneven edges around forms immediately. Proper edging protects insulation layers underneath. Remember to time your final touches well; rushing can lead to poor quality and wasted effort.
Fastening, joint treatment, and termination details
For fastening insulation material, use mechanical fasteners for a solid grip. Avoid relying solely on adhesives—mechanical fasteners like screws or staples are stronger and more reliable long-term.
Joint treatments are crucial to prevent water seepage. Use foam tape or high-quality sealants to plug gaps, ensuring compatibility with used materials to avoid warranties being voided and premature failure.
Termination points are critical for preventing thermal bypass and moisture entry. Carefully detail how elements like walls, floors, and roofs meet to avoid leaving any gaps. Check that base compaction is solid before attaching anything heavy at the bottom edge of your structure; this provides a secure anchor point without risking future movement or cracking.
Retrofit Options for Existing Slab-on-Grade Homes
For existing slab-on-grade homes, retrofitting insulation involves four practical methods: exterior excavation and installation, interior rim insulation, insulated perimeter pours, and floating interior insulation. Each approach balances goals such as R-value, moisture control, indoor air quality, and budget while considering the slab’s condition, soil, drainage, and nearby utilities. Clear sequencing, honest cost estimates, and a decision on DIY versus professional work are crucial before starting any trenching or pours.
Each method alters moisture paths, load transfer, and finish compatibility, so understanding when to excavate, how to lay vapor barriers and drainage, and how to seal rims and thermal breaks helps avoid costly mistakes and rework. With thorough planning, you can enhance comfort, reduce heat loss, and maintain healthier indoor air while keeping the project scope and safety checks realistic for a DIY schedule.
Exterior Excavation and Retrofit: Pros and Cons
This approach allows inspecting and addressing problems under your foundation without damaging interior surfaces.
Pros
- Preserves interior surfaces, keeping your home neat.
- Potential for quick installation of drainage solutions to protect the slab.
- Access to inspect and reinforce underlying support structures.
Cons
- Significant expense, especially labor costs.
- Increased risk if not done correctly; could damage existing building systems outside.
- Exposes exterior walls to moisture and mildew during work.
Exterior excavation is best for addressing major drainage or structural issues without redoing your floors. Carefully consider the financial and practical implications before proceeding.
Interior Retrofit Techniques and Minimal-Invasion Options
To minimize mess and cost, some homeowners prefer insulating from inside their homes. You can inject polyurethane foam directly against interior walls where cold air can infiltrate. This is straightforward but consult professionals if unsure about the required thickness.
Inset trenches involve digging a small trench next to your slab, adding rigid foam boards, and replacing baseboards. It’s effective for fixing drafts at floor-wall transitions but remember to check base compaction during excavation to avoid undermining concrete.
Insulated skirting acts like a curtain along tracks mounted to the subfloor near exterior walls. Though easy to install and remove seasonally, it’s not foolproof against cold floors or drafts under all conditions. It serves as a quick fix but won’t replace comprehensive insulation in harsh winter climates.
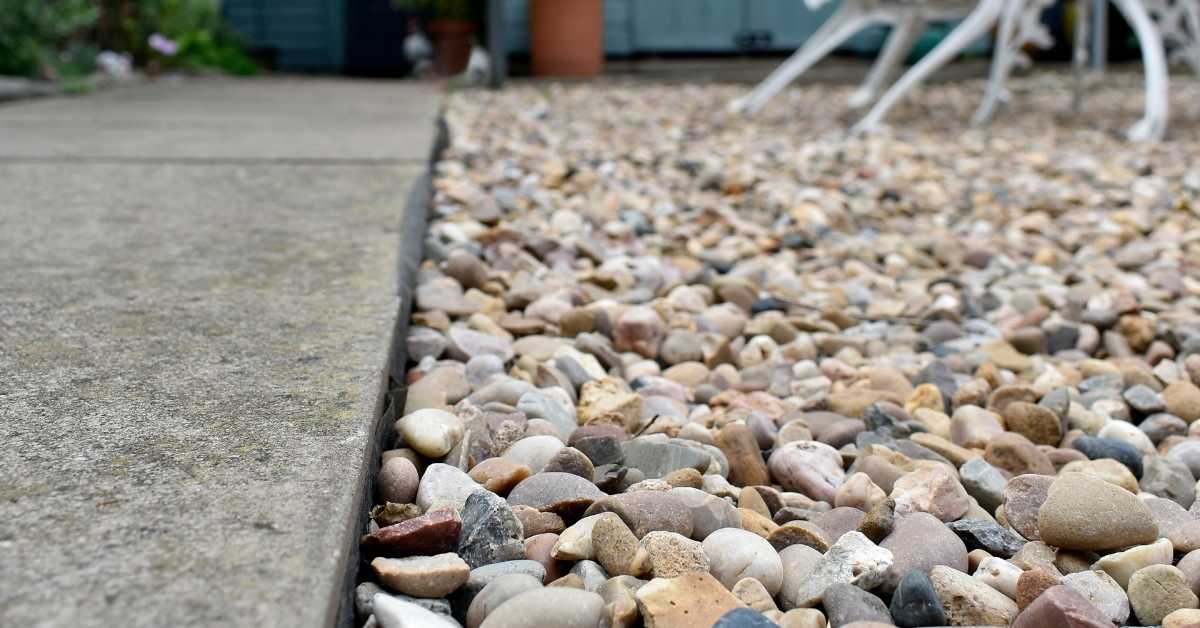
Drainage, damp-proofing, and moisture management at the slab edge
Edge insulation is most effective when integrated into a comprehensive system that includes proper site grading, a continuous capillary break, and reliable foundation damp-proofing. Ensure the slope directs water away from the slab edge, avoid low spots that may wick moisture up into the concrete, and plan for a capillary break between soil, insulation, and the edge pour to prevent moisture migration.
Properly setting up the edge reduces potential damp problems and keeps interior finishes, flooring, and HVAC systems from battling moisture daily. On DIY jobs, sloppy spacing, gaps, or damaged backfill can hide leaks until higher humidity, efflorescence, or mold appear, making repairs costly. Follow a practical sequence: coordinate damp-proofing, edge insulation, grading, and drainage paths; pour in stages, backfill carefully to avoid bridging, and conduct pre-pour inspections and post-pour tests to verify moisture control.
Capillary breaks, permeable backfill, and drainage boards
A capillary break, an impermeable layer preventing water wicking into the foundation, should be placed directly under the slab edge. Next, use permeable backfill material around the base of walls or columns to allow water drainage away from the structure. Ensure base compaction is checked and solid before placing materials.
Install drainage boards along slab edges to direct residual surface water safely away from the building’s foundation walls, keeping basements dry and preventing costly repairs.
Flashing and termination above finished grade
Above the slab edge, properly flash transitions where insulation meets siding or cladding to keep water out of foundation walls. Ensure base compaction is solid before installation. Flashings should extend up and over edges, sloping away to direct water downwards and outwards from the building.
At finished grade, ensure cladding extends far enough below surface dirt so that when soil levels settle, a protective gap remains above ground level, preventing water entry through capillary action once the slab is surrounded by earth and mulch.
Building Code, Standards, and Permit Considerations
Understanding building codes, standards, and permit requirements is crucial for successful slab-on-grade construction. This section delves into relevant codes, permits, and inspections, ensuring your project’s long-term performance and compliance.
Typical Code Requirements for Slab Edge Insulation
Building codes mandate specific R-values for slab edge insulation to maintain energy efficiency. Check with local authorities for the required R-value in your area, as it varies by region. Compliance is mandatory; failure to meet these standards may result in fines or rework.
Codes often prescribe minimum insulation thicknesses for specific R-values. For instance, a 2-inch thickness might be required for an R-10 value. Stick to these prescriptions to avoid potential issues later on.
Base compaction is another critical factor. Ensure the ground beneath your slab is properly compacted before pouring concrete to prevent future structural problems that could compromise insulation effectiveness.
Documentation and Inspection Tips for Permitting
To pass inspections, maintain up-to-date plans with sketches of any changes. Include clear photos showing installed edge insulation and all relevant details.
Check base compaction levels before pouring concrete to avoid issues like sinkholes or cracks. Ensure insulating materials are spaced accurately according to code guidelines. Use high-quality, standards-compliant supplies to prevent inspection issues.
Engage with local building officials early and often. Address any compliance issues promptly to minimize delays. Thoroughly understand your building codes to avoid assumptions and stick strictly to requirements.
Cost Analysis and ROI: Budgeting Edge Insulation Projects
This section provides a practical framework for estimating the costs of edge insulation projects, considering both new construction and retrofits. It breaks down expenses into clear categories, allowing you to compare slabs-on-grade with or without existing edge insulation. You’ll also learn how lifecycle savings, moisture control, and durability contribute to payback periods.
Understanding risks, contingencies, and sensitivities helps you plan for weather delays, material availability, and framing changes, keeping your budget intact. Compare material choices, climate zones, and slab strategies using quick rules of thumb to make informed decisions that align with reality on-site.
Cost Drivers and Low-Cost Alternatives
When budgeting for edge insulation, focus on these three main cost areas: excavation, drainage setup, and material selection. Prioritize proper base compaction to save on long-term repairs.
To cut costs without compromising performance:
- Scout second-hand materials or bulk buys from suppliers.
- Consider less expensive edge insulation products that still meet basic standards, verifying quality before purchasing.
Explore free drainage solutions using natural slope and local grading for water runoff management. However, remember that cheap fixes can lead to costly long-term issues, so balance saving money with getting a solid foundation.
Sample ROI Scenarios by Climate and Energy Price
Climate plays a significant role in your edge insulation project’s return on investment (ROI). In colder regions, you’ll see faster payback times due to higher winter heating costs. Conversely, warmer areas will take longer to recoup initial expenses because of lower summertime cooling needs.
Consider this: if you’re in a cold climate with harsh winters, good insulation can quickly reduce those heating bills. However, if you’re more concerned about occasional air conditioning use, savings won’t accumulate as fast over time compared to year-round heat usage.
Don’t forget that energy prices fluctuate. Factor in current and likely future utility rates when planning your budget for more accurate long-term savings estimates. Stay informed about local trends to make better predictions.
Common Mistakes and How to Avoid Them
Edge insulation for slab-on-grade construction can be a double-edged sword. When done right, it enhances thermal performance and moisture control. However, common mistakes can lead to water intrusion, edge frost, cracks, and a shortened lifespan of your concrete slab.
To ensure a weathertight, durable floor that controls thermal movement and reduces crack formation, plan for correct termination, solid drainage, proper curing, and pair the right compressive rating with compatible insulation and reinforcement. Here’s how to avoid frequent errors:
Mistakes during new construction
Avoid these common pitfalls to keep your project on track:
- Discontinuous insulation: Gaps weaken thermal performance. Use foam gaskets or spray foam around gaps and penetrations to maintain a continuous barrier.
- Pouring without edge protection: Cracks can form where concrete meets wood forms. Secure edges with temporary plastic strips to prevent this.
- Neglecting structural details: Skipping crucial connections weakens the whole structure. Stick to your plans and double-check dimensions before pouring to ensure a strong foundation.
Regularly review each step to catch these avoidable errors early in the construction process.
Mistakes during retrofit projects
Avoid these common errors to save time and money on your retrofit project:
- Inadequate excavation depth: Not digging deep enough can result in weak foundations and structural issues. Always measure existing structures carefully before you dig to ensure a stable base.
- Ignoring drainage patterns: Failing to assess and accommodate current water flow can lead to flooding or erosion problems down the road. Study the layout first, then plan for natural runoff directions to maintain proper drainage.
- Incompatible materials: Mixing incompatible building supplies without checking specifications can cause durability issues. Make sure new additions match existing structural requirements perfectly to maintain a strong, long-lasting structure.
Taking preventive steps early will help you stay on track and prevent costly repairs later in your retrofit project.
Durability, Pests, and Long-Term Maintenance
Long-term durability involves monitoring insulation degradation, preventing pest access, mitigating UV wear, and scheduling regular checks to maintain performance. Identify common failure points like edges, seams, UV exposure, moisture intrusion, and settlement. Mitigate these issues with proper edge detailing, protective coverings, and compatible materials that allow for easy updates.
Maintain a proactive approach to pest control by sealing gaps, using durable membranes, and ensuring drainage and vapor barriers remain intact. Regular inspections are crucial; quarterly visual checks and post-season moisture assessments should be part of your maintenance routine. Inspect for cracks, gaps, stains, compression, and edge seal integrity. Guard positive drainage away from the slab, keep edges dry, and watch for efflorescence, dampness, or leaks that indicate system failures.
Protecting Insulation from Pests and Mechanical Damage
Durable barriers are essential. Prevent rodents from accessing insulation using metal flashing, mesh, or heavy-duty plastic wraps around the building perimeter. Ensure concrete is properly compacted at the base to resist wear and tear from machinery and foot traffic during construction phases.
Install protective barriers underneath any insulation layers. Inspect these areas early in construction to address any issues before installing insulation. Regular post-construction maintenance checks are vital to detect signs of wear or potential pest entry points.
Protecting insulation from pests and mechanical damage now will save you costly repairs and wasted materials later.
Inspection and Maintenance Schedule
To maintain long-term durability, conduct regular inspections. Check for drainage issues every six months, ensuring water isn’t pooling where it shouldn’t. Inspect sealants around edges annually to prevent pest and moisture intrusion.
Perform a thorough annual check for potential damage-causing issues like loose hardware or signs of rodent activity, especially near the ground level. Revisit your insulation protection measures to ensure they’re still effective.
Stick with this basic maintenance routine: inspect seals and drainage twice yearly, conduct a full check annually. This will help prevent costly repairs down the line.
Safety and Environmental Considerations During Installation
Protecting workers and minimizing environmental impact are crucial during slab-on-grade edge insulation installation. This involves handling and cutting rigid foam safely, using appropriate personal protective equipment (PPE), ensuring tool safety, controlling dust, and considering ergonomics.
Monitor volatile organic compounds (VOCs) and off-gassing on site. Maintain adequate ventilation and plan for disposal or recycling of foam to reduce environmental impact. Understand the foam’s flame rating, use fire-rated barriers where required, and follow local building codes for slab-on-grade installations. Keep the site clean and contained: prevent foam dust from entering soil or drains, store scraps away from moisture, and choose low-VOC products to minimize indoor air contamination.
Site Safety and PPE for Cutting Foam Boards
Before cutting foam boards, ensure you have the right personal protective equipment (PPE). Wear a dust mask to avoid inhaling harmful particles and safety glasses to protect your eyes from flying foam bits.
Maintain good dust control by wetting down the area around where you’ll be cutting. This helps minimize airborne dust that could lead to breathing problems or fire risks from static electricity sparks. Ensure a clear workspace with no flammable materials nearby.
Proper cutting practices are essential. Use sharp utility knives and straight edges for clean, controlled cuts. Check that your base is properly compacted before cutting foam boards to ensure a solid foundation.
Environmental Impact and End-of-Life Options
When selecting insulation, consider the embodied carbon. Some foam boards can emit significant greenhouse gases, even more than lower-impact alternatives like cellulose or mineral wool. Check for greener options before making a decision.
Consider how easy it will be to recycle your insulation at the end of its life. Not all foam boards are recyclable, so check with local waste management to find out what’s accepted and plan accordingly. If disposal is necessary, ensure it doesn’t end up in landfills.
For those seeking a greener option without sacrificing performance, hybrid products combining foam with recycled materials are available. These can be a good compromise for both thermal efficiency and environmental stewardship.
Tools, Materials Checklist & Visual Checkpoints for DIYers
For a successful slab-on-grade project with edge insulation, gather essential tools and materials focused on concrete work and insulation:
- Concrete mix or readymix: Ensure it meets your project’s strength requirements.
- Rigid foam edge insulation: Choose a type with suitable R-value for your climate.
- Edge-form or foil, sealants/spray foam: For securing insulation and preventing moisture ingress.
- Trowels, floats, level, chalk line, measuring tapes, utility knife: For concrete placement and finishing.
- Moisture meter or infrared thermometer: To check for potential moisture issues before and after pouring.
- PPE (Personal Protective Equipment): Essential for safety during construction.
- Moisture barrier (if required by code): To prevent moisture from entering the slab.
Plan for site cleaning, formwork, insulation placement, joints and seam treatment, and moisture/vapor barrier requirements. During pouring, visually check:
- Continuous, flush insulation along edges.
- Correct insulation height above slab grade.
- Securement with adhesive or fasteners, no gaps or compressions near penetrations.
Post-pour inspection and curing
After pouring, inspect for:
- Control joints: Ensure they’re properly placed to manage cracking.
- Crack-control measures: Check for any signs of cracks or honeycombing.
- Insulation integrity: Confirm no damage occurred during pouring.
Protect the surface with curing blankets if needed. Safety, codes, and testing involve:
- PPE and dust/air quality controls.
- Local code checks for edge insulation thickness and placement.
- Moisture testing or permeance checks.
- Basic post-pour moisture or thermal performance verification.
Case Studies and Real-World Examples
To understand where edge insulation works best, let’s examine real projects. This section presents a successful installation, a common failure, and the lessons that tie them together. You’ll see practical steps to follow on your jobsite, including proper placement under stem or edge footings, moisture barriers, drainage details, heat loss measurements, and slab humidity effects.
Before and after project data—R-value at the edge, slab surface temperature, interior dew point, and moisture readings—will help you judge performance. Visuals like before/after photos, labeled cross-sections, and simple diagrams will highlight crucial site decisions, especially around gaps, corners, and transitions to foundation walls.
Real-world note: This section features concise case-study snapshots from verified projects that illustrate outcomes, failures, and actionable steps you can replicate or adapt on your site.
Case Study Highlights
-
New-construction project in the Midwest
Edge insulation was installed across the full slab perimeter and under rim joists with R-15 to R-20 foamboard backing and fiberglass batts at the stud-to-sill interface. Outcome: warmer interior zones near exterior walls, reduced draft along the edge, and measurable drop in slab surface temperature gradients during cold snaps.
Key lesson: coordinate with foundation weather-sealing and ensure continuous edge insulation around all penetrations. Practical steps: plan edge-coverage to extend behind future wall finishes, seal all joints with compatible tape, and verify that vapor barrier and drainage layers stay flush with the edge when backfilled. Safety/cost note: confirm equipment access for attic or crawlspace teams and budget for additional fasteners and sealants in colder seasons.
-
Retrofit on a cold-climate industrial building
Partial edge insulation was retrofitted around new window installations, focusing on eliminating cold-bridge paths at sill plates. Outcome: initial moisture reduction but later moisture problems arose due to inadequate insulation around openings and insufficient base slab sealing.
Key lesson: retrofit must include a complete moisture-control plan, not just “slap on insulation.” Practical steps: perform a pre-retrofit moisture assessment, upgrade sill seal runs with bonded membranes, and test interior dew point after retrofit with a dry-warm-up cycle. Safety/cost note: expect demolition-level repairs if moisture has already damaged framing; budget for moisture-damaged wood removal and replacement.
-
Small residential addition in a humid coastal climate
Edge insulation was installed at the new slab edge with a wrapped moisture barrier and proper drainage slope away from the foundation. Outcome: improved comfort and reduced condensation on the slab surface in humid months.
Key lesson: ensure barrier overlap and drainage continuity behind the edge, especially where the slab meets new foundation walls. Practical steps: run moisture barrier under the edge with a continuous seal at joints, test drainage slope with a simple bucket test after rainfall, and inspect weekly during first dry and wet cycles. Safety/cost note: coastal environments require corrosion-resistant fasteners and protective coatings; factor in longer lead times for moisture barriers in high-humidity regions.
In all cases, measurable signals mattered: lower edge temperatures, reduced interior dew point movement, and moisture readings within acceptable ranges after steady-state conditions were achieved. Use the following practical steps on your project to translate these lessons into reliable performance:
- Practical Steps
- Map out edge insulation coverage before pouring, including all penetrations, corners, and transitions to foundation walls.
- Choose compatible moisture barriers and drainage details that seal joints and maintain a continuous path away from the interior.
- Inspect base compaction and subgrade drainage prior to insulation install to minimize future gaps and air paths.
- Coordinate installation with other trades to avoid compromising edge details during framing, siding, or roof work.
- Schedule staged inspections: after edge install, after moisture barrier placement, and after backfill to catch gaps, compression, or sealant failures early.
- Post-install: monitor slab surface temperature and interior dew point for at least 3–7 days across dry and damp conditions, and take corrective actions if dew point nears critical thresholds.
- Document lessons learned with simple photos, labeled cross-sections, and notes on gaps, corners, and transitions to foundation walls for future reference.
Decision Checklist: When to Use Edge Insulation and When Not To
Use this decision checklist to determine when edge insulation for a slab-on-grade is beneficial and when it’s not. This guide considers purpose, climate, slab conditions, moisture paths, and trade-offs to help you choose the right insulation (XPS, polyiso, or spray foam) and decide on continuous or interrupted insulation based on long-term performance, moisture risk, and budget.
Getting this right saves energy, reduces cold spots, prevents frost damage, and protects against frost and moisture risks. However, poor perimeter insulation can lead to rot, mold, and costly rework. Understanding site factors such as soil type, drainage, groundwater, slope, and slab-to-wall interface helps prevent over- or under-insulating and ensures compatible exterior drainage details.
Key Questions to Guide the Decision
- Soil Type: Is it sandy? Sandy soils naturally resist water better than clayey ones, reducing the need for edge insulation. High-clay content soils may require more robust perimeters to prevent water pooling and erosion.
- Budget: Edge insulation increases upfront costs in materials and labor. Consider potential long-term savings from reduced maintenance needs due to better drainage control.
- Climate Zone and Water Table Levels: If groundwater is naturally high or frequent heavy rains are common, edge insulation can protect against prolonged moisture exposure, especially for uses requiring a dry below-grade environment like basements or storage areas.
Recommended Next Steps After the Checklist
- Consult an Expert: If unsure about needing edge insulation, consult a structural or soil engineer for guidance. An energy modeler can also provide insights on how it might affect overall energy efficiency.
- Check Site Conditions: Before installing, double-check site conditions like base compaction to avoid potential issues later.
- Avoid Rookie Mistakes: Seek advice from a seasoned installer and get professional input if you’re not completely confident in your DIY approach.
Conclusion
Properly installed edge insulation for slab-on-grade fortifies the concrete’s perimeter, enhancing safety and comfort while preserving aesthetics.
Begin by assessing local building codes and site conditions. Select suitable insulation targeting specific R-values and temperature performance. Plan drainage and moisture control strategies, prepare a clean, dry edge, install with seamless seams and robust moisture barriers, and verify details before backfilling.
Avoid pitfalls such as neglecting drainage or moisture management, leaving gaps around edges, or forcing insulation where the edge detail cannot accommodate it. Prioritize safety by masking utilities, wearing personal protective equipment (PPE), and handling materials according to manufacturer guidelines.
If unsure about code compliance, complex transitions, or integrating with existing systems, consult a professional. With careful planning, clear targets, and diligent installation, you’ll achieve a stronger, more durable slab edge that ages well and minimizes unexpected issues.
FAQ
What is slab-on-grade edge insulation used for?
Edge insulation keeps heat from escaping around the edges of a slab. It also helps keep frost from cracking the slab in colder climates. It’s a simple line item you don’t want to skip if you’re in a cold area.
Where does edge insulation make the most difference?
In cold climates, along exterior walls where the slab meets the foundation. It also helps in garages that sit next to living spaces. If you have a big, unheated space by the slab, insulation pays off most there.
Where can edge insulation cause trouble?
If you bury it too deep or compress it, you won’t get the seal you expect. A poorly installed edge can trap moisture and invite mold. Don’t tape over it with concrete dust or debris; clean it first and install as designed.
What are common mistakes to avoid?
Skipping insulation in a cold crawl or never checking the insulation before pouring can ruin the slab. Don’t mix different insulation types unless the plan allows it. Follow manufacturer instructions; shortcuts bite you later when the slab cracks.