

Introduction
Repair a chipped slab corner by rebuilding it securely so it won’t pop off.
The guide walks through practical steps, tips, and rules of thumb for matching texture, choosing the right materials, and curing a patch to restore strength and appearance.
You’ll learn how to assess the damage, prepare the surface, apply the repair, and finish for a seamless blend with the surrounding slab.
Key takeaways
- Assess damage: determine whether repair or complete replacement is required.
- Prepare a detailed plan with measurements, materials, and curing timelines.
- Use epoxy or polymer-modified grout for bond strength and shrinkage control.
- Starter forms or temporary support avoid pop-off during cure and setting.
- Curing periods depend on material and temperature; plan rain-free windows.
- Seal finish and joints to prevent moisture ingress and future cracking.
Table of Contents
- Introduction
- Key takeaways
- When to repair vs. when to replace
- Tools and materials checklist
- Prep and planning: the key to a lasting repair
- Step-by-step rebuild technique for a chipped corner
- No-form approaches that actually work
- Curing, finishing, and time expectations
- Safety, costs, and long-term durability
- Conclusion
- FAQ
When to repair vs. when to replace
Assess the chipped corner by looking at severity and scope. Minor surface chips sit on the edge, but deeper chipping or corner loss signals bigger trouble. Active movement or cracks that radiate from the corner require careful evaluation.
Check diagnostic signs like crack width and depth, uneven floors, moisture intrusion, and visible rebar corrosion. Listen for hollow sounds when tapping to gauge bonding integrity. Use a decision flow: targeted corner repair for localized, stable damage; full edge or slab replacement if settlement or wide, spreading cracks or structural concerns are present.
Damage-sizing guidelines
Size up the damage to decide on repair method and materials. Here’s what each level typically needs:
Minor surface chipping (1/8″ – 1/4″): Small, shallow chips can be patched with a concrete veneer or patching compound.
Partial corner loss (1/2″ – 2″ deep): You’ll need to cut out the damaged area and replace it with new concrete. Use a bonding agent for a strong bond.
Deep/large spalls (>2″ deep, or >6″ wide): These require extensive cutting, removal, and replacement of the damaged section. Reinforcement may be needed to prevent recurrence.
Risk factors that predict recurrence
Understand what caused the damage to choose a suitable repair and prevent reoccurrence:
Freeze-thaw cycles: Water expands when frozen, causing cracks. Use air-entraining admixtures in repairs to resist this.
Heavy point loads: Concentrated weight can cause localized damage. Reinforce the repair area with fibermesh or rebar if necessary.
Poor consolidation: Inadequate compaction leads to weak concrete. Ensure proper vibration and compaction during repair.
Undermining soil: Soil movement can cause slab damage. Stabilize the subgrade before repairing the slab.

Tools and materials checklist
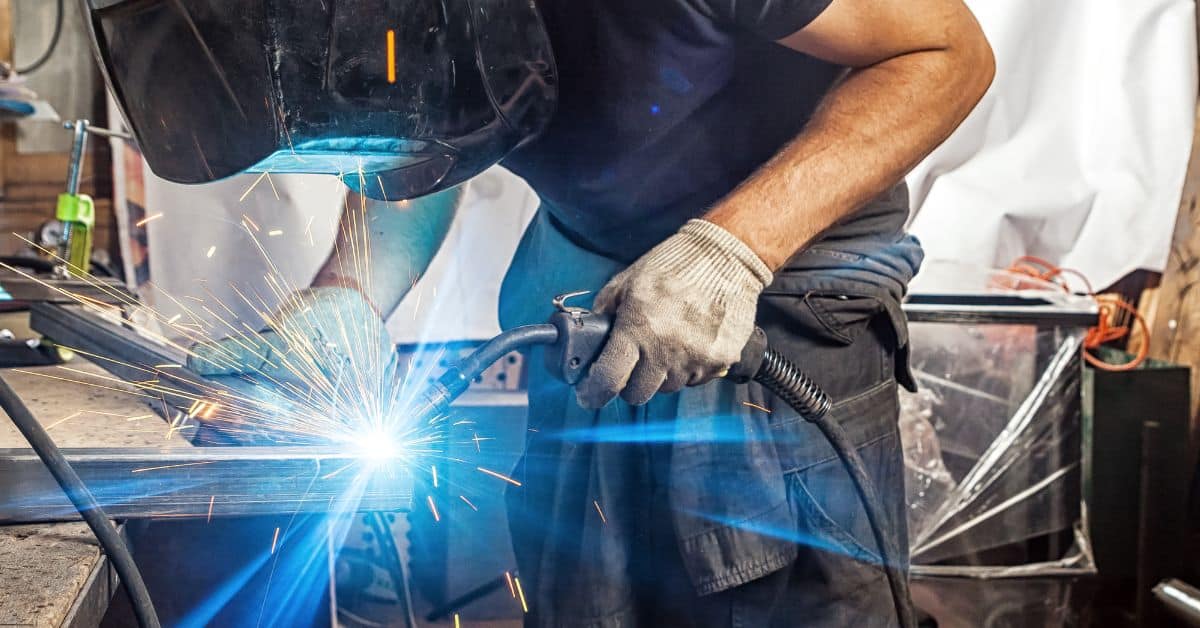
Start with a small-kit approach for tiny chips and scale up to full-rebuild kits for larger corners. Note when a pro-grade grinder or chipping tool is needed for efficient prep. Prioritize by repair scale to guide tool selection.
Core categories include mixing equipment, trowels and floats, bonding agents, patch mortars, aggregates, form and placement aids, and moisture or primer prep tools. Include PPE such as eye protection, gloves, respirators, and hearing protection, plus cleanup supplies. Plan workflow from surface prep to curing and finishing, noting small-slab versus large-rebuild considerations and the recommended order of operations.
Material options and when to use them
Choose the right materials for your repair based on the size of the chip and the load it’ll bear.
- Fast-setting cement patchers: For small chips, quick repairs. Don’t skip: they set in hours, not days.
- Polymer-modified repair mortars: Medium-sized chips, need strength and flexibility. Miss this: may crack under stress.
- Ready-mix concrete: Large corners, heavy loads. Overlook this: weak repairs can pop off.
- Non-shrink grout: Deep cracks, prevents shrinkage-related issues. Neglect this: could cause further damage.
- Epoxy or polymer-modified patch: Heavy-duty repairs, resist chemicals and abrasion. Ignore this: may not last in harsh conditions.
Quick rule: Match material to chip size and load needs for lasting repairs.
Bonding agents, additives, and primers
Use bonding agents and additives to ensure your patch sticks and doesn’t pop off.
- Bonding primers: Apply before patching. Skip this: weak bond leads to pop-offs.
- Latex/polymer additives: Mix into mortar for flexibility. Miss this: rigid repairs can crack under movement.
- Corrosion inhibitors: Use on rebar. Overlook this: corrosion can cause further damage.
- Moisture/primer prep tools: Ensure surface is clean and dry. Neglect this: moisture reduces bond strength.
Quick rule: Always use bonding agents and prepare the surface well for strong adhesion.
Prep and planning: the key to a lasting repair
Define the repair scope by confirming the chipped corner and identifying sound substrate. Decide on undercutting to ensure a mechanical grip for the new concrete. Establish a plan that supports a durable bond.
Follow a site prep sequence: remove damaged material, clean and degrease the area, and expose a sound base while preserving drainage. Assess substrate moisture, laitance, and cleanliness to decide if primer or bonding agents are needed. Undercut and roughen edges to create a key for the repair material and prevent future pop-offs.
Visual and tactile checkpoints before mixing
Before you mix your repair concrete, it’s crucial to confirm the substrate is sound and ready for bonding. Here’s a quick checklist:
- Tap test: Gently tap the area with a hammer. A dull thud indicates solid concrete.
- Probe test: Insert a screwdriver or rebar into the surface. If it goes in easily, remove and clean out loose material.
- Water soak: Pour water onto the area. If it’s absorbed quickly, the concrete is porous and may need sealing.
- Check for laitance: Laitance is a weak, powdery layer that can form on concrete surfaces. Remove it with a wire brush or acid etch.
- Inspect for contamination: Ensure there’s no grease, oil, or other contaminants that could hinder bonding.
- Check moisture levels: Excessive moisture can weaken the repair. Use a moisture meter to ensure readings are within acceptable limits (usually 4-6%).
- Inspect for weak spots: Look for cracks, voids, or soft areas that need to be filled or removed.
- Measure profile depth: Ensure the area is deep enough to accommodate your repair mix and provide adequate mechanical grip.
- Check edge profiles: Make sure edges are well-defined and not undercut too deeply, which could weaken the structure.
Quick rule: Skipping these checks can lead to poor bonding, premature failure, or even complete repair collapse.
Temporary supports and forms alternatives
When repairing a small chipped corner, you may not need full wooden forms. Here are some alternatives:
Using a trowel as a form: For tiny repairs, you can use a trowel to hold the concrete mix in place. Press it firmly against the surface and apply the mix behind it.
Foam blocks or reusable molds: For larger areas, you can use foam blocks or reusable plastic molds to shape your repair. These are especially useful for rebuilding corners or edges.
When to use full forms: If the repair is extensive (more than a few inches deep), or if you’re rebuilding a large section of slab, you’ll need full wooden forms to contain the concrete and maintain its shape as it cures. Always ensure your forms are secure, level, and properly braced.
Step-by-step rebuild technique for a chipped corner
Begin with prep and assessment: inspect the corner, measure dimensions, and look for voids or cracks that could cause future pop-off. Establish a temporary support plan if needed.
Work on surface preparation and bonding: remove loose material, roughen edges, etch the substrate, and apply a bonding agent compatible with both old and patch material. Consider embedded anchors or rebar lacing to lock new material into the old.
Step-by-Step Process
This section guides you through a clear, numbered sequence of practical steps to rebuild your chipped corner effectively and safely.
- Inspect the area, measure dimensions, clean thoroughly, and identify any voids or cracks. If needed, temporarily support the area to prevent further damage.
- Remove loose material using a chisel and hammer. Roughen edges with a wire brush to improve bonding.
- Etch the substrate with an acid solution to enhance adhesion. Apply a compatible bonding agent according to manufacturer’s instructions.
- Mix your patch mortar or decorative concrete, adding a suitable bonding promoter. Ensure slump and color match the existing slab. If the corner is thick, plan for two-step layering.
- Set a rigid form to preserve the original geometry. Place repair material in lifts, consolidating strategically to eliminate air voids. Ensure the patch integrates with adjacent control joints.
- Cure according to product guidelines, shielding from rapid drying. Reseal nearby joints to prevent ingress.
- Level and feather edges to blend with the existing slab. Perform a test adhesion check if possible.
- Re-check alignment and load path with a light load or template. If you’re unsure about any step, don’t hesitate to call a professional.
Mixing and application basics
Correct water ratio is crucial for proper curing and strength development. Aim for a consistency that’s slightly stiffer than cake batter for vertical work.
Add polymers as recommended to enhance flexural strength and durability. Working time varies by product, so mix only what you can apply within the given window.
Never add more water to speed up mixing; it weakens the patch and promotes pop-off failures.
Shaping, compacting, and feathering the repair
Place your mixed material in lifts, no more than 2 inches thick. Use a trowel to spread and consolidate, eliminating air voids.
For corners, use a corner trowel or a straight edge to shape the patch, ensuring it interlocks with the slab and sheds water properly. Work from the bottom up, using smooth, steady motions.
Feather edges to blend with the existing slab, tapering the material to zero thickness at the interface. This helps distribute stress evenly and prevents delamination.
No-form approaches that actually work
Define the scope and limitations of no-form repairs: damage size, slab movement, and moisture conditions. Know when to avoid no-form methods in favor of traditional forms.
Focus on surface prep and substrate assessment: cleaning, removing loose concrete, addressing cracks, and ensuring a sound base. Review material choices and application workflows for rapid-set patchers, polymer-modified mortars, and epoxy backups without forms.
Using a trowel or temporary backboard as a form
For small repairs, you can use a trowel or backboard as a makeshift form. Here’s how:
Trowel: Hold it firmly against the edge of the chipped area at a 90-degree angle. Apply pressure to keep it in place while you fill behind it with patch material.
Backboard: Cut it to size, then position it flush against the slab’s edge. Secure it temporarily using screws or clamps driven into the existing concrete. Ensure no voids are created at the edges.
When you must use permanent forms
Permanent forms are necessary for larger repairs, deep chips, or when heavy loads will be applied to the patch. Here’s when and how:
Size threshold: If the damaged area is more than 12″ x 12″, consider using permanent forms.
Depth: For chips deeper than 2″ or 3″, use forms to prevent blowouts.
Load: If heavy traffic, vehicles, or machinery will be on the patch, use forms for added support. Tips: Ensure form edges are well-sealed and braced. Use stakes and ties to secure them in place. Remove forms only after the concrete has cured properly.
Curing, finishing, and time expectations
Explain curing window concepts without getting technical on numbers: initial set versus full strength and how conditions influence timing. Look for surface hardness or edge curl as indicators to move to the next stage.
Outline protection methods such as wet curing, curing compounds, or covers. Discuss environmental controls like temperature, humidity, and wind, and how to manage rain or rapid drying to avoid cracks.
Weather and season adjustments
Concrete curing is temperature-sensitive. In cold weather, below 50°F (10°C), use accelerators or heating blankets to keep the slab warm. Above 90°F (32°C), monitor for rapid drying and apply curing compounds or mist regularly.
Cold Weather: Below freezing, use insulated forms and heaters. Add accelerators like calcium chloride to speed up setting.
Hot Weather: Keep the slab damp with regular misting or wet burlap. Apply curing compounds as soon as possible to prevent rapid moisture loss.
Surface finishing and texture matching
Match your existing slab’s finish for a seamless repair. For broom finish, use a stiff-bristled broom to sweep the surface as the concrete sets. For aggregate exposure, embed clean stones into the top layer before it sets.
Trowel Finish: Use a magnesium float to level and smooth the surface, then switch to a steel trowel for a smooth, shiny finish. Work in small sections to avoid leaving tracks.
For stamped patterns, use rubber stamps immediately after floating, pressing firmly and evenly. Remove stamps before concrete sets fully to prevent damage.
Safety, costs, and long-term durability
Frame safety around the repair with PPE for dust and grit, proper ventilation, and lifting precautions. Have an emergency plan in case of mishaps during grinding or handling materials.
Compare material options and tools, and outline rough DIY versus pro-accessible ranges to guide budgeting. Include steps for substrate prep, joint detailing, and durability checks to monitor over time.
Common mistakes and how to avoid them
Here are some frequent DIY errors you should steer clear of when repairing a chipped slab corner.
- Poor preparation: Skipping substrate cleaning, profiling, or etching can lead to poor bonding. Always ensure the surface is clean and receptive.
- Overwatering mix: Too much water weakens the patch. Stick to the manufacturer’s recommended water-to-cement ratio.
- Skipping bonding agent: Not applying a bonding agent can cause delamination. Always use one for better adhesion.
- Inadequate consolidation: Poor compaction leaves voids, weakening the repair. Use a trowel or screed to compact the patch properly.
Taking these precautions will help you avoid common mistakes and achieve a durable repair.
Inspecting and maintaining repaired corners
Regular inspection and maintenance are key to prolonging the service life of your repaired slab corner. Here’s what you should look for and how often.
Every 6 months, check for new cracks, signs of delamination, or any movement at the repair site. If you notice anything, address it promptly with a small repair to prevent further damage.
Once a year, apply a fresh coat of sealant to protect the repaired area from moisture and weathering. This will help maintain the integrity of your repair and extend its lifespan.
Remember: Regular maintenance is crucial for preventing minor issues from becoming major problems down the line.

Conclusion
The core idea is simple: repair it right the first time, or you’ll pay later in safety risk, durability problems, and a visible scar on the slab. Prioritize a solid bond, proper curing, and a clean finish to keep the corner stable and looking good for years.
Inspect the damaged area, decide if you can rebuild or if replacement is necessary, gather the listed tools and materials, prepare the surface and backing if needed, mix and apply the repair in controlled lifts, let it cure for the recommended time, and then test for strength and clearance before finishing. Work methodically, keep the area clean, and respect the cure times so you don’t trap weak material inside.
Common mistakes to avoid are rushing the prep, using the wrong repair mix or depth, and skipping cure time or moisture control. Always ventilate and wear eye and hand protection, keep a small area test patch first, and never apply repair material over unstable edges or wet surfaces. If a corner is severely cracked, or you’re unsure about the substrate, stop and reassess before moving forward.
If the damage is deep, wide, or undermines edge support, it makes sense to call in a pro instead of pushing on alone. When you do proceed, stick to the plan, double-check safety, and finish with the same care you’d give any exterior joint: solid, safe, and ready for days of use. You’ve got this—finish strong and don’t rush the cure.
FAQ
What causes a slab corner to chip again after repair?
Most chips come from impact or vibrations after a repair. If the edge isn’t protected or set back with proper reinforcing, it can crack or pop off again. Watch for heavy traffic and strong impacts near the corner.
Can I use regular concrete patch to fix a chipped corner?
You can, but not all patches stick well to slab edges. Pick a patch meant for vertical or edge repairs and follow the product instructions closely. Don’t rush the cure time or skip cleaning first.
Should I remove loose pieces before patching?
Yes. Break off any loose material and clean the edge first. The patch must grip solid concrete; loose bits make the repair fail sooner.
What’s the safest way to prevent future chipping?
Protect the edge with a small, durable cap or by shaping the edge to reduce sharp impact points. Keep heavy items from banging the corner and seal the surface to slow moisture intrusion. Regular inspections help catch trouble before it gets big.