
Introduction
Sawcut depth and timing can be achieved reliably with practical DIY rules of thumb that actually work.
This article explains why correct depth and timing matter for stable cuts and safer projects, and it guides you through practical, easy-to-apply rules of thumb for estimating depth and timing.
You’ll learn how to estimate depth by eye, what common mistakes to avoid, and how to adapt these rules to different materials and blade setups.
Key takeaways
- Assess slab thickness and joint spacing before planning sawcuts to avoid miscuts.
- Use a carbide blade with correct water cooling and steady feed rate.
- Cut depth should be 1/4 to 1/3 of slab thickness, depending on joints.
- Time cuts after cure is adequate: avoid early-age cuts under load.
- Mark well-marked score lines to guide straight, square cuts.
- Inspect joints and adjacent edges after cut for cracking or settlement.
Table of Contents
- Introduction
- Key takeaways
- Why Sawcutting Matters for Concrete Projects
- Rules of Thumb for Sawcut Depth
- Best Timing Practices: When to Make the Cut
- Tools, Blades, and Setup for DIY Sawcutting
- Visual Checkpoints and Quality Signs After Cutting
- Special Conditions and How They Change Rules of Thumb
- Practical Step-by-Step DIY Procedure
- Troubleshooting Common Problems and Quick Fixes
- Conclusion
- FAQ
Why Sawcutting Matters for Concrete Projects
Sawcuts are more than just lines in concrete. They guide where cracks form, reducing random cracking and easing demolition later. You’ll see this in driveways, patios, slabs, and sidewalks where joints help the surface behave over time.
Depth and timing matter because the concrete’s strength and cracking tendency change as it cures. Making the right cuts at the right time helps control movement and keeps your project intact. Always relate the approach to the specific job you’re doing and the conditions on site.
Types of sawcuts and when to use them
Concrete sawcuts, also known as control joints, serve two main purposes: controlling where cracks form and easing demolition. There are three types:
Contraction joints are used in large slabs like driveways or patios. They’re cut at a depth of 1/4 to 3/8 the slab’s thickness, allowing concrete to shrink uniformly as it cures.
Isolation joints are used between different sections of concrete to prevent cracking from one section affecting another. They’re typically cut deeper, around half the slab’s thickness.
Demolition/partial-depth cuts are shallower, usually 1/4 to 1/3 the slab’s depth, and are used when you want to control where a concrete slab will break for demolition purposes.
Consequences of getting depth or timing wrong
Getting the depth and timing of sawcuts wrong can lead to serious problems down the line. Here are some common failure modes:
Raveling occurs when concrete along the cut crumbles away, usually due to cuts being too shallow or made at the wrong time (before concrete has gained enough strength).
Spalling happens when chunks of concrete break off from the edge of a sawcut. This is often caused by cuts being too deep or made too late in the curing process.
Premature cracks can form if sawcuts aren’t made at all, or if they’re not timed correctly. Concrete will crack randomly as it shrinks during curing.
In all these cases, ineffective joints mean your concrete isn’t protected from random cracking and may need to be replaced sooner than expected.
Rules of Thumb for Sawcut Depth
Use simple depth guidelines that apply to most slabs. These rules of thumb aren’t exact specs, but they give you a solid starting point for planning. Check the project’s data if you’re unsure and adjust for any special requirements.
Depth tends to scale with slab thickness and layout, so think in broad terms rather than precise numbers. When in doubt, consult the product label, manufacturer instructions, or local rules to verify the recommended depth for your situation.
Fractional-depth rule (common practical guidance)
The common practice among pros is to cut slabs at a depth equal to about one-third of the slab’s thickness. This is known as the fractional-depth rule.
Why this works:
Control: A shallower cut helps control cracking by allowing the concrete to move naturally with temperature changes and drying shrinkage.
Structural integrity: It leaves enough uncut material to maintain the slab’s strength and stability.
Adjusting depth for surface conditions and finishes
Not all surfaces are created equal. Some require adjustments to sawcut depth:
Thin toppings: If you’ve applied a thin topping (like an overlay or skim coat), cut shallower – around 1/4 of the total thickness.
Broomed surfaces and exposed aggregate: These finishes require deeper cuts, often up to half the slab’s thickness. Why? Because they have reduced tension capacity due to their textured nature.
Caution: Always verify manufacturer or engineer recommendations for specific products or designs.
Best Timing Practices: When to Make the Cut
Timing strategies include early-entry, wet-cut, and cutting after initial set. Each method has its own on-site indicators, so watch the surface and moisture conditions. Prioritize safety and surface protection to avoid chipping or dust issues.
On a DIY job, choose a timing window that keeps the fresh surface safe while allowing the cut to perform as intended. If you’re unsure, reference the tool manufacturer guidance or local regulations for timing specifics.
Early-entry (timber blade/knife) guidance for light surface cracking
Use early-entry tools like timber blades or knives when you want to create shallow, decorative cuts or control minor cracking. They’re ideal for fresh concrete with a bit of ‘give’.
Look for: Bleeding water on the surface. This means the concrete’s still plastic enough for easy cutting.
The knife should slide in smoothly, not forcefully. If it’s hard to push, you’ve waited too long.
Traditional saw-cut timing (after initial set)
For standard saw cuts, wait until the concrete’s had time to start setting. This ensures a clean cut and protects your blade.
Feel for: A firm surface with some ‘give’. It shouldn’t be rock-hard or too soft.
The edge should resist your finger pressure slightly. If it’s too resistant, you’ve waited too long. If there’s no resistance, cut too early.
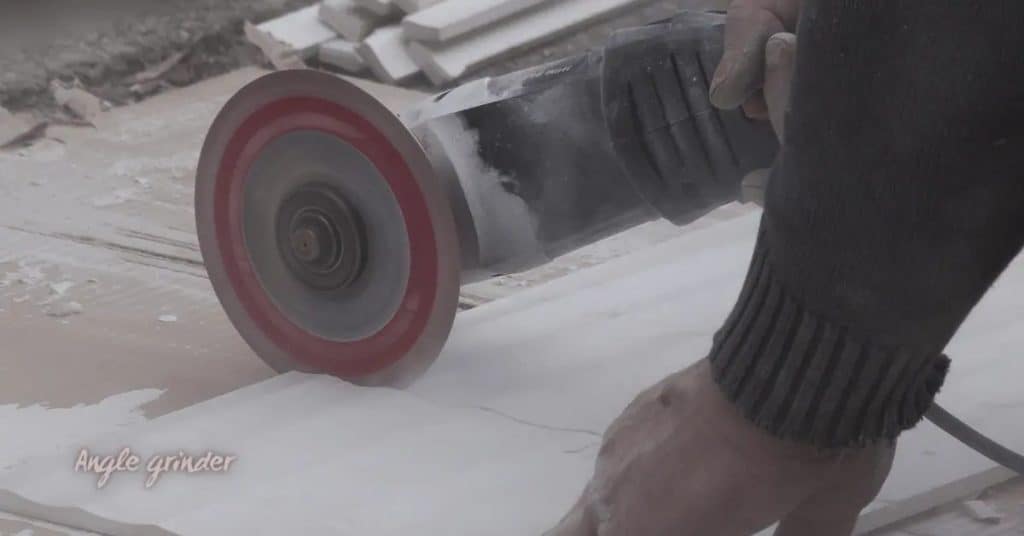
Tools, Blades, and Setup for DIY Sawcutting
Common saws for DIY work include walk-behind and handheld units, plus specialty early-entry saws for fast setups. Blade choice and tooth pattern influence depth control and edge quality. Align blade setup with your planned cut spacing and line accuracy.
Set the depth reference carefully and verify straight runs with marks and guides. Use simple staging, guards, and splash protection to keep the work area clean and safe during cutting.
Choosing the right blade and wheel type
The first step to a good cut is choosing the right blade. For concrete, you’ve got two main types: wet and dry.
Wet blades use water for cooling and dust suppression. They’re great for deep cuts and come in diamond segment or abrasive varieties. Diamond segments last longer and give a smoother cut but cost more. Abrasives are cheaper but wear out faster.
Dry blades don’t need water, making them easier to use. They work well for shallow cuts and light duty. But they generate more dust and can overheat if pushed too hard.
Rig setup and alignment tips for straight, consistent cuts
Once you’ve got your blade, it’s time to set up your saw. Start by attaching a straightedge or guide along the cut line. This keeps your wheel on track.
Next, align your wheel. It should be perpendicular to the surface and centered in your rig. A crooked wheel means a crooked cut.
For consistent depth, use the saw’s built-in depth gauge. Set it to your target depth, then make slow, steady passes. Don’t rush or you’ll wander off course. And remember, halfway down is halfway back. If you’re not sure, err on the side of shallow.
Visual Checkpoints and Quality Signs After Cutting
A good cut shows a clean edge, minimal ravel, and consistent depth across the joint. Look for uniform grooves and avoid torn or ragged edges. Quick tactile checks help confirm the cut feels steady along the line.
If you see signs of failure, stop and reassess—check blade condition, depth reference, and timing. If problems persist, consult the instructions or a professional before proceeding.
What to inspect immediately after cutting
Once you’ve finished sawcutting, don’t walk away just yet. Here’s a quick checklist to ensure your cuts are up to par.
- Edge integrity: Check for clean, straight edges. Any ragged or uneven cuts could lead to cracking later on.
- Exposed aggregates: Ensure no large aggregate particles are exposed. If they are, fill them in with a small amount of grout.
- Dust pattern: A consistent dust pattern indicates even cutting depth. Inconsistencies might mean you need to adjust your blade or technique.
- Cracking at ends: Check for hairline cracks at the ends of your cuts. If present, they should be minimal and not extend beyond the cut line.
- Blade marks: Light blade marks are normal but should be consistent. Deep or inconsistent marks may indicate a problem with your blade or technique.
- Cut depth consistency: Measure cut depths at various points to ensure they’re even and match your desired depth.
- No raveling: Raveling occurs when the concrete crumbles along the cut. If present, it’s a sign that you’ve cut too deep or at the wrong time.
- Check for bridging: Ensure your cuts don’t bridge over reinforcing bars. This can cause stress points and lead to cracking.
Quick rule: If something looks off, trust your instincts. It’s better to address a potential issue immediately than let it become a bigger problem later.
Long-term indicators of success
After the initial inspection, keep an eye on your concrete over the next few weeks to ensure your sawcutting was effective. Here’s what to look for.
- Cracking patterns: Monitor for any new cracks forming along or near your cuts. If they appear, note their location and severity.
- Joint performance: Watch how your control joints perform under traffic and weather conditions. They should open and close evenly as the concrete expands and contracts.
- Edge curling: Check for any edge curling, which can indicate that your cuts were too deep or not timed properly.
- Settlement: Keep an eye on any settlement or movement in your slab. Excessive movement could be a sign of inadequate sawcutting.
- Moisture content: Ensure the concrete maintains its desired moisture content. Too much or too little can affect how well it performs over time.
- Temperature changes: Monitor how your slab responds to temperature fluctuations. Concrete expands and contracts with heat and cold, so any issues should become apparent under these conditions.
Quick rule: Regular monitoring is key. Catching potential problems early gives you the best chance of addressing them effectively.
Special Conditions and How They Change Rules of Thumb
Slab thickness, reinforcement, and environmental factors can shift recommended depth and timing. Warmer weather or high humidity can alter cure rates and joint performance. When conditions differ from the norm, adjust and verify with reliable guidance.
Subgrade stiffness and site conditions also influence how you plan the cut. If you’re uncertain, consult project specs, labeling, or manufacturer directions for any deviations from standard rules.
Reinforced slabs and control joint placement
Reinforcement in concrete slabs strengthens the structure, but it also makes sawcutting a bit trickier. Here’s why:
Reinforcement reduces the effectiveness of shallow cuts. Why? Because steel doesn’t crack like concrete does. So, if your cut isn’t deep enough, the slab won’t have a weak point to follow when it shrinks.
In reinforced slabs, you might need deeper or even full-depth joints. But don’t just guess at this –consult an engineer. They’ll help you decide based on your specific slab design and reinforcement layout.
Hot, cold, and windy weather adjustments
Temperature and humidity affect concrete curing. Here’s how you can adjust your sawcutting schedule to account for extreme conditions:
Hot weather: High temps speed up drying time. This means you’ll need to cut earlier than usual. But be careful – if it’s too hot, the slab might not have gained enough strength yet.
Cold weather: Low temps slow down curing. You’ll need to wait longer before cutting. And remember, freezing temperatures can damage concrete, so protect your cuts with insulation or heat if needed.
Windy conditions: Wind dries out the surface quickly. This can lead to early cracking if you cut too soon. Wait for calmer weather before making your cuts.
Practical Step-by-Step DIY Procedure
Start with a clear layout and proper personal protection. Mark the layout lines and set up guides to ensure straight cuts. Stage your materials and keep water management simple to avoid overspray or mess.
Proceed with the actual cuts in a conservative sequence and pause to check depth and alignment frequently. If you’re unsure, err on the side of caution and verify against the provided instructions or local requirements before finishing the last pass.
Step-by-Step Process
This section guides you through the practical steps of sawcutting, from preparation to cleanup. Follow these steps for a successful and safe job.
- Inspect your site: Check for any hazards like rebar or wires before starting.
- Preparation: Put on safety gear – gloves, goggles, ear protection, and a dust mask.
- Main work: Follow your layout marks. Make the first pass slow (around 30-40 FPM) to ensure accuracy.
- Check quality: Inspect each pass for straightness and depth. If unsure, consult a pro.
- Cleanup: After cutting, clean up debris immediately to prevent accidents.
Marking, measuring, and setting cut depth
Accurate marking and measurement are crucial for a successful sawcut. Here’s how to do it:
First, mark your joint lines using a chalk line or pencil. Ensure they’re straight and evenly spaced.
Next, measure your slab thickness at multiple points along the cut line. The average will give you your cut depth.
Set your saw’s depth to about 1/3 of your slab’s thickness for standard cuts. For deeper cuts or special conditions, adjust as needed.
Making the cut and follow-up cleanup/sealing
Now that you’re set up, it’s time to make your cuts. Here are some tips:
Start slow (around 30-40 FPM) for the first pass, then increase speed (up to 60 FPM) for subsequent passes.
After cutting, clean the joint immediately using a broom or shop vacuum to remove dust and debris. This prevents it from setting into the concrete.
If you plan to seal or fill your joints later, check product instructions for specs. Some products require a clean, dry surface, while others can be applied soon after cutting.
Troubleshooting Common Problems and Quick Fixes
Common issues include shallow cuts, late cutting, and blade wander. Tackle these by rechecking depth settings, adjusting the line guides, and slowing down for control. Protective measures and fresh blades often solve edge problems.
When problems persist, evaluate whether the job should be paused and evaluated by a professional. Rely on product labels, manufacturer instructions, and local rules to determine the safest next steps.
Fixing raveling, spall, or incomplete cuts
If you’ve made a cut that’s too shallow, has raveled edges, or missed the intended depth, don’t panic. Here are your options:
Routing: Use a concrete router to deepen the cut. This is best for minor adjustments.
Patching: If you’ve spalled (chipped away) too much material, use a patching compound to fill in the gaps before sealing and moving on.
Shallow reruns: For incomplete cuts, you might need to make another pass at the same depth. Be careful not to overlap your cuts too much.
However, if the damage is extensive or you’re unsure about how to proceed, stop. Further DIY attempts could worsen the slab and lead to costly repairs down the line. Consult a pro before proceeding.
When to pause work and consult specifications or an engineer
Sawcutting concrete is generally straightforward, but sometimes you’ll encounter issues that warrant a closer look. Here are some red flags:
Extensive cracking: If you’re seeing widespread cracks before cutting, something might be seriously wrong with your slab.
Reinforcement exposure: If your saw blade hits and exposes rebar, stop immediately. This could indicate a structural issue that needs professional assessment.
Inconsistent slab thickness: If you’re finding significant variations in depth as you cut, this might mean your slab wasn’t poured evenly or has settled unevenly over time.
If you notice any of these issues, pause work. Check your original specifications to ensure you’re following the right guidelines. If there’s still uncertainty, consult a structural engineer before proceeding. It’s better to be safe than sorry when it comes to your concrete’s integrity.

Conclusion
Done right, sawcut depth and timing protect the edge integrity, prevent cracks, and keep your project looking clean and durable. Stay deliberate about the sequence and the equipment, and you’ll avoid costly damage.
Check in plain language: confirm the overall slab thickness and planned depth, mark the cut line, choose the correct blade and set the saw straight, verify the timing window for the cut, perform a small test cut in a low‑visibility area, watch the kerf and depth as you go, and keep the workspace clean and dry as you proceed. If you are using water or lubrication, keep it steady and controlled, and walk the cut with a firm guide so the line stays true from start to finish.
Common mistakes to avoid are cutting too shallow or too deep, skipping a proper guide or straightness check, and rushing the cut before the concrete cures or before you’ve confirmed the timing. Stay safe: wear eye and ear protection, keep hands and feet clear of the blade, never rush a cut, and test on a small area first before you commit to the full run. Also, don’t ignore this rule— if the slab carries structural loads, or you’re unsure about rebar, control joints, or critical tolerances, step back and reassess before proceeding.
If the job is large, complex, or demands tight tolerances, call a professional instead of pushing through. When in doubt, a pro can spot hidden reinforcement, adjust for temperature effects, and ensure joints won’t fail later. With careful planning and disciplined execution, you’ll finish with a clean line, solid results, and the confidence to move on to the next step.
FAQ
How deep should a sawcut be for most concrete slabs?
Keep it shallow enough to avoid hitting rebar or utilities, but deep enough to guide the joint. A common rule is about one quarter to one third of the slab thickness. Check local codes and the slab’s design before you cut.
When is the best time to cut after pouring concrete?
Cut while the concrete is hard enough to resist chipping but still soft enough to score. This usually means within a day or two after pour, depending on the mix and conditions. If you wait too long, the crack will not form cleanly.
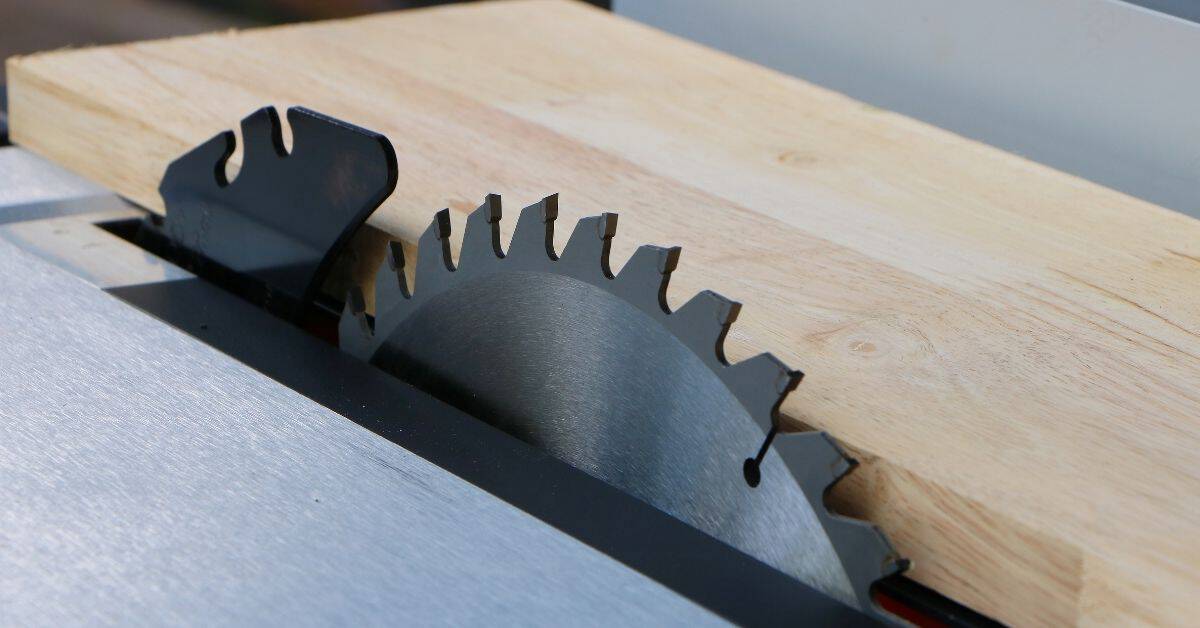
What kind of blade should I use for sawcuts?
Use a diamond blade made for cutting concrete. A dry-cut blade is faster but creates more dust; a water-fed setup keeps dust down and helps keep the blade cool. Don’t use wood-cutting blades on concrete.
What are common mistakes to avoid?
Don’t guess the depth. Measure and confirm with a level or ruler. Don’t skip the joint pattern or cut too soon; you’ll get random cracks and weak edges. Wear eye and ear protection and keep the area clear of bystanders.