
Introduction
The timing of concrete saw cuts is crucial to prevent random cracking and surface damage. But how long does the process take, and when exactly should you make those cuts?
In this guide, we’ll walk you through a step-by-step timeline for concrete saw cutting, ensuring you get it right every time.
The Concrete Saw Cut Timeline: Step by Step
Understanding the timeline of concrete saw cuts is essential to achieve the desired results. Here’s a step-by-step breakdown:
- Day 1-3: Pouring and Initial Curing – After pouring, allow the concrete to initial set (about 24 hours) before proceeding with any work.
- Day 4-7: Saw Cut Preparation – Begin preparing for saw cuts by ensuring the surface is clean and dry. This step may take a few days depending on weather conditions.
- Day 8: Saw Cutting – On the eighth day, start making your control joints using a concrete saw. The exact depth will depend on slab thickness and local codes, but typically it’s around one-fourth to one-third of the slab’s depth.
- Day 9-14: Final Curing – After cutting, allow the concrete to cure for another week or so before applying any sealers or final finishes. This step ensures the concrete gains enough strength and durability.
Key takeaways
The preparation time for saw cuts can significantly impact your overall project schedule, so plan accordingly.
- Plan saw cuts during suitable work window to minimize random cracking.
- Verify cut depth follows manufacturer guidance and local code requirements.
- Delay cuts in high heat or cold snaps to avoid premature drying cracks.
- Use proper joint spacing and dowels to control restraint and raveling.
- Check environmental factors like shading winds and curing to adjust timing.
- Wear PPE, goggles, hearing protection; shut off power before blade adjustments.
Table of Contents
- Introduction
- Key takeaways
- Why Saw Cuts Matter: Cracking Mechanisms and Objectives
- Timing the Sawing Window — How to Know When to Cut
- Determining Saw Cut Depth: Principles and Best Practice
- Preventing Raveling, Spalling, and Damaged Joint Intersections
- Environmental and Site Factors That Change the Sawing Strategy
- Concrete Mixture and Curing — How Materials Influence Raveling and Cracking
- Joint Layout, Spacing, Dowels, and Skew Joints — Planning to Control Cracking
- Tools, Safety, Costs, Common Mistakes, and Visual Checkpoints
- Conclusion
- FAQ
Why Saw Cuts Matter: Cracking Mechanisms and Objectives
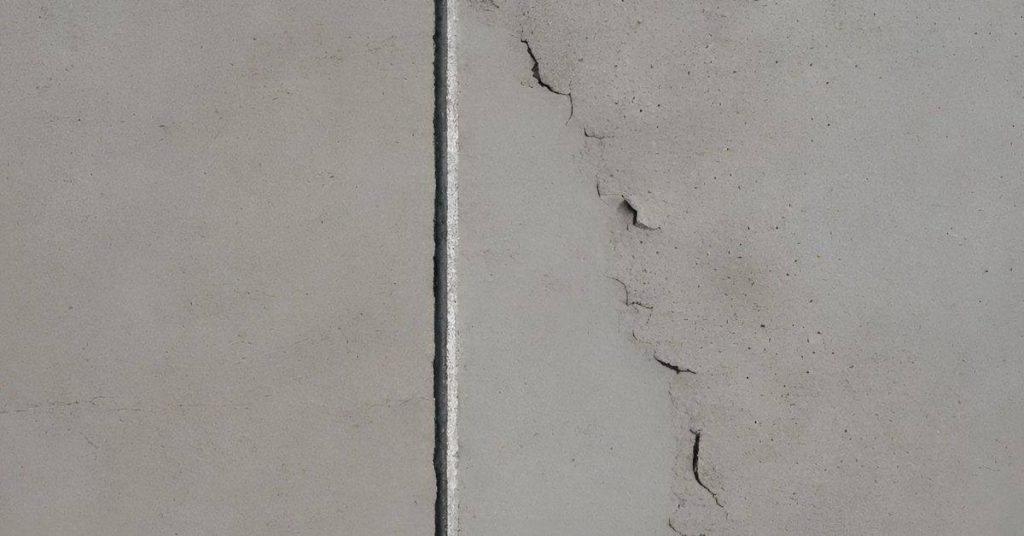
Saw cuts are intentional weak planes that guide where shrinkage and thermal stresses release so cracks occur predictably instead of randomly across the slab. Properly placed and timed cuts protect long‑term slab performance by concentrating movement at designed locations and preserving load transfer and rideability.
When cuts are too shallow, too late, or mistimed relative to the concrete’s cure, the cut edge can ravel, spall, or expose aggregate and the slab can develop unintended random cracks that undermine durability. Verify exact depth and timing guidance from project drawings, product data sheets, or the concrete supplier and adjust for weather and slab maturity rather than guessing.
How cracks form (early-age vs. long-term)
Concrete cracks due to stress, mainly from early-age shrinkage and later drying-shrinkage/thermal changes.
Plastic shrinkage happens right after pouring, before concrete sets. It’s caused by water loss at the surface.
Early-age restraint cracking occurs when concrete is still curing but starts to shrink. If restrained, it cracks.
Timing saw cuts during these critical periods helps control these cracks.
What effective saw cuts must achieve
Saw cuts serve two main purposes: guide cracking and maintain slab integrity.
The cut creates a plane of weakness, encouraging cracks to form here instead of randomly.
Proper depth prevents damaging aggregate or weakening edges, which could lead to spalling or raveling.
Effective cuts balance these goals to maximize slab performance and durability.
Timing the Sawing Window — How to Know When to Cut
The sawing window is the field period after placement when the surface has stiffened enough to carry a cut without shattering but is still soft enough that the saw relieves stress rather than tearing the edge. It shifts with mix, weather, slab thickness, and subbase conditions, so treat it as a moving window, not a fixed clock time.
Use simple site checks—loss of surface sheen, surface firmness tests (thumb/knuckle or a repeatable hardness probe), bleed‑water observations—and corroborate with maturity or surface hardness tests where available. Also check project specifications and applicable standards (for example, ACI guidance) and keep a short log of observations and test results to document the start and end of the window for quality control.
Visual and Tactile Checks to Start Sawing
The ‘sawing window’ opens when your concrete slab starts to lose its glossy sheen. This indicates that the bleed water has mostly evaporated, and the surface is beginning to harden.
Perform a simple thumb or knuckle test to check for initial set. Gently press on the surface; if it’s firm but leaves an imprint, you’re ready to start sawing. Be careful not to push too hard, as this could cause damage.
Observe how the bleed water behaves. When it stops moving and starts to dry out, that’s another sign that your slab is gaining strength and can handle cuts.
Signs the Sawing Window is Closing or Passed
The end of the ‘sawing window’ approaches when you start to see tight, hairline cracks on the surface. These are signs that the concrete is shrinking as it loses moisture and gains strength.
Rapid temperature drops can also signal that the window is closing. If the slab cools too quickly, it may not have enough time to gain sufficient strength before shrinkage occurs, leading to cracking.
If you notice visible shrinkage or warping of the slab, sawing should be finished immediately. These are clear signs that the concrete has passed its optimal sawing window and is now at risk for random cracking.
Determining Saw Cut Depth: Principles and Best Practice
Cut depth controls whether the saw relieves stress effectively without creating a fragile edge; deeper cuts tend to control cracks better but can weaken the slab face if they exceed appropriate fractions of slab thickness. Different approaches — conventional late‑entry versus early‑entry sawing — trade timing for edge integrity and should be chosen based on site conditions and project requirements.
Don’t guess depth: confirm slab thickness, joint spacing, and the contractor’s or engineer’s call, and check the project specs or standards for the recommended fraction of thickness to cut. Before cutting, run a quick checklist: measure slab depth, note curing status and environmental conditions, and reconcile any conflicting guidance with the structural drawings or referenced standards.
Conventional vs. Early-Entry Depth Approaches
The depth of your saw cuts depends on when you make them – before (early-entry) or after (conventional) the concrete has set.
Conventional: These deeper cuts, typically 1/4 to 1/3 of slab thickness, are made once the concrete has reached initial set. They provide better crack control but may compromise surface integrity if too deep.
Early-Entry: Shallower cuts (1/8 to 1/6 of thickness) are made before full set. They preserve surface quality but might not control cracks as effectively.
When to Deviate from the Spec (Site-Based Judgment)
While project specs guide depth, site conditions may demand adjustments. Document your rationale for any deviations.
For thin slabs, consider shallower cuts to preserve structural integrity. For special finishes like exposed aggregate or polished surfaces, deeper cuts might be needed to avoid damaging the finish during sawing.
Always prioritize edge integrity and crack control over strict adherence to specs when site conditions dictate otherwise.
Preventing Raveling, Spalling, and Damaged Joint Intersections
Good blade selection and maintenance are the foundation for clean edges—match blade type to the concrete and keep segments sharp, cooled, and free of glazing to avoid ragged cuts and micro‑cracking. Sawing technique matters: steady feed rates, controlled depths, continuous progress through a joint, and proper water application reduce friction heat and edge damage.
Protect intersections and vulnerable edges by planning sequence, using temporary backstops or joint protectors where needed, and staggering passes to avoid cumulative chipping. Inspect cuts immediately, document any blowouts or spalls, and schedule timely corrective action such as re‑cutting, patching, or sealing before cure advances or weather interferes.
Blade choice, cutting speed, and saw operator technique
Selecting the right blade is crucial. For hard concrete, use diamond blades with segments that match the surface’s hardness.
Proper cooling and lubrication prevent overheating and edge damage. Check for dull segments regularly to avoid ragged edges and micro-cracking.
Maintain a steady RPM and feed rate. Too fast can cause raveling, too slow leads to excessive heat. Practice makes perfect; train your eye to control the saw’s progress.
Protecting intersections and crossing cuts
Use joint protectors or temporary templates at intersections. They shield cut edges from chipping and ragged transitions.
At rebar or dowel locations, use a temporary backstop. This prevents damage where the saw meets reinforcement.
Saw through joints in one continuous pass. Avoid sawing from multiple directions at mismatched angles to prevent blowouts and edge damage.
Environmental and Site Factors That Change the Sawing Strategy
Weather and site conditions—air temperature, wind, sun exposure, humidity, and subbase friction—directly affect how quickly the surface sets and therefore shift the sawing window and ravel risk. Rapid drying or high solar load shortens the window and increases edge fragility; cool, damp conditions lengthen it.
Mitigate risks by adjusting timing, using surface protection (tarps, shading), altering curing practices (fogging, curing compounds), and planning cutting during cooler or shaded periods when practical. Monitor real‑time weather and substrate moisture, and record conditions so you can pause or advance cuts based on observed thresholds rather than a preset schedule.
Weather mitigation tactics
The sun, wind, and humidity can speed up concrete drying and shorten your sawing window. Here’s how to slow it down:
Shade the cut area with tarps or other temporary covers to block sunlight.
Consider nighttime cuts. The cooler temperatures at night help keep the surface from drying too fast.
Use fogging or rapid curing compounds to speed up surface curing. This locks in moisture and reduces raveling risk.
Subbase and friction effects on sawing timing
A stiff or rough subbase can increase friction, making it harder to cut. This reduces your sawing window:
High subbase friction means you’ll need to make cuts earlier than usual.
If the subbase is stiff or unyielding, consider using temporary friction modifiers to improve saw blade performance.
Monitor these conditions closely. Early cuts might be necessary, but rushing can lead to raveling and cracking.
Concrete Mixture and Curing — How Materials Influence Raveling and Cracking
Mix design elements—cement type, aggregate grading, water content, and admixtures—govern early strength gain and surface hardness, which in turn affect the slab’s susceptibility to raveling and early random cracking. Curing method and timing determine how the surface retains moisture and develops strength during the critical window for saw cutting.
Coordinate with the concrete supplier and curing crew to understand expected early strength, bleed characteristics, and curing procedure for the pour. Collect key data (slump, air content, target compressive strength, and curing regimen) and use that information to set sawing timing and depth decisions while documenting the chosen approach for QA/QC and later reference.
Mixture features that shorten or lengthen the sawing window
The concrete mix design can impact when you should start sawing. Here’s what to consider:
Rapid set mixes gain strength quickly, allowing for earlier sawing but may require faster action.
Slower strength gain mixes need more time before sawing. Check the target compressive strength and slump with your mix supplier to plan accordingly.
Curing practices that preserve sawing options
Proper curing helps maintain surface moisture and strength balance, keeping your sawing window open:
Use water curing or curing compounds to keep the surface moist. Control temperature and humidity if possible.
Monitor the air content, bleed water, and shrinkage potential. Adjust your sawing schedule based on these factors and curing progress.
Joint Layout, Spacing, Dowels, and Skew Joints — Planning to Control Cracking
Joint spacing and orientation direct where shrinkage cracks form; proper layout with appropriate dowel placement manages load transfer and reduces the chance of random cracking and edge damage. Saw timing and depth must align with the planned layout so cuts intersect reinforcement and dowels as intended and don’t undermine joint performance.
Plan by assessing expected shrinkage, traffic loads, and subbase conditions, and consult design standards for spacing and dowel recommendations. Verify alignment with adjacent pours and formwork, document the joint map and cut sequence, and resolve any conflicts between timing needs and layout before cutting begins.
Spacing strategy tied to slab thickness and use
The spacing of control joints is crucial for managing cracks. It’s proportional to your slab’s thickness and its intended use.
Thicker slabs need wider spacing because they shrink more. For example, a 6″ thick slab might have joints spaced at 12″ centers, while an 8″ thick one could be spaced at 18″.
Use also matters. High-traffic areas or heavy loads need closer spacing to handle stress better.
Dowels, misalignment risks, and skewed joints
Dowels are used in control joints to transfer load and prevent cracking. But they can cause issues if not aligned properly.
Misaligned dowels can’t do their job right. They might even cause new cracks. So, check them during layout and placement.
Skewed joints help accommodate directional stresses. Position them relative to traffic lanes and expected stress patterns. But remember, they need careful planning too. Misaligned skew joints can lead to unexpected cracking.
Tools, Safety, Costs, Common Mistakes, and Visual Checkpoints
Have the right tools on hand—saw type and blade selection for the concrete, water supply for cooling and dust control, depth gauges, and edging tools—and always follow site safety practices including eye, hearing, and respiratory protection. Poor timing or incorrect depth carries repair and performance costs: expect more patching, sealing, and maintenance when cuts are done improperly.
Avoid common mistakes such as under‑ or over‑cutting, inconsistent spacing, dry cutting without water, and ignoring edge condition checks; use a simple visual checklist before and after cuts to spot raveling, spalling, and misalignment. Record decisions, reference applicable standards, and document observations so corrective work and design reviews are straightforward if problems arise.
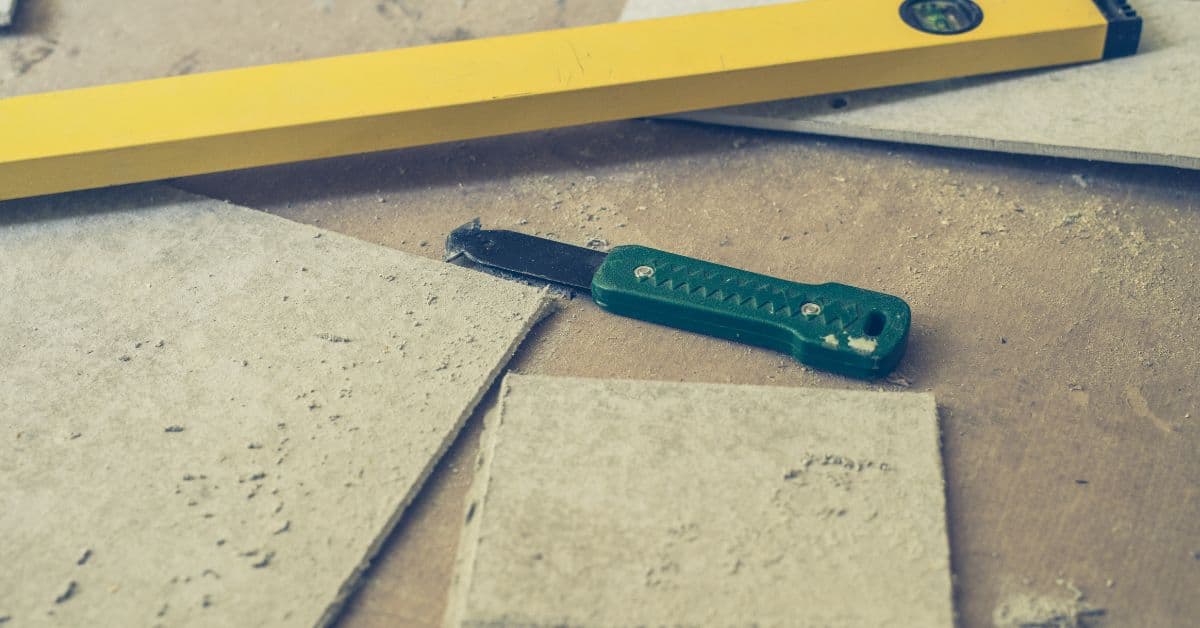
Tools, materials checklist and saw recommendations
Use this checklist before starting any concrete cutting job to ensure you have the right tools and safety gear. Check each item off as you confirm it’s ready.
- Safety glasses: Protect your eyes from debris. Ensure they meet ANSI Z87.1 standards for impact protection.
- Ear protection: Use earplugs or earmuffs to protect against loud saw noise. Check if they’re rated for the decibel level of your saw.
- Work gloves: Choose gloves that provide a good grip and protect your hands from cuts and vibrations.
- Steel-toed boots: Protect your feet from falling objects. Check if they meet ASTM F2413 standards for impact and compression protection.
- Respirator: Use a respirator with a particulate filter to protect against concrete dust. Ensure it meets NIOSH certification standards.
- Safety vest (optional): For high-visibility work areas, use a safety vest that meets ANSI/ISEA 107-2015 standards.
- Concrete saw: Choose a wet-cut saw for most jobs to control dust. Check if it’s rated for the depth and type of cut you need (e.g., diamond blade for reinforced concrete).
- Diamond blades: Ensure blades are compatible with your saw and suitable for the concrete type (e.g., standard, rapid-set, or fiber-reinforced). Check if they’re in good condition before use.
- Water supply: For wet cutting, ensure you have a steady water supply to control dust and cool the blade. Use a water-filled sprayer or connect your saw to a water source.
Quick rule: Always prioritize safety gear before starting any concrete cutting job. Double-check that all tools and equipment are in good working condition to prevent accidents and rework.
Safety and QC visual checkpoints
Use this checklist before, during, and after cutting concrete to ensure safety, quality, and prevent costly rework.
- Wear appropriate PPE: Safety glasses, gloves, steel-toed boots, and hearing protection. Check manufacturer’s guidelines for specific product recommendations.
- Control dust/wet-cutting: Use water to suppress dust when cutting. Ensure your saw has a proper water supply connection and that you’re using the correct nozzle angle (usually 45 degrees).
- Pre-cut visual check – raveling: Inspect the cut area for any loose aggregate or raveled edges. If present, use a chipping hammer to remove them before cutting.
- Pre-cut visual check – straightness: Use a level and chalk line to mark a straight reference line. Ensure your saw’s guide follows this line accurately.
- Pre-cut visual check – depth: Measure the required cut depth using a tape measure or depth gauge. Ensure your saw’s cutting wheel is set accordingly.
- During cutting – blade condition: Regularly inspect the cutting blade for signs of wear or damage. Replace if necessary to maintain clean cuts and prevent blade failure.
- Post-cut visual check – straightness: Inspect the cut for any deviations from the reference line. If necessary, use a chipping hammer to remove high spots or a grinder to smooth out low spots.
- Post-cut visual check – depth: Measure the cut depth at multiple points along its length. Ensure it matches your required depth within acceptable tolerances (usually ±1/8″).
Quick rule: Always double-check your measurements and marks before starting to cut. A few extra minutes spent planning can save hours of rework.
Cost and rework implications of poor sawing timing
Use this checklist to ensure you’re sawing at the right time. Timing is crucial to avoid costly repairs, liability issues, and surface remediation.
- Check concrete age: Saw too early? Concrete may crumble or break. Too late? You risk damaging reinforcement. Check manufacturer’s instructions for ideal sawing times (usually 28-35 days).
- Inspect weather conditions: Saw in extreme heat, cold, or humidity? Cracks can form. Check local forecasts and avoid adverse conditions.
- Verify moisture content: Too dry? Concrete may crumble. Too wet? It won’t saw cleanly. Use a moisture meter (check product label for safe ranges).
- Check reinforcement cover: Saw too close to reinforcement? You risk damaging it. Too far away? You waste concrete. Check local codes and manufacturer’s recommendations.
- Inspect saw blade condition: Dull blades cause rough cuts, increasing surface remediation costs. Inspect blades before use.
- Check sawing depth: Too shallow? You won’t cut through. Too deep? You risk damaging subgrade or utilities. Check your desired slab thickness and adjust accordingly.
- Verify saw alignment: Crooked cuts increase repair costs. Use a straight edge to ensure the saw is aligned properly.
- Check for hidden obstacles: Undisclosed utilities, rebar, or other obstructions can cause costly damage and liability issues. Use utility locating services before sawing.
Quick rule: Always saw concrete at the right time, in the right conditions, with the right tools to minimize costs and risks.
Conclusion
Get the cuts right, and you protect the concrete from unsightly cracks, weak joints, and costly fixes. The key is timing, depth, and a careful joint plan, done with constant safety in mind.
Apply this in one smooth flow: confirm the sawing window on a small test area, set a conservative depth that respects the joint layout and materials, make clean, segmented cuts, and monitor edge conditions as you go. Check environmental factors and curing status, then verify each cut against your plan before moving to the next stage. If you’re unsure, test a dry run and keep the area controlled and clean; always wear eye and hearing protection and keep bystanders clear.
Common mistakes to avoid include cutting too early or too late, over- or under-penetrating joints, and ignoring skew and intersection details that invite spalling or raveling. Maintain simple safety rules: keep the work area dry and well lit, use the right blade and cooling method, and don’t push the tool past its limits. If the project involves complex joints, heavy loads, or uncertain material behavior, consider bringing in a pro rather than pushing ahead alone.
FAQ
When is the best time to saw a concrete slab to avoid raveling or random cracking?
Cut after the surface has set enough to hold a groove without tearing, but while the slab is still firm enough to avoid chipping. Check the concrete’s set and the supplier’s guidelines for your mix. If in doubt, call the product manufacturer or follow local site practices.
How deep should saw cuts be, and how do I know the right depth?
Cut depth should align with the joint plan and the type of crack control you want. Do not guess—use the joint layout and manufacturer instructions for your blade. If unsure, check labels or ask your supplier for the recommended depth range.
What weather or temperature conditions affect when I should cut and how I cut?
Hot, windy days can dry the edge faster and change cut timing. Rain, freezing temps, or rapid temperature swings can change how the concrete behaves. Plan for the forecast and adjust timing if needed, then verify with the blade and mixer labels.
What practical steps help prevent raveling and cracking during sawing?
Use clean, sharp blades and maintain steady feed speed. Avoid forcing cuts or cutting too soon in damp or soft surfaces. Consider joint protectors or spacers to keep proper gaps and protect the edges—follow the manufacturer guidance for your setup.