
Introduction
Rebuilding control joint edges after raveling is the process of renewing the exposed edge of a control joint that has deteriorated. This DIY repair focuses on cleaning, restoring shape, and preparing the edge for bonding or resurfacing. Keep the goal to create a clean, straight edge ready for primers and forms.
You’ll need basic tools, compatible repair material, primers as recommended, and edge forms or guides to keep the edge true. For cleaning, use a safe saw-cut cleanup approach and remove loose material, then apply primers per label after the edge is cleaned and dried. Install edge forms carefully, then follow manufacturer instructions for bonding or topping, and check local rules if unsure.
Key takeaways
- Assess damage and plan rebuild before cutting; verify joint depth and alignment.
- Clear debris from saw-cut joints, then sweep and vacuum for clean primer contact.
- Choose primers compatible with joint material; apply per manufacturer instructions.
- Install edge forms squarely, clamp firmly, and seal joints to prevent leakage.
- Fill and smooth edges after cleanup, then prime and cure as directed.
- Wear PPE, control dust, avoid loose materials; inspect for cracks after setup.
Table of Contents
- Introduction
- Key takeaways
- When to Rebuild Control Joint Edges
- Tools, PPE, and Materials Checklist
- Saw-Cut Cleanup Procedure After Raveling
- Priming Control Joint Edges — Products and Application
- Selecting and Installing Edge Forms
- Filling, Sealing, and Finishing the Joint Edge
- Safety, Environmental, and Quality Control Measures
- Common Mistakes, Troubleshooting, and Preventive Maintenance
- Conclusion
- FAQ
When to Rebuild Control Joint Edges
Raveling shows as edge chips, exposed aggregate, flaking, and a loss of vertical edge height that can weaken joint integrity and load transfer. Assess the severity by looking for depth loss, surface profile changes, and widening of the joint. Decide between rebuild and maintenance based on these observations and the expected use of the slab.
Consider edge depth loss thresholds, how exposed the aggregate is, and the traffic or load the area must carry. Other factors include crack movement, moisture concerns, and the risk of ongoing deterioration if left untreated. Use a quick reference checklist to guide the decision and plan the sequence for repair work with saw-cut cleanup, primers, and edge forms in mind.
Identifying severity and failure modes
Raveling can range from minor surface dusting to severe structural damage. To assess the severity, perform visual and tactile checks:
Minor raveling: Light dusting, slight edge chips, or exposed aggregate near the surface.
Moderate raveling: Noticeable flaking, loss of vertical edge height, and increased joint width. The edge depth may be reduced by 20-50%.
Severe raveling: Significant edge depth loss (over 50%), extensive aggregate exposure, and visible cracks or movement along the joint. These signs indicate deeper joint compromise.
When to repair vs. replace joints
Deciding between repairing and replacing a joint depends on several factors:
Repair: Consider rebuilding if the edge depth loss is less than 50%, there’s no visible crack or movement, and aggregate exposure is minimal. Also, consider the traffic/load conditions – residential areas with light traffic may not require immediate replacement.
Replace: If the joint has lost more than 50% of its original depth, shows signs of cracking or movement, or has extensive aggregate exposure, it might be better to replace the entire joint system. Consult a concrete specialist if you’re unsure about the extent of damage or the best course of action.
Always consider the likelihood of ongoing deterioration and the risk factors (moisture, freeze-thaw cycles) when making your decision.
Tools, PPE, and Materials Checklist
Assemble a project-ready kit that covers saws, grinders, vacuum systems, primers, fillers, edge forms, hand tools, and PPE. Note alternatives for renting versus buying based on how often you tackle similar jobs. Verify that each item fits your DIY setup and workspace.
Include dust-control vacuums with the right filtration, edge-form types, and compatible primers. Check moisture tolerance and cure times on labels, and plan surface prep steps before priming. Have a range of hand tools and safety gear ready so you can work cleanly and safely from start to finish.
Recommended tools and cleanup equipment
Before you start saw-cutting or removing ravels, make sure you have the right tools and cleaning gear. This checklist will help you stay safe and efficient.
- Circular Saw: Check blade size (6-1/2″ to 7-1/4″) and teeth per inch (TPA) – 18-30 TPA is suitable for concrete. Ensure the saw’s safety features are functioning.
- Wet/Dry Vacuum: Verify it has a HEPA filter for dust control. Check hose length and capacity to handle your project size.
- Diamond Blades: Inspect blades for proper segmentation, core type (wet or dry), and arbor hole size (matching saw’s arbor).
- Safety Glasses: Ensure they meet ANSI Z87.1 standards and provide side protection.
- Ear Protection: Check noise reduction rating (NRR) – 25-30 dB is recommended for concrete cutting.
- Work Gloves: Inspect for durability, grip, and protection against cuts. Size should fit comfortably.
- Respirator: Check filter type (P100 or N95) and ensure a proper seal with the facepiece. Follow manufacturer’s instructions for use and maintenance.
- Cleaning Supplies: Have plenty of water, soap, and rags for cleaning tools and equipment post-use.
Quick rule: Always double-check your safety gear before starting any task. A moment’s carelessness can lead to serious injuries or rework.
Material types and brief use cases
Before you start mixing and pouring concrete, ensure you have the right materials for your project. This checklist helps you verify each material’s suitability for your job.
- Concrete Primer: Check label for “concrete primer” or “bonding agent”. Confirm it’s compatible with your substrate (e.g., concrete, masonry, metal).
- Bonding Agent: Similar to primer, check label. Ensure it’s suitable for your project type and substrate.
- Semi-Rigid Filler: Check label for “semi-rigid” or “pourable”. Confirm it can fill cracks up to 1/2″ wide.
- Rigid Filler: Check label for “rigid” or “crack filler”. Ensure it’s suitable for filling wider cracks (up to 3/4″).
- Edge Form Material: Check if it’s designed for your specific edge form system (e.g., snap ties, form-ties).
- Concrete Admixtures: Check labels. Ensure they’re compatible with your concrete mix and purpose (e.g., accelerators, retarders, water reducers).
- Concrete Mix Design: Check if it matches your project’s requirements (e.g., strength, slump, air content).
- Aggregates: Visually check for clean, well-graded materials. Ensure they match your mix design.
Quick rule: Always follow manufacturer instructions and local building codes to avoid costly mistakes and rework.
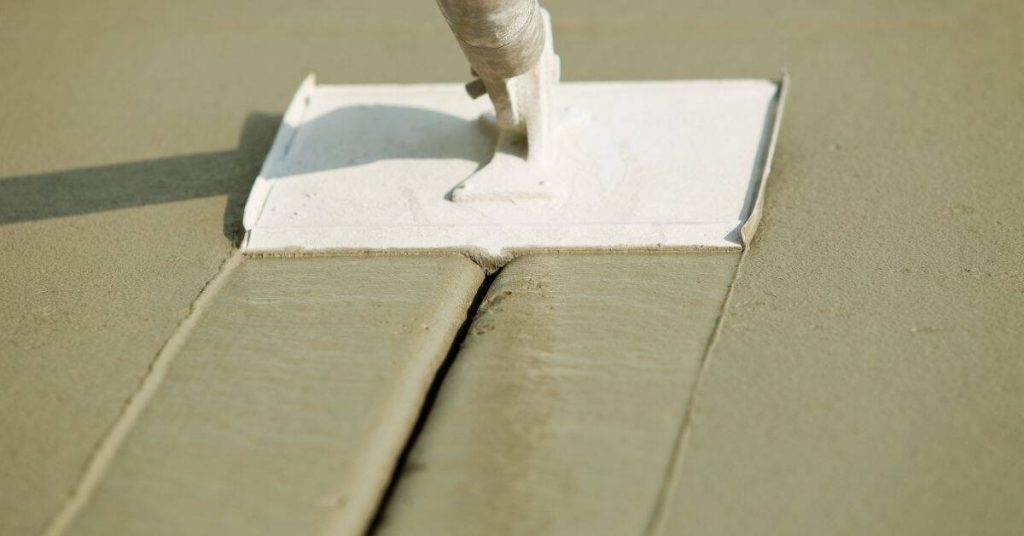
Saw-Cut Cleanup Procedure After Raveling
Follow a precise sequence: remove the raveled material first, trim back damaged edges, then clean and dry the joint to receive primer and filler. Avoid further edge damage by protecting the face of the remaining concrete during each step. Keep the workspace organized to prevent cross-contamination.
Use the appropriate tools for material removal and precise edge restoration, and maintain dust control throughout. Ensure safety by following tool-specific cautions and maintaining a clean line along the joint. Prepare the cavity so the filler can achieve a solid, uniform bond with the substrate.
Saw-cutting technique and depth control
Set your saw’s depth to match the width of your chosen joint filler. This ensures a proper fit and prevents overfilling or underfilling.
Make multiple passes, overlapping each one slightly. This helps create smooth, vertical faces without overcutting. Check your progress after each pass using a straightedge or level.
Never force the saw. Let it cut at its own pace to avoid damaging edges.
Cleaning and contaminant removal
First, vacuum out loose material from the joint cavity using a shop vac. Then, use compressed air to blow out any remaining dust or debris.
Brush the edges with a stiff-bristled brush to remove any embedded dirt or oils. This ensures good adhesion for your primer and filler.
Before priming, test surface cleanliness by sticking a small piece of tape on the edge, then pulling it off. If there’s no residue left behind, your surface is clean enough for priming.
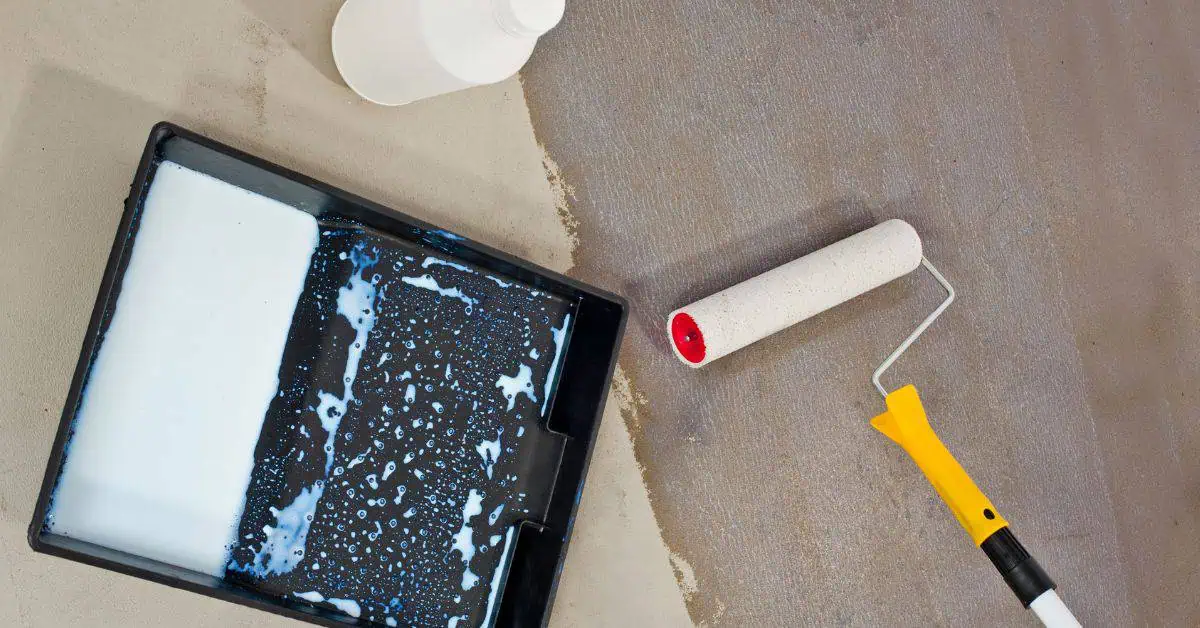
Priming Control Joint Edges — Products and Application
Primers and bonding agents help reestablish adhesion between the concrete surface and edge-form materials, especially where raveling has occurred. Determine if a primer is necessary for the repair scenario by checking the substrate condition and the chosen filler system. Consult the product label or manufacturer instructions for exact requirements.
Review primer chemistry options and choose based on porosity, temperature considerations, moisture, and service environment. Prepare the surface with cleaning and profiling, and perform moisture checks as guided by the product data sheet. Follow safety notes and compatibility guidance for the saw-cut filler system you plan to use.
Choosing the right primer or bonding agent
A primer’s job is to reactivate or improve adhesion between your concrete substrate and edge-form materials. It’s crucial when fixing raveling repairs.
Different primers have different chemistries – epoxy, polyurea, acrylic, even moisture-tolerant ones. Choose based on:
- Substrate porosity: Porous surfaces need better adhesion.
- Temperature and moisture: Some primers won’t work in cold or wet conditions.
- Expected service environment: Harsh environments need tougher primers.
Always check manufacturer compatibility with your chosen filler/sealant (epoxy, polyurea, polyurethane).
Application best practices and visual checks
Mix primers thoroughly. Follow pot life guidelines to avoid waste.
Apply using brush, roller, or spray – follow manufacturer’s instructions. Aim for 2-4 mils coverage.
Before filling, do a tack test: lightly touch the primed surface with a clean rag. If it sticks, you’re good to go. Also, look for:
- No visible signs of delamination
- No excessive gloss or sheen: This could indicate too much primer.
- No signs of curing: Wait until the primer is fully cured before filling.
Selecting and Installing Edge Forms
Compare edge form types such as rigid, flexible, and temporary options, weighing their pros and cons for typical joint widths and traffic. Use selection criteria that match the joint movement potential and the intended finish. Reference form availability and long-term performance when planning your install.
Plan attachment and alignment with fasteners, bracing, and stakes to keep edges straight and the form depth consistent. Address sealing between the form and slab to prevent leaks and edge chipping. Consider timing for removal and how forms integrate with primers and fillers in the workflow.
Form selection by joint condition and finish
First off, you gotta match your edge forms to the job at hand. It’s like choosing a hammer – you don’t want a sledgehammer for a delicate task, right?
Check base compaction. If it’s not up to snuff, even the best form won’t save you. You need rigid forms here, like steel or aluminum. They’ll hold their shape and keep your concrete from leaking out.
Now, if your joint condition is good, you’ve got options. For a clean, sharp edge, go for permanent forms. They’re usually made of plastic or composite. But remember, once they’re in, they’re there to stay. So, if you think you might want to change that edge later, consider removable forms instead.
As for finish, it’s all about aesthetics and what you’re aiming for. Smooth forms give a smooth finish. Textured forms, well, they give a textured finish. It’s up to you and your vision. Just make sure whatever you choose is compatible with the rest of your setup.
Securing forms and preventing leaks
Once your edge forms are up, it’s time to secure them and make sure they’re watertight. Here’s how:
Align and anchor forms: Use form ties or clamps to connect your forms together. Check that they’re level and plumb using a laser level or water level. Make sure they’re tight against each other to prevent leaks.
Seal gaps: Use backer rod or foam sealant to fill any gaps between the forms and the base. This stops concrete filler from bleeding out. Also, apply a bead of form release agent along the top edge to help with stripping later on.
Check straightness and elevation: Before pouring, double-check that your forms are still level and plumb. Use a 2-foot or 4-foot level for this. If you’re not sure about your base compaction, check it. Soft spots can cause your forms to shift when you pour.
Filling, Sealing, and Finishing the Joint Edge
Compare filler and sealant options for semi-rigid versus rigid products based on joint width, movement, and exposure. Choose a system that matches the expected service conditions and the joint behavior. Verify compatibility with primers and edge forms before mixing.
Cover mixing and placement methods, including flush versus recessed finishes and handling beveled edges. Use proper tooling to avoid air voids and ensure uniform depth. Follow curing guidance and perform post-cure checks before traffic resumes.
Placement and tooling for a durable bond
The key to a strong, long-lasting joint edge is proper placement and tooling of your filler or sealant. Here’s how:
- Pour/Gun Fill: Use a caulking gun or pour directly from the pail for wider joints. Key: Maintain consistent depth.
- Use Backer Rod (if needed): For wide, deep joints, insert backer rod to maintain uniform depth and prevent overfilling. Rental: $10-$20/day.
- Tool the Material: Use a jointing tool or trowel to smooth out the material, achieving your desired profile (flush or slightly recessed). Tip: Work quickly before it sets.
- Avoid Entrapped Air: Ensure no air pockets form during placement. Warning: Voids can weaken the bond.
- Chamfered/Beveled Edges: Use a flexible tool or your fingers to work material into these edges, ensuring full coverage.
Curing, protection, and post-install inspection
After filling and sealing your joint edge, follow this checklist to ensure a successful cure before reopening it to service.
- Protect from Traffic: Keep the area clear of foot traffic or vehicles for at least 24 hours. Why: Prevents damage and ensures proper curing.
- Monitor Temperature: Maintain cure temperature between 50°F – 90°F (10°C – 32°C). Warning: Extreme temperatures can hinder cure.
- Check Adhesion: Gently pull on the sealant with your fingers or use a pull test tool. Expect: No peeling or lifting.
- Inspect Visual Appearance: Look for any discoloration, cracking, or other defects. Warning: These could indicate issues with adhesion or cure.
- Check Joint Depth: Ensure the joint is filled to the desired depth and uniform across its length.
- Test Movement: Gently push on either side of the joint to check for movement. Expect: No movement; slight flexibility is normal.
- Check Joint Width: Measure the joint width at several points along its length. Expect: Consistent width as originally planned.
- Inspect Edges: Check that edges are well-defined and free of raveling or other defects.
Quick rule: Always follow the manufacturer’s recommended cure time before exposing the joint to use, cleaning agents, or heavy traffic.
Safety, Environmental, and Quality Control Measures
List PPE needs such as respirators, eye protection, gloves, and hearing protection, plus any fall-arrest considerations for elevated edges. Establish site controls and pre-job safety briefings to keep everyone informed. Emphasize hazard communication and emergency planning in daily routines.
Implement dust and fume controls with wet-cut methods, dust collectors, and containment curtains. Ensure ventilation to dilute fumes from primers and solvents. Use labeled waste containers and follow local rules for hazardous materials and spill response; document edge checks and adhesion tests for QA records.
Dust, Silica, and Respirable Hazards
Concrete dust is a serious hazard on any jobsite. It contains crystalline silica, which can cause lung disease if inhaled.
Control measures:
Use wet cutting methods to reduce dust. If dry cutting is necessary, use a vacuum system with HEPA filters. Always wear a NIOSH-approved P100 respirator and ANSI Z87+ eye protection.
Visual and Simple Non-Destructive Quality Checks
After repairing your control joint edges, it’s crucial to inspect the workmanship. Here’s a simple checklist:
1. Edge Soundness: Check for any cracks or chips in the newly repaired edge.
2. Adhesion: Gently tap the edge with a hammer. A dull sound indicates good adhesion; a hollow sound suggests delamination.
3. Voids and Movement Accommodation: Inspect for any voids or signs of movement restriction in the joint. The joint should move freely with the slab.
Common Mistakes, Troubleshooting, and Preventive Maintenance
Identify common missteps such as poor cleaning, incompatible primers or fillers, and incorrect saw depth that can lead to edge raveling. Explain how each error affects bond, movement, and appearance. Use practical remedies to correct or prevent issues.
Provide a troubleshooting flow for field decisions on re-cutting, recompression, or patching. Outline a maintenance plan with routine cleaning, resealing, and periodic checks to extend joint life. Include a simple reference for recognizing failure modes and taking corrective action early.
Fixes for adhesion and spall recurrence
If you’re seeing recurring spalling or delamination, it’s time to dig deeper. First, check if the surface was properly cleaned before repair.
Step 1: Re-clean the affected area using our best-practice cleaning protocol from earlier. Remove all debris and ensure the surface is dry.
Step 2: If spalling persists, consider making deeper saw cuts. This allows for better mechanical interlocking with the new filler material. Make sure to follow precise saw-cut depth guidance to avoid damaging reinforcement.
If delamination continues, it might be time to try an alternative filler chemistry that’s more compatible with your concrete substrate. Consult a materials specialist for advice.
Preventive maintenance schedule and visual checkpoints
Regular inspections are key to catching early signs of raveling before major repairs are needed. Use this checklist every 6 months or after severe weather conditions.
- Check for cracks: Even hairline cracks can allow moisture and debris in, weakening the joint over time. Seal as soon as possible.
- Inspect sealant joints: Ensure they’re intact and not pulling away from the concrete face. Re-seal if necessary.
- Look for discoloration: Yellowing or darkening can indicate moisture intrusion, which can lead to raveling.
- Feel for dampness: Press a dry towel onto the joint face. If it stays wet, there’s a moisture issue that needs addressing.
- Check edge forms: Ensure they’re still securely in place and not leaking. Tighten or replace as needed.
- Monitor joint width: A narrowing joint could indicate settlement or movement issues.
- Inspect backside of slab: If accessible, check for signs of delamination on the underside.
- Review recent weather events: Severe heat, cold, or rain can accelerate raveling. Adjust your maintenance schedule accordingly.
Quick rule: If you notice any of these issues, don’t wait – address them promptly to prevent further damage and costly repairs.
Conclusion
Rebuilding control joint edges is about durable, clean joints you can trust. Do the work with care, follow the steps, and keep safety first to avoid costly damage and bad appearances.
Proceed in order: inspect the raveling area and damaged edge, gather the right tools, PPE, and materials, perform the saw-cut cleanup, prime the edges, fit the edge forms, fill, seal, and finish the joint edge, then verify the cure and protect the area. Work methodically, test a small area first, and stop if anything looks off before you proceed.
Common mistakes to avoid include skipping cleaning and profiling, using the wrong primer or edge form, rushing the primer or sealant, and skipping safety checks or PPE. Follow basic safety rules: wear eye and skin protection, ventilate as needed, and keep a clean work zone. If something about movement, moisture, or cracking feels beyond scope, pause and reassess before continuing.
If the project involves unusual damage, large movement, or code concerns, call a pro rather than forcing a fix. When you see clear limits, stop early and get a professional opinion. Stay steady, follow the plan, and you’ll end up with a joint that lasts and looks right.
FAQ
What tools and materials do I need to rebuild control joint edges?
Have a sturdy utility knife, trim tool, and chisel for shaping. A grinder or angle grinder with a diamond blade helps clean the edge. You’ll want a shop vacuum, stiff brush, and a spray bottle or bucket for cleaning. For materials, grab edge forms, backer rod if needed, primer compatible with your joint material, and the chosen filler or sealant.
How do I clean saw-cut joints after raveling?
First, remove loose material with a stiff brush or vacuum. Pick out any embedded grit with a small scraper, then vacuum again. Rinse lightly only if the product instructions allow it, and let the joint dry before priming or filling.
How is primer applied to control joint edges?
Make sure the edges are clean and dry. Use a primer that matches the joint material and apply as directed by the manufacturer, usually a thin, even coat. Let the primer cure to the recommended tack or dry state before adding filler or sealant.
What’s the right way to install edge forms?
Choose the correct width and profile for your joint, then position the forms so the edges align with the joint. Secure firmly and check that forms are level and straight; supports should prevent movement during filling. Remove or release forms per the product instructions after the edge has set enough to hold shape.