

Introduction
Rebuilding decorative plaster edges means making simple, handmade molds to reproduce the profile you want. You can shape the mold from clay or use basic flexible material to match the original edge, then set it up for casting. Check the profile on the piece and follow manufacturer instructions or local rules for materials and safety.
Build a small armature and template to guide the edge profile before applying plaster. You may modify tools like taping knives to control thickness and surface texture, then apply multiple thin layers for strength and smoothness. Let each layer set, then sand lightly and blend the edge into surrounding work, checking fit and alignment against the existing profile.
Key takeaways
- Plan mold profiles by matching existing edges and confirming plaster hardness before work.
- Build a lightweight armature and templates to hold consistent profiles on-site.
- Modify common taping knives into profile tools with safe edge changes.
- Create simple plaster molds using release and skin-through methods; test fit first.
- Apply plaster in deliberate layers, letting each set before next to reduce cracks.
- Wear PPE and follow site safety; read manufacturer guidelines for materials.
Table of Contents
- Introduction
- Key takeaways
- Project Overview and Planning
- Tools, Materials, and Material Specs Explained
- Measuring and Replicating Profiles: Templates and Patterns
- Making Custom Profile Knives and Simple Molds
- Building the Armature and Installing Molds on-Site
- Applying Plaster and Layering Techniques
- Finishing, Visual Checkpoints, and Painting Prep
- Troubleshooting, Common Mistakes, and Advanced Tips
- Conclusion
- FAQ
Project Overview and Planning
Identify the scope clearly: which plaster edges need rebuilt and which profiles to match, whether historic or modern. Define the expected look and whether the goal leans toward cosmetic restoration or structural reinforcement. Outline the level of skill needed and the general sequence from assessment to finish.
Evaluate the site for feasibility: check the plaster integrity, adjacent moldings, moisture issues, and any preexisting damage. Decide if a DIY approach is appropriate or if a pro should handle core repair or framing concerns. Sketch a simple roadmap that covers mold creation, casting, curing, detailing, and sealing, with realistic time expectations based on your workspace and access.
Assessing the existing profile
Before you start, document your existing plaster edge. Take clear photos from different angles to reference later.
Trace the profile onto paper or use a digital app to capture its shape and dimensions. Measure key radii, bead sizes, and fillets accurately. These details will guide your mold creation.
Identify any ornamentation or texture. You’ll need to replicate these in your molds to match the surrounding surfaces.
Project timeline and budgeting
The timeline depends on the scope of work, but here’s a rough guide:
Week 1-2: Assessment, mold creation. Week 3: Casting, curing. Week 4: Detailing, sealing.
Budget for materials like molds ($50-$200), release agents ($10-$30), plaster mix ($30-$100 per bag), and reinforcement if needed ($10-$50).
Contingency: Allocate 10-15% of your budget for unexpected costs like repairs or additional materials.
Permissions, safety, and prep
Safety first. Wear a dust mask when working with plaster. If your home is old, test for lead before disturbing any surfaces.
Protect the site. Lay down drop cloths to catch any drips or spills. Cover adjacent moldings with plastic wrap to prevent damage.
Check local building codes and HOA rules. You may need permits for structural changes or condo/landlord approval.

Tools, Materials, and Material Specs Explained
List the core hand tools and power tools you’ll rely on, and flag which items are strictly necessary or optional. Include safe handling tips, and note options for renting or borrowing for a short project window. Keep the focus practical for a DIY setup and small scope repair.
Cover mold-making and profiling supplies, profile templates, and alternative DIY molds with their pros and cons. Include notes on plaster or hydrocal cores, release agents, and basic material specs, plus moisture considerations for decorative edges and how these choices affect finish and durability.
Essential tools and optional upgrades
Before you start, gather these must-have tools:
- Profile knives (4″ to 6″) for shaping and trimming concrete forms.
- Taping knives (4″ to 12″) for smoothing and finishing concrete surfaces.
- Sanding blocks or orbital sander for final surface preparation.
- A drill with various bits for mixing, breaking up old concrete, and making formwork adjustments.
For larger projects or to speed up work, consider these optional tools:
- Bandsaw/grinder: Useful for making custom knives or repairing damaged ones. Check local safety guidelines before operating.
- Concrete vibrator: Speeds up consolidation and reduces air pockets in large pours, improving final strength.
- Power trowel: Smooths and finishes large surfaces quickly, but requires practice to use effectively.
Plaster and compound choices
When it comes to plastering, you’ve got a few options. Each has its uses, so let’s keep it simple.
Traditional Lime/Cement Plaster: This is the old-school stuff. It’s durable, breathable, and great for external walls or internal walls with high humidity. But it’s slow to set, so you’ll need patience. Use it when you’re working on an older property or want that classic look.
Gypsum Plaster: This is your modern marvel. It sets fast, sands smooth, and doesn’t shrink much. Perfect for internal walls and ceilings where speed and finish are key. But it’s not as breathable as lime/cement, so avoid using it on external walls or in high humidity areas.
Joint Compounds: These are your finish coats. They come in different types – lightweight for final coats, regular for embedding joints. Use the right one for the job. If you’re using lightweight, make sure it’s compatible with your base plaster. Check the label or manufacturer instructions to be sure.
Molding materials and adhesives
The right molding materials and adhesives ensure your plaster work looks great and lasts. Here’s what you need:
- Plywood or MDF templates: For creating simple, straight molds. Look for smooth surfaces (no knots) and thickness suitable for your mold size. They’re cheap but not reusable.
- Resin putty: For making molds from complex shapes. Choose a two-part, room-temperature curing type. It’s more expensive but allows reusing molds.
- Silicone for detailed casts: Ideal for intricate patterns. Get a high-quality, platinum-cure silicone for durability and detail reproduction. It’s pricey but worth it for fine work.
- Thinset mortar (Type N): For adhering molds to surfaces. Look for ANSI Type N rating for strength and flexibility. Avoid cheaper, lower-rated types to prevent mold detachment.
- Construction adhesive: For joining mold pieces or attaching them to supports. Choose a water-resistant, heavy-duty type like PL Premium or Gorilla Glue. Skip cheap, indoor-use adhesives for durability.
- Brad nails (16-24 gauge): For temporarily securing molds. Use 1″ to 2″ lengths depending on mold thickness. Avoid using too many as they can cause cracks in thin molds.
Pro tip: Always check product labels for compatibility and safety info. Store materials properly to maintain their effectiveness, and follow manufacturer mixing instructions for best results.
Measuring and Replicating Profiles: Templates and Patterns
Set up a repeatable measurement workflow that starts from a reliable reference piece and uses consistent points to maintain uniformity across pieces. Decide on a baseline for radii and depths that won’t drift as you scale up the project. Establish a simple system for versioning templates as you refine the profile.
Outline methods for tracing profiles, whether you use tracing paper, profile gauges, or flexible contour kits. Include tips for capturing curves without distortion and notes on translating those traces to durable templates that can be reused multiple times.
Tracing and documenting complex profiles
Use this checklist to accurately trace and document intricate plaster edge profiles for replication.
- Rubbing profiles: Use a lead pencil on tracing paper taped to the profile. Keep steady pressure.
- Profile gauges: For sharp corners, use a set square and scribe lines with a sharp pencil.
- Photograph details: Capture intricate patterns or textures that can’t be traced.
- Annotate photos: Draw on printouts to show dimensions, angles, and key features.
- Measure radii: Use a flexible tape measure for curves. Mark centerpoints and endpoints.
- Avoid distortion: For complex curves, use a string or flexible ruler to trace along the curve’s path.
- Check symmetry: Ensure both sides of the profile match by comparing traced lines.
- Document tolerances: Note acceptable deviations from the original for consistency across pieces.
Quick rule: Double-check dimensions and angles before moving on to template creation.
Building plywood templates and armatures
Follow this checklist to create durable, accurate guides for shaping plaster and guiding profile knives.
- Choose material: Use high-density plywood (e.g., ¾” or 12mm) for rigidity and longevity.
- Cut pieces: Cut each layer of the template to match traced lines, allowing for plaster thickness.
- Stack templates: Align layers using clamps and a straight edge. Ensure they’re flush at all points.
- Drill pilot holes: Before screwing, drill pilot holes to prevent splitting the plywood.
- Secure with screws: Use #8 or #10 wood screws, spacing them evenly along the template’s length.
- Create armatures: For complex curves, build armatures using PVC pipe and fittings as a base structure.
- Test fit: Ensure the assembled template fits snugly against the original profile without gaps or warping.
- Label templates: Mark each layer with its position in the stack (e.g., ‘Top’, ‘Middle’, ‘Bottom’) for easy assembly.
Quick rule: Always test-fit your template before using it to ensure accuracy and proper alignment.
Making Custom Profile Knives and Simple Molds
Clarify the goal: why a custom profile knife matters, which profiles you’re targeting, and how removable molds can extend capability without new tools. Emphasize safety and predictable results when altering shapes for consistent edges. Build a plan that scales from small sections to more complex corners.
Describe prep steps for selecting a base taping knife, the safety gear needed, and the specific tools to shape radii and fillets. Include guidance on mold design basics, materials to use, and how to transfer a profile from an existing edge to a mold master for repeatable production.
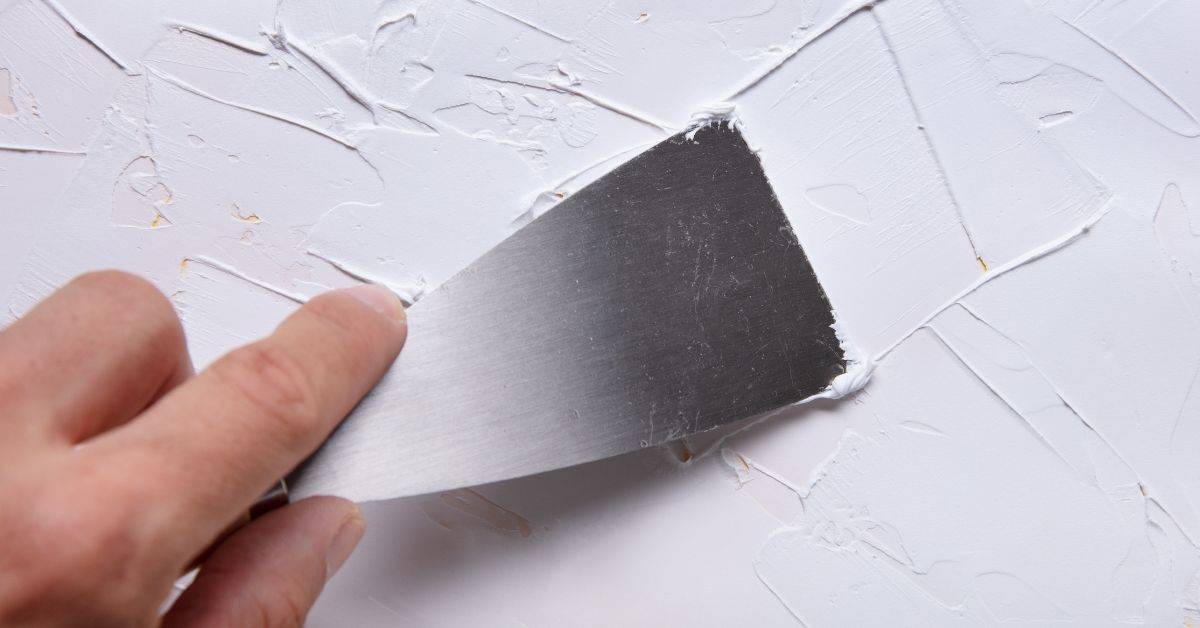
Modifying a taping or profile knife
Start by tracing the desired plaster edge profile onto your chosen taping knife. Use a sharpie and a straight edge to ensure accuracy.
Rough-cut along the line using a hacksaw, then use a grinding wheel to shape it precisely. Be sure to wear safety glasses and gloves.
Add wall or ceiling angles to your knife for accurate shaping. A 45-degree angle works well for most profiles. Remember, sharpness is key but don’t make it too thin – durability matters too.
Carving wooden profile templates and mold blocks
Use this checklist when creating wooden templates or mold blocks for your plaster edges.
- Select the right wood: Choose plywood or MDF. Avoid woods with large grain patterns that could interfere with detail reproduction.
- Transfer the profile: Trace your knife’s profile onto the wood using a sharpie and a straight edge.
- Cut out the template: Use a jigsaw to cut along the line. Be careful not to tear the wood.
- Sand smooth: Sand any rough edges with 120-grit sandpaper for a clean finish.
- Check for accuracy: Test your template by running it along the original plaster edge. It should match perfectly.
- Create mold blocks (optional): If you’re making multiple segments, create simple wooden blocks to hold your template in place during casting.
- Mark placement: Mark where each segment will go on your wall or ceiling before installing the templates.
- Secure templates/mold blocks: Use screws or nails to secure your templates and mold blocks temporarily. Be careful not to damage the wood.
- Quick rule: Always test your setup on scrap material before committing to the real project.
Using silicone or rubber molds for intricate details
Flexible molds are great for ornate profiles with deep undercuts. They allow you to capture even the finest details.
To make a silicone mold, first prepare your original plaster edge by applying a release agent like Vaseline or cooking spray. Then, mix and pour your silicone according to the manufacturer’s instructions. Let it cure before peeling off the mold.
For release agents with plaster, use something like baby powder mixed with a bit of mineral oil. This helps prevent the plaster from sticking while still allowing it to bond with itself.
Building the Armature and Installing Molds on-Site
Explain the purpose of a temporary armature to support inside and outside corners and transitions near ceilings or walls. Define when to invest in a simple frame versus a more robust support system based on the job’s scale. Keep the setup straightforward to minimize disruption on a busy wall surface.
Compare common armature options and mold securing methods that won’t mar surfaces, such as clamps, screws, or magnets. Include step-by-step notes for aligning corners and ensuring plumb and level checks before committing to molding or plaster application.
Armature for radiused and bullnosed corners
Bullnose and radiused corners present a challenge when rebuilding decorative plaster edges. You’ll need an armature to bridge these corners and create a continuous guide for your molding profiles.
For bullnose corners, use 1×2 or 1×3 pine boards, cut to length. Screw them together at the corner, ensuring the outer edges match the bullnose radius. This creates a simple yet effective armature.
With radiused corners, you’ll need to create a curved guide. Use a jigsaw with a fine-tooth blade to cut curves from 1/2″ or 3/4″ plywood. Clamp these together at the corner, following your desired radius.
Securing templates and checking alignment
Before applying plaster, secure your templates in place to ensure a perfect fit. This step is crucial for maintaining consistent profiles throughout your project.
- Screw templates in place: Use drywall screws or small wood screws to temporarily attach your templates to the wall or ceiling. Be sure not to overtighten and damage the surface.
- Use shims for level/plumb alignment: Place shims between the template and the substrate to ensure it’s level and plumb. Check with a torpedo level and adjust as needed.
- Check alignment with adjacent moldings: Ensure your templates align perfectly with any existing moldings or edges. Use a straight edge to check for gaps or overlaps.
- Verify fit before applying plaster: Dry-fit your molds onto the armature, checking for any gaps or misalignments. Make adjustments as necessary.
- Check plumb and level at corners: Use a torpedo level to ensure corners are square and walls/ceilings are plumb and level. Any discrepancies can cause issues with your final plaster edge.
- Inspect for obstacles: Check for any light fixtures, outlets, or other obstacles that might interfere with your mold placement. Make accommodations as needed.
- Pre-fit molds onto armature: Before applying plaster, ensure your molds fit perfectly onto the armature. This helps prevent air bubbles and ensures a smooth finish.
- Check for vibration: Gently tap your templates to check for any vibration. If they move, secure them more tightly or use additional shims.
Quick rule: Always double-check your alignment before applying plaster. A few minutes spent verifying fit can save hours of rework later on.
Working around obstacles and transitions
When rebuilding decorative plaster edges, you’ll often encounter obstacles like light fixtures, outlets, or uneven substrates. Here’s how to work around them:
Light fixtures and outlets: Measure and mark the location of these features on your templates. When installing molds, cut out corresponding sections to accommodate them. You can fill these gaps with plaster later.
Uneven substrates: If you’re working over existing plaster or other uneven surfaces, use a flexible mold material like silicone or rubber. This allows the mold to conform to irregularities, ensuring a smooth final product.
Adjacent moldings: When joining adjacent moldings, ensure they align perfectly. Use a straight edge to check for gaps or overlaps, and make adjustments as needed. You may need to trim back existing moldings or extend your new ones to create a seamless transition.
Applying Plaster and Layering Techniques
Prepare the surface with cleaning and priming, and confirm compatibility between plaster, veneer plaster, or lightweight compounds and the existing edge. Outline a basic layering plan that establishes the profile without overloading the edge. Plan around the substrate’s conditions and moisture status to avoid future cracking.
Describe shaping with profile knives and progressing through coats to achieve a faithful profile. Include guidance on feathering joints and controlling thickness to minimize tool marks while allowing for proper cure and finish work.
Building up base coats and shaping
Start with a thin, smooth thinish skim coat. This sets the profile’s accuracy. Use a 4:1 or 5:1 ratio of plaster to water for your first few layers.
Let it dry for at least 24 hours before shaping. Then use your custom profile knives to shape, applying constant pressure and transitioning between knife sizes to match the original profile.
Each layer should be around 1/8″ to 3/16″ thick. This ensures stability and minimizes shrinkage cracks. Let each layer dry before adding the next one.
Shape between coats, using your knives to refine the profile as you go. Remember, patience is key here – building up layers gradually gives you better control over the final result.
Final coats and feathering for a smooth finish
For your final coats, use a lightweight joint compound. This is easier to sand and gives a smoother finish. Apply it thinly – around 1/16″ per pass.
Feather the edges of each coat to avoid cracking. Use a wide knife or trowel, working the compound outwards from the edge until it’s barely there. This blends the new plaster into the old seamlessly.
Let each final coat dry for at least 24 hours before sanding lightly with fine-grit sandpaper. Wipe off any dust with a damp cloth before applying the next coat.
Repeat this process until you have a smooth, paint-ready surface. Remember, less is more – build up your final coats gradually to avoid tool marks and cracking.
Repairing seams and joints
For plaster-to-plaster joins, use a scoring technique. Score the surface with a knife or comb to create keying points. This helps the new plaster bond better.
If needed, embed fiberglass mesh into the joint before applying the first layer of plaster. This adds strength and stability, preventing cracks from forming.
When smoothing transitions, use a wide knife or trowel to work the compound outwards from the seam. This helps blend the new plaster into the old seamlessly, making joints invisible.
Let each layer dry before adding the next one. Patience and careful application are key here – rushing through this stage can lead to visible seams and cracking.
Finishing, Visual Checkpoints, and Painting Prep
Walk through a final inspection to confirm alignment, profile accuracy, and edge sharpness after removal of molds and any touch-up plaster work. Note common trouble spots and how to address them before priming. Build a simple checklist you can repeat on future repairs.
Summarize sanding and cleanup steps, recommended primers for plaster edges, and how to achieve a unified texture and sheen with surrounding surfaces. Include practical tips for painting order and edge treatment to avoid color discrepancies or visible ridges.
Visual checkpoints for profile accuracy
Before you start painting or applying any final finishes, use this checklist to ensure your concrete surfaces are accurate and ready. Perform these checks after the concrete has cured and been cleaned.
- Check against original photos/templates: Compare the finished edge with the original design or template. Ensure all curves, angles, and details match.
- Inspect for deviations using light/shadow checks: Shine a flashlight along the edges at different angles to spot any deviations from the intended profile. Look for shadows that indicate misaligned or incorrect surfaces.
- Measure key points: Use a tape measure to confirm critical dimensions, such as edge-to-edge distances and curve radii, match the design specifications.
- Check for levelness: Use a laser level or bubble level to ensure all surfaces are level. Uneven surfaces can cause issues with final finishes and may require rework.
- Inspect for cracks or damage: Look for any hairline cracks, chips, or other damage that could affect the final finish. Repair as necessary before proceeding.
- Check for proper curing: Ensure the concrete has cured properly and is ready for painting or finishing. Check with the manufacturer’s instructions if unsure about cure times.
- Verify surface cleanliness: Clean the surface thoroughly to remove any dirt, dust, or debris that could interfere with paint adhesion or final finishes.
- Check for proper tooling marks: Ensure all tooling marks are consistent and even. Inconsistent tooling can lead to an uneven finish and may require additional passes with the trowel.
Quick rule: Always check your work against the original design or template. Skipping this step can lead to expensive rework and a finished product that doesn’t meet expectations.
Surface prep and priming
Before you start painting, use this checklist to ensure your surfaces are clean, repaired, and primed for the best results. Follow these steps after completing your visual checkpoints for profile accuracy.
- Remove dust: Use a soft brush or vacuum to remove all dust from the surface. Check by running your hand over the area; it should feel smooth with no grit.
- Check for repairs: Inspect the surface for any cracks, holes, or other defects. Spot-prime repaired areas before painting to seal them and improve paint adhesion.
- Choose the right primer: Select a primer compatible with your plaster or joint compound. Check the product label for recommendations. Common options include acrylic, latex, or shellac-based primers.
- Spot-prime repairs: Apply a thin coat of primer to all repaired areas using a paintbrush. Let it dry according to manufacturer instructions before painting.
- Avoid heavy application: Be careful not to apply too much primer, as this can lead to drips and uneven surfaces. What goes wrong if you skip this: Drips and runs can cause an uneven finish and may require sanding and re-priming.
- Allow proper drying time: Let the primer dry completely before painting. Check the manufacturer’s instructions for recommended drying times, typically 1-2 hours.
- Avoid painting in direct sunlight: Priming in direct sunlight can cause the primer to dry too quickly, leading to poor adhesion and an uneven finish. What goes wrong if you skip this: Sunlight can cause the primer to dry too fast, resulting in a poor paint job.
- Check for humidity: Ensure the surface and surrounding area have low humidity levels (below 50%) before priming and painting. Check with a hygrometer if unsure.
Quick rule: Always spot-prime repaired areas to seal them and improve paint adhesion. This simple step helps prevent costly rework and ensures a better-looking finish.
Matching paint and patina
Use this checklist when you’re ready to paint your concrete surfaces, ensuring new repairs blend seamlessly with existing ones.
- Check color match: Hold the new paint swatch next to the old surface in different lights. Confirm it’s a close match.
- Verify sheen consistency: Ensure the sheen of your new paint matches the existing surface. Touch-ups should look uniform.
- Test on small area first: Paint a hidden or inconspicuous spot to check for color and sheen accuracy before committing to larger areas.
- Inspect patina: Examine the existing surface’s patina (aging, wear). Decide if you want to replicate it or start fresh.
- Choose aging method: If replicating patina, use techniques like steel wool and vinegar, or specialized aging solutions. Follow product instructions.
- Test aging technique: Apply your chosen method on a small, hidden area to ensure it gives the desired effect.
- Check for moisture: Before painting, test surfaces with a moisture meter (moisture content should be below 18%).
- Inspect repairs: Ensure all repairs are fully cured and structurally sound before painting. Check manufacturer guidelines.
- Prime properly: Apply a high-quality primer suitable for concrete, following the manufacturer’s instructions for best adhesion and coverage.
Quick rule: Always test your chosen paint color, sheen, and aging techniques on small, hidden areas first. This helps avoid costly mistakes and ensures you’re happy with the final result.
Troubleshooting, Common Mistakes, and Advanced Tips
Identify frequent pitfalls such as overthin coats, mismatched profiles, or premature tool modification errors. Provide practical fixes and a lean workflow for reshaping edges or re-molding without compromising the surrounding plaster. Use caution to avoid recurring issues.
Offer checks for mold material compatibility, release agents, and consistent pressure to match historic or custom designs. Include notes on substrate prep, moisture control, and advanced techniques for intricate profiles, along with lightweight QA steps to document recipes and curing times for repeatability.
Fixing gaps, cracks, and popped moldings
After installation, it’s common to find minor imperfections like cracks or gaps in your plaster edges. Here’s how to fix them:
Cracks: If the crack is small, you can fill it with a thin layer of joint compound using a putty knife. For larger cracks, use an adhesive like PL Premium and embed a fiberglass mesh tape before applying the compound.
Gaps: To fix gaps between moldings or at corners, apply an adhesive like PL Premium into the gap, then press in a strip of paper tape or fiberglass mesh. Apply joint compound over it, feathering out to blend with the surrounding surface.
Popped moldings: If a section has popped off, clean the area and remove any old adhesive. Reapply adhesive, press the molding back into place, and use clamps or weights to hold it until dry. Touch up with joint compound if needed.
Advanced replication for ornate profiles
Replicating intricate historic profiles can be challenging, but here are some advanced techniques to help:
Splitting complex profiles: Break down the profile into smaller, repeatable sections. Create a mold for each section, then assemble them on-site to recreate the full profile.
Flexible molds for fine ornament: For delicate ornaments, use flexible mold materials like silicone or latex caulk. These can capture even the finest details and make it easy to remove the cast piece.
Combining casts with sculpted transitions: For profiles that change gradually, combine casting with hand-sculpting techniques. Cast the main profile, then use a flexible material like joint compound or spackling paste to blend and transition between sections.
Checklist of do-not-do items
Before you start your project, review this checklist to avoid common mistakes:
- Skipping test pieces: Always make test casts to ensure your mold and plaster mixture work as expected.
- Insufficient curing time: Allow enough time for the plaster to cure completely before handling or painting. Rushing this step can lead to cracks or damaged edges.
- Using the wrong compound: Ensure you’re using the right type of joint compound or plaster for your application and finish coat.
- Ignoring substrate prep: Proper cleaning, priming, and sealing of the substrate is crucial for a successful cast.
- Overthinning plaster mixture: Adding too much water to your plaster can weaken it, leading to cracks or crumbling edges.
- Mismatching profiles: Double-check that your molds match the historic profile you’re trying to replicate. Using mismatched molds will result in inaccurate casts.
- Modifying tools incorrectly: Be sure to use tools designed for plaster work, and follow manufacturer instructions for proper usage and maintenance.
- Neglecting moisture control: Excessive moisture can cause plaster to crack or crumble. Ensure your workspace is dry and well-ventilated.
- Overlooking abrasion or pitting repair: Before recasting, repair any damaged areas on the substrate to prevent defects in your new edges.
Quick rule: Regularly review this checklist throughout your project to ensure you’re avoiding these common pitfalls.

Conclusion
Rebuilding decorative plaster edges with simple molds works when you plan, test, and stay disciplined about safety. With clean templates, proper armature, and measured plaster coats, you’ll get durable profiles that look right and stay attached.
First, verify the wall and profile; then gather and organize tools and materials, make or adapt templates, set up the armature and molds on site, mix and apply plaster in controlled, thin coats, let each layer set before the next, perform a careful finish, and finally prep and paint. Test a small area first, document your measurements, and proceed in stages rather than all at once to avoid costly mistakes.
Common mistakes to avoid include skipping a small-area test, rushing the plaster application, and not securing the molds or armature, which leads to shifting edges. Follow safety rules every step: wear eye protection and a dust mask when handling plaster, keep the work area well ventilated, remove trip hazards, and clean up spills before they harden. If you’re unsure about fit or wall condition, stop and check your plan before continuing.
If the profile is complex, the wall is damaged, or you’re dealing with a large area or structural concerns, consider bringing in a pro instead of pushing on alone. When in doubt, err on the side of caution and prioritize a conservative approach—the result should be solid, reversible, and visually true to the profile. You’ve got this if you stay methodical and patient.
FAQ
How do I create plaster molds for decorative edges at home?
Start with a clean, dry substrate and build a simple form that follows the edge profile you want. Use a flexible mold material or plaster bandages for corners, then cast a positive mold to capture the profile. Always follow the product instructions and check ventilation and cure times on the label.
What should I know about building armatures and templates?
Build a sturdy frame to hold the edge profile in place during casting. Use templates to lock in consistent shapes; keep them square and true. Check that templates won’t warp under plaster pressure and adjust with shims if needed.
Can I apply multiple plaster layers without causing cracking?
Yes, but work in thin, cashing-connected layers. Let each layer set enough to support the next without slumping, and keep joints clean. If you’re unsure about cure times or adhesion, refer to the plaster’s instructions or test on a scrap piece first.
What finishing steps help hide mold seams and get a smooth look?
Use a joint compound or feathering technique to blend transitions after demolding. Sand lightly once dry, then re-spot with a thin skim if needed. Follow safety tips for dust control and wear a mask during sanding.