
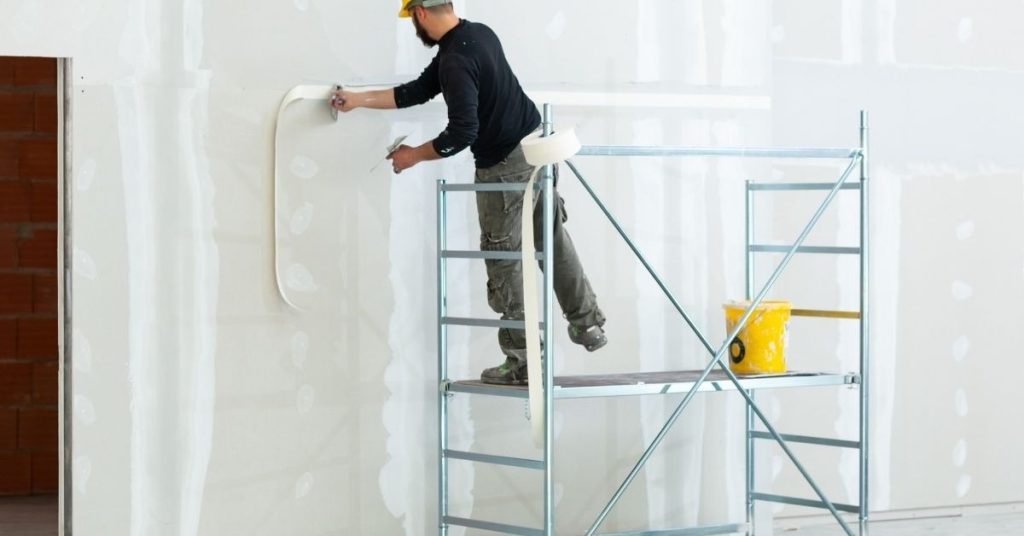
Introduction
Cement board seams are the joints where panels meet and must be taped and mudded to stay flat.
This article covers a practical tape plus thinset method that minimizes humps.
Work with clean surfaces, use the right tape and setting compound per manufacturer instructions, and blend joints smoothly.
If you’re unsure about product specs or local rules, check labels or ask the store for guidance and aim for a flush finish.
Take time to feather edges and wipe excess while it’s wet.
Key takeaways
- Choose matching cement boards and fiberglass mesh tape for seamless joints.
- Prepare substrate by cleaning, securing, and squaring boards to avoid gaps.
- Apply thinset evenly, press tape firmly, then scrape to remove voids.
- Feather edges with light passes to minimize raised seams.
- Check alignment and level across multiple joints before tiling.
- Safety: wear eye protection, dust mask, and follow manufacturer instructions.
Table of Contents
- Introduction
- Key takeaways
- Why Seams Hump and How to Avoid It
- Tools and Materials Checklist
- Substrate Preparation and Board Alignment
- Step-by-Step Tape + Thinset Application That Minimizes Hump
- Feathering and Thin-Layer Build-up Strategies
- Troubleshooting and Fixing Existing Humps
- Visual Checkpoints and Quality Assurance Before Tiling
- Material Specs, Standards, and Manufacturer Guidance
- Conclusion
- FAQ
Why Seams Hump and How to Avoid It
Criction at cement board seams often shows up as a noticeable bump. The main culprits are tape thickness, excess thinset, and an uneven substrate. Edge geometry of the boards can also push the seam out of flush alignment.
Understanding the physics helps you target the fix. A flush seam means the tape and thinset sit level with the board surface, not building a high ridge. If done correctly, the seam disappears under the tile rather than becoming a humps or shadow line.
Common installation mistakes that cause humps
Here are some common pitfalls to avoid when installing tile to prevent unsightly humps at seams.
- Using overly thick thinset: Too much thinset can lead to ridges that dry out and cause humps. Stick to the recommended thickness on the product label.
- Taping ridges: Using tape to level ridges is a temporary fix at best. It’s better to address the underlying issue – uneven surface or too thick thinset.
- Misaligned boards: If your backer board isn’t properly aligned, it can cause humps where seams meet. Ensure boards are straight and level before securing.
- Not bedding the board: Failing to fully embed the backer board in thinset can lead to voids that fill with air and expand over time, causing humps. Make sure the entire board is properly bedded.
Double-check these points before you start tiling to avoid common mistakes that can cause seams to hump.
Understanding tolerances and expectations
First off, let’s get one thing straight: you can’t make a perfect, perfectly flat surface every time. It ain’t gonna happen, no matter what anyone tells ya.
Now, when it comes to tile substrates, you’re looking for a surface that’s as flat as possible within reason. We’re talking about 1/8″ in 10′ or 5mm in 2.4m. That’s the industry standard, and it’s what you should aim for.
If your surface ain’t up to snuff, don’t go trying to fix it with joint work alone. You’ll just be wasting time and money. Instead, check base compaction, and if needed, grind or skim-coat the surface to get it right before you start laying tile.
Remember, every substrate is different, so don’t be afraid to adjust your expectations based on what you’re working with. Just keep in mind that a little prep work goes a long way in preventing those nasty humps later on.

Tools and Materials Checklist
Gather the essentials for a tape + thinset joint that stays flat. You’ll want the right trowels, a mixing bucket, and a hawk for controlled placement. A margin trowel helps with details at the edges.
Choose alkali-resistant mesh tape and a compatible thinset. Add sanding tools and measuring aids to verify flatness as you work. Check product labels and manufacturer instructions before mixing or applying.
Recommended thinset and tape types
Before you start, check these items to ensure a smooth, hump-free finish.
- Thinset: Choose unmodified or modified thinset. Unmodified is cheaper but sets faster. Modified has polymers for better flexibility and adhesion. Check manufacturer guidance for your project’s needs.
- Non-sag, workable thinset: Ensure the thinset you choose doesn’t sag too much or set too fast. It should be easy to apply and level.
- Alkali-resistant fiberglass mesh tape: Prefer this over paper-faced tape. Fiberglass resists alkali in cement, preventing delamination. Paper can absorb water and cause humps.
Quick rule: Always check manufacturer guidance for specific project needs.
Optional tools for precision
For a professional finish, consider these optional tools to minimize humps.
- Depth gauge: Ensure consistent cement board thickness. Too thin can cause cracking; too thick wastes material and creates humps.
- Straightedge or level: Check for flatness as you apply thinset. A 6′ straightedge works well for large areas.
- 1/16″ taping knife: Use this to smooth out thinset and remove excess, reducing the risk of humps.
- Corner trowel: Apply thinset in corners with a corner trowel for better adhesion and no humps.
Quick rule: Use these tools to maintain consistency and check your work as you go.
Substrate Preparation and Board Alignment
Start with clean, solid backing and properly spaced boards. Verify screws are driving into solid substrate and not overdriven. Align boards so the seam sits near your tile center line and is flush with the board faces.
Inspect edge cuts and remove burrs that can catch the tape. A straightedge can help confirm edge alignment before you begin taping. Follow manufacturer guidelines for any board-specific preparation.
Fastening and Screw Placement Best Practices
Use the right screws. I recommend #8 x 1-1/4″ or #10 x 1-1/2″ for most jobs.
Space them every 6″ along studs, and stagger rows to create a strong bond.
Countersink screws slightly below the board’s surface. Too deep, and you’ll overdrive them, pulling boards out of plane.
Checking and Correcting Uneven Boards Before Taping
Before you tape, ensure your boards are flush. Use a straight edge to check.
If you find high spots, sand them down gently. Be careful not to dent the board.
For bigger gaps or warped edges, use a hand plane to shave off excess material. Or, add thin shims behind the board to bring it into plane.
Step-by-Step Tape + Thinset Application That Minimizes Hump
Begin with a thin bedding layer if your substrate requires it. Apply a light skim of thinset to the seam area. This creates a uniform bed for the tape.
Embed the mesh tape into the thinset, then bed and smooth another thin layer over the tape. Feather the edges outward so the seam blends with the surrounding board surface. Finish by lightly smoothing to remove tool marks and ridges.
Step-by-Step Process
The following steps will guide you through applying tape and thinset to minimize humps, ensuring a smooth, professional finish.
- Gather materials: Have your backer board, tape, thinset mortar, trowel, notched trowel, straight edge, and safety gear ready. Why: Organization saves time and reduces errors. Check: All tools and materials are accounted for.
- Inspect backer board: Check for any damage or defects before installation. Why: A sound base ensures a strong, durable finish. Check: No visible cracks, warping, or other issues.
- Apply tape: Starting at the center, apply tape horizontally across the backer board, overlapping seams by 2 inches. Why: Tape reinforces seams and prevents cracking. Check: Tape is evenly applied with no gaps or overlaps.
- Spread thinset: Using a notched trowel, apply thinset to the backer board in an ‘S’ pattern, ensuring full coverage. Why: Thinset adheres the tape and provides a smooth surface for tile installation. Check: Thinset is evenly spread with no bare spots.
- Scrape excess thinset: Use a straight edge to scrape off any excess thinset from the surface, creating a smooth, hump-free finish. Why: Removing excess prevents uneven tile installation and reduces the risk of cracking. Check: Surface is smooth with no visible humps or valleys.
- Let it cure: Allow the thinset to cure for at least 24 hours before tiling. Why: Proper curing ensures a strong, durable bond between backer board and thinset. Check: Thinset is no longer tacky to touch.
- Inspect cured surface: Before tiling, check for any signs of cracking or delamination. Why: Early detection prevents costly repairs later on. Check: Surface is smooth and free from defects.
Pro tip: To minimize humps, use a straight edge to scrape off excess thinset immediately after application, before it has a chance to set.
Correct thinset mix and consistency for feathering
The key to a smooth, hump-free tile installation is getting your thinset mix just right. You want it spreadable, not soupy.
Check the product label, but typically, you’re aiming for a consistency that’s like peanut butter or mashed potatoes. Too watery and it’ll create ridges when you try to feather it out. Too thick and it won’t spread evenly.
Here’s how to get it right:
- Start with the recommended mix ratio from the manufacturer (usually 6:1 or 7:1 by volume, cement to sand).
- Gradually add water, mixing well after each addition. Check consistency before adding more.
- Don’t be tempted to make it too soupy. It’s easier to add a bit of water than it is to fix ridges later.
Embedding tape without creating ridges
You’ve mixed your thinset right and it’s the perfect consistency for feathering. Now, let’s get that mesh tape in there without leaving any humps.
Press the tape into the thinset using a flat trowel or a notched trowel turned over. You want to use even pressure across the whole width of the tape. Don’t be heavy-handed, but don’t be too light either – you’re trying to remove air pockets, not just lay it on top.
Feel your way along the tape. If you hit a spot that feels different, stop and check. You might have a pocket of air or too much thinset. Use the edge of your trowel to scrape away any excess and press down again.
Remember, you’re not trying to create a hump with the tape. The key is even pressure and feeling your way along. If you’ve got the right mix and consistency, this should be a breeze.
Feathering and Thin-Layer Build-up Strategies
Use multiple ultra-thin coats rather than one thick layer. Let each coat set as recommended by the thinset manufacturer. Feather the edges so the transition tapers away from the seam.
Keep the surface as flat as possible during each pass. Avoid creating thicker zones at the center or edges that would telegraph through the tile. Always verify with a straightedge after each coat.
Tools and strokes for a smooth feather
The right tools make all the difference. Here’s what you need:
- 1/4″ x 6″ Notched Trowel (6-in-1): This is your workhorse. It’s perfect for embedding tape and applying thin, smooth layers of thinset.
- 3/8″ x 12″ Straight Edge Trowel: Use this to spread thinset evenly over the seam and onto the board surface. It helps create a smooth taper.
- 4-in-1 Trowel (1/4″, 3/8″, 1/2″, 3/4″): This is optional but helpful for fine-tuning your feathering. The varying notch sizes let you control the thickness of your thinset application.
- Long, Overlapping Strokes: Use long, overlapping strokes with your trowels to ensure even coverage and a smooth finish. This helps prevent ridges and humps.
- Rentable Tools (Optional): If you’re feeling fancy, consider renting a laser level or straight edge guide for ensuring perfect feathering. They’ll set you back around $50-$100 per day but can save you time and frustration.
How much to feather and when to stop
Feathering is all about creating a smooth transition from the seam to the board surface. The key is knowing when you’ve achieved that.
Start small: Begin your feathering at least 2 inches away from the seam on both sides. This gives you room to work and helps prevent over-feathering.
As you approach the seam, feather more gradually: Use shorter strokes with less thinset as you get closer to the tape. This creates a smooth taper.
Check your progress: Regularly step back and look at your work from different angles. You’re aiming for an almost invisible transition between the seam and the board surface. If you can’t see it, you’re on the right track. Once you’ve achieved that, stop: There’s no need to keep feathering if you can’t see or feel any ridges.
Troubleshooting and Fixing Existing Humps
Assess the hump severity with a straightedge and dry-fit test pieces. For minor humps, add feather coats to gradually build the surface flush.
If necessary, perform gentle sanding or grinding to reduce higher spots. In stubborn cases, you may need to re-tape and re-thinset the joint following proper steps and approvals.
When to Sand or Grind Versus Redoing the Seam
Before you decide whether to sand, grind, or redo a humped seam, assess its severity.
Light humps: These can often be addressed by gentle sanding. Use 120-grit sandpaper and work in the direction of the board’s fibers. Be careful not to damage the substrate.
Moderate to severe humps: For these, you might need a diamond cup grinder. Start with a coarse grit (e.g., 50) to remove the bulk of the hump, then finish with a finer grit (e.g., 120) for a smoother surface. Always wear appropriate safety gear and keep the area wet to minimize dust.
If the hump is causing stress on surrounding boards or has damaged them, it’s best to redo the seam entirely.
Repair Sequence for Redoing a Problem Seam
If a seam hump is severe or causing damage, it’s best to remove and redo the entire seam. Here’s how:
1. Remove old thinset and tape: Use a utility knife to score and cut along both sides of the problematic seam. Then, use a chisel or pry bar to carefully lift off the old thinset and tape.
2. Clean and re-bond: Thoroughly clean the area with water to remove any residual thinset. Allow it to dry, then apply a thin layer of thinset to re-bond the seam edges to the surrounding boards.
3. Re-embed tape: Apply thinset to the seam using your trowel, embedding the new tape as you did originally. Ensure the tape is fully embedded and no ridges are present.
4. Re-feather: Using the correct technique and tools, feather out the thinset from the seam to match the surrounding plane. Remember to check your work frequently to ensure a smooth, even surface.
Visual Checkpoints and Quality Assurance Before Tiling
Check seams with a straightedge along the full length for flatness. Run your fingertips over the joint to feel for any high spots. Do a mock tile lay to confirm flushness before tiling begins.
Simulate grout joints to ensure the seam remains invisible under a tile edge. Document any areas that require additional feathering or touch-up before you grout.
Using a straightedge and light to find defects
Before tiling, use this method to check for any low or high spots across your cement board seams.
- Check for low spots: Place a straightedge along the seam. Shine a raking light (at an angle) onto it. If there’s a gap between the straightedge and the seam, you’ve found a low spot.
- Measure low spots: Use feeler gauges to measure the depth of low spots. This helps determine if they need filling before tiling.
- Avoid missing low spots: Skipping this step can lead to tiles not bonding properly, causing future issues.
- Check for high spots: Flip the straightedge over. If it doesn’t sit flat on the seam, you’ve found a high spot.
- Feel for high spots: Run your fingertips along the seam. You should feel any raised areas.
- Identify tape ridges: High spots could be due to improperly embedded tape. Check if tape is causing ridges.
- Check feathering consistency: Ensure thinset was feathered evenly across the seam. Inconsistencies can cause high or low spots.
- Verify flatness with a level: Place a level on the seam to check for any remaining unevenness.
Quick rule: Always use both sight and touch to confirm seam flatness. Relying on just one method can lead to missed defects.
Test-tiling and small-area checks
Before committing to full tile installation, perform these checks to ensure your seams are flat and ready for tiling.
- Lay test tiles: Place a few tiles with spacers onto the seam area without bonding them. This allows you to move them around easily.
- Check for level: Use a level to ensure the test tiles are sitting flat on the seam.
- Inspect grout joints: Check if grout joints between test tiles look even and consistent. This indicates a flat seam.
- Examine tile pattern: Ensure your tile layout looks good in the test area. This helps avoid surprises during full installation.
- Check for lippage: Gently tap each test tile with a rubber mallet. If any tiles feel ‘lippy’ (uneven), there may be seam issues.
- Inspect for voids: Look at the edges of your test tiles. Any visible light indicates a void or low spot under the tile.
- Check for proper bonding: Gently pull on each test tile to ensure it’s not lifting off the seam. If it does, there may be issues with the thinset or seam preparation.
- Inspect for color variation: Check if your test tiles match the rest of your wall or floor in color and appearance.
Quick rule: Always perform these checks before full tile installation. Skipping this step can lead to costly mistakes and rework.
Material Specs, Standards, and Manufacturer Guidance
Follow the compatibility guidelines for cement board and thinset from the manufacturers. Using the wrong pair can compromise bond strength and warranties. When in doubt, consult the product data sheets and labels.
Adhere to local rules and best practices for substrate preparation and waterproofing. Keep records of specified products and the steps you followed to support warranty compliance.
When to consult product datasheets
Before you start, grab the datasheets for your cement board and thinset. They’re your go-to guides to avoid humps.
Open time tells you how long a mix stays workable. Too short, and you’ll rush. Too long, it might set before you’re done.
Pot life is how long the mixed material remains usable. Don’t waste material by mixing too much at once.
Check substrate preparation. Some products need primed or clean surfaces to stick right and avoid humps.
Compatibility notes for large-format tile and waterproofing systems
Large tiles need extra flatness. Check your thinset’s suitability for them.
If you’re using membranes or waterproofing, check if your thinset is compatible. Some need special primers or surface treatments.
For large tiles and waterproofing, consider alternate joint treatments. Larger tiles may need wider joints, and some waterproofing systems require specific joint treatments.
Always consult the manufacturer’s guidelines for your specific products to ensure compatibility and avoid humps.

Conclusion
At the end of the day, clean, flat seams that stay set through the tile install come from disciplined tape and thinset work plus solid substrate prep. Do it right, and the risk of humps, cracking, or failed tiling drops dramatically, protecting both safety and long-term durability.
Make the method part of your routine: verify the substrate is true and boards are aligned, choose the right tape and thinset per the manufacturer guidance, mix to a workable consistency, apply thin even coats with a careful embed, feather the edges, and keep build-up to a thin layer. Test a small area first, let it cure, and use visual checkpoints before you tile offsets or joints. Keep the area clean, follow curing times, and double-check specs so you’re not guessing.
Common mistakes to avoid are laying tape over a rough or misaligned surface, applying too much or too little thinset, and letting build-up create a new hump. Don’t rush the embed or skim coat; don’t ignore dust, debris, or moisture on the substrate. Safety rules are simple: wear eye protection and a mask where dust or splatter is possible, keep a dry, well-ventilated work area, and test changes in a small area before committing to the full run.
If the substrate is questionable, the seam layout is complex, or you’re seeing persistent humps after attempts to fix them, consider a professional. When in doubt, pause and confirm by reviewing manufacturer guidance and local standards. Stay focused, follow the steps, and you’ll finish with seams that stay flat, look clean, and hold up under tile work for years to come.
FAQ
What should I do if I see a small hump after the tape and initial thinset have set?
Don’t try to sand it flat right away. Lightly feather the edge with a fresh thinset application and re-tape if needed, then re-check after cure. If the hump stays, inspect board alignment and substrate flatness before proceeding.
Can I re-tape over the same seam if I notice a bump later in the process?
Yes, but only after you address the cause. Clean the seam, re-apply tape, and use a thin, even layer of setting material to avoid creating a new high spot. Let it cure per the manufacturer’s guidance before tiling.
What sequence helps minimize humps when using cement board seams?
Start with solid substrate prep and board alignment. Apply tape over the seam, then press it in with a thin layer of setting material. Keep layers light and even to prevent edge buildup that turns into a hump.
How do I fix an existing hump without pulling boards loose?
Carefully remove enough of the thinset and tape at the seam to flatten the area. Re-tape and apply a slimmer layer of setting material, then smooth the transition. Check for embeddment in the board surface and clean any ridges before tiling.