
Introduction
A skim coat is a thin layer of joint compound applied to walls to smooth imperfections and create a flat surface. You’ll apply it over existing drywall or patches, let it set, then sand as needed. With patience and thin coats, you can reduce the sanding down to a couple of passes rather than a full marathon.
To avoid endless sanding, apply thin coats and let each coat dry according to the product label. Sand lightly with a drywall screen if you need to level high spots, and wipe dust before the next coat. Finish with a final light pass and inspect for craters and a uniform look.
Key takeaways
- Plan skim coat when repair holes and ridges align with wallboard seams
- Check substrate for moisture before applying; damp surfaces cause pinholes
- Use a wide trowel and proper angle to minimize smear and sanding
- Apply thin coats; let each layer dry fully before next
- Wear a mask and protect nearby surfaces when sanding or mixing
- Visual checks: edge ridges flush, texture even, light grazing helps spotting
Table of Contents
- Introduction
- Key takeaways
- Why Skim Coats and When to Choose Them
- Substrate Assessment and Preparation
- Tools and Materials Checklist
- Choosing the Right Skim-Coat Product and Mix
- Application Techniques That Reduce Sanding
- Layering, Drying, and Knowing When It’s Ready
- Sanding Alternatives and Dust-Reduction Strategies
- Troubleshooting and Visual Checkpoints
- Conclusion
- FAQ
Why Skim Coats and When to Choose Them
A skim coat serves as a thin, smooth layer that can hide minor imperfections and create a uniform base for subsequent finishes. It helps reduce the amount of sanding needed when transitioning from rough textures to a flat field.
Use it on walls with old textures, after patching repairs, or to refine joints on plasterboard. Compare skim coats to other methods by checking your project goals, wall condition, and finish requirements on the product label or manufacturer instructions to decide if it’s right for you.
Skim coat vs patching vs re-plastering
A skim coat is a thin layer of plaster applied over existing walls to create a smooth, flat finish. It’s ideal for refreshing old textured walls or finishing new plasterboard joints.
Patching is used for spot repairs – fixing holes, cracks, or minor damage. It’s quicker and cheaper than a full skim coat but won’t give you the same even finish.
Re-plastering involves stripping back to bare walls and applying new plaster. It’s the most labor-intensive option but provides the best results for severely damaged or uneven surfaces.
To decide, assess your walls: minor issues? Patch. Moderate texture or damage? Skim coat. Severe problems? Re-plaster.
Expected outcome and realistic limits
A well-applied skim coat can remove most texture, leaving a smooth finish. But remember, it’s a thin layer – it won’t fix severe unevenness or deep imperfections.
Expect to see 90-95% of the original texture gone. Any remaining issues will be minor and easily sanded out.
If your walls have major cracks, large holes, or significant undulations, a skim coat alone won’t solve these problems. You’ll need to address these first – either by patching, re-plastering, or using other repair methods.
Substrate Assessment and Preparation
Start with a visual and tactile check of the wall surface to identify dust, grease, and loose material. Look for signs of moisture damage or old coatings that might affect adhesion.
Prepare drywall, plaster, or painted surfaces by cleaning, abrading, and priming as needed. Always verify substrate compatibility and any specific prep steps on the product data sheet or manufacturer guidance before proceeding.
Identifying and repairing problem areas
Before you start skim coating, walk your walls. Look for:
Loose plaster. Tap it gently with a screwdriver handle. If it sounds hollow or crumbles, stabilize it with a patching compound.
Hairline cracks. These need filling too. Use a flexible filler to prevent them from reappearing.
If you find grease or mold, clean these thoroughly before proceeding. Grease can stop your skim coat from adhering, and mold will grow back if not removed.
Cleaning, bonding primers, and surface key
Start by cleaning your walls. Use a degreasing detergent to remove any dirt or grease. Rinse well and let it dry.
A bonding primer or PVA helps your skim coat stick better. Apply it with a paintbrush, following the manufacturer’s instructions. This is especially important on new plaster or painted surfaces.
Next, create a surface key. Lightly sand your walls to give the skim coat something to grab onto. Be careful not to over-sand – you don’t want to smooth away the surface texture completely.
Tools and Materials Checklist
Gather trowels, squeegees, and brushes that fit your working range and comfort. Keep a hawk or flat tray handy to control material and minimize overworking seams.
Include a suitable mixing container, a mud pan, and a lightweight compound for easier handling. Check tool sizes and material compatibility on the product instructions or label to avoid wasted effort.
Trowels, knives, hawks and floats — what to buy and when
Before you start mixing concrete, use this checklist to ensure you have the right tools for a smooth application. Check these items off as you gather them to avoid mid-job scrambling.
- Trowel (Square Edge) – 12″ to 18″. Check edge sharpness by running your thumb along it. A sharp edge ensures smooth, even surfaces.
- Trowel (Round Edge) – 14″ to 16″. Test the edge on a scrap piece of concrete. It should leave a smooth, rounded finish.
- Float – 20″ to 36″. Check size against your slab dimensions. Too small and you’ll struggle to cover the area; too large and it’s unwieldy.
- Hawk – 14″ to 18″. Ensure it’s sturdy enough to hold a full scoop of concrete without bending or breaking.
- Margin Trowel (Edge) – 6″ to 9″. Verify the edge is straight and sharp for clean, precise work around slab edges.
- Bull Float – 24″ to 36″. Check size against your slab dimensions. It should be large enough to cover the area efficiently but not so large it’s unwieldy.
- Finishing Broom – 18″ to 24″. Ensure bristles are stiff and uniform for consistent texturing.
- Concrete Knife (Trowel) – 6″ to 9″. Check blade stiffness. It should be flexible enough to cut through concrete but rigid enough to hold its shape.
Quick rule: Always check your tools before starting work. Dull or damaged tools lead to poor finishes and rework, costing you time and money.
Consumables and safety gear
Use this checklist before you start mixing or applying any joint compound/plaster. It’ll help you avoid common mistakes and keep your work area safe.
- Joint Compound/Plaster: Check label for type (light, medium, or all-purpose) and ensure it matches your needs. Confirm it’s fresh and hasn’t dried out.
- Mesh Tape: Inspect tape for any tears or weak spots. Ensure it’s wide enough to cover entire joint seam.
- Mixing Tools (Bucket, Drill, Paddle): Check bucket for cracks; ensure drill and paddle are in good working order. Confirm drill speed is within safe range (200-350 RPM).
- Dust Mask: Inspect mask for tears or holes. Ensure it fits snugly around nose and mouth.
- Safety Glasses: Check lenses for scratches; ensure they provide adequate protection.
- Ventilation (Fan, Dust Extractor): Test fan/extractor to confirm it works. Ensure it’s rated for dust extraction and has a HEPA filter.
- Dust Control Tools (Sponge, Sanding Screen): Check sponge for wear; ensure sanding screen is clean and free of clogs.
- Gloves: Inspect gloves for tears or holes. Ensure they provide adequate protection without compromising grip.
Quick rule: Always prioritize dust control to minimize sanding and keep your work area safe from harmful particles.
Choosing the Right Skim-Coat Product and Mix
Understand the general categories: premixed compounds, setting-type plasters, and polymer-modified finishing blends. Each type behaves differently under work time and drying conditions.
Evaluate the tradeoffs for your workflow and finish goals by reading the manufacturer notes and labels. If in doubt, compare guidance and warnings to choose a product that supports minimal sanding.
Premixed vs Setting Compounds
When it comes to skim-coat products, you’ve got two main types: premixed and powder-setting. Each has its own strengths and best use-cases.
Premixed compounds are ready-to-use right out of the pail. They’re great for small jobs or when you need to get started quickly. Their workability is consistent, but open time is shorter compared to setting types.
Setting-type plasters, on the other hand, come in powder form and require mixing with water on-site. This gives you more control over consistency and working time. They’re ideal for larger projects or when you need a longer open time for intricate work.
Premixed products are often used for touch-ups or small repairs, while setting types are typically chosen for full wall coverage or complex finishes. Choose based on your project size and the time you’ve got to work with each application.
Mix Consistency and Additives
The right mix consistency is key for easy application and crack resistance. Here’s how to get it just right:
First, always check the manufacturer’s instructions for water ratios. Too little water will make your mix too thick, leading to cracks. Too much, and it’ll be too thin, causing sagging.
For a consistent mix, use clean water and add it slowly while mixing. Aim for a consistency that holds its shape but isn’t so stiff it won’t spread easily. Think of mashed potatoes – not too runny, not too thick.
To boost adhesion and flexibility, consider adding safe modifiers like acrylic additives. These can help prevent cracking and improve bond strength. Just follow the manufacturer’s guidelines for usage rates to avoid overdoing it.
Application Techniques That Reduce Sanding
Use steady, controlled trowel angles and apply even pressure to create a consistent surface. Work in short, overlapping passes to smooth out ridges as you go.
Plan a layering sequence that builds a flat field with feathered edges. Follow the product’s recommended application tips in its instructions or data sheet for best results.
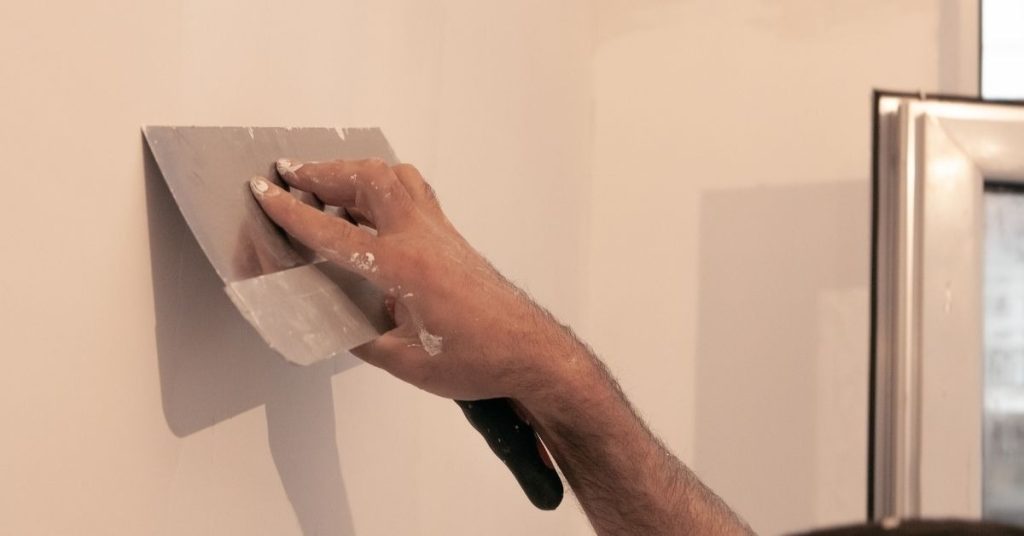
Mastering the trowel sweep and feathering edges
Start by holding your trowel at a 45° angle to the wall. This helps spread the compound evenly.
Sweep the trowel in wide, overlapping ‘W’ or ‘M’ patterns. Overlapping ensures no ridges form and gives you a smooth finish.
Feathering edges is key to preventing hard lines. Tilt your trowel slightly at the edge, reducing pressure as you reach the end. This thins the compound, creating a seamless transition.
Wet-on-wet vs multi-pass approach
Wet-on-wet involves applying a single thick layer. It’s faster but can hide imperfections poorly and may require more sanding.
For multi-pass, apply thin coats, letting each dry before the next. This reveals imperfections, allowing you to correct them with the next pass. It takes longer but needs less sanding.
Use wet-on-wet for small areas or minor repairs. For larger jobs or hiding major imperfections, multi-pass is your best bet.
Layering, Drying, and Knowing When It’s Ready
Apply each coat within the guidance for thickness and time between applications. Look for a uniform surface without obvious ridges or hollows as you progress.
Check drying cues and perform non-invasive readiness tests suggested by the manufacturer or product label. Use these checks to prevent over-sanding or premature work that could affect the finish.
Visual and Tactile Readiness Checks
Before you start sanding, check your skim coat’s readiness. It’s crucial to avoid over-sanding or premature sanding that can damage the finish.
Tackiness: Gently touch the surface with a clean finger or a damp cloth. If it feels sticky, it’s not ready yet. Wait until it’s no longer tacky.
Color Change: Look for any color changes. The skim coat should look consistent and uniform. If there are still wet spots, wait until they dry out completely.
Firmness: Press lightly with your finger or a trowel. The surface should feel firm and not give way. Test small areas first before full sanding or repainting to ensure readiness.
Controlling Environment and Drying Times
The environment plays a significant role in the drying process of your skim coat. Follow these guidelines for optimal results.
Temperature: Keep the room temperature between 50°F to 70°F (10°C to 21°C) during application and drying. Too cold or too hot can affect curing.
Humidity: Maintain a relative humidity of about 40% to 60%. High humidity can slow down the drying process, while low humidity can cause the skim coat to dry too quickly, leading to cracking.
Ventilation: Ensure there’s adequate ventilation in the room. Open windows or use fans to circulate air. However, avoid drafts as they can interfere with the curing process. Always follow the product’s guidance for safe drying times and environmental ranges.
Sanding Alternatives and Dust-Reduction Strategies
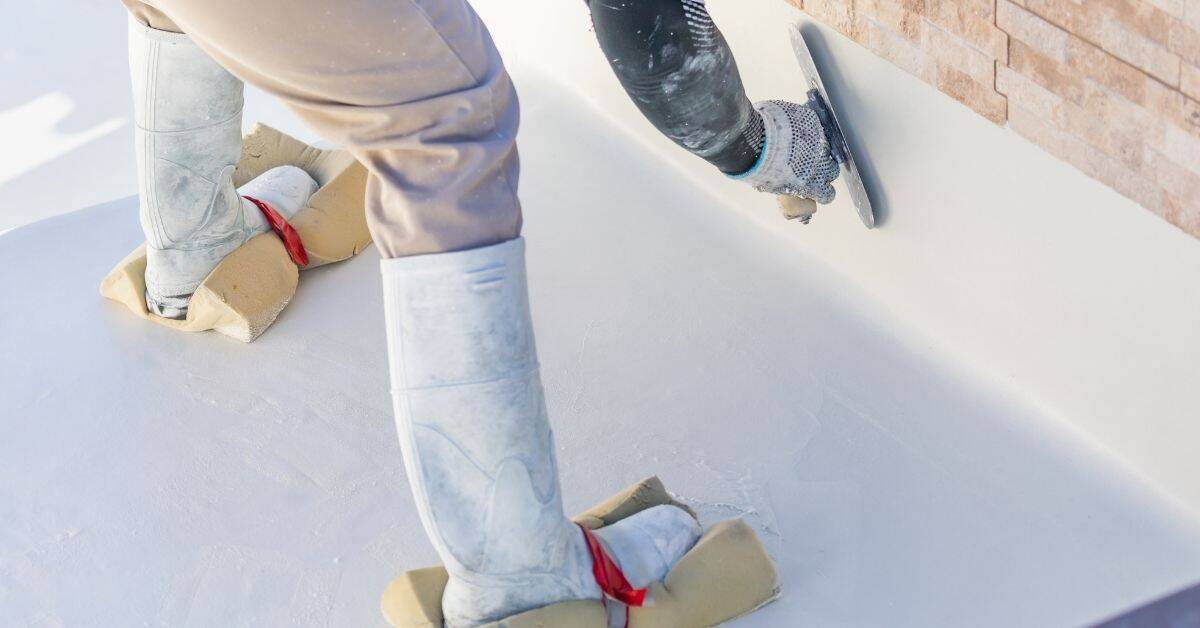
Adopt methods that minimize abrasive cleanup, such as careful wet-smoothing or light mechanical touch where appropriate. Use non-dusty techniques first to preserve a clean work area.
Choose tools and methods that suit your finish goals and room constraints, and follow safety notes on dust control from the product instructions or SDS guidance where provided.
Wet-sponge finishing and block smoothing
When you’ve got small imperfections to flatten, reach for a wet sponge or block smoother. They’re dust-free and gentle on your skim coat.
How to use: Dip the sponge or block in water, then press and smooth over the surface. The moisture helps fill tiny voids and evens out minor bumps.
Use these tools after initial application, before the skim coat dries completely. They’re great for evening out trowel marks and small lumps.
Remember, they won’t replace sanding for major imperfections. But for touch-ups and fine-tuning, they’re a dust-free dream.
Dust extraction and abrasive choices when sanding is necessary
Sometimes, you can’t avoid sanding. But that doesn’t mean you have to breathe in a cloud of dust.
HEPA vacuums: Hook up a HEPA vacuum to your sander. It’ll suck up 99.97% of particles, keeping your air clean and your lungs happy.
Fine-graded abrasives: Use fine-grit sandpaper (like 120 or 220) to minimize dust and achieve a smooth finish. Start with the coarsest grit you need, then progress to finer grits.
Low pressure is key: Apply gentle, even pressure while sanding. You’re not trying to scrub off the skim coat; just lightly smooth it.
Troubleshooting and Visual Checkpoints
Identify common defects like inconsistent texture, shallow patches, or surface anomalies early in the process. Note how and where they appear to guide fixes.
Address causes by inspecting patch quality, bond issues, or cure conditions, then verify fixes with a careful visual check. Always consult the product label or manufacturer instructions for repair steps and compatibility notes.
Fixing adhesion and cracking problems
Before you start sanding, use this checklist to identify and fix adhesion issues or cracks.
- Check for any areas where the skim coat has pulled away from the wall. Confirm by gently tapping on these spots with a screwdriver handle. If it sounds hollow, there’s an adhesion problem.
- Look for hairline cracks or small holes. Confirm by running your fingers over the surface. Any imperfections will feel rough.
- Inspect corners and edges where cracking is common. Confirm by checking if they’re still sharp and well-defined.
- Check for any signs of moisture or dampness, as this can cause adhesion issues. Confirm by using a moisture meter.
- Inspect the substrate for any new cracks or movement since priming. Confirm by comparing it to your initial inspection.
- Check if the skim coat is still flexible and can be pressed in with a thumb. Confirm by gently pressing on it. If it’s hard, it might have dried out too much.
- Look for any signs of blistering or delamination. Confirm by inspecting the surface closely under good lighting.
- Check if the skim coat has been applied evenly and consistently. Confirm by comparing different areas of the wall.
Quick rule: If you find any issues, address them immediately to prevent further damage or rework.
Final visual checkpoints before painting
Before you prime and paint, use this checklist to ensure your skim coat is ready for the next step.
- Check that the skim coat has a consistent sheen across the entire surface. Confirm by viewing it from different angles under natural light.
- Look for any shadow lines or uneven areas. Confirm by using a flashlight to cast a low angle of light on the wall.
- Inspect edges and trims to ensure they’re smooth and even. Confirm by running your fingers along them.
- Check for any missed spots or areas that need touch-up. Confirm by inspecting the surface closely with a critical eye.
- Look for any signs of texture telegraphing from the substrate. Confirm by comparing it to your initial inspection and preparation work.
- Check that the skim coat has dried completely. Confirm by touching it gently with a dry finger. If it feels cool or tacky, it’s not ready.
- Inspect corners and joints to ensure they’re well-defined and smooth. Confirm by running your fingers over them.
- Check that the skim coat has been applied evenly across all layers. Confirm by viewing it from different angles and under different lighting conditions.
Quick rule: If you find any issues, address them before moving on to priming and painting to avoid costly rework.
Conclusion
Keeping a flat, durable wall finish comes down to preparation, the right mix, and controlled drying. When you follow the steps from substrate prep through layering and drying, you reduce sanding work and protect against costly call-backs.
Start with a quick, practical check: assess moisture and substrate condition, clean and repair as needed, select the proper skim-coat product and mix per the label, apply in thin, even coats, keep the workspace clean and temperature steady, test a small area first and allow proper curing, and finish with a final skim that you can sand or skim minimally, then cure fully before paint. Test in a small area and protect yourself with masks and eye protection, and verify the coat is ready before any further work.
Two common traps to avoid are over-thinning or overworking the surface, and skipping primer or substrate prep steps. Don’t rush the drying cycles or force cure by high heat, and always wear a respirator or mask and keep dust away from air intakes. If you detect persistent moisture, large cracks, or structural issues, pause and call a professional instead of pushing on. With discipline and care, you’ll get a smooth wall that lasts. Stay practical, stay safe, and you’ll finish strong.
FAQ
How do I know when a skim coat is dry enough to sand or add another layer?
Check the product’s instructions for tack-free times and recoat windows. Look for a solid, non-sticky surface across the wall and no visible wet sheen. If in doubt, give it extra time and test a still spot with a clean finger before proceeding.
What’s the best way to feather the edges so the finish blends and doesn’t show ridges?
Work from the center of the patch toward the surrounding wall with light, even passes. Keep a consistent amount of mix on the tool and avoid pressing hard at the edges. A long, curving stroke helps blend the transition rather than stopping abruptly at the edge.
How do I avoid obvious pinholes or sags after applying the skim coat?
Mix to a smooth, pourable consistency and avoid overloading the trowel. Apply thin passes and keep the surface level to reduce air pockets. If you see pinholes, let the coat firm up slightly and fill with a light, even skim before it fully dries.
What should I check on the product label or instructions to ensure compatibility with my substrate?
Read the substrate recommendations, mixing ratios, and open time on the label or datasheet. Confirm surface prep requirements and any additives or primers the manufacturer calls for. If unsure, compare notes with the product instructions or local guidelines.