
Introduction
Hairline cracks in smooth plaster are very thin surface cracks that appear as fine lines after finishing and painting.
They often show up after you cut in or wash the wall, and they don’t always mean a big problem. This guide sticks to practical, hands-on fixes you can do in a weekend, with simple steps and no guesswork. If you’re unsure about the cause or movement, check the plaster’s instructions or local rules before you start.
Key takeaways
- Inspect plaster for movement by tapping and noting hollow or dusty areas.
- Gather putty knife, fine filler, scraper, sanding block, and matching paint.
- Clean surface, remove loose plaster, dampen dusty edges before filling, wear PPE.
- Apply thin layers, feather edges, seal joints, and cure under paint.
- Slightly sand flush, check light reflections to reveal uneven skin.
- Use stain-blocking or tailored primer and light coats to blend.
Table of Contents
- Introduction
- Key takeaways
- Quick Overview: What Are Hairline Cracks in Smooth Plaster?
- Tools and Materials Checklist
- Surface Assessment and Prep
- Repair Techniques That Stay Invisible Under Paint
- Sanding, Leveling, and Visual Checkpoints
- Priming and Paint Strategies for Invisible Repairs
- Color, Sheen, and Lighting Considerations
- When to Call a Pro and Long-Term Prevention
- Conclusion
- FAQ
Quick Overview: What Are Hairline Cracks in Smooth Plaster?
Hairline cracks are very thin openings that appear on a smooth plaster finish. They often run along joints, corners, or inside the flat field of a wall. In plain terms, they can be cosmetic or, in some cases, a sign of something more serious, so it helps to tell the difference clearly.
These cracks form when the plaster layer or underlying substrates move slightly or when the surface dries unevenly. They tend to stay narrow and discreet under normal light, which is why paint can make them snap back into view. If you’re unsure, check the product data sheets or manufacturer instructions for guidance on your specific finish.
Common causes at a glance
Hairline cracks in smooth plaster are usually caused by common, non-structural issues. Here’s what you need to know:
Shrinkage: As the plaster dries, it naturally shrinks a bit. This can cause fine cracks, especially around windows and doors.
Thermal movement: Plaster expands and contracts with temperature changes. These movements can create tiny cracks, often at corners or where walls meet ceilings.
Minor substrate settling: Over time, the underlying structure may settle slightly. This can cause hairline cracks to appear on your plaster walls.
How to tell hairline vs structural cracks
Not all cracks are created equal. Here’s how to tell if a crack is just cosmetic or needs professional attention:
Width and pattern: Hairline cracks are typically less than 0.175 inches (4mm) wide and have a random, irregular pattern. Wider cracks or those with a straight, diagonal, or stepped pattern may indicate structural issues.
Spread and location: Cosmetic cracks usually appear in small clusters or isolated areas. If cracks are widespread, especially around windows, doors, or where walls meet ceilings, it could be a sign of structural problems. Also, check if the crack is at an angle to the wall’s surface – this can indicate settlement.
Simple checks: Gently press on the plaster near the crack. If it feels solid and doesn’t give way, it’s likely just cosmetic. However, if it feels soft or moves when you press on it, get a professional opinion.
Tools and Materials Checklist
Start with the basics you can handle in a DIY project. A magnifier helps you see the crack’s width and any depth. Have a brush or cloth for cleaning and a light sand block for smoothing edges. Keep a small trowel or putty knife handy for feathering the repair.
Prepare a few compatible compounds and primers specified for smooth plaster. Have a damp sponge to wipe away dust and optional glazing or flexible sealant if gaps widen. Always verify labels or instructions for suitability with your plaster finish before buying.
Recommended fillers and compounds
Before you start applying any fillers or compounds, use this checklist to ensure you have the right products for your specific job. This will help you avoid common mistakes that can lead to expensive rework.
- Skim-coat joint compound: Check label for “joint compound” and “skim coat” or “topping.” Confirm it’s suitable for your substrate (drywall, plaster, etc.). Skip this and you might end up with a compound that doesn’t stick or dries too fast.
- Setting-type compounds: Ensure it’s a “setting-type” compound. Check the label for drying time (15-30 minutes is typical). Verify it’s suitable for your application (patching, taping, etc.). Ignoring this can result in improper setting and poor adhesion.
- Glazing putty: Look for “glazing putty” on the label. Confirm it’s paintable and suitable for filling small holes or cracks. Overlooking this can lead to visible imperfections after painting.
- Paintable caulks: Check label for “paintable” and “caulk.” Ensure it’s suitable for your gap size (1/8″ – 3/4″ is common). Neglecting this can result in gaps that show through paint or caulk that doesn’t adhere properly.
- Primer: While not a compound, primer is crucial. Check label for “primer” and ensure it’s suitable for your surface (drywall, wood, etc.). Skipping this can cause poor adhesion of fillers and compounds.
- Sandpaper or screen: Not a compound, but essential. Check grit size (120-220 is common). Ensure it’s suitable for your application (sanding joint compound, smoothing caulk, etc.). Using the wrong grit can cause damage or leave visible marks.
- Protective gear: Safety first! Check you have safety glasses, gloves, and a dust mask. Skipping this can lead to injuries or health issues.
Quick rule: Always check the label and manufacturer instructions before using any filler or compound. This ensures you’re using the right product for your specific job, saving you time, money, and potential rework in the long run.
Sanding, finishing, and paint supplies
Use this checklist before starting any sanding, finishing, or painting work to ensure you have the right tools and materials for a professional-looking result.
- Abrasives (sandpaper): Check grit sizes from 80 to 220. You’ll need coarse (e.g., 80) for initial prep, medium (e.g., 120) for smoothing, and fine (e.g., 220) for final sanding.
- Sanding blocks: Ensure you have various sizes to fit different surfaces. Check they’re sturdy and won’t bend or break during use.
- Primer types: Have both oil-based (for better adhesion) and water-based (for faster drying) primers on hand. Check labels for compatibility with your paint type.
- Paint brushes: Inspect bristles for stiffness and length. Synthetic bristles are versatile; natural bristles are best for oil-based paints. Sizes should range from 1″ to 3″.
- Paint rollers: Check coverages (9″, 12″, or 18″) and nap lengths (1/4″ to 3/4″). For smooth surfaces, use short naps; for textured, use longer.
- Blending tools: Have a good quality paint edger for cutting in. Check it has adjustable wheels for various line widths.
- Sandpaper holders: Ensure you have both handheld and stick-on sandpaper holders for different tasks. Check they’re secure and won’t drop sandpaper during use.
- Tack cloths or vacuum: For dust removal after sanding. Tack cloths pick up fine dust; vacuums are better for larger particles. Check both are clean before use to avoid introducing new debris.
Quick rule: Always start with the coarsest grit, progress to finer grits, and end with a tack cloth or vacuum to remove all dust before priming. Skipping this process can lead to poor paint adhesion and visible imperfections in your finish.
Surface Assessment and Prep
Begin with a close inspection of the crack to determine its length and whether there are other nearby issues. Clean the area with a light brush to remove dust, then gently wipe with a damp cloth. Avoid forcing the crack open during cleaning or prep.
Lightly feather the edges of the surrounding paint so the repair can blend in. If the surface is very slick, a quick scuff with fine sandpaper helps with adhesion. Always follow the manufacturer’s prep instructions for the product you plan to use.
Gentle opening and cleaning technique
First, lightly score the crack with a utility knife to slightly widen it. This helps filler penetrate deep into the crack.
Be gentle. We’re not trying to create a gaping hole, just enough space for the filler.
Next, use a soft brush or vacuum to remove dust and contaminants from the crack. A drywall vacuum works great here.
Finally, wipe the area with a damp cloth to remove any remaining residue. Let it dry before proceeding.
Checking adhesion and loose plaster
Before you start patching, check if the surrounding paint has good adhesion. Try gently scraping a corner with your thumbnail. If it peels off easily, you’ll need to address this first.
Loose plaster is another issue. Gently tap the wall around the crack. If it sounds hollow or feels loose, you’ve got a problem that needs fixing before patching.
To test for failing paint, try sticking a piece of masking tape over the area and then pull it off quickly. If paint comes off with it, you’ll need to prep the surface better.
If you find any issues, address them now. A proper repair starts with a solid base.
Repair Techniques That Stay Invisible Under Paint
Feathered skim coats lay down a thin layer that traps the crack and smooths the surface for a seamless finish. Work in small, controlled passes and avoid building up texture. Check that the compound is compatible with your plaster and paint system by reading the label.
Glazing or micro-fill products fill fine lines without adding noticeable bulk and can be used for delicate repairs. Flexible caulks provide motion accommodation behind the finish but must be compatible with paintable surfaces. Note product instructions and test a small area before full use.
Feathered skim coat with thin compound
A feathered skim coat is your best bet for small, hairline cracks. Here’s how:
Start by mixing a thin joint compound, almost like pancake batter. Apply it to the crack using a 6-inch taping knife. Work from both sides of the crack towards the middle.
Key: The trick is to spread the compound out thinly on either side of the crack. This ‘feathers’ the edges, blending the repair into the surrounding plaster seamlessly.
Let it dry, then lightly sand with fine-grit sandpaper. Wipe off any dust and you’re ready for paint.
Micro-fill glazing technique for ultra-fine cracks
For those super fine hairline cracks, a micro-fill glazing technique works wonders. Here’s the drill:
Mix your joint compound to a peanut butter consistency. Use a putty knife or even your finger to push the compound into the crack.
Tip: Work quickly and smoothly. You want to fill the crack without leaving any texture behind.
Wipe off excess compound with a damp sponge, let it dry, then lightly sand and paint.
Flexible caulk for moving hairline cracks
When you’ve got recurring movement causing those hairlines to reappear, it’s time for flexible caulk. Here’s why:
Paintable acrylic-latex or elastomeric caulks can stretch and flex with the wall, preventing new cracks from forming.
Caution: Don’t use this method on wide cracks. It’s best suited for hairlines up to 1/8 inch wide.
Cut the caulk tube tip at a 45-degree angle, then apply a thin bead along the crack. Use your finger or a damp sponge to smooth it out and wipe off excess. Let it dry, then paint.

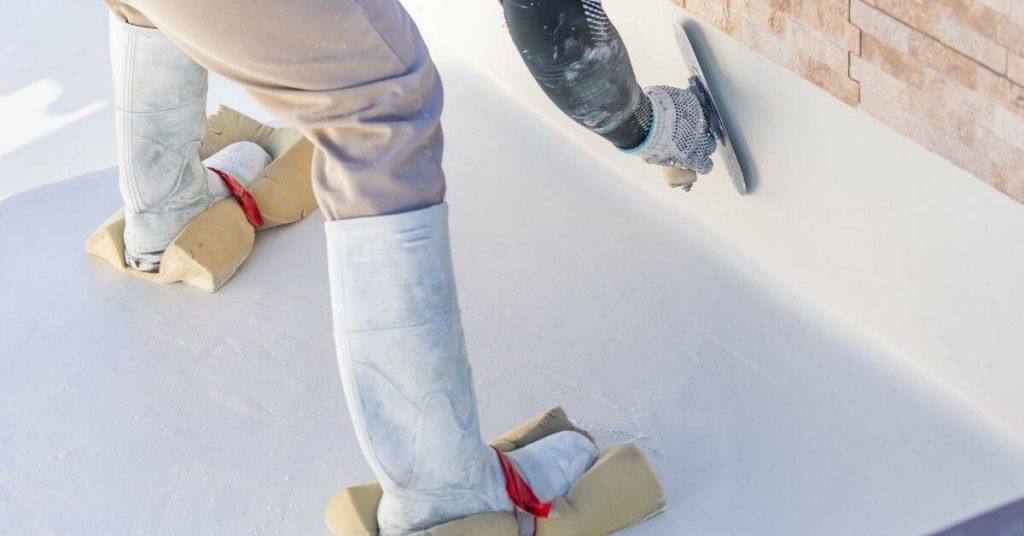
Sanding, Leveling, and Visual Checkpoints
After the repair cures, lightly sand the area with a fine touch so the patch sits flush with surrounding texture. Work gradually and keep the surface even to avoid creating new ridges. Wipe away dust and inspect under different lighting for any remaining lines.
Use a straightedge or edge tool to confirm the surface is level with nearby areas. If you see a hollow feel or a raised edge, address it before priming. Always follow labeled cure times and surface prep directions from the product you used.
Sanding technique and progression
Start sanding once the filler or compound is completely dry.
- Start with 120-grit: Use a light touch, just enough to level the surface. Don’t press too hard or you’ll create low spots.
- Check for flatness: Feel the area with your fingertips. It should be smooth and even.
- Switch to 220-grit: This finer grit helps remove any remaining imperfections without creating shine.
- Wipe off dust: Use a damp cloth to clean the area before moving on. Dust can clog sandpaper and create scratches.
- Check for sheen differences: Look at the patched area in natural light. It should match the surrounding wall’s sheen.
- Use 320-grit (optional): For ultra-fine results, switch to this extra fine grit. Be gentle; it’s easy to over-sand.
- Final wipe-down: Clean the area one last time before priming and painting.
Quick rule: Always sand gently and progress from coarse to fine grits for best results.
Raking light and touch inspection
Before priming, inspect the patched area thoroughly. Use both your eyes and fingertips.
- Use side (raking) light: Hold a flashlight at an angle to cast shadows on any imperfections. This helps you see tiny flaws that might be missed in regular light.
- Check for hollows or low spots: Look for areas where the light seems to dip or disappear. These could indicate unevenness.
- Feel with fingertips: Run your fingers over the area. You should feel no bumps, dips, or rough patches.
- Check edges: Make sure the patched area blends seamlessly into the surrounding wall. No sharp lines or edges.
- Inspect for shine differences: Look at the area in different lights. It should match the rest of the wall in both natural and artificial light.
- Check for flexibility: Gently press on the patch. It should feel solid, not spongy or soft.
Quick rule: Never rely on just one inspection method. Use both sight and touch to ensure a perfect finish.
Priming and Paint Strategies for Invisible Repairs
Select a primer compatible with smooth plaster and your chosen patch material. Spot priming the repaired area can help it absorb paint evenly without affecting the rest of the wall. Check that the primer is suitable for glossy or flat finish options you plan to use.
Decide between spot priming and full-area priming based on how visible the repair is and the surrounding texture. Apply paint in thin, even coats and follow recommended drying times. Always validate technique with manufacturer guidelines for your products.
Choosing the right primer
Priming your repair area is crucial for a consistent finish. It helps seal the patched area, improves paint adhesion, and ensures even color absorption.
Adhesion primers are great when you’ve used a filler or compound. They grip well to these materials. Use them after sanding and before painting.
Sealing primers are ideal for new plaster or bare walls. They seal the surface, preventing tannin bleed (that yellowish stain) and ensuring even paint coverage.
Always choose a primer that matches your wall’s condition and the type of paint you’ll use. Read labels carefully to ensure you’re getting the right one for your job.
Blending paint: feathering and application methods
The key to invisible touch-ups is blending the new paint with the existing wall. This means making the transition between the two areas as seamless as possible.
Brush/roll method: Apply a thin coat of paint along the edge of your repair, feathering it out towards the rest of the wall. Use a damp cloth to wipe any excess paint off your brush or roller to avoid leaving visible lines.
Spray method: If you’re using a sprayer, hold it at an angle and move in steady, overlapping passes. This helps create a smooth blend with the existing wall. Remember to wear appropriate safety gear when spraying.
Match your paint sheen to avoid visible touch-up lines. Glossy paint will reflect light differently than flat or satin paint, so try to use the same sheen throughout. If you’re unsure about matching sheens, test a small area first before committing to the entire wall.
Color, Sheen, and Lighting Considerations
Color choice can influence how well the repair disappears. A slightly different shade under certain lighting can reveal the patch, so test a small area if possible. Consider wall color and potential sheen changes when selecting finish.
Room lighting affects visibility too; diffuse light often hides subtle repairs better than direct light. If you’re unsure, check with paint manufacturer recommendations and compare samples under the room’s typical lighting conditions.
Why sheen matters more than color
The human eye is a sharp critic, especially when it comes to differences in sheen. A slight variation can make repairs stand out like a sore thumb.
Sheen refers to the level of gloss or reflection in your paint finish. It’s measured on a scale from flat (matte) to high-gloss. Matching the existing sheen is crucial for repairs to blend seamlessly.
Here’s why: sheen highlights imperfections. A shiny surface will reflect light and draw attention to any bumps, dips, or inconsistencies in your repair. So, if you’re working on a high-gloss wall, make sure your repair is just as glossy.
On the other hand, color differences are less noticeable, especially with the right primer and blending techniques mentioned earlier. So, focus on getting that sheen spot-on.
Checking repairs under realistic lighting
Lighting is a game-changer when it comes to spotting repairs. What looks perfect in bright, direct light might be glaringly obvious in the soft glow of evening lamps.
Here’s what you need to do: check your work under the same lighting conditions the room will typically use. This means turning off those harsh overhead lights and using table lamps or floor lamps instead. This is how you’ll catch any imperfections that might be hiding in plain sight.
Pay special attention to side lighting and reflective angles. These can accentuate even the tiniest of bumps or dips. Use a raking light – shine a flashlight across the wall at an angle – to reveal any inconsistencies. This is a simple yet effective technique used by professionals to inspect their work.
Remember, it’s better to find and fix issues now than to live with them and have to redo your repair later. So, take the time to check your work under realistic lighting conditions.
When to Call a Pro and Long-Term Prevention
If you notice widening cracks, new movement, or cracking that repeats after repair, schedule a professional assessment. Signs of structural concerns require expert judgment and sometimes further evaluation. Always verify regulatory or code guidance in your area when in doubt.
Preventive steps include keeping humidity stable, addressing structural causes, and using compatible materials for repairs. Regularly inspect and address small cracks before they widen, and follow product instructions to reduce future recurrence.
Structural Red Flags and Next Steps
Cracks in your plaster are usually no cause for alarm. But sometimes, they can indicate serious structural issues. Here’s what to look out for:
Widening cracks: If cracks are getting wider over time, it could mean there’s a problem with the structure itself.
Cracks affecting doors and windows: If cracks are causing your doors or windows to bind or not close properly, it might be a sign of foundation issues.
If you notice any of these signs, don’t wait. Consult a professional contractor or structural engineer immediately. They have the tools and expertise to assess the situation and recommend appropriate action.
Preventive Maintenance and Environmental Controls
Once you’ve repaired your hairline cracks, it’s important to take steps to prevent them from coming back. Here are some practical tips:
Stabilize humidity levels: Fluctuating humidity can cause plaster to expand and contract, leading to cracks. Use a humidifier in dry seasons or an air conditioner in hot ones.
Secure loose fixtures: Loose light switches, electrical outlets, or other fixtures can put stress on the walls, causing cracks. Tighten them up if they’re loose.
Address underlying causes: If you’ve had repeated failures in the same area, there might be an underlying issue like a leaky pipe or poor ventilation. Address these issues to prevent future cracks.
Conclusion
Repairing hairline cracks so they stay invisible under paint is about solid prep, careful technique, and safe execution. Do it right and your walls stay smooth, durable, and looking finished for years.
Move through this as a quick check: examine the crack and surrounding area, clear dust, dampen lightly if needed, apply the chosen repair method, sand smooth, apply primer, and finally test a small painted patch in a hidden spot to confirm invisibility before finishing the whole wall. Keep a steady pace, follow the order, and don’t skip steps that keep the repair behind the paint.
Common mistakes to avoid include over-wetting plaster or filler, which can cause future cracks; skipping surface prep or a proper primer, which makes repairs show through; and rushing sanding or applying too much material, which creates ridges or uneven sheen. Follow simple safety rules: test in a small area first, wear eye protection when sanding, and never work on damp or actively cracked plaster. If you see movement, persistent moisture, or large or complex cracks, pause and reassess before continuing.
When to call a professional? If cracks recur after repairs, the wall shows signs of moisture, or there is suspected structural movement, bring in a pro instead of pushing on. Otherwise, with careful prep and the right steps, you can finish the job confidently and keep the repair quiet and durable—the key is steady work, proper priming, and a final paint plan that hides any signs of fix.
FAQ
How do I know if a crack is cosmetic or something I should worry about before repairing?
Look for changes in size or movement. If the crack keeps opening, or if you see additional cracking near doors or windows, flag it for a pro. For simple, stable hairline cracks, you can proceed with careful repairs per the manufacturer’s guidance.
What steps help the repair stay invisible under paint?
Clean the crack, fill with a compatible patch compound, and feather the edges smooth with the surrounding plaster. Sand lightly so the patch lies flush with the surface, then prime with a compatible primer before painting. Use thin coats and avoid overloading with filler.
How should I test the repaired area before painting the entire wall?
Apply a small test patch of primer and paint to the repaired spot and compare in different lighting. Look for a seamless blend with the surrounding finish, and check that the surface doesn’t reveal the repair after drying. If it stands out, fix and re-prime before continuing.
What common mistakes ruin invisibility and how can I avoid them?
Overfilling cracks or skipping proper priming can show through paint. Skipping surface prep, using incompatible products, or rushing drying times also hurts the result. Check product labels, follow instructions, and use compatible primers and patch materials for the plaster you have.