

Introduction
Priming over patches means applying a seal coat to even out repairs so they don’t show under strong raking light. It helps blend repairs with the surrounding paint and surface texture. This is especially important on walls with uneven sheen or rough patches.
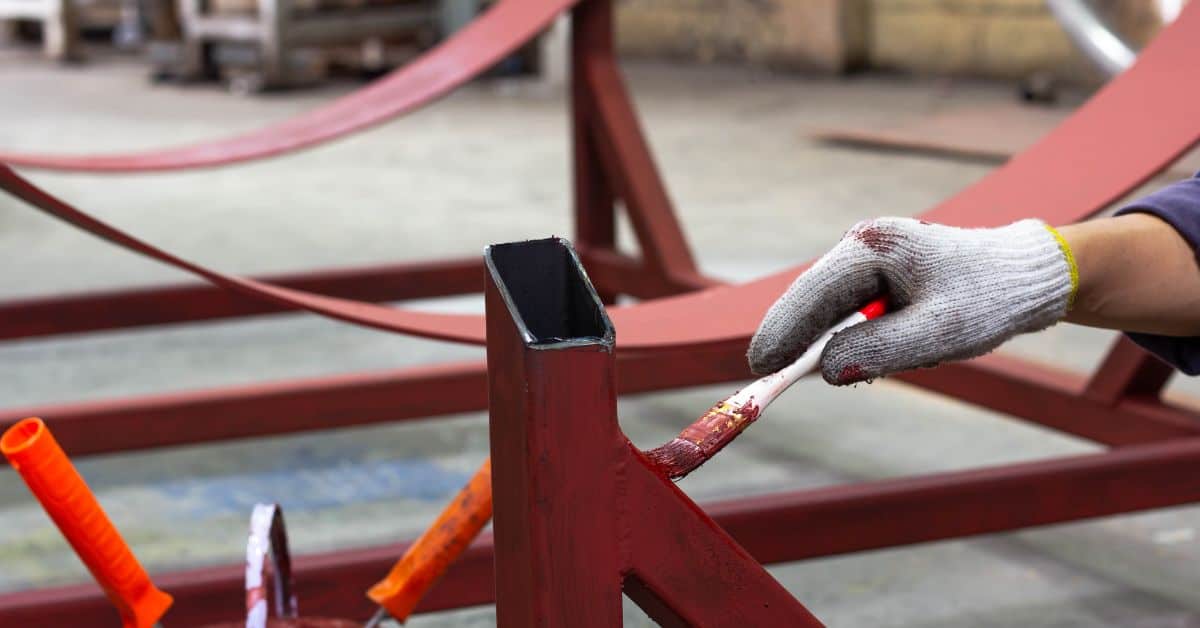
Start with a clean, dry surface, lightly scuff the patched area, then apply primer over it. Use a primer compatible with your topcoat and follow the label for coverage and drying time. Check the repair under raking light and adjust with additional coats if needed, and always follow manufacturer instructions and local rules.
Key takeaways
- Raking light highlights hidden repairs, guiding every feathered edge and texture match.
- Diagnose substrate moisture and prior coatings before patching to avoid failure.
- Prepare surfaces with thorough sanding and feathering; wear eye protection and dust mask.
- Skim-coat small repairs to level texture; allow gentle cure or dry time.
- Prime strategically to absorb sheen differences and help repairs disappear under light.
- Perform raking-light inspection after painting, addressing any glare or mismatch promptly.
Table of Contents
- Introduction
- Key takeaways
- Why Raking Light Reveals Repairs
- Diagnosing the Repair and Substrate
- Tools and Materials Checklist
- Surface Preparation: Sanding, Feathering, and Leveling
- Filling and Skim-Coating Techniques to Match Texture
- Priming Strategy for Invisible Repairs
- Painting and Sheen-Matching Techniques
- Inspection, Raking-Light Testing, and Troubleshooting
- Conclusion
- FAQ
Why Raking Light Reveals Repairs
Raking light is a simple test that shows what a flat wall might hide. When light hits at a sharp angle, tiny high spots and texture differences cast shadows. Those shadows make patches stand out and reveal a mismatch in surface height or finish.
Understanding this effect helps you target where the repair is visible, not where it isn’t. It also sets the goal: eliminate the height differences so the wall reads as a single plane under the light you’ll use for inspection.
How surface irregularities create shadows
Raking light, that’s low-angle sunlight or artificial light, casts long shadows. These shadows highlight even the slightest imperfections on your walls.
Edge feathering, that’s when you’ve not blended the patch well enough into the surrounding wall, creates visible lines under raking light. It’s like a fence throwing a shadow on a sunny day.
Ridges or bumps in your patch, maybe from applying too much compound or not sanding smooth enough, they catch the light and cast shadows too. It’s like a tiny mountain range catching the sun.
Inconsistent texture between your patch and the surrounding wall, that’s another shadow-caster. Your eye picks up on these differences under raking light, no matter how well you’ve color-matched.
Common repair mistakes that show under raking light
Avoid these common pitfalls to keep your repairs hidden even under raking light.
- Insufficient feathering: Not blending the patch edges well enough into the surrounding wall makes lines visible. Always use a wide putty knife for feathering.
- Mismatched texture: Your patch should match the existing wall’s texture. Use the right joint compound and sanding technique to achieve this.
- Incorrect primer or sheen: Using a primer that doesn’t seal the patch well or choosing a paint sheen that doesn’t match can make your repair stand out. Always use a stain-blocking primer and match the existing sheen.
- Not sanding enough: Even small bumps or ridges catch the light and cast shadows. Sand your patches smooth as glass.
- Color matching gone wrong: A perfect patch can still stand out if the color doesn’t match exactly. Use a touch-up paint that matches the existing wall perfectly.
Remember, prevention is better than cure. Take your time to avoid these mistakes and your repairs will stay hidden even under raking light.
Diagnosing the Repair and Substrate
Start by identifying what was repaired and what the wall is made of. Different patches respond differently to sanding, filling, and priming. Note whether you’re dealing with drywall, plaster, or wood as the underlying substrate.
Check the surrounding finish for texture, gloss, and porosity. This helps you choose compatible prep steps and products. If you’re unsure, consult product labels or manufacturer instructions for substrate compatibility and recommended primers.
Identifying patch type and depth
The first step is to figure out what kind of repair you’re dealing with. Grab a flashlight and examine the patched area closely.
A shallow fill will be barely noticeable, just a slight indentation or change in texture. It’s usually used for small holes or cracks.
A full patch is deeper, often used to repair larger damage like gouges or missing chunks. You’ll see a clear difference in level compared to the surrounding surface.
A skim-coat job is when new material has been applied over an entire area to smooth out imperfections. It’s usually feathered out, but you might still see slight differences in sheen or texture at the edges.
Evaluating surrounding finish and texture
Now that you’ve identified the patch type, it’s time to assess the existing wall finish. This will help you choose the right primer and paint for a seamless blend.
Check the texture. Is it smooth or does it have some kind of pattern? If it’s textured, what’s the depth and pattern like?
Next, look at the sheen. Is it glossy, semi-gloss, eggshell, or matte? The sheen will affect how light reflects off the surface.
Also, note any color variations. Even if you’re using the same paint, slight differences in lighting can make colors appear different.
Tools and Materials Checklist
Prepare a basic set of tools: sanding options, scrapers, mud or filler, a taping knife, and a lien-free brush for primer. Keep a damp cloth handy to wipe dust as you go. Have a level or straightedge nearby to check feathered edges.
Extras like a texture roller, spackle knife, and a fine-grit sanding block can help fine-tune the surface. For DIY work, choose user-friendly options and verify any tool limits or safety guidelines on the product label or instructions.
Essential tools for prep and application
Before you start, make sure you have these essential tools to ensure a smooth repair job.
- Sanding tools: For smoothing surfaces. Skip this and you’ll end up with visible ridges.
- Knife: To apply filler. A 6-in-1 multi-tool works great.
- Feathering tool: To blend edges of repairs. Without it, you’ll see harsh lines.
- Brushes/rollers: For applying primer and paint. Cheap brushes can leave bristles behind.
- Light source: For raking-light inspection. A simple flashlight works, but a dedicated inspection light is best.
Quick rule: Don’t skimp on tools. Good tools make the job easier and results better.
Filler, primers, and paint types to consider
Choose the right materials for your repair. Here’s what to consider.
- Filler: High-build filler for deep holes, bonding primer for poor adhesion, stain-blocking for old stains.
- Primer: Choose a primer that matches the paint type (water-based, oil-based).
- Paint finish: Gloss for durability, semi-gloss for easy cleaning, flat/matte for hiding imperfections.
Quick rule: Match filler, primer, and paint types to the job. Wrong materials can cause repairs to fail or show up under raking light.
Optional tools for professional results
These tools aren’t necessary, but they can make your job faster and easier.
- Texture sprayer: For matching existing textures. Saves time and effort.
- Corner tool: For sharp corners. Prevents drips and runs.
- Inspection light: Dedicated raking-light inspection tools. Makes it easier to spot missed spots.
Quick rule: Optional tools can speed up the job and improve results, but they’re not essential for a good repair.
Surface Preparation: Sanding, Feathering, and Leveling
Begin by smoothing the repaired area with light sanding to remove ridges. Avoid gouging by keeping the abrasive gentle and steady. Work from the edges toward the center to create a gradual transition.
Feathering the edges is key to a seamless blend. Check that the surrounding texture remains intact while the repair recedes. If needed, wipe the area clean before moving to filling or priming.
Best practices for feathering patch edges
Feathering is key to making your repair disappear under raking light. The goal is to taper the repair edge smoothly into the existing surface.
Start with a flexible filler that allows for easy sanding. Apply it generously, then use a flexible putty knife to spread and feather the edges.
Tip: Hold the knife at an angle and pull towards you as you reach the edge. This helps create a smooth transition.
Let it dry, then lightly sand with fine-grit sandpaper (220 or 320 grit) to ensure a smooth surface that blends seamlessly with the surrounding area.
Sanding strategy without overworking the area
Sanding is crucial but can easily damage surrounding finish if not done carefully. Start with a low-grit sandpaper (120 or 150 grit) to remove any high spots.
Feel and visually inspect the surface as you go. Use your fingers to check for any remaining rough patches or low spots. Switch to a fine-grit sandpaper once the area is mostly flush.
Tip: Don’t over-sand. It’s easier to remove high spots than it is to fill in low ones.
Wipe off dust with a damp cloth periodically to check your progress and ensure you’re not creating swirl marks.
Cleaning and dust removal before priming
A clean surface is crucial for proper primer adhesion. Start by wiping the area with a damp cloth to remove any dirt or debris.
Use a tack cloth or slightly damp cheesecloth to wipe again, removing any remaining dust particles. These can become trapped under the primer and show up under raking light.
Important: Do not use a dry cloth for the final wipe as it can spread dust around instead of removing it.
Allow the surface to dry completely before priming. This ensures that any remaining moisture won’t interfere with the primer’s bond.
Filling and Skim-Coating Techniques to Match Texture
Choose a filler or skim coat that matches the wall’s texture and porosity. Apply thin coats and let each dry fully before the next. Build up only as much as needed to reach the surrounding surface.
Sand between coats with a fine grit to keep the surface smooth. Aim for a uniform profile that cancels shadows when light hits the wall at the typical angle you use for inspection. If in doubt, test a small area first and compare under raking light.
Applying fill in thin, controllable layers
Thin, controlled layers are key to a smooth finish. Thicker layers shrink as they dry, leaving ridges.
Start with a thin layer – about 1/8 inch thick. Let it set for the time recommended by the manufacturer before sanding lightly.
Apply subsequent thin layers, allowing each to set and sand between. This builds up your repair gradually, reducing shrinkage and ridges.
Recreating texture: blending vs matching
When repairing small areas, blend the patch into existing texture. This works best when the repair is smaller than a few square feet.
For larger repairs or visible patterns, match the texture. Use a sample of the surrounding wall to create a texture guide. Apply filler with a trowel or hawk and knife, following your guide.
DIY options include using a comb, brush, or even crumpled aluminum foil to mimic texture patterns.
When to re-skim larger sections
Small repairs can remain visible if they don’t blend well. Assess your repair – if it’s noticeable, consider re-skimming a larger section.
Re-skimming involves applying a thin layer of filler over a wider area to even out the wall. This works best when the original finish is consistent and you can match it.
Start with a small test area first, to ensure you can match the surrounding texture and color.
Priming Strategy for Invisible Repairs
Select a primer compatible with your substrate and finish. Some primers are designed to improve adhesion for skim coats and paints, while others block stains or seal porosity. Read the product label or manufacturer instructions for substrate guidance.
Apply primer in light, even coats, following the recommended pattern for the surface. Avoid puddling or heavy builds that can create flat spots under raking light. Allow proper drying per the label before proceeding to paint.
Choosing the right primer type
A good primer is your first line of defense for a smooth, invisible repair. Here’s what you need to know:
Bonding/Adhesion Primers: These are great for new drywall or bare surfaces. They create a strong bond between the patch and the wall, preventing peeling.
High-Build Primers: If your patch is thick or textured, use a high-build primer. It adds extra coverage to help hide imperfections and create an even surface for painting.
Stain-Blocking Primers: For water stains or knots in wood, use a stain-blocking primer. It seals the area to prevent tannins from bleeding through your paint.
Spot-priming versus full-panel priming
Deciding whether to prime just the repair or the whole panel depends on a few factors:
Spot Priming: Priming only the repair is faster and uses less product. It’s ideal when the rest of the wall is in good condition.
However, it can leave slight differences in sheen and absorption, which might show under raking light. To minimize this, feather the primer out onto the surrounding wall slightly.
Full-Panel Priming: Priming the whole panel ensures even sheen and absorption, making your repair disappear completely. It’s best when the rest of the wall needs painting anyway or has minor imperfections that would otherwise show up.
Application method and film build considerations
The application method affects how well your primer hides the repair. Here’s what to consider:
Brush Application: Brushing on primer gives you more control over where it goes, making it great for spot priming. However, it can leave visible strokes if not done carefully.
Roller Application: Using a roller creates an even film with no strokes. It’s ideal for full-panel priming but can be messy and wasteful for spot priming.
Spray Application: Spraying primer gives you the best coverage and control, but it requires more equipment and know-how. Always check the product instructions for application details to achieve the recommended film build without creating texture differences.
Painting and Sheen-Matching Techniques
Match the sheen level of the surrounding wall and apply with consistent technique. Use long, even strokes and maintain a steady hand to minimize lap marks and texture differences. Check under raking light as you work to spot discrepancies early.
Consider using a single-coat or pass strategy if your paint coverage allows, but follow label guidance for drying times. If texture differences appear, you may need a light second pass at a compatible angle to blend the finish.
How sheen influences visibility under raking light
Sheen is the amount of light a surface reflects. Under low-angle, or ‘raking’ light, differences in sheen become highly visible.
High sheen surfaces reflect more light, making them appear brighter and drawing attention to repairs. Low sheen surfaces absorb more light, helping to hide imperfections but can look dull compared to the original surface.
To match sheen, observe the original surface in raking light. Use a small test area of your chosen paint to find the closest sheen that blends seamlessly.
Blending paint edges and feathering coats
Feathering is key to making repairs disappear. It’s about applying paint in thin, overlapping layers that gradually build up to the final coat.
Start at the edge of your repair, using a 2-inch brush for control. Paint a thin layer just onto the repair and slightly onto the original surface. Let it dry.
Next, use a 3-inch brush to apply another thin coat, overlapping the first by about half. Continue this pattern, gradually increasing brush size and decreasing overlap until you reach the full wall coat.
When to repaint larger areas for a seamless finish
Sometimes spot-painting isn’t enough. When repairs are large, or the original paint is significantly aged or damaged, consider repainting a larger area.
If your repair is more than 12 inches in diameter, it’s likely that spot-painting will result in visible edges under raking light. Similarly, if the original paint is peeling, faded, or has significant texture loss, repainting a larger area will give a more consistent finish.
Before you start, test your chosen paint color and sheen on a small, hidden area to ensure it matches the surrounding walls. Then, prep and prime the entire area before painting for best results.
Inspection, Raking-Light Testing, and Troubleshooting
Perform a pre-paint inspection by sweeping light across the wall at a low angle. Note any remaining ridges, shadows, or gloss differences. Address issues before you apply paint to avoid telegraphing later.
After painting, recheck with raking light to confirm the repair disappears. If you still see a mismatch, re-evaluate feathering, fill depth, or primer choice, and adjust your approach as needed. Keep product labels and instructions handy for specific fixes.
How to set up raking-light tests
Use this checklist before and after painting to ensure repairs are invisible under raking light.
- Set up lighting: Use a handheld lamp or natural light at a 45-degree angle to the wall. This simulates raking light.
- Inspect before painting: Check each repair for any visible signs, like texture mismatch or shine.
- Check fill layers: Ensure fill layers are thin and controllable, as per earlier instructions.
- Texture match: Confirm texture blends well with surrounding area. Revisit blending techniques if needed.
- Primer check: Ensure primer is fully dried and provides a consistent base for painting.
- Sheen consistency: Check sheen matches surrounding area to avoid visibility under raking light.
- Inspect after painting: Re-examine each repair with raking light to catch any issues before finalizing the job.
- Check for shadows: Ensure no shadow lines are visible, indicating uneven paint application or texture mismatch.
Quick rule: Always inspect under raking light. It’s your best friend in catching invisible repairs.
Fixes for common visible problems
Use this checklist when issues appear after painting to address them minimally invasively.
- Feathering issue: If edges are too harsh, feather the next coat more. Blend paint edges as per earlier instructions.
- Texture mismatch: Lightly re-skim with joint compound if texture doesn’t match. Follow blending vs matching guidelines.
- Shine spot: Sand lightly and re-prime the area to reduce shine before repainting.
- Shadow lines: Lightly sand, re-prime, and repaint any visible shadow lines.
- Inconsistent sheen: Repaint the entire panel if sheen is inconsistent. Sheen-matching techniques can help.
- Texture depression: Apply thin layers of joint compound to build up depressed areas. Re-skim as needed.
- Repair too shiny: Sand lightly, re-prime, and repaint with a flat or matte sheen to reduce shine.
Quick rule: Always start with the least invasive fix. Repainting entire panels should be a last resort.
Visual checkpoints before declaring a job finished
Use this checklist to ensure a seamless, invisible repair job before signing off.
- Texture uniformity: Check for consistent texture across the entire area. No high or low spots.
- Absence of shadows: Inspect under raking light for any shadow lines indicating uneven repairs.
- Consistent sheen: Ensure sheen is uniform under different lighting angles to avoid visibility issues.
- Edges blend well: Check that paint edges blend seamlessly with surrounding area. No harsh lines.
- No visible repairs: Under raking light, ensure no repairs are visible. If so, revisit troubleshooting steps.
- Overall finish: Step back and inspect the entire area for any inconsistencies or issues.
Quick rule: Only declare a job finished when every repair is invisible under raking light from all angles.
Conclusion
Raking light and careful prep let repairs disappear and keep your finish durable and safe. Do the work in small, tested steps and check each stage before moving on to paint, so you don’t lock in a flaw or waste material.
Start by confirming the repair is sound, then feather, level, and skim to texture, prime with a light, uniform coat, and match the paint sheen in a single pass—test a small area first, cure, and recheck under raking light before sealing the project with final coats. Keep tools clean, work in dry conditions, and follow the product directions for mixing, drying times, and ventilation.
Common mistakes to avoid include skipping surface prep or over-priming, rushing feathering or skim-coating, and ignoring lighting tests that reveal gaps after paint. Safety rules are simple: wear a dust mask and eye protection when sanding, protect floors and surrounding surfaces, cover or tape edges you don’t want affected, and never apply coats over damp patches or damaged substrate.
If you’re unsure about substrate integrity, structural movement, or persistent texture mismatch after testing, don’t push ahead alone—calling a professional can save time and money by preventing repeated repairs. Stay deliberate, finish with confidence, and you’ll have a nearly invisible repair that lasts as long as the surrounding walls.
FAQ
How do I choose the right primer for patches that will be viewed under raking light?
Pick a primer labeled for patches and texture. Check the label or datasheet for compatibility with your topcoat and substrate. If unsure, ask the store or check the manufacturer instructions and local rules.
What should I do if a patch still shows through after priming?
Re-wet the area and re-sand lightly, then apply another thin coat of primer. If it persists, you may need a specialized shellac or bonding primer—confirm with the product label and follow the instructions exactly.
How can I test invisibility under raking light before painting the whole wall?
Shine the raking light at a low angle across the repaired area with the surface dry. Look for shadows or color differences. If the patch stands out, plan another skim or primer step rather than rushing to paint.
What are common mistakes to avoid when priming patches for an invisible finish?
Avoid skipping dust removal and uneven coverage. Don’t apply thick coats that pool or dry unevenly. Always verify you’re using compatible products and follow label directions for drying and recoat times.