
Introduction
The timeline for preventing concrete form blowouts is crucial, as rushing through steps can lead to costly mistakes. Understanding how long each task takes helps you plan your project effectively.
Let’s break down the process into a clear, time-focused guide to ensure your forms are secure and ready for pouring.
For the full guide, see How to Prevent Concrete Form Blowouts: Bracing Patterns and Common DIY Weak Points.
The Step-by-Step Timeline to Prevent Concrete Form Blowouts
Preventing concrete form blowouts requires careful planning and execution. Here’s a detailed timeline to help you understand how long each step takes:
- Formwork Setup: 1-3 hours
- Assembling forms: 30 minutes – 1 hour
- Securing forms with ties or clamps: 30 minutes – 45 minutes
- Aligning and leveling forms: 30 minutes – 1 hour
- Bracing Patterns: 30 minutes – 2 hours
- Planning bracing layout: 30 minutes
- Installing braces: 1-1.5 hours (depends on form size and complexity)
- Securing braces with nails or screws: 30 minutes
- Pre-Pour Inspection: 30 minutes – 1 hour
- Checking form alignment and plumb: 30 minutes
- Inspecting ties, braces, and supports: 30 minutes
- Walking the forms to identify weak points: 30 minutes
- Pouring Concrete: Variable (2-8 hours)
- Concrete delivery and placement: 1-4 hours
- Finishing and leveling concrete: 1-4 hours
Total time depends on form size, complexity, and concrete volume. Plan accordingly to ensure a smooth pour and minimize the risk of blowouts.
Key takeaways
The timeline for preventing concrete form blowouts is crucial, as rushing through steps can lead to costly mistakes. Understanding how long each task takes helps you plan your project effectively.
- Recognize common causes of form blowouts and how DIY setups fail.
- Use proper bracing patterns to prevent wall bulges or collapse during pours.
- Align forms precisely and check plumb before pouring to avoid deformation.
- Inspect components and anchors for damage; replace frayed ties or bent supports.
- Pre-pour checklist reduces errors; plan access, drainage, and sequencing ahead.
- Emergency response: stop work, secure area, and reassess bracing after any blowouts.
Table of Contents
- Introduction
- Key takeaways
- Common Causes of Concrete Form Blowouts
- Bracing Patterns That Prevent Blowouts
- Materials and Components: Which Forms and Braces Perform Best
- Common DIY Weak Points and How to Fix Them
- Pre-Pour Site Planning and Checklist
- Safety Protocols and Emergency Response for Blowouts
- Repair Strategies and Post-Blowout Prevention
- Cost, Scheduling Impact, and Decision-Making
- Conclusion
- FAQ
Common Causes of Concrete Form Blowouts
Blowouts almost always trace back to three root categories: form and bracing loads that exceed capacity, material defects or degradation, and human error in setup or inspection. Recognizing which category applies before the pour helps you prioritize fixes and reduce immediate risk.
Before pour day, walk the forms and verify design assumptions against the planned pour: check that bracing layout, tie spacing, and anchor capacity match expected loads and pump pressures, and confirm form plumb and square. Look for fast, practical signals—loose braces, deformed or wet lumber, missing ties, misaligned panels—and tighten, replace, or realign components as needed; if you need exact limits, check the product label or manufacturer data sheet.
Hydrostatic and Lateral Pressure During Pours
Fresh concrete exerts fluid pressure on formwork. This pressure increases with pour height, rate, and when using vibration.
Pour height: The higher the pour, the greater the hydrostatic pressure. Ensure your forms can handle this.
Pour rate: Rapid pouring increases lateral pressure. Slow down to reduce risk.
Vibration: Vibrating concrete helps consolidate it, but it also increases lateral loads on forms. Use vibration judiciously.
Damaged, Modified, or Inappropriate Form Materials
Using the wrong or damaged materials weakens your forms and increases blowout risk.
- Cuts in lumber: Cuts reduce strength. Avoid them if possible. If not, reinforce with extra bracing.
- Fractured lumber: Check for cracks before use. Replace any damaged pieces.
- Weakened blocks: Use only concrete or cement blocks rated for your load. Don’t substitute weaker materials.
- Improper form lining: Use the right form release agent to prevent bond and staining issues.
- Modified forms: Altering forms reduces their strength. Avoid modifications if possible.
Installation and Planning Errors
Common mistakes in form installation and planning can lead to blowouts. Here’s what to avoid:
- Poor alignment: Ensure forms are plumb, level, and square. Misaligned forms can’t handle loads properly.
- Inadequate anchors: Use enough anchors to secure your forms against lateral movement.
- Improper tie/rebar placement: Follow design specs for tie spacing and rebar layout. Incorrect placement weakens the form’s structure.
- Sequencing mistakes: Pour in the correct sequence, from bottom to top, to avoid overloading lower forms.
Regularly inspect your forms during installation to catch and correct any errors early.
Bracing Patterns That Prevent Blowouts
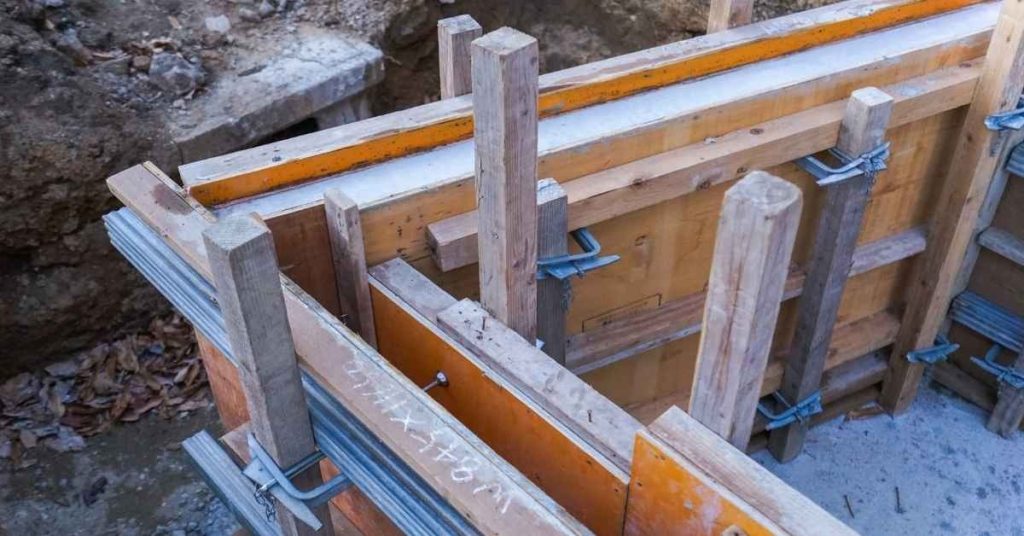
Bracing works by creating a clear load path from the form face to anchors or the ground; choose patterns—cross-bracing, vertical/horizontal studs, or diagonal braces—based on wall length, height, and whether the wall is straight or curved. Each pattern has strengths: cross-bracing suits short runs and quick temporary support, studs and walers carry distributed pressure on longer straight walls, and diagonals help resist buckling at larger heights.
Lay out braces so they have solid bearing, avoid gaps, and provide redundancy; verify spacing and attachment quality before loading and refer to manufacturer guidance or design notes for spacing ranges. Use appropriate materials and hardware for wet conditions, install braces in sequence to hold plumb as you build, and inspect connections—common DIY faults are missing bottom support, misaligned braces, and overtightening that deforms the form; correct these before pouring.
Wall bracing geometry and load paths
The way you brace your concrete forms is crucial to prevent blowouts. Here’s how different bracing patterns work:
Diagonal braces are great for small forms and straight walls. They transfer lateral loads (weight, wind, hydrostatic pressure) into the ground or adjacent structures.
Horizontal walers at the top and bottom tie everything together. They distribute loads evenly across the form face, preventing bulging.
For curved layouts, vertical/horizontal studs might be better. They follow the curve’s shape, providing uniform support.
Choosing brace spacing and frequency
Brace spacing depends on form size, pour rate, and type. Follow manufacturer and engineer guidance:
For small forms, 4′ to 6′ spacing is common. For larger ones, go up to 8′. If you’re pouring fast or using light-duty forms, space braces closer.
Remember, braces should be tighter at the bottom. This supports the form’s base and prevents uplift.
Tying systems and continuity (walers, ties, and sheathing)
Continuous walers at the top and bottom tie your braces together. They keep your form from bulging between braces:
Use 2×4 or 2×6 lumber for walers. Make sure they’re long enough to span the entire form width.
Ties and shear connectors maintain form integrity. Use them at every brace location, especially in tall forms. This keeps your braces from shifting and maintains a solid connection between form faces.
Materials and Components: Which Forms and Braces Perform Best
Different form materials behave differently under wet concrete: wood is forgiving but can swell and deform when wet, steel resists deformation and repeats well, plastics and ICFs provide consistent shape but have other limitations—check supplier guidance for reuse and moisture behavior. For braces and hardware, stake types, adjustable braces, walers, and straps each transfer loads differently; evaluate corrosion resistance and anchorage method for your ground conditions.
Identify likely failure modes for your chosen system—warping and bowing in lumber, anchor pullout in soft soils, or creep in some plastics—and plan installation details to mitigate them, such as additional anchoring or stiffer walers. Follow a step-by-step check for plumb, level, spacing, and secure fasteners before the pour, and consult product instructions or code guidance where specific capacities matter.
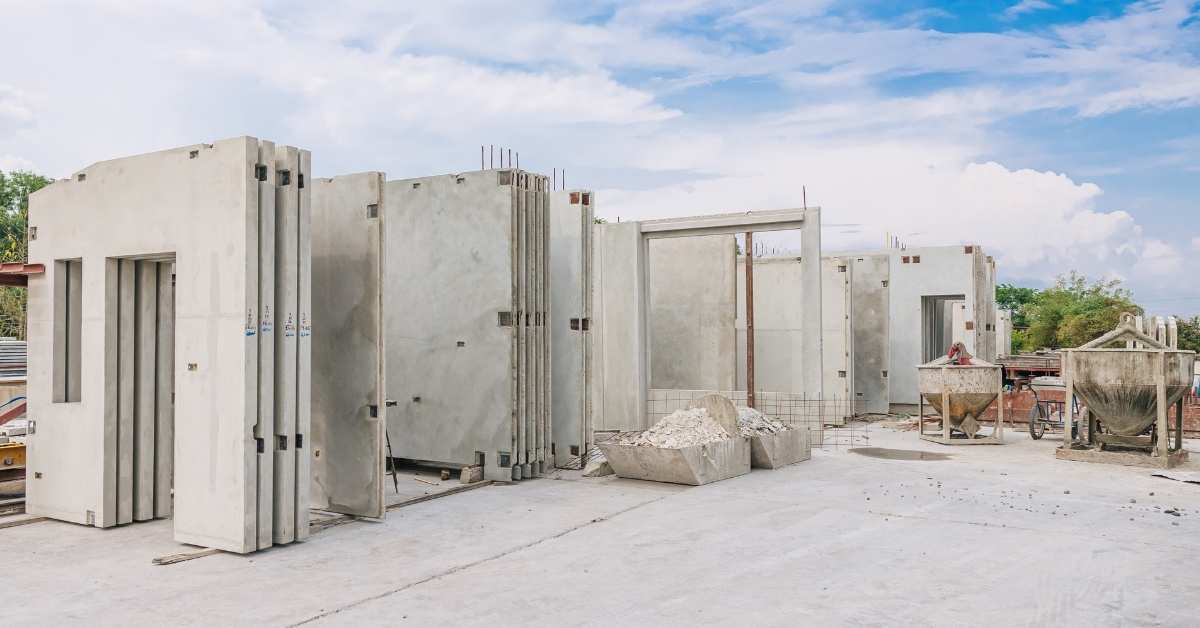
Form types: ICFs, timber, metal, and composite systems
Choosing the right form material is crucial for a successful pour. Each has its pros and cons:
Insulated Concrete Forms (ICFs): Stiff, insulate concrete, easy to repair. Susceptible to damage if modified.
Timber: Cheap, flexible, easy to modify. Warps over time, prone to moisture issues.
Metal: Strong, durable, long-lasting. Expensive, difficult to modify, can stain concrete.
Composite systems: Lightweight, strong, easy to install. More expensive than timber, less stiff than metal or ICFs.
Bracing materials: lumber, steel braces, adjustable systems
The material you choose for bracing affects your form’s stability. Here are the options:
- Lumber: Cheap, easy to find. Less stiff than steel, prone to warping.
- Steel braces: Stiff, strong, durable. More expensive, heavier, less flexible.
- Adjustable systems: Versatile, great for DIY. Can be over-tightened, causing damage.
Fasteners, ties, and anchors
Connectors and anchors keep your forms in place. Inspect for strength and corrosion:
Stakes: Transfer lateral loads to the ground. Check for proper embedment depth.
Ties: Connect form faces, preventing displacement. Ensure they’re tight and evenly spaced.
Anchors: Secure forms to existing structures. Check for adequate grip strength and no corrosion.
Common DIY Weak Points and How to Fix Them
On small jobs, common mistakes show up as out-of-plumb forms, too few braces, uneven tension on ties, and rushed setups; each of these increases lateral load on a few points and raises blowout risk. Spot these issues during a calm pre-pour walkthrough and fix them with field-proven methods rather than full rework when possible.
Practical fixes include adding temporary cross-braces or diagonal supports, using adjustable wedges to fine-tune plumb, replacing damaged lumber, and retensioning ties to even load distribution; document the changes and re-check alignment. Also confirm concrete-related factors such as slump and pour height to avoid excess lateral pressure, and if you’re unsure of limits, consult manufacturer instructions or an experienced pro before proceeding.
Improper cutting or modification of blocks and panels
Modifying concrete forms without proper care weakens them, increasing blowout risk. Always use sharp tools for clean cuts.
Never cut through ties or reinforcing elements. Instead, reinforce modified areas with additional ties or bracing. If damage is severe, replace the form section entirely.
Use a straight edge and level to ensure accurate cuts. For complex shapes, consider using templates or CNC-cut forms for precision.
Under-supported corners and wall junctions
Corners and junctions bear the most load. Inadequate support here leads to blowouts. Reinforce these areas with extra bracing.
Use L-shaped or T-shaped walers at corners, tying them into both walls. Add extra diagonal braces for additional support.
For intersecting walls, use cross-bracing patterns and ensure ties are continuous through the junction. Consider using thicker forms or additional layers of plywood at these critical points.
Inadequate temporary supports and sequencing errors
Rushing form setup can leave sections unsupported during the pour, leading to blowouts. Plan your sequence carefully.
- Set forms in place first, ensuring they’re level and plumb.
- Tie forms together using ties or walers, starting at the bottom and working up.
- Brace forms diagonally, starting from the base and moving upwards. Ensure braces are tight and secure.
- Avoid leaving sections unsupported during the pour. If necessary, use temporary supports or shoring to maintain form integrity.
- Check all ties and braces before pouring to ensure nothing has shifted.
Proper sequencing ensures your forms can withstand hydrostatic pressure during the pour, reducing blowout risk.
Pre-Pour Site Planning and Checklist
A reliable pre-pour plan ties site, materials, crew roles, and contingencies together so nothing is left to guess on pour day. Walk the site to verify grade and drainage, ensure forms are clean, plumb, square, and well-braced, and replace any warped or damaged pieces before you start.
Stage materials and hardware so replacement bracing, extra stakes, fasteners, release agents, and sealants are on hand; assign a pre-pour lead and clear sign-off steps for forms, reinforcement, and form ties. Plan pour sequencing to limit load on any single wall, confirm slump and vibration approach, monitor weather, and document the final walk-through with photos and a sign-off before placing concrete.
Visual checkpoints and form inspection
Before any concrete arrives, walk your forms to ensure they’re ready. Here’s a quick checklist.
- Check grade/drainage: Ensure water will flow away from the footing.
- Inspect form alignment: Forms should be plumb, square, and aligned. No warping or gaps allowed.
- Verify ties and anchors: Check if ties are secure and anchors are properly embedded in the footing.
- Look for cracks: Any cracks in forms can lead to blowouts. Patch them up.
- Confirm bracing: Brace patterns should be correctly installed as per your plan.
- Check joints: Ensure they’re tight and well-sealed to prevent leakage.
- Inspect form release: Apply release agent to ensure concrete won’t stick to forms.
- Verify reinforcement: Check if rebar is properly placed and secured within the forms.
Quick rule: A thorough visual inspection can prevent 90% of blowouts.
Tools and materials checklist
Before pour day, ensure you have all necessary tools and materials. Here’s a quick list to check off.
- Bracing: Cross- and diagonal-bracing should be adequate for your form size.
- Walers: Check if they’re in good condition and ready for use.
- Anchors: Ensure you have enough anchors to secure forms to the footing.
- Fasteners: Nails, screws, or other fasteners should be accounted for.
- PPE: Safety gear like hard hats and safety glasses should be available.
- Repair materials: Have extra lumber, ties, and sealant on hand for last-minute repairs.
- Release agents: Ensure you have enough to apply a coat before pouring.
- Measuring tools: Tape measures, levels, and plumb bobs should be ready.
Quick rule: Missing materials can halt the pour. Check twice.
Coordination: pour rate, crew roles, and weather contingency
Proper coordination reduces pressure on forms and prevents blowouts. Here’s how to manage it.
- Pour rate: Plan a consistent pour rate to avoid overloading forms.
- Crew roles: Clearly define each crew member’s role and responsibilities.
- Communication: Establish clear hand signals or radios for smooth communication.
- Weather contingency: Monitor forecasts. Have plans to cover forms if rain is expected.
- Pour sequence: Plan pour order to minimize wall loads on any single form.
- Edge casing: Have reinforcement ready for potential edge casing failures.
- Concrete slump: Ensure consistent concrete slump throughout the pour.
- Vibration plan: Plan how and where to vibrate the concrete to remove air pockets.
Quick rule: Good coordination prevents pressure spikes that cause blowouts.
Safety Protocols and Emergency Response for Blowouts
Prepare the crew with clear stop-work actions: if a form leaks or blows out, halt pouring immediately, evacuate the area, and isolate the affected section to prevent injury and further material loss. Assign a safety lead who controls access and communications and make sure everyone knows the exclusion zone boundaries and muster point.
Keep first-aid and emergency contact procedures accessible, ensure PPE is worn at all times, and shut off pumps or feeds if it can be done safely to limit flow. After immediate actions, photograph and document the scene, notify the responsible parties, and follow up with a structural engineer or supervisor before resuming work; for detailed medical or rescue steps, follow your site emergency plan and local regulations.
Immediate on-site actions when a blowout begins
A blowout can happen fast. Here’s what to do:
Stop the pour. Shut off pumps or close valves if it’s safe. Don’t risk getting hurt trying to save concrete.
Evacuate nearby workers. Get everyone at least 50 feet away from the blowout area. Keep them there until you’ve secured the site.
Secure formwork. Add extra bracing to prevent further collapse. But be careful – live concrete can still cause injuries or structural damage.
PPE, exclusion zones, and rescue considerations
Safety first. Here’s how to protect your team:
Establish an exclusion zone. Mark it clearly with tape or cones. Keep everyone not involved in the response at least 100 feet away.
Wear PPE. Hard hats, safety glasses, gloves, steel-toe boots, and high-visibility vests are a must. Use fall protection if you’re near elevated forms.
Assign a safety lead. They’ll coordinate access and ensure everyone’s following the plan. Keep rescue routes clear for emergency responders.
Temporary stabilization and controlled concrete recovery
Stop the damage, then recover what you can:
Stabilize the site. Use temporary shoring to limit further movement. If needed, deploy additional braces or props to support weakened areas.
Contain leaks. Use absorbents or sandbags to stop concrete from spreading. Prevent it from entering drains or stormwater systems if possible.
Recover or redirect concrete. If you can do so safely, use pumps or gravity feeds to move remaining concrete back into forms or into a holding area for reuse. But don’t risk injury or further damage trying to save every last drop.
Repair Strategies and Post-Blowout Prevention
After a blowout, secure the area and assess hazards first; don’t rush repairs—stabilize with shoring or temporary bracing so workers can operate safely. Next, run a diagnostic checklist to identify the root cause: misalignment, inadequate bracing, pour rate, or anchor failure.
Choose a repair path based on the damage: temporary shoring to hold the section while permanent repairs are made, patching with compatible mortar or concrete, or recasting an affected portion if the integrity is compromised; check product instructions for suitable repair materials. Finally, implement preventive refinements—adjust bracing patterns, change sequencing, or strengthen joint details—and verify fixes through a documented inspection before resuming pours.
Assessing damage and deciding repair vs. rebuild
The first step after a blowout is to assess the damage. Inspect the affected area thoroughly, looking for cracks, displaced formwork, or other signs of structural compromise.
Consider these factors when deciding whether to repair or replace:
Repair: If the damage is minor and localized (e.g., a small crack or slight displacement), you can likely patch and reinforce. This option saves time and money but may not be suitable for extensive damage.
Replace: For major blowouts, it’s often best to replace the entire affected section. This ensures a strong, uniform structure and prevents future issues. However, this method takes more time and resources.
Fast repair techniques for blocking and shoring
While you plan permanent repairs, use temporary methods to stabilize the affected area. This prevents further damage and maintains safety on-site.
Here are some quick repair techniques:
Blocking: Insert wooden or metal wedges between formwork and adjacent structures to prevent movement. Ensure they’re secure and evenly spaced.
Shoring: Use vertical supports (shores) to brace the affected wall. Place them at regular intervals, ensuring they bear against a solid structure. Temporarily prop them with jacks or other supports until permanent repairs are complete.
Lessons learned: adjustments to bracing and process
After a blowout, review your formwork design and construction process. Identify what went wrong and make necessary adjustments to prevent future issues.
Consider these changes:
Brace pattern: Tighten up your brace pattern, especially at corners and junctions. Use more braces or adjust their spacing for better support.
Process improvements: Implement stricter inspections before pouring. Check formwork alignment, plumbness, and bracing. Ensure all tools and materials are on-site and ready to use.
Cost, Scheduling Impact, and Decision-Making
Deciding how much to invest in bracing and prep comes down to weighing up-front material and labor time against the higher cost and delay of a blowout repair. Identify the major cost drivers for your job—materials, crew hours, inspection time—and compare those to potential rework and schedule impacts so you can make a reasoned choice.
Factor time into the decision: installation, inspections, and any cure or staging windows affect trade sequencing and weather risk; if you’re unsure whether to DIY or hire a pro, match your skill level and risk tolerance to the complexity of the wall and pour. Keep procurement options in mind—rentals, local suppliers, or bulk buys—and plan contingency routes if adjustments or quick repairs become necessary during the project.
Comparing prevention costs vs. repair and waste costs
Blowouts don’t just cost you concrete, they hit your wallet hard in other ways.
Prevention: Bracing materials, labor for installation, and consumables like ties and wedges – these are upfront costs. But think of it as an investment.
Repair: If a blowout happens, you’re looking at wasted concrete, extra labor to fix forms, possible equipment rental extensions. And that’s just the start. Delays mean more idle time for your crew and trades on site.
Minimizing schedule disruption and claims handling
Blowouts can throw a wrench in your project timeline. Here’s how to keep disruptions minimal and document events for claims.
Limit downtime: Have backup plans ready. Keep extra materials on hand. Train your crew to act fast when a blowout starts.
Documentation: Take photos, note the time, and record what happened. This helps with insurance or contractor claims if you need them later.
Communicate: Keep everyone in the loop – your crew, trades, and project managers. Clear communication keeps expectations realistic and prevents misunderstandings down the line.
Conclusion
Safety is the core of every step from setup to finish. When you brace correctly and test your form before the pour, you protect people, the pour’s shape, and the look of the finished work.
Make your plan concrete in a single pass: verify the brace layout matches the recommended patterns, inspect forms for tight joints and clean contact surfaces, secure all braces and fasteners, check vertical supports and stake depth, and run a quick light-load check or short test lift if you can. Before you pour, double-check site prep, level and plumb, clean interfaces, plan pour sequence, and confirm weather and timing fit your schedule.
Two common mistakes to avoid are undersizing or skipping bracing and rushing the setup. Don’t reuse damaged or warped forms, and never skip a test load or inspection. Stay within safe limits, wear proper PPE, and keep the work area clear of hazards. If you’re unsure about any step, stop and re-check the fundamentals rather than guessing. Always treat any sign of movement as a red flag.
If the project grows beyond a simple setup, or you see obvious form damage, or you’re unsure about bracing for a large or complex pour, call in a professional. For most DIY pours, follow the checklist you’ve written, verify each connection, and pour in stages to maintain control. Stay deliberate, stay safe, and you’ll end with a solid, clean pour and less risk of costly mistakes.
FAQ
What is a concrete form blowout and why does it happen on DIY jobs?
A form blowout is when the side of the form fails and bulges or collapses under the wet concrete. It happens when the form isn’t braced correctly, misaligned, or the pressure isn’t controlled as the concrete goes in. Check the manufacturer instructions and your local rules for proper setup before the pour.
Which bracing patterns are most effective at preventing blowouts?
Use bracing every few bays and support every panel so it can’t move. Keep bracing under and along the edges, and don’t leave large gaps unbraced. Match patterns to the wall height and form type, and re-check as you fine-tune alignment.
What are the common DIY weak points that lead to blowouts, and how can I fix them quickly?
Weak points are loose panels, missing or misplaced ties, and improper caster or screw placement. Tighten and re-seat panels, add or reposition bracing, and verify ties aren’t pulling toward the pour. If a section feels soft or springy, stop and secure it before proceeding.
How do I verify alignment and plumb before pouring, especially with ICF blocks?
Check vertical alignment with a level or string line and confirm the blocks are plumb in both directions. Look for uniform gaps and straight joints along the wall face. If anything looks off, straighten it and re-check before concrete goes in.