
Introduction
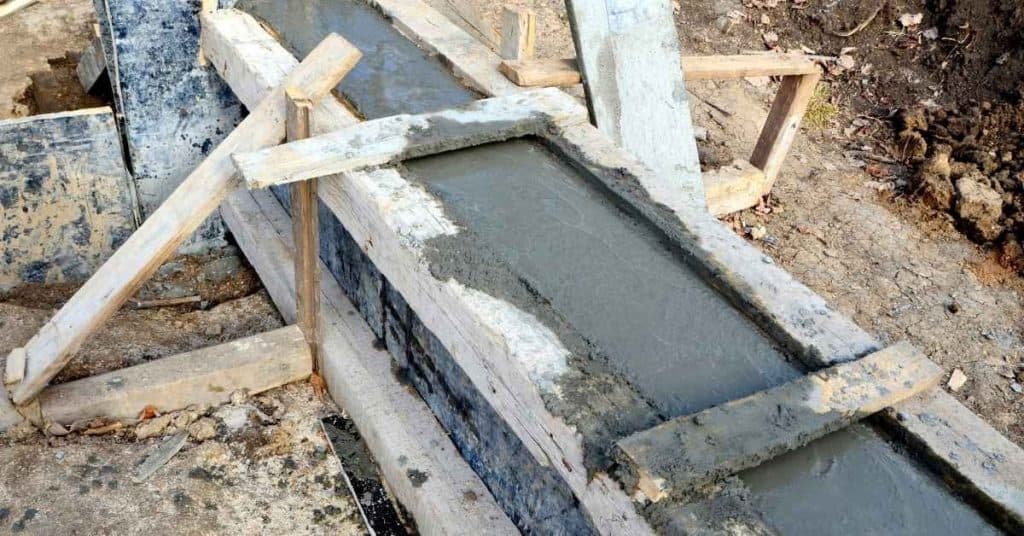
Bracing concrete forms with well-planned 2x lumber patterns prevents bowing and keeps the pour straight.
The guide walks through practical bracing patterns, proper lumber spacing, and quick checks to keep forms straight and secure during a pour.
Key takeaways
- Use 2x lumber bracing on all forms every 2–4 feet.
- Align bracing to load paths with cross-braces at every corner.
- Use wedge anchors and screws; avoid nails for high wind.
- Space braces 24–36 inches; tighter for high pours or tall forms.
- Inspect forms daily; tighten bolts and recheck alignment before concrete pour.
- Remove and re-set formwork promptly after curing to prevent distortion.
- Establish a simple inspection cadence: do a quick check before pour, monitor for movement during pour (every 2–4 hours if possible), and inspect again after curing for any distortion or loosening.
- Long-term maintenance and reusability: clean all components after each job, seal or treat lumber to slow moisture damage, store braces off the ground in dry, stacked conditions, and rotate stock to replace damaged or worn braces to reduce future form failures.
Table of Contents
- Introduction
- Key takeaways
- Why concrete forms bow — causes and risk factors
- Tools and materials checklist for bracing with 2x lumber
- Basic bracing principles and load paths
- Bracing patterns that work with 2x lumber — step-by-step layouts
- Spacing, sizing, and calculation quick-reference for 2x bracing
- Fastening methods and connection details that prevent failure
- Installation sequence and practical tips on site
- Handling special situations: curved forms, corners, and high wind
- Troubleshooting common bracing failures and repair fixes
- Maintenance, storage, and cost-saving tips for durable formwork
- Conclusion
- FAQ
Why concrete forms bow — causes and risk factors
Concrete forms bow when the wet mix pushes on the panels and they bend or bulge. Hydrostastic pressure from the pour, the weight of the concrete, pour height, and weak anchors all push harder than your 2x lumber can safely carry.
If you see bowing starting, stop and fix the bracing now before the wall moves. Weak anchors and under-braced 2x lumber will fail fast under hydrostatic pressure and wet concrete. Proper anchors and solid braces keep the form true and save you from costly rework.
Pressure from fresh concrete and pour rate
The weight of wet concrete can be a real force to reckon with. As you pour, the fluid pressure builds up inside your forms, pushing outward. This is especially true for high pours where gravity adds its own pull. Pouring too fast only makes it worse.
Think about pouring in increments instead. Break up the pour into smaller sections and let each settle before moving on to the next. This gives the concrete a chance to start setting, reducing that outward push. It’s like letting water fill a balloon slowly rather than all at once.
The key is to keep an eye on how your forms are holding up as you go. If they’re starting to bow or shift, slow down and reinforce them before continuing. This way, you avoid the sudden shock of too much weight hitting the formwork all at once.
Lumber limitations and moisture effects
The type of 2x lumber you use can make a big difference. Different species have different strengths, and even within the same wood, the grain direction plays a role in how stiff it is under load.
Moisture content is another factor. Wood that’s too wet will bend more easily than dry wood. As moisture evaporates from the lumber during curing, it can also shrink and twist. This movement adds to the risk of forms bowing or shifting out of place.
To minimize these issues, choose quality lumber with straight grain patterns and a moisture content close to what your local climate will maintain once the concrete is set. Check the wood before you start building your forms; if it feels damp or has visible warping, find something better suited for the job.
Poor connections and uneven backfill
Nailing or screwing your formwork together isn’t just about holding pieces in place. Weak joints can lead to forms bowing under pressure, especially if there’s no continuous support from wales or braces.
Uneven ground or poorly compacted backfill around the foundation also adds stress points where the forms are more likely to shift. If your base isn’t level and solid, you’re setting yourself up for trouble as soon as concrete starts flowing in.
To avoid these issues, make sure all connections are tight and reinforced with additional bracing if needed. Use wales at regular intervals along the length of your formwork to distribute loads evenly. And before pouring, take time to ensure that any backfill is well compacted and level around the perimeter of your forms.

Tools and materials checklist for bracing with 2x lumber
For bracing with 2x lumber, you need the right sizes, fasteners, connectors, braces, stakes, and basic tools. Use common 2x lumber (2x4s, 2x6s, or 2x8s as needed), galvanized nails or screws, metal connectors, and sturdy braces. Keep plenty of stakes and a simple toolkit on hand to set and pin the braces.
This matters because proper bracing stops bowing and keeps the frame square on rough sites. Using the right hardware and timing saves you trim calls and rework, and it keeps people safe when the wind picks up.
Recommended 2x lumber types and sizes
This checklist helps you pick the right wood for your concrete forms, ensuring they stay straight during the pour.
- Use 2x4s for smaller walls; check if spans are less than eight feet. Longer spans risk bowing.
- Select 2x6s for medium-sized walls up to twelve feet wide. Confirm spans fit within structural limits.
- Avoid green wood; it warps and twists under pressure. Check moisture content with a meter or look for dry, seasoned lumber.
- Grade selection matters. Choose ACQ-treated for durability; confirm grade stamps match project specs.
- Add 2x8s for wider spans over twelve feet to distribute load better. Ensure you have enough material on hand.
- Use straight boards; inspect lumber for bends or twists before cutting. Bent wood can cause formwork issues.
- Consider 2x10s for very wide walls over sixteen feet; confirm structural drawings match your choice.
- Avoid knots and splits. Check each board carefully to avoid weak points that could fail under pressure.
Always double-check lumber sizes and quality before cutting. Poor choices lead to formwork failures.
Fasteners, connectors, and tensioning hardware
This checklist ensures you have the right tools for securing your concrete forms tightly without damaging them.
- Nails or screws; use 16d nails or #10 x 2-1/2 inch deck screws. Confirm fasteners are long enough to penetrate into backing material.
- Carriage bolts; for heavy-duty connections, check bolt length and diameter match your lumber thickness.
- Hinges and brackets; use galvanized steel hinges; confirm they fit the wood width and spacing.
- Turnbuckles; adjust tension as needed. Check if you have enough to brace all sides of forms evenly.
- Carpenter’s clamps; for temporary bracing, ensure clamps are strong enough to hold lumber in place.
- Lag screws; use 1/2 inch lag bolts; confirm they fit your wood thickness and have washers.
- Steel straps; secure forms together. Check if straps can withstand the concrete pressure without breaking.
- Bolted connectors; for permanent connections, ensure all parts are compatible and securely fastened.
Always verify hardware fits your project needs before starting to avoid mid-job shortages or failures.
Optional tools for accuracy and safety
This checklist includes items that help you install forms accurately and safely, reducing mistakes and injuries.
- Bracing jigs; use adjustable braces to keep forms straight. Confirm they fit your lumber sizes.
- Digital levels; check horizontal and vertical alignment. Ensure accuracy with regular calibration checks.
- Stringlines; mark form positions accurately; confirm lines are taut and level before cutting.
- Safety glasses; protect eyes from flying debris during hammering or drilling.
- Hearing protection; use earplugs or earmuffs to guard against loud noises.
- Steel-toed boots; wear them for foot safety on the job site. Confirm they fit properly and are comfortable.
- Gloves with grip; prevent hand injuries while handling tools and materials.
- Hard hats; protect your head from falling objects; ensure a snug, secure fit.
Always wear proper PPE and use accurate measuring tools to avoid mistakes and stay safe on the job site.
Basic bracing principles and load paths
Bracing is how the load moves from the plywood and forms into the ground and the building beside it. Make a continuous path from the slab, to the braces, to the anchors. Use triangles wherever you can; straight lines fail under pressure.
If you skip braces or fake them, you’re inviting wall bow, wobble, or collapse. Proper bracing keeps forms square and the floor level, even when the wind or soil shifts. Do it right the first time and save yourself a headache later.
Triangulation and diagonal bracing basics
Diagonal braces are the backbone of any concrete form system. They lock your forms into place by preventing them from racking, which is when the forms twist or bow under pressure. The key to effective diagonal bracing lies in triangulation.
To set up a diagonal brace, you need two points: one at the top of the wall and another at the bottom. This creates a triangle that distributes load evenly across your formwork. Use 2x4s or 2x6s for these braces, depending on the height and pressure of your pour.
When sizing your diagonal braces, aim to keep them as short as possible while still providing adequate support. A good rule is to have a brace length no more than twice the height it’s supporting. This keeps the angle sharp enough to resist racking forces effectively.
Remember, the goal of triangulation isn’t just about preventing bowing but also ensuring your forms stay plumb and true throughout the pour. Properly angled braces will keep your walls straight and s