
Introduction
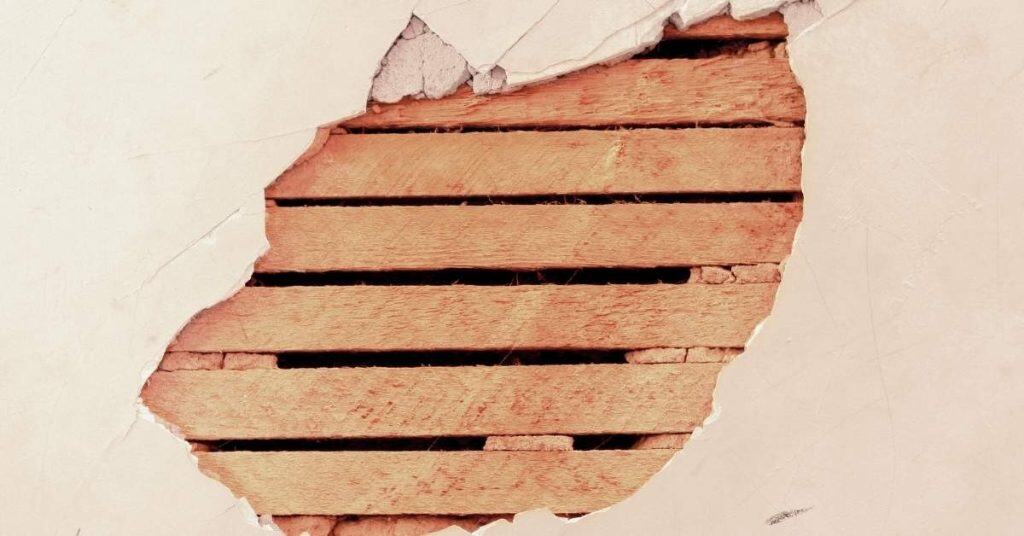
Plaster has detached from lath when you notice sagging, cracking, or hollow-sounding patches behind the surface.
The guide walks you through identifying common signs, understanding the risks, and learning practical steps you can take to evaluate the extent of damage and plan safe, lasting repairs.
Key takeaways
- Plaster keys bind plaster to wood lath, preventing cracking and detachment.
- Detachment signs include hollow spots, cracking, and loose plaster sheets on walls.
- Inspect edges and corners for loose keys or bulging plaster during tap tests.
- Simple home tests: gently tap, poke with dental mirror, listen for hollow sounds.
- If plaster detaches widely, consult a licensed pro and avoid drywall patching.
- Temporary fixes: infill with plaster washers or mesh while scheduling repairs.
- Tool checklist: putty knife, pry bar, level, hammer, goggles, dust mask, caulk.
Table of Contents
- Introduction
- Key takeaways
- What are plaster keys and why they matter
- Common causes of plaster detachment from lath
- Visual checkpoints to inspect for detachment
- Simple diagnostic tests you can do at home
- When to call a professional and what to expect
- Repair options: temporary fixes vs. permanent solutions
- Tools and materials checklist for inspection and DIY repairs
- Cost, timeframes, and decision-making guidance
- Conclusion
- FAQ
What are plaster keys and why they matter
Plaster keys are the embedded grips where plaster locks onto the wooden lath, creating a secure bond. They help hold plaster in place and maintain the wall’s integrity as it cures.
If keys fail, plaster can crack, sag, or detach from the lath, signaling compromised wall integrity. Early signs like looseness, popping sounds, or visible gaps alert you to repair before larger sections fall.
Anatomy of a plaster key
Plaster keys are the hooked bits of plaster that form behind the lath and lock the finish coat to the wall. They form when wet plaster squeezes through gaps and grips the rear of the lath as it cures.
Hand-formed keys from horsehair or lime mixes tend to be irregular and chunky. Machine or modern gypsum keys are more uniform and thin but still must fully engage the lath to work.
Healthy keys are continuous, show no large voids, and break cleanly away with force rather than crumble to powder. If keys are thin, cracked, or detached, the plaster is likely to delaminate.
Typical plaster and lath materials by era
Materials changed over time and that affects how well keys form and hold. Know the era so you can predict common failure modes and pick the right repair approach.
- Early lime plaster Common in 18th–19th century work, it uses lime and hair for tensile strength. It forms large, fibrous keys but takes longer to cure. Wrong modern mixes cause cracking and poor bond.
- Horsehair mixes Popular through early 1900s, horsehair adds pull strength. Look for cohesive, flexible keys when intact. Replacing hair with synthetic binders can lead to brittle failure and staining.
- Gypsum plasters Became common mid-1900s for faster set times. They form cleaner, thinner keys; check for complete penetration through lath gaps. Using gypsum over wet conditions can cause soft, weak keys.
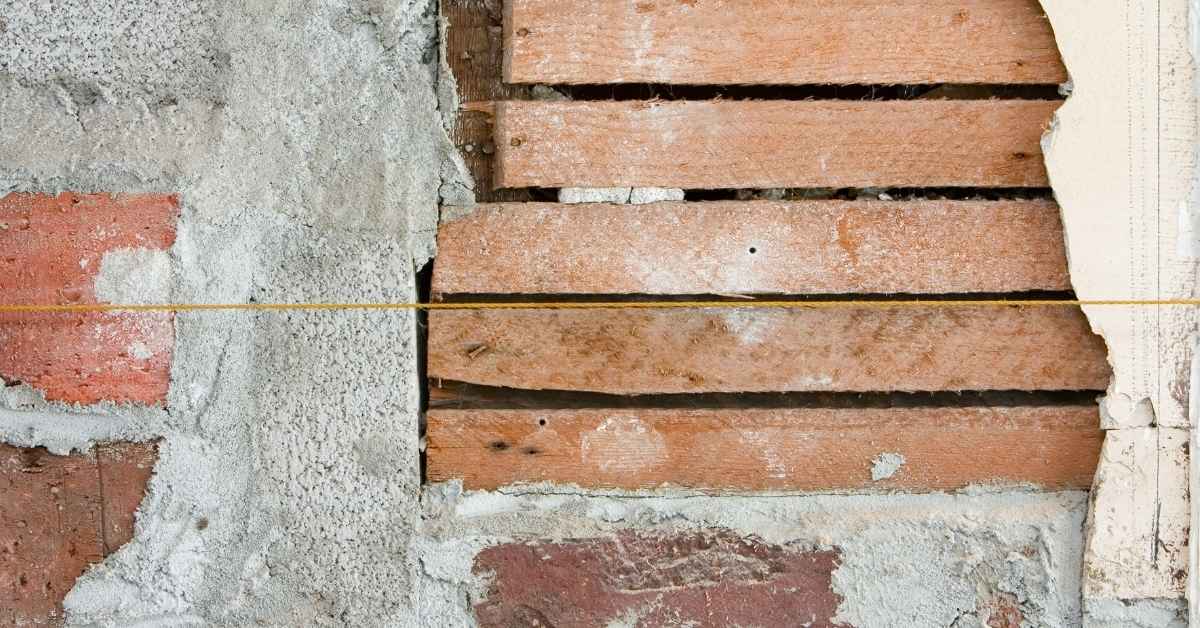
- Wood lath Narrow strips nailed to studs, used for centuries. Keys grab the back of the wooden slats; look for tight-fit nails and minimal rot. Rot or wide gaps let keys pull out and plaster sag.
- Metal lath Widespread since the early 20th century, expanded or woven lath gives many anchor points. It needs corrosion-free surfaces and the right plaster type. Rusted lath causes staining and loss of bond.
- Gypsum board underlays Late-century renovations sometimes used blueboard or backing board. These require veneer plasters formulated for board-to-plaster bonding. Using wrong veneer mix leads to delamination and edge cracking.
Common causes of plaster detachment from lath
Common causes of plaster detachment from lath include moisture, vibration, structural movement, poor original application, and aging, all of which weaken the plaster keys. When keys lose grip, plaster cracks and pulls away from the lath. Understanding these factors helps you spot trouble before major damage occurs.
For a DIYer, recognizing moisture sources, looking for movement, and evaluating old workmanship helps you plan effective repairs and reinforcement. Addressing these issues early protects the wall system and reduces repeat failures. Understanding which factor is at play guides your repair method and materials.
Moisture and water damage
Water is the number-one enemy of plaster keys. Humidity, roof or plumbing leaks, and rising damp all soften gypsum, wash out lime binders, and dissolve the thin grip that keys need to hold.
Capillary action draws moisture into the lath-plaster interface. Over time the keys corrode or crumble and the plaster pulls away in sheets. Look for stains, efflorescence, and soft spots near windows, pipes, and exterior walls—those are the usual failure points.
Structural movement and vibration
Every building moves a little. Settling foundations, floor joist bounce, and even heavy foot traffic transfer stress into the plaster keys that hold the coat to the lath.
Repeated flexing fractures the keys at their thin necks. Nearby construction, demolition, or heavy machinery can create vibration spikes that break already-weakened keys. Expect hairline cracks that lengthen into separated panels where movement is the culprit.
Poor installation and incompatible materials
Wrong mixes, thin coats, or mismatched layers set the stage for key failure. Material choice and application matter as much as later stresses.
- Thin scratch coat — If the first coat is too thin it won’t reach through the lath to form keys. Spec: 3/8″–1/2″ where required. Tip: Follow original thickness or keys won’t develop and plaster will crack.
- Insufficient keying — Missing or shallow key formation leaves large areas unsupported. Spec: ensure plaster squeezes through lath gaps. Tip: Check backs of removed samples to confirm keys exist.
- Wrong binder mix — Using the incorrect gypsum-to-sand ratio weakens the set. Spec: match historical mix or manufacturer’s recommended ratios. Tip: Avoid modern gypsum mixes where lime-based originals were used; they can crack and stain.
- Incompatible top layers — Applying modern drywall or heavy finishes over old plaster changes load paths. Spec: use compatible adhesives and isolation where needed. Tip: Don’t hide detachment under new finishes—address it first.
- Poor curing — Fast drying or freezing during cure prevents full strength. Spec: cure at recommended temperature and humidity. Tip: Keep new work protected for the first week to avoid weak keys.
- Wrong fasteners — Long nails or improper staples can split lath or prevent key formation. Spec: use nails sized for lath and keep spacing correct. Tip: Replace damage; don’t rely on added fasteners to fix bad keys.
- Contaminated surfaces — Dust, paint, or oil on lath stops bonding. Spec: clean lath to a sound surface before plastering. Tip: Remove coatings or roughen surfaces to restore adhesion.
Visual checkpoints to inspect for detachment
Visual checkpoints help you spot ceiling and wall detachment early. Look for bulging areas, hairline cracks, and shadow lines along seams, plus any odd sound changes when you tap or knock on the surface.
Catching these signs early lets you plan repairs before serious damage develops and keeps a DIY project safer. Being systematic on inspections saves time and helps you communicate issues with contractors. It also reduces the risk of unexpected collapse and costly fixes later.
Crack patterns and what they indicate
Not all cracks mean the plaster has lost its key. Hairline, random shrinkage cracks are common and usually follow no clear route. They’re thin, shallow, and won’t change much over time.
Running cracks, stair-step cracks along seams, or long horizontal lines that trace the lath pattern point to movement or separation. Those patterns suggest the plaster is pulling away from the lath or the lath itself is shifting.
Tip: Watch for cracks that widen after vibration or seasonal humidity swings. If cracks reopen or propagate, plan for a closer inspection — they often mark delamination or failing keys.
Bulging, sagging, and discoloration
A localized bulge or a sagging panel is a strong visual cue that the plaster has detached. Bulges feel soft or springy when pressed and usually sit over a patch of missed or failed keys.
Water stains, peeling paint, or dark discoloration near a bulge increase the odds of delamination. Moisture breaks down keys and the bond between layers, so stains plus distortion are a red flag.
Quick check: Mark the edge of a bulge and recheck in a week. Growth in size or staining change means active deterioration and likely removal and repair.
Using light and touch for closer inspection
Raking light across the surface reveals shadow lines where plaster has started to separate. Hold a flashlight at a low angle and scan for subtle relief, hairline shadow gaps, or waves in the finish.
Tap the surface with a knuckle or the handle of a screwdriver. A hollow, resonant sound indicates lost contact with the lath. Solid, dull sound usually means the key is intact.
Probe gently: Use a small awl at a crack or edge to test for movement. Don’t force it — you only need to confirm hollowness or give. If you find hollow spots, plan for removal and proper reattachment.
Simple diagnostic tests you can do at home
You can perform simple, safe, non-destructive tests at home to gauge a material’s condition. Use methods like tapping to listen for hollow sounds, raking light to reveal flaws, and tiny exploratory holes to peek beneath the surface. These checks help you spot obvious issues without damaging the material.
These quick tests give you immediate clues about interior problems, helping you decide when to bring in a pro. They save time and prevent bigger damage by guiding where to focus further inspection on a DIY jobsite.
Tapping (sound) test methodology
Stand close to the wall and work in a grid about 6–12 inches apart. Use the handle of a screwdriver or a small rubber mallet and tap each point with a consistent, light blow. Mark hollow-sounding spots with a pencil or painter’s tape so you can map the pattern.
Hollow tones are high and ringy; solid areas give a dull thud. Pay attention to transitions—long runs of hollow sound usually mean the plaster has lost its keys over multiple lath bays. Keep notes as you go so the map matches what you see later if you open a test hole.
Small exploratory hole technique
Pick a low-visibility spot inside a hollow area identified by the tapping test. Using a 1/2″ drill bit or spade, make a small hole through the plaster just large enough to peer inside. Aim between lath seams, not directly through a stud or diagonal backing.
Look for intact plaster keys poking behind the lath and any gaps or loose material. If you need to probe, use a hooked pick or screwdriver carefully. Patch the hole afterward with a small backing (expanding foam for deep voids is overkill—use strips of mesh and quick-setting patching compound). Smooth, feather, and prime to hide the repair.
When a moisture meter or thermal camera adds value
Use a moisture meter when water damage or hidden leaks are suspected. Take baseline readings on a known-dry area, then compare suspicious spots. Readings substantially above the baseline—especially consistent high readings across an area—point to wetting that can soften keys and cause detachment.
A thermal camera helps find cold or damp areas and large delaminations you can’t hear. Look for temperature deltas of several degrees from surrounding plaster or irregular thermal patches. Both tools don’t replace a physical check but will prioritize where to drill or open a repair and reduce guesswork.

When to call a professional and what to expect
Know when to call a professional: if you’re dealing with large damaged areas, sagging or unsafe ceilings, or any sign of structural problems, bring in a licensed inspector. A pro will perform a thorough assessment, describe the conditions, and explain what needs to be done.
Expect a typical process: a site visit, measurements, photos, and a written report with recommendations and next steps. Understanding the results helps you plan safe repairs, estimate costs, and protect yourself and others on the jobsite.
Structural risk signs that require immediate attention
Any large, sagging section of plaster—especially on a ceiling—or areas where plaster is actively falling away from the lath are red flags. Exposed lath, long horizontal separations at joints, or chunks of plaster that drop with little provocation mean the material is no longer supported and can come down without warning.
Also watch for new, rapidly growing cracks that cross multiple lath bays, loud creaks or popping, and visible gaps between the wall or ceiling and the framing. If you see these signs or there’s a safety risk to people below, do not delay—evacuate the immediate area and call a professional.
Typical professional inspection and repair plan
A contractor will start with a prioritized visual inspection and targeted probing to map loose areas and check for moisture or framing damage. They’ll document the findings, note structural concerns, and rank zones by risk so the worst spots get attention first.
Next comes stabilization—temporary props, netting, or spot removal to prevent collapse—followed by a decision between repair (re-bonding or patching) and removal with re-lathing or drywall. The pro will present a written scope, cost estimate, and timeline. Expect them to stabilize first, then repair or replace based on safety, underlying damage, and cost-effectiveness.
Repair options: temporary fixes vs. permanent solutions
Repair options come in two speeds: quick stabilization methods for immediate stability and longer-term fixes that rebuild the surface. Temporary fixes like plasterpins and adhesive injections stop the drift or cracking quickly. For lasting results, you may plan partial re-plastering, float-and-brown, or even removal and a new substrate.
Quick fixes can buy time and reduce damage while you plan, but they aren’t a substitute for proper repair. Choosing the right approach saves effort and money by matching the fix to the problem, materials, and use of the space.
to move from quick stabilization to a durable repair follows these steps in order: assess condition, select method, prep site, implement fix, cure and test, then finish and maintain. Below is a practical sequence you can reference section by section while staying within the current headings.
When adhesive injection or reattachment works
Adhesive injection is a good choice when the plaster is intact but has detached from the lath in localized pockets. Look for hollow-sounding areas or small loose spots found with tapping or a probe; when the plaster hasn’t cracked through, an injected epoxy or polyurethane can bond the gap back to the substrate.
Epoxy gives a hard, long-lasting bond for dry areas and structural backing. Polyurethane foam is better where you need some gap-filling and moisture tolerance. Expect a professional-grade injection to last many years if the underlying cause — moisture, movement, or poor adhesion — is fixed.
Safety and prep: wear eye protection and a respirator or dust mask. Clear the area of loose debris, protect floors, and seal off the work area to minimize dust. Check for hidden electrical or plumbing behind the plaster before drilling. Use a drill with a masonry bit suitable for lath and plaster; avoid overtapping that could crack surrounding areas.
Do not rely on injection if the plaster is crumbling, heavily cracked, or the lath is missing or rotten. In those cases the adhesive will not have enough sound material to hold onto, and you’ll waste time and money.
Materials: epoxy or polyurethane injection resin, injection ports, mixing cups, caulk or barrier tape to seal boundaries, PPE.
Patching vs. full-panel replacement
Patch repairs are economical when damage is limited to small areas and the surrounding plaster is firmly attached and stable. Use patches when the lath and keys are sound, surface cracks are localized, and you can feather new plaster or joint compound into existing work without obvious transitions.
Choose full-panel replacement when detachment is widespread, keys have failed over a large area, or moisture and lath damage are present. Stripping back to lath or installing new drywall gives a clean, durable surface and prevents repeated callbacks. It’s the right call when the repair area will otherwise show through or continue to move.
Stepwise approach for patches: 1) isolate the damaged zone with masking, 2) remove loose plaster to a clean edge, 3) dampen the substrate to reduce suction, 4) apply bonding agent if recommended by product, 5) apply patch material, 6) feather edges and smooth with skim coat, 7) cure and recheck for movement or cracks.
Stepwise approach for replacement: 1) determine extent, 2) remove damaged plaster and lath as needed or detach to reveal solid substrate, 3) install new lath or drywall, 4) apply base coat and finish plaster or joint compound, 5) feather and finish to blend, 6) cure, then inspect for movement or moisture issues.
Rule of thumb: if more than one panel’s worth (roughly a few square feet per panel) or multiple joins are involved, lean toward replacement rather than repeated spot patches.
Plaster pinning/anchoring technique overview
Plaster pinning uses galvanized or stainless pins (or screws with washers) to pull the detached plaster tight to the lath. Technicians drill through the plaster into the lath, insert the pin or screw, and set it so the face is flush or slightly countersunk before filling. It mechanically restores contact when adhesive alone won’t reach gaps.
Pinning works best on medium-size hollows where the plaster still has keys and the lath is solid. It’s fast and durable and lets you avoid full removal. Expect to install several fasteners across a hollow and then skim or patch the heads for a smooth finish.
Safety and sequencing: mark existing lath screws and avoid drilling into electrical boxes or plumbing. Use a stud finder or magnet to identify lath spacing. Maintain a light touch to avoid cracking surrounding plaster. After pinning, allow the patch material to cure fully before applying final finish coats.
Limitations: avoid pinning where plaster is powdery, lath is missing, or movement is ongoing. In those cases pins won’t hold and a more extensive rebuild is necessary.
Tools and materials checklist for inspection and DIY repairs
This checklist lists the essential tools, safety gear, and replacement supplies you’ll need to diagnose issues and perform small repairs. It covers hand tools, fasteners, testing equipment, and basic consumables.
Having the right kit on hand reduces delays, improves safety, and helps you complete tasks without repeated trips to the hardware store. Use it as a practical guide on the jobsite to plan tasks, verify you have what you need, and stay organized during diagnostics and repairs.
Safety equipment and prep materials
Keep people and the house safe before you touch plaster. The right PPE and simple containment cuts cleanup time and health risk.
- Respirator (N95/P100) Filters dust and old plaster particles. Use N95 for light work, P100 for heavy sanding or demo; replace cartridges per manufacturer. Tip: buy a box of N95s for under $30; P100 cartridges may be pricier or rentable with a supplied-air setup.
- Eye protection Safety glasses or goggles protect against chips and dust. Choose sealed goggles when sanding or drilling. Warning: normal glasses don’t stop fine dust.
- Disposable coveralls Cheap suits keep dust off clothes and skin. Use ones with zip hood for full coverage; dispose after heavy demo. Tip: a pack of 5 runs $10–$20.
- Gloves and knee pads Protect hands and knees during inspection and repairs. Nitrile or leather for handling tools; soft knee pads for prolonged work. Warning: gloves reduce dexterity—switch to thin nitrile for fine tap tests.
- Drop cloths and tarps Catch debris and protect floors and furniture. Use heavy-duty canvas for reuse, plastic for quick containment; tape edges to prevent trips. Price cue: plastic sheeting rolls $10–$25.
- Plastic sheeting & tape Create containment zones to control dust spread. 6 mil poly and contractor tape work well; seal doorways and vents. Tip: rent a negative-air fan for large jobs if available.
- HEPA vacuum or dust extractor Removes fine plaster dust at the source. A shop vac with a HEPA-rated filter is fine for small jobs; rent a dust extractor for major work. Expect a small HEPA vac for $80–$200, extractors higher or rentable.
- First-aid & fire extinguisher Minor cuts and sparks happen. Keep a stocked first-aid kit and a 2A:10B:C extinguisher nearby. Safety foreman tip: know emergency exits and phone number for help.
Diagnostic and basic repair tools
Use durable, familiar tools for diagnosis and small reattachments. Pick tools that match the job: light inspection or basic pinning and patch work.
- Tapping tools set Includes hammer, mallet, and small screwdriver for sound tests. Use a wooden mallet for gentle taps and metal for firm checks. Tip: avoid heavy blows that damage flimsy plaster.
- Moisture meter Detects elevated moisture behind plaster. Choose a pin/scan combo for both surface and in-wall readings. Rental option: handheld meters $40–$200; rent if only occasional use.
- Cordless drill Drives screws, installs anchors, and drills pilot holes. Use variable speed with low torque for plaster; keep 1/16″–1/8″ bits handy. Warning: high speed can crack brittle plaster.
- Injection adhesive kit For reattaching plaster to lath without full removal. Kits include cartridge gun and epoxy or polyurethane adhesive; follow cure times. Price cue: inject kits $20–$60; professional adhesives cost more.
- Plaster pins & tool Metal pins or screw anchors to hold loose plaster until adhesive sets. Use pins spaced per manufacturer and a pinner or screwdriver to set them. Tip: pins are inexpensive; buy extras for testing placement.
- Drywall compound & patch plaster For filling cracks and finishing patched areas. Use a lightweight joint compound for skim coats and a setting-type plaster for quick repairs. Warning: match drying times to room humidity.
- Setting plaster (browncoat) Stronger mix for shallow dove-tailed repairs and re-skim. Choose a fast or slow set based on room temperature. Job tip: small tubs cost $10–$25; mix only what you can apply in working time.
- Finishing tools kit Trowel, hawk, knives, corner tools and sanding block. Proper steel knives (6″–12″) give cleaner finish and less sanding. Tip: keep a hand sander and 120–220 grit for final smoothing; respirator required when sanding.
Cost, timeframes, and decision-making guidance
DIY repairs usually cost less upfront, but you’ll trade time and potential mistakes for the savings. Ballpark costs range from a few tens to a couple hundred dollars in parts for DIY, while professional repairs can run into several hundred dollars or more, depending on complexity. Timelines can vary from a same-day or short DIY project to longer waits when scheduling a pro.
To decide, weigh your skills, tool access, and how critical the outcome is. Consider factors that drive price: parts availability, required hardware, and whether specialized labor or warranty coverage is needed. A simple, low-risk task may be worth DIY, while complex or safety-sensitive jobs are better handled by a pro.
Typical cost ranges by repair type
Adhesive injection (syringe or pressure-inject bonding) is the least expensive route when the plaster is only slightly detached: expect roughly $50–$200 for DIY materials and $150–$600 for a contractor per small area. Costs rise with access difficulty and the need for multiple injections.
Plaster pinning plus patching to repair local failures commonly runs $100–$400 DIY for parts and patch materials, or $300–$1,200 for a tradesperson depending on how many pins, skim coats, and finishing passes are required. More texture or paint matching pushes the price near the top end.
Re-plastering a full panel or performing substantial skim coats is typically $300–$1,000 DIY (if you have experience) or $800–$3,000 professionally, depending on square footage and complexity. Full lath-and-plaster replacement is the most expensive: plan $1,200–$4,500+ for contractors for a single room wall or ceiling, with wide variance for historic lath, unusual heights, or plaster salvage work.
Project timeline and disruption expectations
Small adhesive injections or spot pinning can be a same-day job for the work itself, but count prep and cleanup: 1–2 hours prep, 1–3 hours for the repair, then time for the compound to cure. If paint or texture needs to match, add 24–72 hours for drying between coats. Expect dust and limited access to the room during work.
Re-plastering or large skim coats expand the timeline. Plan for 1–3 days of active work across multiple visits to allow each coat to set. Full panel replacement or lath repairs often take 2–5 days from demo to final finish, with the heaviest disruption on demolition and reinstallation days.
If hiring professionals, schedule buffers: many contractors book out a week or more and may spread work over multiple days to allow proper curing and finishing. Prepare to move furniture and seal off adjacent areas for the duration to protect belongings and control dust.

Conclusion
Plaster keys matter for safety, durability, and how your walls look once you’re done. If the key system is failing, you’ll see telltale signs fast and you’ll pay later in damage and bigger repair costs.
First, do a quick, practical check: look for loose or hollow-sounding plaster, tap test with a plastic hammer, probe gently with a thin scraper in suspect spots, and note where moisture or cracking shows up. Move in a logical path—start at corners, around windows and doors, then check larger flat sections—then plan your next move based on what you find, not guesswork. If you decide to test and repair, work from a small area first to prevent wider damage, and keep a simple tools-and-materials checklist handy as you go.
Common mistakes to avoid are prying or chiseling too hard, skipping moisture checks, and postponing repairs that look minor but are actually signs of a bigger problem. Safety rules: wear eye protection and a mask when in doubt, test small areas before escalating, and keep the work area well-ventilated. Don’t mix repair approaches in the same spot—what’s temporary won’t fix a detached plaster system, and irreversible changes can create new failures.
If you see large sections detaching, persistent moisture, or you’re unsure about the extent, call a professional. They’ll assess the lath-and-plaster system, outline a repair path, and avoid pushing you into inappropriate fixes. You’ve got the knowledge and the plan—trust the process, stay safe, and move methodically toward a solid, lasting wall.
FAQ
How can I tell if plaster has detached from the lath?
Look for hollow spots when you tap the wall. If it sounds dull and you can press in with your finger or a pry bar and it moves, the plaster is likely detached from the lath.
Is it safe to push on suspect areas to test for detachment?
No. Pushing on loose plaster can cause chunks to fall and hurt you. Use a small hammer tap test from a distance and only poke with a thin tool if you must.
What should I check before repairing plaster issues?
Check the lath behind the plaster. If the wood lath is warped, broken, or squeaks with movement, you have bigger problems. Also look for water stains, which mean moisture is loosening the plaster.
What’s the simplest fix for detached plaster?
Small areas can be re-adhesed with plaster repair compound or patching plaster. For large sections or water damage, you’ll likely need to replace the lath and re-plaster the wall. Don’t skip ground-up repairs—detached plaster won’t hold long if the lath is bad.