
Introduction
Reattaching loose plaster can be done without a full demolition by choosing between washers and adhesive methods.
You’ll learn how each approach works, what signs indicate a repair is appropriate, and practical steps you can follow to secure plaster safely and effectively.
The guide walks through common materials, simple checks, and general tips to help you decide which method fits your wall and skill level.
Key takeaways
- Evaluate recurrence and structure to decide repair vs full demolition.
- Plaster washers are ideal for loose panels near adjacent studs.
- Adhesives work well for edge lifts and limited access situations.
- Prepare clean surfaces, avoid moisture, and follow manufacturer cure times.
- Check for hollow backing with tapping; route around decorative plaster hazards.
- If in doubt, consult a pro to avoid future panel failures.
Table of Contents
- Introduction
- Key takeaways
- When to repair instead of demo
- Overview: Washers (plaster washers) method
- Overview: Adhesive methods (injection and surface)
- Tools and materials checklist
- Step-by-step: Installing washers and re-securing plaster
- Step-by-step: Injecting adhesive to re-bond plaster
- Comparing outcomes: durability, appearance, cost, and time
- Troubleshooting, visual checkpoints, and when to call a pro
- Conclusion
- FAQ
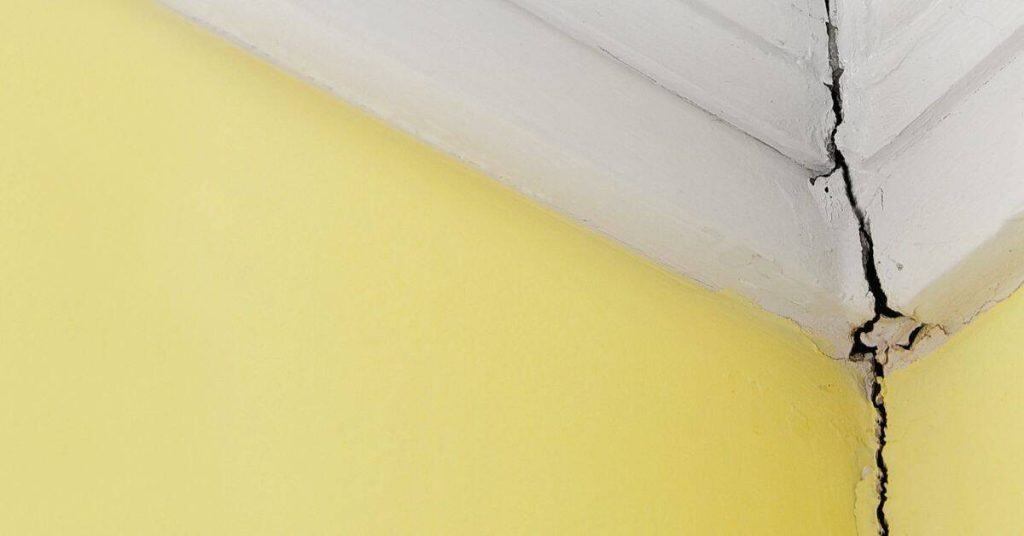
When to repair instead of demo
If the plaster is still solid and the lath is intact, repair the loose spots in place. Only demo it when the damage is widespread and the substrate is failing.
Before you start, check the substrate and any movement signs, and steer toward repairs that restore grip. Skipping this check can hide a structural issue, cost more, and make the wall fail later.
A clear decision protocol: Use this quick flow to decide between repair vs. demo. If you answer “Yes” to any of the major criteria below, consider demo or substantial substrate work before patching. If you answer “No” to all, proceed with repair and patching as described in the following steps.
- Is the plaster solid and the lath intact across the area? Yes = repair likely; No = consider demo/replacement of the affected panel.
- Are there hollow sounds or visible voids that indicate loose plaster beyond the repair area? Yes = map and assess; if widespread, plan repair in stages or demo; if localized, repair with proper adhesive and anchors.
- Is there active moisture, mold, or water damage? Yes = address moisture source and replace damaged plaster/substrate; repair-only may fail later.
- Is the substrate showing movement, significant cracking, or base compaction issues? Yes = demo or major underpinning/repair of substrate before plaster work.
- Are the lath strips severely corroded, rotten, or detached? Yes = repair is unlikely; demo and replace lath may be required.
If you answered No to all questions, proceed with in-place repair as outlined below. If you answered Yes to any, plan to address those issues first or opt for a controlled demo to ensure long-term stability. See the individual checks below for more details and to confirm the best path forward.
Assessing the plaster condition
To decide if your plaster needs repair instead of a full demo, start by tapping around with a hammer. Listen for hollow sounds; these indicate loose plaster that might need fixing. Use a probe to map out any hollow areas and mark them on a diagram.
Next, measure the cracks. If they’re hairline thin or less than an inch wide, you can likely patch them up without major issues. But if there are large gaps or widespread cracking, it’s probably time for a redo. Don’t forget to check base compaction; loose foundations mean bigger problems down the line.
Avoid the temptation to just slap on new plaster over old cracks and voids. It’s like putting a bandaid on a broken leg—it looks okay at first but won’t hold up long-term. Take your time, assess thoroughly, and make an informed decision.
Substrate and lath inspection
This checklist helps you decide if the existing substrate and lath are worth repairing or need to be demoed. Use it when assessing plaster condition.
- Lath type: Check if wood or metal lath is present. Look for gaps between strips, indicating old repairs that may weaken structure. If unsure, skip this step and risk structural issues later.
- Lath spacing: Measure the distance between lath strips; it should be consistent (usually 1/4 to 3/8 inch). Inconsistent spacing can cause plaster cracks over time.
- Plaster thickness: Use a ruler or feel with your hand for at least 1-inch thickness. Thinner plaster may not support new repairs effectively, leading to future issues.
- Mold presence: Look for dark spots or musty smells indicating mold growth. Mold can weaken the substrate and cause health risks if ignored.
- Moisture damage: Check for water stains or bubbling plaster which indicates past leaks. Moisture-damaged areas often need full replacement to prevent future problems.
- Lath condition: Inspect lath strips for rot, rust, or breaks. Damaged lath won’t support new plaster properly and can lead to structural instability.
- Plaster adhesion: Tap the wall lightly with a hammer; loose areas should be noted as they may need reattachment or replacement. Skipping this step risks future cracks and repairs.
- Substrate flatness: Use a straightedge to check if substrate is level. Uneven surfaces can cause plaster to crack, requiring more work later on.
Quick rule: If any major issues are found with lath or substrate condition, consider demoing instead of repairing for long-term stability.
Safety and building code triggers
If you find that your plaster walls are compromised, safety should be your top priority. Don’t just patch up the surface; check for electrical wires and plumbing pipes behind the wall. If there’s a chance of damaging these systems during repair work, it might be safer to tear down the old wall completely.
Local building codes can also dictate when you need to go beyond simple repairs. Sometimes, even if your plaster looks fixable, local regulations may require you to bring the entire structure up to current standards. This could mean replacing outdated electrical systems or reinforcing weak points in the foundation that aren’t visible from a surface inspection.
Before starting any major work, it’s crucial to consult with a professional inspector who can advise on both safety and compliance issues. Ignoring these aspects can lead to costly fines or unsafe living conditions down the line.
Overview: Washers (plaster washers) method
Washers (plaster washers) are used to reattach loose plaster to lath or drywall. The method uses screws and washers to bite into solid backing and pull the plaster tight as patch material dries.
This gives a durable hold and helps prevent future cracking when done right. Use the right washer size, set screws to the proper depth, and work gradually instead of yanking; cutting corners always costs you later.
Types of washers and fasteners
When it comes to plaster washers, you’ll mainly deal with three sizes: #8, #10, and #12. These are the go-to choices for most residential projects. Always check base compaction before deciding on washer size.
Screws come in two main types: self-tapping and pan head screws. Self-tappers are great for quick work, but pan heads offer better grip and stability. Use self-tapping for fast setups and switch to pan heads when you need a secure hold.
For different substrates like concrete or brick, don’t just rely on washers alone. Consider using specialty anchors such as sleeve anchors or masonry screws. These provide extra strength where regular washers might not cut it.
Pros and cons of washers
Washers, also known as plaster washers, offer a quick fix for securing objects to concrete or plaster walls. Here’s what you need to know about their strengths and weaknesses.
Pros
- Mechanical hold: Provides immediate grip without drilling deep holes.
- Quick installation: No time wasted on setting anchors or waiting for mortar to set.
- Cost-effective: Cheaper than specialized fasteners.
- Suitable for light loads: Ideal for small items like pictures and mirrors.
Cons
- Visible spots: Washers can be noticeable on smooth walls, ruining aesthetics.
- Limited reach into powdery plaster: May not work well in older or damaged surfaces.
- Risk of damage: Can crack the surface if over-tightened.
- Short-term solution: Not durable for heavy-duty applications.
Washers are best used when you need a quick, temporary fix and don’t mind some visible hardware. For permanent or heavy installations, consider other methods like anchors or screws with mortar.
Overview: Adhesive methods (injection and surface)
Adhesive methods fall into two main categories: injected adhesive with ports, and surface-applied bonding compounds. There is also contact adhesive for fast grabs. Pick the right method for the job and follow the product instructions.
Injected systems need proper port placement and clean edges to work. Surface adhesives demand clean, dry surfaces and patient curing. If you rush or skip prep, the bond will fail.
Practical port placement and sequencing guidelines:
- Port pattern: use a symmetrical grid or staggered rows depending on the plaster crack or void distribution. Typical starting points are a row along the vertical joint and one along the horizontal joint, with spacing of 6–12 inches between ports, adjusted for wall thickness and plaster density.
- Edge alignment: place ports within 1/2 to 1 inch of the edge of the repaired area to minimize edge chipping and maximize adhesive transfer into voids.
- Depth aspiration: drill ports to just below the plaster surface into the backing substrate (concrete or lath) to ensure adhesive can anchor into solid material rather than only the plaster.
- Injection sequence: begin at the lowest port and work upward in a staged pattern to prevent air pockets. Inject slowly to fill voids, pause to observe resin movement, and seal ports as you advance.
- Seal and cure: after filling, seal the surface with the recommended cap or epoxy cap and allow the specified cure time in-situ, avoiding vibration or loads during cure.
- Common failure modes and troubleshooting: (a) air gaps along edges—inject a second pass with adjusted pressure; (b) back-pressure indicating blocked ports—inspect and re-drill; (c) insufficient bonding—confirm port depth and substrate prep; (d) moisture-driven bond loss—dry and seal surface before reapplication.
Adhesive types and properties
When it comes to adhesives, you’ve got a few main choices: epoxy, polyurethane, and polymer-modified cement. Each has its own strengths and weaknesses.
Epoxy is the go-to for strong bonds that can handle heavy loads. It’s waterproof, but it takes time to cure—up to 24 hours in some cases. Make sure your base is solid before you start, or you’ll be redoing work later.
Polyurethane is great for sealing gaps and providing a flexible bond that can move with the concrete. It’s fast-curing but pricey. Use it where you need flexibility without compromising on strength.
For those who want something simpler, polymer-modified cement offers a balance between ease of use and durability. It sets faster than epoxy and is cheaper too. Just check base compaction before applying to avoid future issues.
Pros and cons of adhesives
Adhesives can be a quick fix for concrete issues, but they come with their own set of challenges.
Pros
- Clean finish without visible repair lines.
- Minimal disruption to surrounding areas.
- Faster curing times compared to traditional methods in some cases.
- Potential for use in tight spaces where other repairs are difficult.
Cons
- Need access to the backside of concrete elements for injection methods.
- Possible compatibility issues with existing materials leading to failure.
- Varying cure times can affect project timelines.
- Risk of improper application causing weak spots or leaks.
Adhesives work best when you need a quick, clean fix and have access for proper application. Otherwise, consider traditional methods for long-term durability.
Tools and materials checklist
This is a DIY-ready tools and consumables list for washer and adhesive repairs, with safety gear and prep items included. Have these basics on hand before you start and check each item off as you go.
Keep the area clean, wear eye protection and gloves, and use the right sealant or epoxy for the job. Staying prepared saves time, prevents leaks, and reduces the risk of injury on the job.
Tools unique to washers method
This checklist covers the specific tools you need for installing screws with washers. Use it when preparing your site for mechanical fastening.
- Screws and washers: Ensure you have enough of each size needed. Confirm by measuring against a template or blueprint.
- Drill bits: Have the correct bit sizes for pilot holes. Check by comparing with screw diameters.
- Countersink tool: Verify it fits your screws and washers properly. Test fit before drilling to avoid sinking screws too deep.
- Impact driver: Ensure it’s in good working condition. Check battery charge and test operation briefly.
- Screwdriver bits: Confirm compatibility with impact driver. Swap out a bit and test.
- Level: Essential for ensuring screws are straight. Use to check alignment before driving each screw.
- Tape measure: Accurate measurement is crucial. Test by comparing against known dimensions.
- Safety glasses: Protect your eyes from flying debris. Always wear during drilling and fastening.
- Caulk gun: For sealing gaps around screws. Check for proper sealant type before use.
- Trim patch kit: Have on hand for any surface damage. Test by applying a small patch to ensure it matches.
Quick rule: Always double-check your tools and materials match the job specifications to avoid costly mistakes later.
Tools unique to adhesive method
This checklist covers the specific tools and materials needed for concrete repairs using adhesives. Use it when you’re ready to start your adhesive repair project.
- Injection gun: Ensure it’s fully charged or has enough compressed air. Check by attempting a test spray; if no adhesive comes out, there’s an issue with the seal or pressure.
- Adhesive cartridges: Confirm they’re not expired and have the correct type of adhesive for your project. Examine the date stamp on each cartridge and compare it to the application instructions.
- Mixing nozzles: Verify that all parts are clean and free from debris before attaching them to the injection gun. A clogged nozzle can result in poor adhesion or wasted material.
- Scrubbers: Make sure they’re sharp enough to remove old sealants and loose concrete. Test by scrubbing a small, inconspicuous area; if it doesn’t scrape off easily, the tool isn’t effective.
- Surface prep tools: Confirm that you have grinders, chipping hammers, and brushes ready for surface preparation. Check each tool’s condition before starting work to avoid delays.
- Sealant applicator: Ensure it’s properly loaded with the correct sealant type. Test by applying a small amount on scrap material; if it doesn’t spread evenly or looks lumpy, there may be an issue.
- Safety gear: Confirm that you have gloves, goggles, and respirators available. Check each piece of equipment for damage before use to prevent injuries.
- Measuring tape: Ensure it’s accurate up to 10 meters with clear markings. Test by measuring a known distance; if the measurement is off, replace the tape measure.
- Mixing containers: Confirm they’re clean and free from residues that could contaminate your adhesive mix. Rinse each container thoroughly before use.
- Adhesive mixing sticks: Check for any cracks or breaks in the stick. A broken stick can lead to uneven mixing, affecting the quality of repairs.
- Cleaning solvent: Ensure you have enough and it’s not expired. Test by applying a small amount on scrap material; if it doesn’t clean effectively, replace with fresh solvent.
- Adhesive hardener: Confirm that it’s correctly mixed into the base adhesive according to manufacturer instructions. A poorly mixed batch can result in weak repairs.
Quick rule: Always double-check your tools and materials before starting any work to avoid costly mistakes on-site.
Step-by-step: Installing washers and re-securing plaster
Start by locating hollow spots behind the plaster. Then install the washer and drive in the screws. Finish by setting the washer heads flush for a clean patch.
This prevents creaks and cracks and keeps patches solid. A proper setup saves you time and avoids rework.
Step-by-Step Installation Process
This sequence will guide you through installing washers and re-securing plaster, ensuring your walls are sturdy and safe.
- Start by marking the exact spots on the wall where the new washers will go. Use a level to ensure they’re straight and evenly spaced. Check each mark with a pencil line that’s clearly visible; if it’s crooked or too faint, redo it now.
- Drill holes slightly larger than your screws at each marked spot. Drill carefully to avoid cracking the plaster; if you see cracks forming, stop immediately and consult a professional.
- Insert plastic washers into the holes. Make sure they fit snugly but aren’t forced in too tightly. A loose washer will rattle or feel wobbly when tapped with your finger.
- Screw the screws through the plaster and into the washers, tightening them firmly but not overly tight to avoid damaging the wall. Check by gently pulling on each screw; it should hold firm without any give.
- Apply joint compound over the screw heads and around the washer edges for a smooth finish. Smooth out with a putty knife until flush with the surface. If you see gaps or unevenness, reapply more compound and smooth again.
Pro tip: Always use a dust mask when drilling into plaster to avoid inhaling harmful particles. This keeps your work area clean and safe.
Preparing the area and locating hollows
Before you start installing washers, make sure to mark all hollow spots on your plaster. Use a small hammer and a coin-sized nail to tap around the wall. When you hear a dull thud, that’s where the plaster is loose or there’s no backing behind it.
Once you’ve marked these areas, remove any loose material with a vacuum cleaner or brush. This step is crucial because if you leave debris in place, your new fasteners won’t hold properly and can lead to future issues.
Protect the surrounding surfaces from damage while working. Cover floors and furniture with plastic sheets or drop cloths. You don’t want plaster dust ruining your carpet or paint.
Fastening technique and finishing
When fastening plaster, space screws about 6 inches apart to distribute load evenly. Avoid over-tightening, which can cause new cracks. Screws should feel snug but not tight as a drum.
Place washers under each screw head for added grip and stability. This prevents the plaster from splitting or cracking around the screw holes. Make sure the washer is flush with the surface to avoid bumps later.
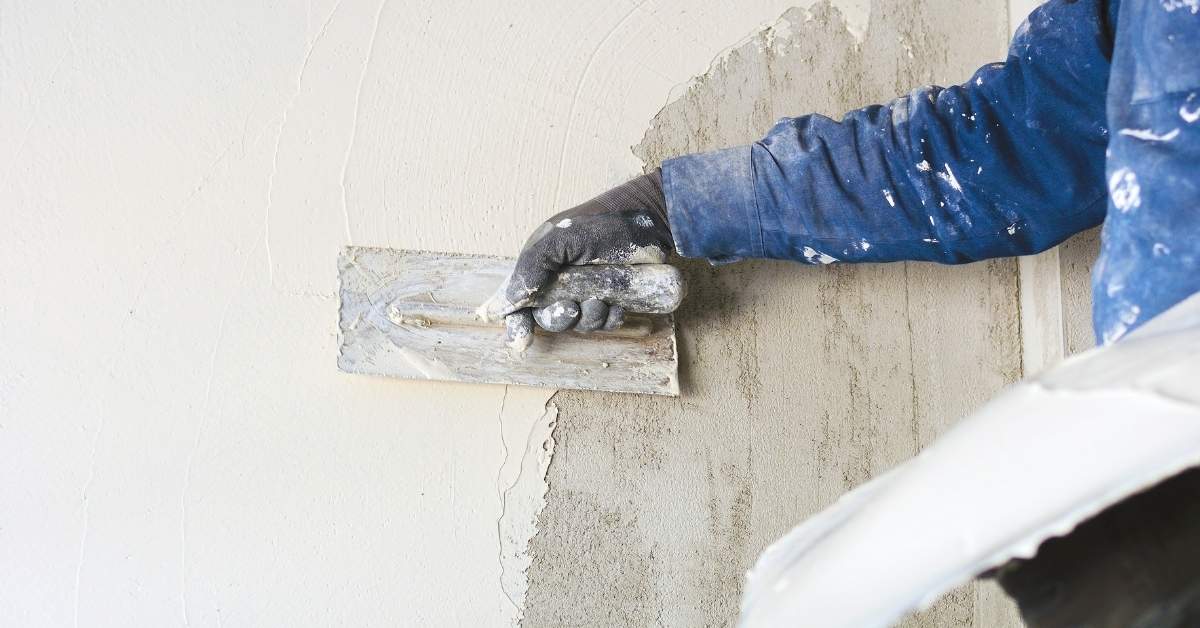
After securing, give the area a final skim coat if needed. Use a small trowel to smooth out any imperfections left by washers or screws. Let it dry completely before painting or applying wallpaper.
Step-by-step: Injecting adhesive to re-bond plaster
Place ports at key spots in the damaged plaster. Inject the adhesive through those ports in controlled stages. Monitor the cure to ensure a solid bond.
Doing it right saves you from pulling apart the plaster later. If you skip proper port placement or use the wrong adhesive, you’ll waste time and weaken the bond. Take your time, clean the surface, and watch the cure process; it matters for long-term durability.
Step-by-Step Process
This sequence will guide you through injecting adhesive to re-bond plaster, ensuring your walls stay strong and stable.
- Action: Begin by marking the exact spots where the plaster has come loose. Reason: This helps in targeting the injection precisely. Check: Ensure marks are clearly visible and accurate to the gaps. Note: If you find large areas or multiple cracks, consider consulting a professional.
- Action: Drill small holes along the marked lines using a masonry bit. Reason: This allows for proper adhesive injection without damaging the plaster further. Check: Holes should be clean and free of debris. Note: Wear safety goggles to protect your eyes.
- Action: Inject adhesive into each hole using a caulking gun or similar tool. Reason: Adhesive fills the gaps, bonding plaster back in place. Check: Ensure the adhesive is evenly distributed and slightly overflows around edges for proper sealing. Note: If you notice any leakage, stop immediately to avoid mess.
- Action: Smooth out excess adhesive with a putty knife or similar tool. Reason: This ensures a neat finish that blends well with the surrounding plaster. Check: Surface should be smooth and even without any visible gaps or cracks. Note: Allow at least 24 hours for the adhesive to cure before applying additional finishes.
- Action: Once cured, apply a thin layer of joint compound over the repaired area. Reason: This helps in blending the repair with the rest of the wall and provides a smooth surface. Check: The compound should be evenly spread without any visible seams or ridges. Note: A professional might use a different technique for better results, especially on larger repairs.
Pro tip: Always test the adhesive in an inconspicuous area first to ensure it matches your plaster and doesn’t cause discoloration or other issues.
Preparing injection ports and surface prep
Before you start injecting adhesive, mark your spots. For best results, space out the injection ports every 12 to 18 inches. Use a small drill or hammer to make clean holes about half an inch deep. These will be your access points for the glue.
Clean up around each port with a wire brush and vacuum to remove dust and debris. This step is crucial; dirty spots won’t let the adhesive stick properly, leading to weak bonds. Remember, clean surfaces mean strong adhesion.
If you’re dealing with large gaps or cracks, consider using surface ports instead of drilling holes. These are like small patches that sit on top of the crack and allow for easy injection without damaging the plaster further.
Injection, cure, and finish work
Once you’ve injected the adhesive into your prepared ports, keep an eye on the pressure gauge. It should drop as the gap fills up. When it stops dropping significantly, that means the gap is full. Don’t overdo it; too much pressure can push out plaster or damage surrounding areas.
Cure times vary but generally range from 24 to 72 hours depending on conditions and adhesive type. Check your product’s instructions for specifics. During this time, avoid any activities that might disturb the area. Once cured, you’re ready to smooth things over.
For a clean finish, skim-coat or sand the patched areas to blend them with the rest of the wall. This step is crucial for hiding repair work and ensuring your plaster looks as good as new. Don’t rush this part; take your time to get it right.
Comparing outcomes: durability, appearance, cost, and time
When you compare washers to adhesives for common repairs, fasteners usually win on longevity and a clean, predictable look. Adhesives can save upfront costs, but they often cost you time and you may not get the same hold or alignment.
On the job, you need to choose based on load, access, and how visible the fix will be, not just price. This matters because a quick glue job can fail under vibration or moisture, leaving you redoing the repair and wasting materials.
Long-term durability and failure modes
When it comes to concrete, you want a job that lasts. The key is in the prep work—check base compaction. If your foundation isn’t solid, your slab will suffer from hollowness and vibration issues over time. Moisture can also seep through weak spots, leading to cracks and spalling.
Signs of failure are clear: cracks that widen or deepen, especially around edges or corners; hollow sounds when you tap the surface with a hammer; and water pooling in low spots where it shouldn’t be. These issues mean your concrete isn’t doing its job right.
To avoid these problems, make sure to use quality materials and follow proper curing techniques. Skimping on these steps might save money upfront but will cost you more later when repairs are needed. Remember, a well-built foundation is the backbone of any good concrete project.
Cost and time estimates
When you’re looking at small to medium concrete repairs, the cost can vary widely depending on materials and labor. For a basic patch job, expect to spend around $100-$200 for supplies if you do it yourself. If you hire pros, figure in an extra few hundred dollars just for labor.
Time-wise, DIY repairs take about half a day to prep and pour the concrete, plus another day or two for curing before you can use the area again. Professionals might finish faster but won’t let you walk on it until it’s fully cured either way—usually 24-72 hours, depending on weather.
Before starting any repair work, make sure to check base compaction and drainage issues. Fixing these first can save you money in the long run by preventing future cracks or potholes. Don’t rush this step; it’s crucial for lasting repairs.
Troubleshooting, visual checkpoints, and when to call a pro
Troubleshooting is about quick checks, clear visual clues, and knowing when to call a pro. Do simple tests first, look for obvious signs of trouble, and stop before you make the problem worse. If you spot the red flags, don’t push your luck.
Visual checkpoints keep you safe and save you time. They help you verify progress and avoid rework. If the signs point past DIY, get a contractor on it before the problem spreads.
Common problems and fixes
This checklist helps you spot issues early when working on your concrete project. Use it for quick visual checks to avoid costly mistakes.
- Adhesive bleed: Check for dark, oily patches on the surface. Confirm by wiping with a cloth; if oil stains, treat with sealant before curing.
- Screw pop: Look for screws protruding from concrete. Test by gently tapping around them; if loose, re-drill and use longer screws or anchors.
- New cracking: Inspect joints and edges for cracks wider than 1/8 inch. Confirm with a ruler; repair with epoxy or concrete filler to prevent water damage.
- Uneven surface: Measure flatness with a straight edge across the slab. If gaps exceed 1/4 inch, grind high spots down before sealing.
- Water pooling: Check for standing water after rain; confirm by marking water level and rechecking in an hour. Slope concrete to drain or add channels.
- Surface scaling: Look for flaking on the surface, especially near edges. Confirm with a chisel test; if flakes easily, apply a bonding agent before resurfacing.
- Inadequate curing: Check for dry patches within 24 hours of pouring. Confirm by pressing your thumb into concrete; if it leaves an imprint, cover and mist daily.
- Concrete spalling: Inspect corners and edges for chipped or broken pieces. Test with a hammer; if loose, remove damaged area and patch with fresh concrete.
- Rebar exposure: Look for rusted bars near the surface. Confirm by scraping away concrete; if exposed, cover with epoxy-coated rebar and sealant.
- Improper mix ratio: Check consistency of wet mix; should be workable but not soupy. Confirm by dropping a sample on hard ground; it should hold shape without cracking.
- Cracks from settling: Look for cracks near walls or columns after 2 weeks. Test with a ruler; if more than 1/8 inch wide, consult an engineer before sealing.
- Concrete efflorescence: Check for white powder on the surface. Confirm by wiping with water; if it returns quickly, clean thoroughly and seal surface.
- Void formation: Inspect around forms or embedments for hollow spaces. Test with a hammer; if sounds hollow, drill small holes and fill voids with grout.
- Inadequate compaction: Look for soft spots when walking on the slab. Confirm by pressing down; if leaves an impression, rework area or add more concrete.
Quick rule: If it looks off and feels wrong, double-check before moving forward to avoid costly fixes later.
Visual and Tactile Checkpoints
This checklist helps you verify the quality of your concrete repair at each stage. Use it to ensure your work meets professional standards before moving on.
- Pre-finish surface: Should be smooth with no large cracks or voids. Confirm by running a straightedge across the surface; gaps should not exceed 1/8 inch.
Gotcha: Skipping this check can lead to uneven finishes and wasted materials later. - After skim coat: Surface must feel even, without any dips or bumps larger than your thumbprint. Check by lightly running your hand over the surface.
Gotcha: Overlooking this step may result in a patch that stands out after painting. - Edge alignment: Edges should be straight and flush with existing concrete. Use a level to check for any misalignment.
Gotcha: Misaligned edges can cause water pooling issues, leading to further damage over time. - Color match: The repaired area should blend seamlessly with the surrounding concrete in terms of color and texture. Compare side-by-side under natural light.
Gotcha: A poor color match will be noticeable and detract from your project’s overall appearance. - No visible cracks: Look for any hairline cracks that might have formed during curing. Use a magnifying glass if necessary.
Gotcha: Cracks can grow over time, causing structural issues or requiring costly repairs later. - Slope and drainage: Ensure the repaired area slopes correctly to direct water away from critical areas like foundations or doorways. Check with a level or straightedge.
Gotcha: Improper slope can lead to water damage and mold growth, necessitating major repairs down the line. - No air bubbles: Surface should be free of any visible air pockets that could weaken the concrete structure. Tap lightly with a hammer to check for hollow spots.
Gotcha: Air bubbles reduce structural integrity and can lead to surface failure over time. - Consistent texture: The repaired area should match the existing surface in terms of roughness or smoothness. Use your hand to feel any differences.
Gotcha: A mismatched texture will be obvious and may require additional work to correct later. - No visible tools marks: Look for any tool marks from trowels, floats, or other finishing tools that could mar the surface appearance. Check under good lighting conditions.
Gotcha: Visible tool marks can detract significantly from the aesthetic quality of your repair work. - Cured properly: The repaired area should feel hard and dry to the touch without any soft spots or moisture. Press gently with your thumb to test hardness.
Gotcha: Prematurely moving on before proper curing can lead to weak, crumbly concrete that needs redoing. - No water stains: After a rain check for any signs of water retention or staining around the repair area. This indicates improper drainage or sealing.
Gotcha: Water stains are an early sign of potential structural damage and should be addressed immediately to prevent further issues.
Quick rule: If it looks right, feels right, and passes a simple test (like running your hand over the surface), you’re likely on track for a successful repair job.
Signs you need a pro or full demo
This checklist helps you spot serious issues that require professional help to avoid costly mistakes.
- Substrate rot: Check for soft spots under concrete. If it feels spongy, call in an expert to assess structural integrity.
- Widespread delamination: Look for large areas where the surface layer is peeling off. Measure the extent; if more than 25% of the slab shows this issue, seek professional advice.
- Cracks over 1/4 inch wide: Any crack wider than a quarter-inch likely indicates structural issues beyond DIY repair scope.
- Buckling or heaving concrete: Observe if sections of your slab are lifting or warping. This often signals underlying soil problems requiring professional attention.
- Exposed rebar: If metal bars are visible, it’s a sign of severe degradation and needs expert evaluation to prevent further damage.
- Water pooling persistently: Check for low spots where water collects. Persistent puddles can indicate improper grading or drainage issues that need professional assessment.
- Cracks near load-bearing walls: Inspect around structural supports; cracks here often mean serious foundational problems.
- Visible rust stains: Rust on concrete usually means there’s water intrusion and potential metal corrosion, which can compromise the slab’s strength.
- Signs of settlement: Look for gaps between your slab and adjacent structures. This could indicate settling that needs professional evaluation.
- Unusual noises from below: Listen for creaking or groaning sounds when walking on the concrete, which might suggest structural instability.
- Mechanical damage: If you notice any signs of underground utilities being compromised (like exposed pipes), halt work immediately and consult a pro.
- Uneven slab height differences: Measure variations in elevation; if they exceed 1 inch, it’s likely an indication of uneven settling or improper installation that needs professional correction.
- Frequent repairs needed: If you find yourself frequently repairing the same area, it might be a sign of underlying issues beyond simple patching.
- Cracks in corners: Cracks forming at right angles often indicate stress points requiring expert analysis to prevent further damage.
Quick rule: If you spot any signs that suggest more than surface-level problems, it’s best to call a professional for an assessment before proceeding.

Conclusion
Getting loose plaster back where it belongs matters for safety, durability, and how the room looks. Do the minimum needed, test first, and seal the repair so it won’t crack or fall again under everyday use.
Check for a few things and proceed in order: assess moisture and the back side, decide between plaster washers for a snug edge or adhesive methods for gaps, gather only the tools and materials you actually need, try a small test patch, then install the washers or apply the adhesive exactly as described, let cure, and then recheck the surface for secure, even seating before you finish.
Common mistakes to avoid include over-tightening fixtures that crush the plaster, using the wrong adhesive or letting it cure in high humidity or cold conditions, and skipping a test area or safety checks that could reveal hidden rot or ongoing moisture. Always wear eye protection and a mask, work in good light, and never force a patch that won’t sit flat or that shows fresh cracks after tightening.
If you’ve got moisture, wide gaps, or stubborn edges that won’t seat after careful repair, it’s wise to call a pro rather than pushing on. When in doubt, keep the project small and controlled, and stay focused on safety and quality—the wall will thank you with lasting strength and a clean look. You can do this, one solid step at a time.
FAQ
What is the simplest method to reattach loose plaster without a full demo?
Use a few mechanical washers with screws to pull the plaster back tight. It’s quicker and you can see and adjust the bond as you go. Don’t overdo it or you’ll crack the surface again.
Are washers a better option than adhesive for loose plaster?
Washers grab the plaster and hold it in place. Adhesive can work in a pinch, but it dries brittle and doesn’t handle movement well. If the plaster is really loose, washers win.
What type of washers should I use?
Use galvanized or stainless steel flat washers with short wood screws. They resist rust and won’t pull through the plaster. Don’t skimp on the screw length or you’ll waste your time.
Can I use adhesive alone to fix flaking plaster?
Adhesive alone is risky. It may hold for a while, but vibration or humidity will make it fail. If you go adhesive, use it to supplement washers, not replace them.