

Introduction
Water-based polyurethane dries quickly and stays clear, while oil-based polyurethane darkens floors and adds durability.
This guide helps you compare factors like odor, cure time, traffic, and maintenance so you can choose the right finish for your floor.
You’ll learn how to assess your project, weigh the pros and cons, and follow practical guidance for prep and application.
Key takeaways
- Water-based: Clearer, faster drying, low VOCs, easy to clean up.
- Oil-based: Richer color, longer lasting, slower drying, high VOCs, tougher cleanup.
- Durability: Oil-based wins for high-traffic areas; water-based for light use.
- Drying & Recoat: Water-based dries faster (1-2 hours) and can be recoated sooner.
- Application: Both easy to apply, but oil-based requires more ventilation due to strong odor.
- Cost: Water-based generally cheaper; oil-based may last longer, offsetting initial cost.
- Use-case: Choose water-based for quick turnaround, oil-based for long-lasting durability.
Table of Contents
- Introduction
- Key takeaways
- Quick Comparison Overview
- Appearance and Color Change
- Durability and Longevity
- Drying, Curing, and Recoat Times
- Application Methods and Ease of Use
- Vocs, Odor, and Environmental Impact
- Compatibility with Existing Finishes and Repairs
- Cost, Labor, and Professional vs DIY Considerations
- Long-term Maintenance and Care
- Use-case Scenarios and Final Recommendations
- Visual Checkpoints and Testing Before You Commit
- Water-based vs. Oil-based Polyurethane Floor Finishes
- Conclusion
- FAQ
Quick Comparison Overview
Water-based polyurethane stays clear, dries fast, and has low odor, while oil-based adds warmth, a thicker film, and yellows over time.
Ventilation and temperature control are crucial—run fans and maintain steady temps to prevent fumes from being trapped in concrete pores. Choose water-based for living areas or basements with tight spaces; opt for oil-based in garages or shops if you can handle the odor and longer cure times.
Side-by-side Pros and Cons
Water-based polyurethane offers a quick-drying, low-VOC option that’s easier to recoat and maintain. Oil-based polyurethane provides deeper penetration into concrete for enhanced durability but has longer drying times.
Pros
- Faster drying time allows quicker return to use.
- Lower VOC content better for indoor air quality.
- Easier recoating process over time.
Cons
- Tends to yellow slightly over time, especially in direct sunlight.
- Requires more frequent maintenance and touch-ups.
- Poorer chemical resistance compared to oil-based options.
Maintain water-based floors with ease after cure; oil-based can be tougher but may wear faster in high-traffic spots.
Quick Recommendation Guide
Select water-based polyurethane for basement floors exposed to high moisture, due to its fast drying and easy recoating properties. For garages or workshops where heavy machinery is used, opt for oil-based polyurethane for superior durability and chemical resistance.
In living areas with light traffic and a need to minimize indoor air pollution, choose low-VOC water-based options for better health benefits and ease of maintenance.
For concrete floors that see regular use or are prone to spills and wear, oil-based polyurethane is the safer choice despite its longer setup time and higher odor during application. If unsure about moisture levels in concrete, consult a professional before applying any finish.
Appearance and Color Change
Water-based polyurethane maintains a clearer, more natural look right after application, allowing the wood’s grain to remain prominent. Over time, it may slightly amber but generally retains its initial clarity.
In contrast, oil-based finishes can give your floors a warmer tone from day one due to their rich ambering properties. This warmth intensifies over time as oils penetrate deeper into the wood, enhancing the natural grain and color richness.
How Each Finish Alters Wood Grain and Color
Hard woods like oak or maple work well with both types but may show more pronounced differences in oil-based finishes.
- Oil-Based: Enhances natural wood grain, provides a rich, warm tone. Ideal for showcasing intricate patterns and figuring.
- Water-Based: Maintains natural color, offers a more subtle sheen. Better suited for contemporary or minimalist designs.
Softwoods such as pine might benefit from water-based polyurethane to maintain a cleaner look without excessive ambering.
What to check:
- If you want to emphasize the natural grain and color of your hardwood floor, choose oil-based.
- When aiming for a more modern or understated appearance in softwoods like pine, opt for water-based.
Common mistake: Assuming all polyurethanes will have the same effect on different wood species. This can lead to unwanted color shifts and grain alterations.
Choosing Sheen and Achieving a Consistent Look
Matt finishes provide minimal reflection, concealing imperfections but also muting wood grain. Satin sheens balance glossiness and depth, enhancing grain while still showing texture.
Glossy finishes reflect light beautifully, making colors pop and grains stand out sharply. However, they can highlight any unevenness or scratches more prominently.
To select the right sheen:
- Consider your room’s lighting: glossier sheens work best in well-lit areas.
- Evaluate traffic: higher-traffic rooms may require a more durable, less reflective finish.
- Examine existing furniture and decor: match or complement their finishes for a cohesive look.
Common mistake: Not testing samples in your specific space. Lighting and color interactions can vary greatly from room to room.
Sanding between coats is crucial for achieving a smooth finish and ensuring even color distribution across multiple layers.
Durability and Longevity
Durability for floors depends on scratch resistance, abrasion resistance, chemical resistance, and longevity under foot traffic. Water-based finishes typically cure harder and resist scuffs quickly but may show wear sooner with heavy use. Oil-based finishes tend to wear slower and offer longer intervals between recoats.
Hardness vs Flexibility Trade-offs
Floor finishes must balance hardness for scuff resistance and flexibility to prevent cracking or chipping under impact and resist everyday wear.
- Water-based: Harder, less flexible; excellent scuff resistance but more prone to showing marks from heavy furniture or high heels.
- Oil-based: Softer, more forgiving; fewer visible scratches over time but may show signs of wear sooner.
Flexibility also helps a finish resist moisture and humidity changes. For example, if you live in an area with high humidity or have a basement prone to dampness, consider the flexibility factor when choosing your floor finish.
Common mistake: Choosing based solely on initial appearance without considering long-term durability and resistance to specific types of wear in your environment. Consequence: A finish that looks great at first may show signs of wear or damage much sooner than expected, leading to costly repairs or refinishing.
Decision rule: If you have heavy furniture or high foot traffic in an area, opt for the harder, more scuff-resistant water-based polyurethane. When durability and resistance to everyday wear are your top priorities, choose oil-based finishes for their flexibility and ability to absorb minor impacts without showing visible damage.
Real-world Longevity Factors
The lifespan of your floor finish varies based on factors such as foot traffic, furniture movement, and spills. Regular cleaning helps prolong its life.
What to check:
- Inspect for signs of wear like scratches or dullness.
- Check if the finish is peeling or bubbling, indicating it’s time for a recoat.
When you notice these signs, consider:
- Lightly sanding and cleaning the floor before applying new coats.
- Using a high-quality product to ensure better adhesion and durability.
- Increasing the number of coats for added protection.
Common mistake: Neglecting to clean up spills promptly. This can lead to permanent damage or discoloration, reducing the lifespan of your floor finish.
Drying, Curing, and Recoat Times
Open time is the window when dust can settle on the finish; water-based poly tends to move faster than oil-based, which carries more odor and requires longer drying times. Temperature, humidity, and airflow affect both types.
Recoat timing depends on film readiness rather than a clock; test with light sanding or a tack test to determine when the surface is ready for recoating. Follow brand guidance closely, as water-based finishes often allow earlier recoat while oil-based needs more cure time.
How Drying Time Affects Project Scheduling
Water-based polyurethane typically dries faster than oil-based, allowing a second coat sooner under normal conditions (typically within days for water-based and up to several days for oil-based).
In a typical room setting, applying two coats of water-based polyurethane could be done in about four days total. With oil-based finishes, you’re looking at around five to seven days.
Temperature and Humidity Impacts
Maintain indoor temperature between 60°F and 85°F (15°C to 29°C) for optimal drying times. Aim for humidity levels of 40% to 60%. Extreme conditions will extend your project timeline.
To monitor progress, check the surface for any signs of condensation or feel the floor with your hands to gauge warmth and moisture. If you notice excessive condensation or feel unusual dampness, adjust your environment accordingly.
- If temperature drops below 60°F (15°C), expect slower curing and increased risk of finish defects.
- When humidity exceeds 60%, water-based finishes may take longer to dry and become tacky.
- In very cold or humid conditions, consider using heaters or dehumidifiers to maintain optimal environment.
Common mistake: Ignoring temperature and humidity fluctuations can lead to extended drying times, increased risk of finish damage, and potential project delays.
To perform a tack test: lightly press a clean finger or cloth on the surface; if it feels sticky, wait until it’s no longer tacky before recoating. If drying times are significantly longer than expected due to humidity or temperature fluctuations, stop and reassess your project timeline or consult brand-specific guidance to avoid damaging the finish.
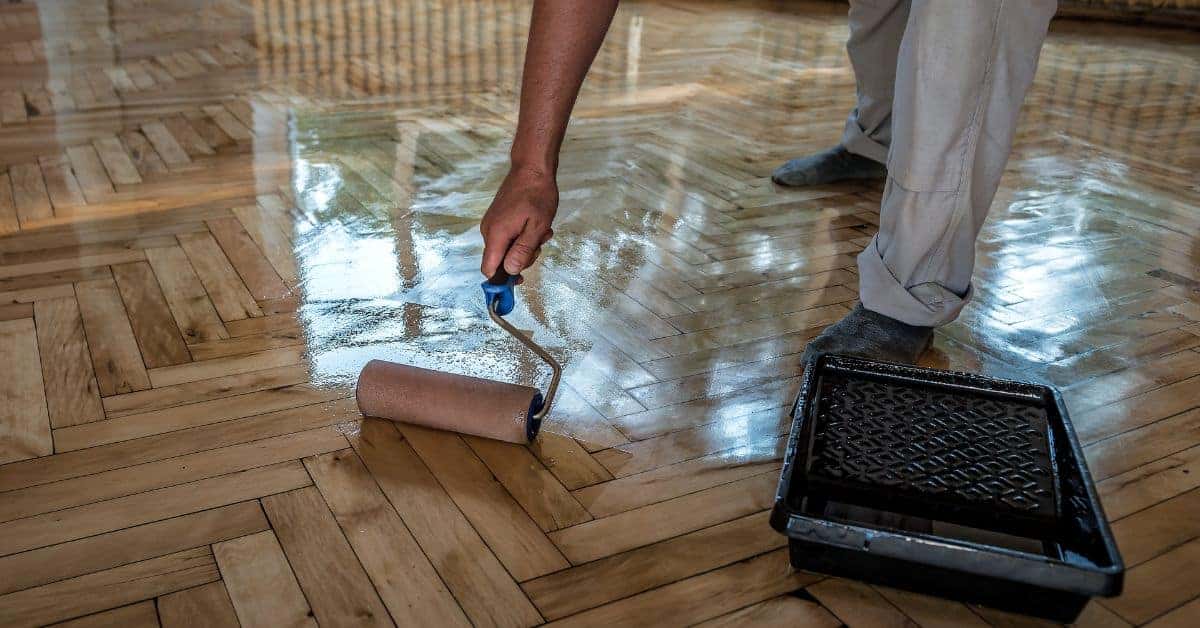
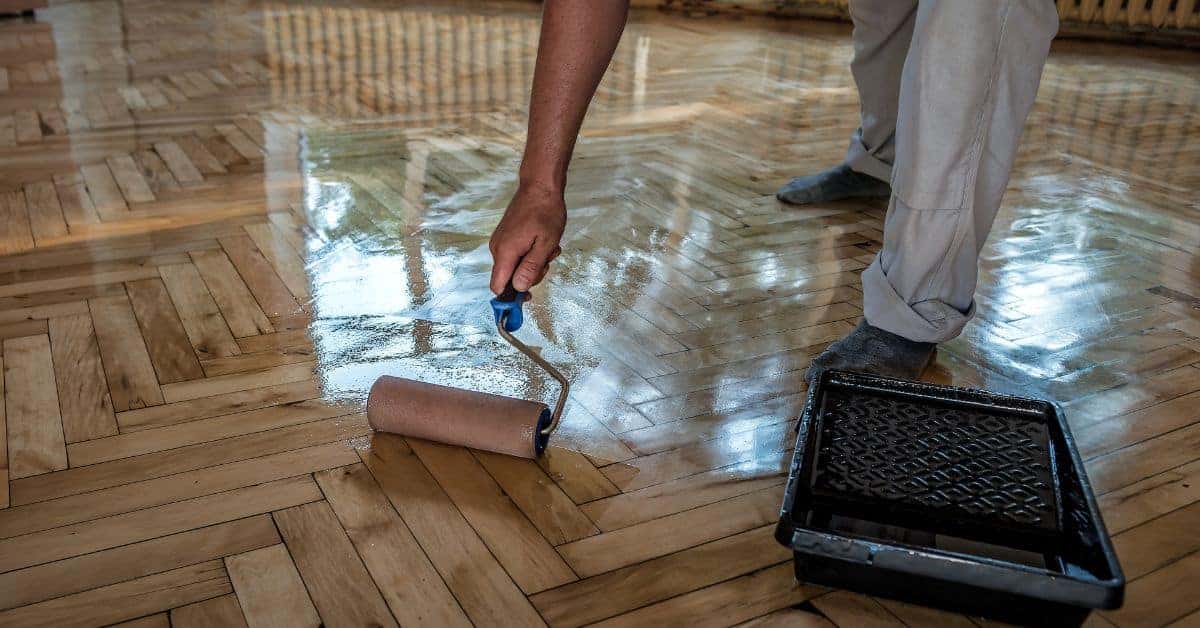
Application Methods and Ease of Use
Use various application methods—brushing, rolling, spraying, and buffing—with tool choices depending on the finish and surface. Each method has pros and cons for speed, film thickness, and finish quality; DIY work versus professional work affects prep, containment, and consistency.
Spray work requires proper containment and cleanup to prevent overspray issues, while brushing or rolling can be safer and easier to manage in tight spaces. Proper ventilation, respirators, tack cloths versus a dust-free zone, and careful recoat windows are non-negotiable safety and quality steps. Consider hiring a pro for large projects, spraying needs, historic or high-value floors, moisture mitigation requirements, commercial traffic demands, or warranty stipulations.
Tools and Materials Checklist
To apply either water-based or oil-based polyurethane, you’ll need a range of tools and materials to ensure a smooth application process.
- A paintbrush for detailed work and edges
- A roller with a long handle for larger areas
- An airless sprayer if spraying is preferred
- Steel wool or sandpaper for scuffing between coats
- Dust sheets to protect the floor during application
- Tack cloths or compressed air for dust removal
- A respirator and proper ventilation setup
- Safety goggles and gloves
- Clean rags for clean-up
- Disposable coveralls or old clothes
- A squeegee to remove excess material
Once you have all your tools ready, make sure the area is clear of any movement before starting. This prevents dust and debris from ruining your work.
Common Application Mistakes and How to Avoid Them
Mistakes during the application process can lead to issues like bubbling, lap marks, or poor adhesion. Here are some common errors and how to fix them.
- Mistake: Applying too thick a coat leads to orange peel texture.
Solution: Thin the polyurethane slightly and apply multiple thin coats. - Mistake: Not scuffing between coats causes poor adhesion.
Solution: Use steel wool or sandpaper to lightly roughen the surface before recoating. - Mistake: Overlooking proper ventilation leads to health risks and odor issues.
Solution: Ensure good airflow with fans or open windows, use a respirator. - Mistake: Not cleaning tools properly results in dried material buildup.
Solution: Clean brushes and rollers immediately after use.
The fastest on-site correction is to address any issues as soon as they appear. Quick fixes can prevent bigger problems later.
Vocs, Odor, and Environmental Impact
VOCs and odor drive choice and safety here: water-based polyurethanes typically run lower on VOCs than oil-based, but you still need to know what “low-VOC” means and watch state and federal thresholds to avoid surprises on site. Expect noticeable smells during application and curing, with off-gassing tapering as coats dry, and know that thin coats and closed spaces can worsen odor and lengthen the cure. The real deal is balancing ventilation, eco-friendliness, and long-term durability to protect air quality for everyone in the home.
Plan ventilation like you mean it: aim multiple air exchanges per hour, use exhaust fans, and seal off adjacent rooms for a temporary window of safe curing; time the work to when occupants can skip the space or wear a mask, depending on sensitivity. Choose finishes with clear certifications (GREENGUARD, CARB) and prefer water-based options for lower embodied emissions, easier cleanup, and safer disposal, while recognizing that cleanup practices and waste handling matter as much as the finish itself. This matters for DIYers with kids, pregnant people, or allergy issues, because a quick, sloppy job saves time but costs health and future maintenance when odors linger or recoats are needed.
Indoor Air Quality and Safety Precautions
When applying water-based polyurethane, you can usually get by with good ventilation but no extra safety gear. For oil-based finishes, wear a respirator rated for organic vapors to protect your lungs from strong fumes.
Set up exhaust fans or open windows to exchange air at least every 20 minutes during application and curing. Seal off adjacent rooms if possible to contain odors. Wait until the finish is fully cured before letting anyone, especially kids or pregnant women, back into the space.
Disposal and Regulatory Considerations
Proper disposal is crucial to prevent environmental harm and ensure safety.
- Oil-based: Dispose at a hazardous waste facility. Wrap rags in plastic, seal tightly, and take immediately.
- Water-based: Generally safe for drain disposal with plenty of water. Always check local regulations first.
If you’re unsure about local regulations, contact your city or county environmental department for guidance.
Common mistake: Mixing oil- and water-based finishes in the same area without proper cleaning can lead to poor adhesion and reduced durability.
Compatibility with Existing Finishes and Repairs
Water-based finishes can often go over clean, well-adhered oil-based finishes, but not every old coating will bond. Test first by applying a small amount to a wear spot and checking for adhesion using a tape test. If the surface feels sticky or the finish pulls away when wiped, strip or sand down before recoating.
Thoroughly clean and prepare the surface: degloss with light sanding (120-150 grit), fill cracks, feather edges, and ensure wood is dry and below roughly 12 percent moisture content. Sand to a matte finish for better adhesion. Use compatible sealers or stains if needed.
Repair damaged planks first, feather the edges, and assess how repairs will affect color and uniformity. Bad repairs can ruin compatibility and increase future recoating costs.
Step-by-step Prep for Recoating an Existing Floor
Before recoating, ensure your floor is clean and free of any contaminants that could hinder adhesion.
- Check: For signs of peeling or flaking. If present, these areas must be sanded down to a smooth surface before proceeding.
- Check: The gloss level of your existing finish. A duller finish indicates better adhesion for the new coat.
If your floor is in good condition with no signs of peeling, proceed with the following steps:
- Clean the floor using a degreaser or solvent-based cleaner to remove any dirt, oils, or wax buildup.
- Scuff-sand the surface lightly with 120-150 grit sandpaper to create a dull finish and improve adhesion. Be sure to follow the grain of the wood for best results.
- Common mistake: Not allowing sufficient drying time after cleaning. This can lead to poor adhesion and bubbling.
Consequence: A poorly bonded new coat that may peel or lift over time.
- Test adhesion by applying painter’s tape, pressing firmly, and peeling it off after an hour. If it comes up easily, recoat is needed.
- Remove dust with a tack cloth or vacuum to ensure the surface is clean, dry, and free of any debris before application.
When: The floor passes the tape test and feels completely dry, you can proceed with applying your new coat of polyurethane.
Spot Repairs and Maintenance Recoats
To blend patches seamlessly, feather edges to match surrounding areas. Use a screen-and-recoat method for small repairs or full sanding if extensive damage is present.
For high-traffic wear areas, apply an additional coat of sealer before recoating the entire surface to maintain uniformity and durability across the floor.
Cost, Labor, and Professional vs DIY Considerations
Material costs break down by square foot for water-based versus oil-based polyurethane, plus primer or sealer, top coats, sandpaper, rollers or brushes, and disposal, with coverage rates and waste driving the total for a typical concrete floor. Labor and schedule matter too, since prep, sanding, dust containment, ventilation, and the number of coats, plus drying and curing gaps, translate into real hours and longer timelines for oil-based finishes.
Understanding long-term performance and ongoing costs is crucial. Follow manufacturer guidelines for the best results. Compare durability, scratch resistance, yellowing risk, and maintenance needs with recoat intervals and future cleaning versus solvents or water-based cleanup. A practical decision framework helps you decide when to DIY or hire a pro based on project size, room layout, humidity and temperature, power and ventilation access, warranty considerations, and your risk tolerance, plus a rough break-even point for professional work.
Smart cost-saving moves—timing purchases, renting tools, optimizing surface prep to reduce coats, and ensuring proper curing—keep a project within budget without inviting costly failures. Plan extra for unexpected issues like surface imperfections or weather delays that can add to your project timeline and costs.
Cost Examples and Budgeting Tips
Water-based polyurethane typically costs around $2 to $5 per square foot, while oil-based can range from $4 to $8. Consider these factors when deciding:
- Coverage area: Oil-based has better coverage due to its thicker consistency.
- Drying time: Water-based dries faster, allowing for quicker recoating and project completion.
- Durability: Oil-based offers superior durability and resistance to wear and tear.
When calculating your budget, keep these in mind:
- Add primer, sealer, top coats, sandpaper, rollers, brushes, and disposal fees, which might bump your total by another dollar or two per square foot.
- Expect material waste to add 10-20% to your budget for a typical concrete floor project.
Common mistake: Overlooking surface imperfections. Consequence: Inadequate preparation can lead to poor adhesion and an uneven finish, requiring rework or additional costs.
To avoid underbidding, plan extra for unexpected issues like weather delays that can add to your project timeline and costs. Factor in labor costs based on prep time, number of coats, drying times, and the need for ventilation and dust containment. A professional might charge $50-$75 an hour or more.
When to Hire a Pro
If you’re dealing with large areas, complex layouts, high-end finishes, or tight deadlines, hiring a pro might save time and reduce stress. Professionals have the tools and experience to handle tricky situations efficiently.
For DIYers, small projects in controlled environments are better suited for self-application. Ensure proper ventilation and dust containment if you go this route. If your project is high-risk due to location or material value, consider professional help to avoid costly mistakes.
When budgeting, factor in the cost of hiring a pro versus potential repair costs from DIY errors. For large spaces like commercial floors or areas with strict environmental controls, professionals are often worth the investment.
Long-term Maintenance and Care
Maintaining water-based or oil-based polyurethane floors involves regular cleaning and timely recoating to prevent damage and maintain shine.
Improper cleaners or delayed maintenance can cause yellowing, cracking, or permanent damage. Keeping a simple log helps track wear and plan for future work.
Daily/weekly Cleaning and Stain Removal
Sweep daily to remove dirt and debris that can scratch the surface. Use a damp mop with pH-neutral cleaner weekly.
Avoid ammonia, wax, or silicone-based products as they can dull the finish over time.
What to check:
- Look for any visible scratches after daily sweeping; if present, address them immediately.
- Inspect the floor weekly for signs of wear or discoloration.
When to take action:
If you notice any deep scratches, use a touch-up kit to restore the finish. If there are signs of discoloration, consider stripping and refinishing the entire floor.
Common mistake: Using harsh chemicals or abrasive tools can damage the polyurethane finish.
Consequence: Damaged finish may appear dull, lose its protective properties, and require early refinishing.
When to Recoat, Sand, or Refinish
Inspect your floor every six months for signs of wear like dull spots, scuffs, or scratches. If you notice these issues, it’s time to recoat.
For minor touch-ups, lightly sand the area with fine-grit sandpaper before applying a new coat. For extensive damage, consider professional help to avoid further harm.
Use-case Scenarios and Final Recommendations
This section helps you pick finishes and strategies based on real situations like kids/pets, rentals, high-end hardwood, historical homes, and condos. It lays out how water-based and oil-based finishes differ in look, odor, maintenance, and suitability for traffic, humidity, and UV exposure, with a simple decision flow for new installs or refinishing. Use the quick checklist to match your scenario.
For each scenario you’ll see the big priorities, from scratch resistance for pets to stain resilience in rentals, and compatibility with historical or pre-existing finishes, to moisture tolerance in condos and easy cleaning for families. Following the guidance helps you plan prep, ventilation, odor management, curing times, recoat windows, and long-term cost and value, so your DIY job stays smart and not risky.
Best Choice by Room and Wiring (E.g., Kitchens, Basements)
Kitchens and basements often see high traffic and moisture exposure. For kitchens, water-based polyurethane is ideal due to its quick drying time and low odor, making it easier to finish without disrupting daily activities. In basements, oil-based polyurethane offers better resistance against humidity and stains.
- Tool: Paint roller + use a high-quality nap for even application in areas with uneven surfaces.
- Tool: Sanding block + start sanding with 120-grit paper, progressing to finer grits as needed.
- Tool: Floor buffer + apply finish evenly across large areas for a professional look.
- Tool: Heat gun + use for quick drying in humid conditions but ensure proper ventilation.
- Tool: Paint tray and brushes + ideal for detailed work around edges and corners.
Rent or borrow tools like floor buffers and heat guns if you don’t plan to do frequent refinishing. Buy sanding blocks, paint rollers, and trays as they are versatile and useful for various projects.
Best Choice by Wood Species and Desired Aesthetic
When selecting a polyurethane floor finish, consider your wood species and desired aesthetic:
- Light woods like maple or birch benefit from water-based polyurethane, which provides a clear finish that highlights the natural grain.
- For darker woods such as walnut or cherry, oil-based polyurethane can enhance the rich tones with its amber hue.
If your flooring is engineered, check the manufacturer’s recommendations. Water-based finishes are generally more compatible due to their quicker drying and lower VOC levels, making them easier to apply in confined spaces.
Common mistake: Not considering the wood species’ natural color and grain pattern when choosing a finish. This can lead to an unnatural or dull appearance.
Visual Checkpoints and Testing Before You Commit
Before committing to a full floor, you run a controlled small-area testing plan: lay test panels on representative sections, document substrate type, any existing finish, and typical environmental conditions, and run both water-based and oil-based products in the same space to compare how they perform under real-use conditions.
Vary coats, sheen levels, and application methods, then measure color shifts and amber tint, film build and thickness, adhesion with simple scrape or tape tests, and how the surface looks and feels after cure to establish reliable benchmarks for success.
Keep a simple log: take before-and-after photos, note ambient temperatures and humidity, track cure times and recoat windows, and record results across several days to catch slow or late-emerging issues that could derail a full-floor plan.
Those thresholds decide when you proceed with the full floor, require a re-test, or switch products or technique, and you should define how many panels to test and how long to wait before making a final judgment, based on consistent data and practical limits of your space.
Watch for common pitfalls like blotching, raised grain, or blushing, and know how fixes might alter final color, build, or sheen, so you can make a confident choice without guesswork or repeating steps unnecessarily.
How to Create a Proper Test Patch
Before applying polyurethane to your entire floor, create a test patch in an inconspicuous area to assess how the finish interacts with your specific flooring. This step helps you make informed decisions about which finish and application method to use.
- Select a representative section: Choose an area that matches the rest of the floor in terms of wood type, condition, and traffic patterns.
- Prepare the surface: Clean and sand the test patch as you would the entire floor to ensure accurate results.
- Apply finishes side by side: Apply both water-based and oil-based polyurethane on the same test patch, allowing for direct comparison. Vary coat numbers (e.g., 1-3 coats) to observe how each finish builds up over multiple layers.
Common mistake: Not testing different sheen levels. This can lead to dissatisfaction with the final result if you prefer a different level of gloss than what was tested.
- Test different sheen levels: Apply both water-based and oil-based polyurethane in satin and semi-gloss finishes on your test patch to see which one best suits your preferences.
- Vary application methods: Use brushes, rollers, or pads to apply the finish and observe any differences in appearance and ease of application.
- Document and evaluate: Take photos before and after curing, note down ambient temperature and humidity during application, and check for color changes, ambering effects, adhesion issues, and sheen uniformity across different areas. Wait at least 24 hours before evaluating the results thoroughly.
Decision rule: If you notice significant issues like raised grain or blushing, address them and re-evaluate your test patch before making a final decision on which finish to use for your entire floor.
Decision Checklist Before Full Application
Before proceeding with the full floor, run through this checklist to ensure you’re ready for a large-scale application.
- Confirm that VOC levels meet local regulations and safety guidelines.
- Evaluate your schedule to allow adequate time for curing between coats.
- Check product quality by examining consistency and color uniformity.
- Perform an adhesion test on the test patch to ensure proper bonding.
- Note any environmental factors that could affect drying times or finish quality.
- Consider the aesthetic impact of different sheen levels in natural light.
- Evaluate if there are any noticeable defects like bubbles, streaks, or unevenness.
If you encounter significant issues during testing, address them before proceeding. This ensures a smooth and successful full-floor application.
Water-based vs. Oil-based Polyurethane Floor Finishes
Water-based and oil-based polyurethane finishes each bring a different look, feel, and durability profile to a wood floor, and your choice should hinge on appearance, wear patterns, room function, and how much maintenance you’re willing to perform. Water-based dries clear, resists ambering, and cleans up with soap and water, while oil-based adds warmth and tends to amber over time, with a stronger scent and longer cure times. Compare side by side on common species and high-traffic zones, and you’ll clearly see why the decision isn’t just price but how the floor will behave under daily abuse and light exposure.
This section breaks down prep steps, number of coats, drying and recoat windows, and maintenance routines so you can pick the right finish and apply it with fewer surprises. You’ll get practical, room-by-room guidance for kitchens, basements, bathrooms, and living areas, plus a concise decision framework that accounts for ventilation, budget, desired appearance, and maintenance willingness. Follow a straight plan, respect the timing, and the result will be easier to clean, longer lasting, and more predictable, while bad approaches flip the results into extra cost, odor, and failed finishes.
Surface prep and compatibility: ensuring proper adhesion and finish by selecting the right base, sanding, and compatibility checks
To ensure a durable finish, start with a clean substrate free of dirt or oils. For water-based polyurethane, use a grit that won’t leave deep scratches but will give good tooth for adhesion. Oil-based finishes may require a coarser grit to open up the wood grain properly.
Before applying any new coat, test compatibility by doing a small patch on an inconspicuous area. If you’re refinishing over existing polyurethane, strip back to bare wood or sand thoroughly until you have a smooth surface ready for recoating. This ensures your finish will adhere well and look consistent.
Choose the right grit based on whether you’re working with water-based or oil-based products. Water-based finishes generally work better with finer grits, while oil-based can handle coarser sands without compromising their durability.
Application steps and techniques: recommended methods, film build, and coat sequencing for durable results
The right application technique can make or break your finish.
- Water-based: Brushing is preferred for better control over coat thickness.
- Oil-based: Both brushes and rollers work well, but avoid using a roller on the final coat to prevent visible marks.
Apply thin coats (around 2-3 mils) for a smoother finish. Start with two or three light coats, then apply one heavier coat if needed, adjusting based on drying time in your environment.
Drying time: Allow adequate time between coats to prevent blisters and unevenness. In humid conditions, wait longer; in dry air, shorter waits are sufficient. Always follow the manufacturer’s guidelines for best results.
Common mistake: Not allowing enough drying time can lead to trapped moisture causing bubbles or peeling of the finish.
Decision rule: If you notice any signs of tackiness after the recommended drying time, wait longer before applying the next coat. If it remains tacky for an extended period, sand lightly and start over with that coat.
Safety, ventilation, and environmental considerations: VOCs, PPE, and storage for safer DIY finishing
VOC emissions can be high with oil-based finishes. Ensure good air circulation by opening windows or using fans to keep the area well-ventilated during application.
Wear protective gear like gloves, respirators, and goggles when handling these materials. A half-mask respirator is a typical choice for dealing with solvent-based products due to their higher VOC levels.
Store leftover finishes in a cool, dry place away from direct sunlight or heat sources. Proper disposal of unused material is crucial; follow local regulations on hazardous waste disposal to avoid environmental harm.

Conclusion
Choose with your real needs in mind and don’t skip the prep. A properly selected finish and a cautious test plan keep the floor looking great and prevent costly mistakes.
Run a quick, practical checklist in your head as you move: confirm the base is clean and dry, pick the finish that matches your wear pattern and odor tolerance, test the chosen product in a small, inconspicuous area, document the results, and then proceed in light, even coats with the right dry and cure times. Protect nearby surfaces, ventilate well, and follow the label for recoat windows and safety gear.
Common mistakes to avoid are rushing dry or cure times, skipping surface testing, and mixing products or applying over incompatible finishes. Always ventilate, wear a respirator or mask when needed, and keep kids and pets off the floor until the finish has fully cured. If you’re unsure about compatibility with an existing finish or you’re dealing with a large, high-traffic area, pause and plan a professional check, especially for repairs or color changes.
When to call a pro is clear: if the floor has stubborn stains, water damage, deep scratches, or you’re weighing a color shift that requires even, consistent application across a wide area. If you’re confident with small projects and the space isn’t risky, you can proceed with care. Stay methodical, test first, and you’ll finish strong with a durable, good-looking floor.
FAQ
What’s the main difference between water-based and oil-based polyurethane?
Main thing to know is how they clean up. Water-based dries clear with soap and water cleanup, but oil-based needs chemicals like mineral spirits.
Which one cleans up easier?
Water-based wins hands down in this category. You just use soap and water for easy cleaning during application.
Should I go oil-based if I want a really shiny floor?
You might think so, but it’s not the case. Water-based can give you that wet look too. Plus, oil-based tends to turn yellow over time in sunlight.
Can I apply water-based polyurethane over an existing oil-based finish?
No way! You’d need to strip off and re-sand your floor first. They’re not compatible, so don’t mess around with this.