
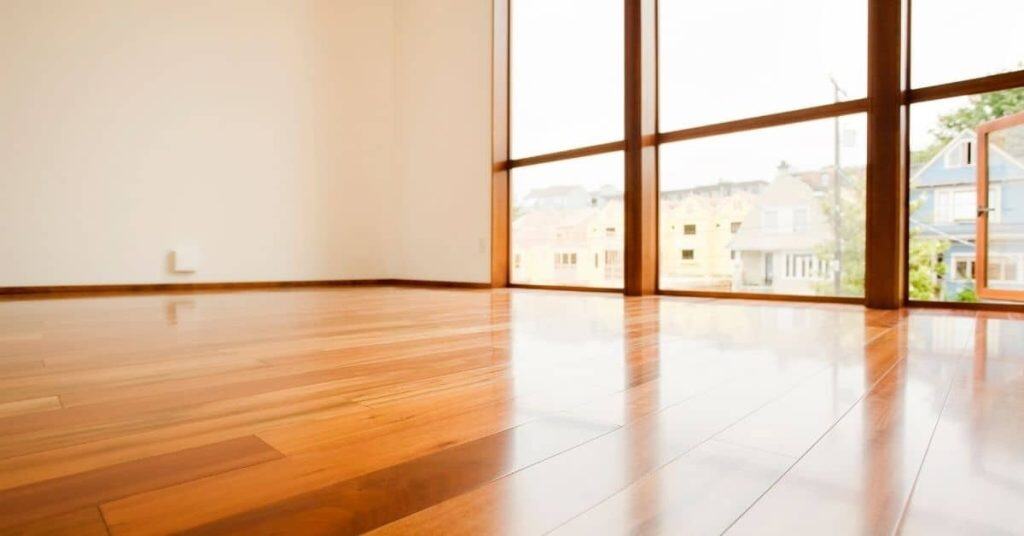
Introduction
Restoring the shine of your hardwood floors doesn’t have to be a time-consuming project. With a clear understanding of the process and a dedicated timeline, you can transform dull floors into gleaming surfaces in no time.
This step-by-step guide walks you through the entire process, from diagnosing the issue to completing the final touch-ups, ensuring that your hardwood floors regain their luster efficiently and effectively.
The Comprehensive Timeline for Restoring Hardwood Floor Shine
Follow this detailed timeline to ensure you allocate sufficient time for each step in the process. Remember, rushing through any stage may lead to subpar results or even damage your floors.
- Week 1: Inspection and Preparation (3-5 days)
- Inspect your hardwood floors visually and tactilely to identify dull spots, scratches, or buildup.
- Test a small, inconspicuous area with an appropriate cleaner to confirm shine results.
- Gather necessary tools, materials, and safety gear.
- Week 2: Cleaning and Degreasing (3-4 days)
- Clean and degrease your floors using safe procedures, ensuring proper ventilation and protection.
- Allow the floor to dry completely before proceeding.
- Week 3: Buffing, Polishing, and Spot Repair (5-7 days)
- Buff your floors following manufacturer guidance, using machines at moderate speeds.
- Polish any remaining dull spots or apply touch-ups as needed.
- Perform spot repairs, matching the finish and blending gradually to prevent halos.
- Week 4: Refinishing or Recoating (7-10 days)
- If cleaning and polishing won’t restore the gloss, plan for refinishing or recoating with a certified professional.
- Follow manufacturer instructions and local rules for the best results.
- Week 5: Final Touches and Maintenance (2-3 days)
- Apply any final touch-ups or sealants to protect your floors.
- Establish a preventive maintenance routine to keep your floors shiny longer.
Key takeaways
Proper preparation is key to ensuring that the entire process stays on schedule. Allocate sufficient time for each step, and don’t rush through any stage to avoid potential setbacks or damage to your hardwood floors.
- Inspect for dull finish, scratches, or buildup before cleaning to plan steps.
- Test a small area with appropriate cleaner to confirm shine results.
- Follow safety gear: gloves, ventilation, and eye protection when degreasing floors.
- Buffing should follow manufacturer guidance, use machines at moderate speed.
- Spot repairs require matching finish and gradual blending to prevent halos.
- If polishing fails, plan refinishing vs recoating with a certified pro.
Table of Contents
- Introduction
- Key takeaways
- Why Hardwood Floors Lose Their Shine
- Visual and Tactile Checkpoints to Diagnose Shine Problems
- Cleaning and Degreasing to Restore Shine (Safe Procedures)
- Minor Fixes: Buffing, Polishing, and Spot Repair
- When Cleaning and Polishing Won’t Help: Refinishing Vs Recoating
- Preventive Maintenance to Keep Floors Shiny Longer
- Tools, Materials Checklist, and Safety Considerations
- Troubleshooting Common Specific Problems and Quick Fixes
- Conclusion
- FAQ
Why Hardwood Floors Lose Their Shine
Shine fades for several reasons you can actually spot. Surface wear from foot traffic and furniture scuffs wears down the top layer that reflects light. Buildup from cleaners or waxes can dull the finish and obscure the grain.
Finish degradation from age or moisture shows up as a hazy look or milky film that won’t wipe away. Improper cleaning leaves residues that trap dirt, and moisture damage can cause cupping or discoloration. Each cause leaves a distinct visual and tactile clue you can feel with your hand and see in the light.
Surface wear and abrasion
Hardwood floors take a beating from daily foot traffic, pets running around, and furniture being moved. Over time, these activities create micro-scratches that dull the floor’s shine.
Look for patterns in the wear:
- High-traffic areas will show more scratches.
- Pet nails can leave deep grooves.
- Heavy furniture may cause dents or indentations.
Finish type affects how visible the wear is. For example, glossy finishes show scratches more than matte ones.
Dirt, residue, and product buildup
Soap scum, wax, or polish can build up over time, causing a cloudy or sticky appearance on your hardwood floor. This isn’t the same as finish loss.
To detect residue:
- Wipe an inconspicuous area with a damp cloth. If the shine returns, it’s just dirt.
- If the area still looks dull or sticky, you’ve got buildup.
Regular cleaning can prevent this, but sometimes you’ll need to strip and reapply finish.
Finish breakdown and coating issues
Different finishes age differently:
- Polyurethane can yellow over time.
- Oil-based finishes may darken or change color.
- Shellac can crack or peel. Water-based finishes might appear patchy.
Signs of finish failure include:
- Cracks, chips, or peeling.
- Darkened or discolored areas.
- Areas that feel sticky or rough to the touch.
Contamination can also cause issues. If you’re unsure, test a small area before stripping and refinishing.

Visual and Tactile Checkpoints to Diagnose Shine Problems
Set up a quick lighting check: hold a flashlight at an angle and look for dull patches, scratches, or a milky film. Do a light touch test in several areas to feel for roughness or sticky residues. Compare edges near doors, stairs, and traffic lanes to user patterns.
Flat, glistening areas with smooth texture usually indicate proper finish; dull, rough spots hint at buildup or wear. Sticky or oily patches point to residue or wax. If the surface feels soft or recessed, moisture or finish breakdown may be involved.
Lighting and reflection tests
Use this checklist to inspect your hardwood floors for scratches, ripples, or haze caused by wear and tear. This test works best in natural light.
- Raking light: Angle a lamp across the floor to reveal imperfections. Scratches will cast shadows.
- Reflections: Move a lamp around to see specular highlights. A uniform reflection indicates a healthy finish.
- Sunlight: Inspect floors in direct sunlight for any discoloration or unevenness.
- Dark spots: Check for areas where light doesn’t reflect, indicating possible finish loss.
- Ripples: Look for wavy patterns that could indicate a problem with the subfloor.
- Haze: Inspect for a general cloudiness or lack of clarity in the finish.
- Gloss level: Compare different areas to see if some are duller than others. This could indicate uneven wear or finish breakdown.
- Edges and corners: Check these areas for signs of damage, as they often show wear first.
Quick rule: Regular lighting checks help you spot problems early, preventing them from worsening.
Finger and microfiber wipe test
Use this test to differentiate loose dirt or residue from finish loss. It’s best done after your lighting tests.
- Dry microfiber: Wipe the floor with a dry, clean microfiber cloth. If it picks up dirt, you’ve got surface grime.
- Wet microfiber: Dampen another microfiber and wipe. If it leaves streaks or doesn’t glide smoothly, there might be residue buildup.
- Sticky feeling: Check if the floor feels sticky after wiping. This indicates a residue issue.
- Dull areas: Compare wiped and unwiped areas. If the wiped area looks shinier, you’ve removed dirt or residue.
- Uneven shine: Inspect for areas that still look dull after wiping. This could indicate finish loss.
Quick rule: Regularly removing surface dirt and residue helps maintain your floor’s shine and prolongs the life of your finish.
Water bead and alcohol test
This test checks for finish repellency and dissolvable residues. Always test in a hidden area first to avoid damaging the floor.
- Water bead: Place a small droplet of water on the floor. If it beads up, your finish is still repellent.
- Water spread: If the water spreads out instead of beading, your finish may have broken down.
- Alcohol test (hidden area): Apply a small amount of isopropyl alcohol to a hidden part of the floor. If it dissolves the finish, do not use it on visible areas.
- Residue check: Wipe the alcohol with a clean cloth. If residue comes off, you’ve found a dissolvable buildup.
Quick rule: Always test in hidden areas first to avoid damaging your floor’s finish.
Cleaning and Degreasing to Restore Shine (Safe Procedures)
Start with a gentle cleaner recommended for hardwoods and follow label directions. Use a well wrung mop or microfiber, and avoid soaking the wood. If buildup remains, a second, targeted pass can help lift residue without saturating the floor.
For stubborn grime, consider a labeled degreaser and test in a hidden area first. Dilution ranges and contact times vary by product, so verify with the manufacturer or product data sheet. Stop and reassess if you notice changes in color or finish integrity.
Dry cleaning and dust removal
Start by removing large debris with a broom. Use soft bristles to avoid scratching the finish.
Vacuum regularly using a hardwood-safe attachment. Be gentle, don’t press too hard.
For tough spots, use a microfiber mop dampened with plain water. Wring it out well – too much water can damage your floor.
pH-neutral and manufacturer-recommended cleaners
Use pH-neutral cleaners to avoid damaging the finish. They’re gentle yet effective.
Follow the cleaner’s instructions for dilution. A little goes a long way.
Always check your floor’s manufacturer guidelines first. Some floors require specific cleaners.
Test any new cleaner on a small, hidden area before using it across the whole floor.
Removing sticky residue and wax buildup
Start with gentle solvents like mineral spirits or white spirit. Apply, let it soak, then wipe off.
For tough spots, use a soft-bristled brush to scrub gently. Don’t scrub too hard – you don’t want to strip the finish.
If residue persists, try a stronger solvent like acetone. But be cautious: it can damage some finishes if left on too long.
Always test solvents on a small area first. If your floor’s finish starts to bubble or discolor, stop immediately and reassess.
Minor Fixes: Buffing, Polishing, and Spot Repair
Manual buffing with a soft pad can restore a thin surface sheen in small areas. Use light pressure and keep the pad moving to avoid creating swirls or heat buildup. Mirror-polish with a microfiber pad if your finish allows it and you’re careful with pressure.
Commercial floor polish can help revive shine on lightly worn floors, but it has limits. Avoid products not labeled for your finish type and avoid over-application, which can cause hazy spots. Spot repair may be needed if deeper scratches remain after buffing.
Hand-buffing and microfiber polishing
For small areas, hand-buffing and microfiber polishing are great for restoring shine. Here’s how:
Direction: Work in the direction of the grain to avoid damaging the finish.
Pressure: Apply firm but gentle pressure. Too much can damage the finish, too little won’t buff effectively.
Pad type: Use a soft, non-abrasive pad for microfiber polishing. For hand-buffing, use a lambswool or horsehair pad.
Frequency: Buff in small sections, then move on to avoid overworking the finish.
Using liquid or paste polish
Liquid or paste polish can add a new layer of protection and shine. Here’s how to use it:
Selection: Choose a polish compatible with your existing finish. Check the label or consult the manufacturer.
Application: Apply sparingly in small sections, working in the direction of the grain. Use a soft cloth or pad.
Drying/Curing: Follow the product’s instructions for drying and curing time. Most need 24-48 hours to fully cure.
Warning: Never layer incompatible products. It can cause discoloration, bubbling, or other issues.
Spot-sanding and blending scratches
For small scratches, spot-sanding can help. Here’s how to do it safely:
Sanding: Use a fine-grit sandpaper (220 or higher) to gently sand the scratch in the direction of the grain.
Blending: Feather the edges of the sanded area to blend it with the surrounding floor. This prevents visible lines.
Cleaning & Recoating: Clean the area thoroughly, then recoat with a compatible finish or repair product. Follow the manufacturer’s instructions for application and drying time.
Warning: Spot-sanding is a delicate process. If done incorrectly, it can cause more damage than good. If you’re unsure, consult a professional.

When Cleaning and Polishing Won’t Help: Refinishing Vs Recoating
Screening or recoating adds a fresh layer without removing the old finish, ideal when the wear is light and the floor is structurally sound. Full sanding and refinishing removes the existing film and exposes bare wood for a new finish. Choose based on the depth of wear and the floor’s age.
If you’re unsure, evaluate finish depth with a scratch test and inspect for moisture damage or deep stains. Manufacturer instructions and local rules can guide whether recoating is acceptable or a full refinish is required. Consider consulting a pro if the job extends beyond surface-level care.
Screening and recoating process
When cleaning and polishing won’t bring back your hardwood’s shine, it might be time to consider screening or recoating. Both processes involve abrading the existing finish, but they differ in intensity.
Screening is a light abrasion using fine-grit sandpaper (120-150 grit) or a screening tool. It removes minor scratches and dullness without affecting the wood’s surface. Recoating follows screening, applying new coats of finish to restore shine.
Benefits include extending your floor’s lifespan by 3-5 years and are suitable for DIYers with moderate skills. However, if damage is deeper or finish is old, full sanding might be necessary.
Full sanding and refinishing
If your hardwood floors are severely damaged, dull, or you want to change the stain color, full sanding and refinishing is the way to go. This process involves heavy-duty sanding using progressively finer grits (starting from 24-grit), removing all existing finish.
After sanding, apply wood conditioner, stain, and multiple coats of your chosen finish. Expect a significant time investment and potential dust mess. It’s best left to professionals or experienced DIYers.
The outcome is a fresh, smooth surface with long-lasting shine. Common finish choices include water-based, oil-modified polyurethane, and penetrating oils.
Choosing the right finish for future sheen
Selecting the right finish impacts your floor’s long-term shine. Here are three common options:
Water-based polyurethane offers a clear, non-yellowing finish with low VOCs and quick drying time. It’s easy to apply but less durable than oil-based finishes.
Oil-modified polyurethane provides more durability and better adhesion than water-based options. However, it may yellow over time and has longer drying times.
Penetrating oils like linseed or tung oil soak into the wood for a natural look with minimal buildup. They’re easy to maintain but require reapplication every 2-3 years.
Preventive Maintenance to Keep Floors Shiny Longer
Establish a practical maintenance rhythm that fits your home and traffic. Use entry mats and felt pads under furniture to minimize scratches. Keep humidity levels stable to prevent wood movement that dulls the surface.
Regular cleaning with appropriate products and quick wipe-downs after spills help maintain clarity. Develop routines for dusting, mopping, and addressing high-traffic zones to preserve shine over time.
Daily and weekly care routines
Keep your hardwood floors looking shiny with these quick, daily routines:
Daily: Use a soft-bristled broom or microfiber mop to remove dust and dirt. Sweep in the direction of the grain.
Weekly: Spot clean any marks or spills using a pH-neutral cleaner, as mentioned earlier. Buff lightly with a soft cloth to restore shine.
Seasonal and annual maintenance tasks
Maintain your floors’ gloss with these seasonal and annual tasks:
Spring/Summer: Deep clean using a manufacturer-recommended cleaner. Inspect for any signs of damage or wear.
Fall/Winter: Maintain humidity levels between 30-50% to prevent cupping. Apply a fresh coat of polish if needed, following the spot repair guide.
Traffic management and protective measures
Protect your floors’ finish with these simple measures:
Area rugs and runners: Place them in high-traffic areas to reduce wear. Use non-slip backing to prevent slippage.
Pet care: Keep pet nails trimmed to avoid scratches. Wipe paws clean after outdoor walks.
Furniture pads: Protect floor surfaces from furniture legs by using felt or rubber pads.
Tools, Materials Checklist, and Safety Considerations
Maintain a concise set of tools: soft pads, microfiber cloths, a mild cleaner, and any recommended finish compatible products. Have a spare mop head and non-slip footwear for safe operation. Include PPE like gloves and ventilation prompts when using finishes or strong cleaners.
Know safe alternatives and warnings about solvents, proper ventilation, and finish compatibility. Always verify product labels, data sheets, and manufacturer instructions before use to avoid harming the floor.
Essential tools and products
Before you start, make sure you have these essentials on hand. This checklist covers cleaning, testing, buffing, and small repairs.
- Microfiber cloths: For dusting and wiping. Skip this, and you’ll spread dust around.
- pH-neutral cleaner: To clean floors without damaging the finish. Using the wrong cleaner can dull your floor’s shine.
- Isopropyl alcohol: For removing tough spots. Not using it might leave residue behind.
- Fine-grit sandpaper (120-150 grit): For spot-sanding scratches. Skipping this step can make scratches more visible.
- Buffing pads: To apply and buff liquid or paste polish evenly.
- Applicators (foam or lambswool pad): For applying finish. Using the wrong applicator can lead to streaks or uneven application.
- Liquid or paste polish: To restore shine. Not using it might leave your floor looking dull.
- Finishing oil (if needed): For touch-ups and recoating. Skipping this can make touched-up areas look different from the rest of the floor.
Quick rule: Always have these tools and products ready to avoid mid-project trips to the store.
Personal protective equipment and ventilation
Safety first! Here’s what you need to protect yourself and ensure proper ventilation when using solvents or finishes.
- Gloves: To protect your hands from chemicals. Not wearing gloves can cause skin irritation.
- Eye protection (safety glasses): To shield your eyes from splashes. Without it, you risk eye injury.
- Dust mask or respirator: For sanding and using certain finishes. Not wearing one can expose you to harmful dust or fumes.
- Proper ventilation (open windows, use fans): To ensure good airflow when using solvents or finishes. Poor ventilation can lead to dizziness or headaches.
- Safety Data Sheets (SDS): Check these for product-specific safety information. Ignoring SDS can result in improper handling and potential harm.
Quick rule: Always follow safety guidelines and check SDS before starting any project involving chemicals.
How to test new products safely
Before using a new cleaner, polish, or finish on your entire floor, follow this patch testing protocol to avoid unwanted results.
- Choose an inconspicuous spot: Test in a corner or under furniture where it won’t be noticeable. Testing in visible areas can lead to unsightly results if the product doesn’t work as expected.
- Clean the test area: Ensure the surface is clean before testing. A dirty surface can affect the test’s accuracy.
- Apply a small amount of the new product: Use just enough to cover the area. Using too much can waste product and make the test area more noticeable.
- Wait recommended cure time: Follow the manufacturer’s guidelines for drying or curing times. Not waiting long enough can lead to inaccurate results.
- Inspect the test area: Check for any changes in color, texture, or shine. If you see unwanted effects, don’t use the product on your entire floor.
Quick rule: Always patch test new products to avoid costly mistakes and ensure compatibility with your floor’s finish.
Troubleshooting Common Specific Problems and Quick Fixes
Cloudy finish often hides under top layers or moisture exposure; check for finish film integrity and moisture sources. White water rings may indicate mineral deposits or residue buildup that needs a thorough cleaning. Sticky floors usually point to residues or improper cleaners.
Dull high-traffic paths can come from wear through the topcoat; assess wear depth and consider refinishing or recoating. For each issue, follow up with a targeted cleaning, inspection, and a decision on whether a minor fix or a larger recoat is needed.
Cloudy or milky appearance
A cloudy or milky look on your hardwood floor could be due to moisture, wax build-up, or finish blushing. Here’s how to tackle each:
Moisture: Let the floor dry completely. If it doesn’t improve, you might have a bigger issue like a leak.
Wax build-up: Use a gentle cleaner designed for hardwood floors and follow up with a damp cloth to remove any residue. Avoid using too much water.
Finish blushing: If the problem persists, it might be finish blushing. This requires professional assessment and possible refinishing.
White water rings and spots
White rings or spots on your hardwood floor are usually caused by moisture or heat. Here’s how to reduce or remove them:
Moisture: Wipe up spills immediately. For existing rings, try a mixture of equal parts white vinegar and water. Let it sit for 15 minutes, then wipe off.
Heat: Direct sunlight or heat sources can cause discoloration. Move furniture to even out exposure and consider using window treatments to block harsh sunlight.
If these remedies don’t work, refinishing might be necessary.
Sticky or tacky floors after cleaning
A sticky or tacky floor after cleaning could be due to residue, insufficient rinsing, or incompatible product layering. Here’s how to fix it:
Residue: Re-clean the area with the appropriate hardwood floor cleaner and a damp cloth. Make sure to rinse thoroughly.
Insufficient rinsing: Rinse the area again using clean water and a damp cloth until no residue is left.
Incompatible products: If you’ve used multiple cleaning or treatment products, they might not be compatible. Stick to products designed for hardwood floors in the future.
Conclusion
Confidence comes from having a clear, repeatable plan that protects your floor and your wallet. You’ve got the steps to diagnose shine issues, restore what you can safely, and know when to stop and call for help.
Follow this practical checklist: inspect the floor for dull spots and texture, test a small, inconspicuous area with cleaning and degreasing first, try minor fixes like buffing or spot repair on non-porous finishes, and only move to refinishing or recoating if cleaning and polishing won’t restore the gloss; keep the work area well ventilated, wear proper protection, and complete each step in a small, controlled section before moving on to the next.
Common mistakes to avoid include over-wetting the wood, using harsh cleaners or abrasive pads on a fragile finish, and rushing through buffing or polishing without cleaning residue first. Safety rules to follow are simple: always work in good lighting and test in a small area before broad application, use the recommended products and pads, and never skip drying times or protective coats—these prevent irreparable damage and costly rework.
If the shine stubbornly won’t return after sensible cleaning and light refinishing options, or you see deep scratches, watermarks, or uneven wear, it’s time to call a professional. Stay steady, follow the plan, and you’ll keep floors looking strong and long-lasting. You’ve got this set up to protect your investment and finish with confidence.
FAQ
How can I tell what type of finish I’m shining up and why it matters for maintenance?
Check the product label or datasheet on the finish. Knowing if it’s polyurethane, oil-based, or wax helps you choose the right buffing method and cleaners. If in doubt, follow the manufacturer instructions and avoid aggressive methods that can dull or burn through the finish.
What should I do before buffing if I suspect hidden moisture or swelling under the boards?
Look for soft spots, musty smells, or cupping at edges. If you see signs, stop and dry the area first and consult local guidelines or a pro before continuing. Pushing through moisture problems can cause bigger damage.
How do I use a buffing machine without making scratches or dull spots?
Use a light touch, move systematically across the floor, and follow the grain where possible. Use the correct pad for the finish and keep the pad clean; dirty pads carry grit that can scratch. If the surface looks dull after a pass, back off and recheck your approach.
What if buffing and cleaning don’t restore shine, should I recoat or refinish?
If the finish is worn through or damaged in high traffic areas, a recoating or refinishing may be needed. Check the existing finish’s compatibility with a new coat and follow product instructions. When in doubt, verify with the label, manufacturer guidance, or a local pro before proceeding.