

Introduction
Touch-up kits and screen-and-recoat are two common ways to repair scratches on bamboo flooring. Bamboo floors are durable, but everyday wear can show scratches, especially in high-traffic areas. This guide will help you decide which method fits your situation and budget.
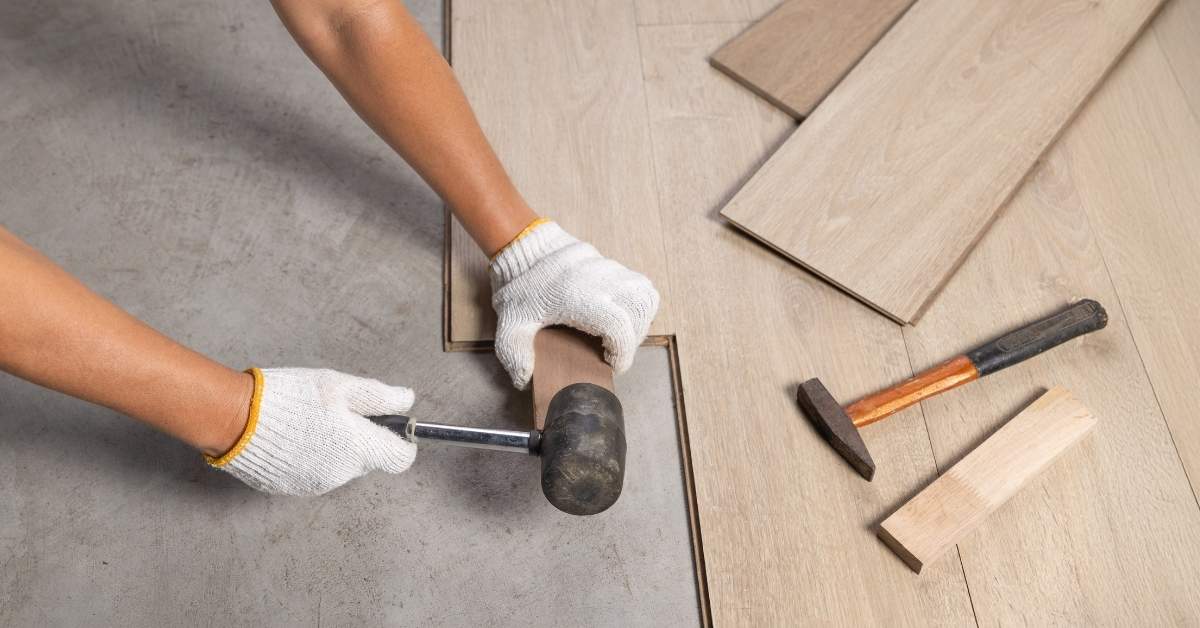
Scratch causes include grit, furniture movement, and moisture exposure, so address the underlying issue first. Touch-up kits come in pigment touch-up sticks or pens and may be clearer or amber-toned; check the label for compatibility with your bamboo finish. Screen-and-recoat involves lightly abrading the surface and applying a fresh coat filmed evenly; follow manufacturer instructions and local rules for ventilation and drying times.
Key takeaways
- Bamboo flooring offers durability, sustainability, and unique grain patterns in homes.
- Scratches commonly come from grit, furniture movement, and moisture exposure risks.
- Touch-up kits include markers, wax sticks, and fill sticks for minor repairs.
- Screen-and-recoat reshapes finish by sanding lightly and applying multiple thin coats.
- Safety: wear eye protection and ventilation; protect surrounding floor from dust.
- DIY vs professional: assess skills, warranties, and inspection for optimal results.
Table of Contents
- Introduction
- Key takeaways
- Quick Comparison and When to Choose Each Method
- Types of Bamboo Flooring Scratch Repair Kits Available
- Screen-and-Recoat Process Explained
- Benefits and Drawbacks of Using Touch-up Markers for Bamboo Floors
- Longevity, Effectiveness, and Impact on Appearance
- Cost Considerations and Detailed Analysis
- DIY Vs. Professional Assistance: Risks, Skills, and Selecting Help
- Safety, Environmental Impact, and Maintenance Planning
- Conclusion
- FAQ
Quick Comparison and When to Choose Each Method
Decide whether you’re fixing a small, isolated scratch or refreshing worn finish across a room. Inspect scratch depth, check how many areas are affected, and pick a targeted touch-up for single shallow marks or a screen-and-recoat for widespread dullness or many scratches.
Choosing correctly saves time and money and affects how long the repair lasts. A marker or filler is fast but temporary; a screen-and-recoat restores uniform protection and sheen but requires more prep, product, and downtime—watch for finish compatibility and follow manufacturer guidance for cure and safety.
Touch-up kits at a glance
Touch-up kits are your quick fix for minor surface scratches and small chips on bamboo flooring. They’re designed to tackle localized damage, saving you time and effort.
Convenience is key here. These kits are easy to apply, usually requiring just a few minutes of your time. No need to clear the room or plan for extended downtime.
Think of touch-up kits as spot treatment for your floors. They’re perfect for those small pet scratches, utensil marks, or minor wear that doesn’t affect the overall finish.
Screen-and-recoat at a glance
When your bamboo flooring shows broader signs of wear – dullness, coalesced scratches, or color mismatch – it’s time for screening and recoating. This method resurfaces the finish across larger floor areas.
It’s a bigger job than touch-up kits, but it’s chosen when minor repairs won’t cut it. Screening involves lightly sanding the floor to remove the worn finish, while recoating applies a new layer of protection.
Screen-and-recoat extends your floor’s lifespan by refreshing its entire surface. It restores uniform sheen and protection, making it ideal for high-traffic areas that show signs of wear over time.
Types of Bamboo Flooring Scratch Repair Kits Available
Identify the kit that matches the damage: marker/stain pens for surface discoloration, wax or filler sticks for small gouges, putty for deeper voids, and polish kits for light surface scuffs. Check whether your floor is strand-woven or solid bamboo because porosity and finish build affect how well each product penetrates and hides damage.
Picking the wrong kit wastes effort and can worsen appearance or adhesion. Match solvent type and sheen to your finish, test color in an inconspicuous spot, and follow product directions and safety notes on the label for ventilation and cleanup to avoid blotching or incompatibility.
Marker and stain pens
Marker and stain pens are your first line of defense against fine scratches and color correction. They work by filling in the scratch with a matching color, blending it into the surrounding floor.
Pros: Easy to use, quick results, great for surface-only scratches.
Cons: Not suitable for deeper gouges or missing material. Blendability has limits; may not be perfect on wide or dark scratches.
Best used for: Light surface scratches, color touch-ups.
Wax, filler sticks, and putty
For deeper gouges or missing material, reach for wax, filler sticks, or putty. These products are shaped into the scratch, then sealed to protect it.
Pros: Can fill gaps and restore surface level, great for medium-depth scratches.
Cons: Requires more skill than markers; improper application can lead to uneven results. Not suitable for deep or wide scratches.
Best used for: Medium gouges, missing material (like nail holes).
Full touch-up kits with polish/sealant
Some kits include polish, beeswax, or sealing compounds for a more complete cosmetic fix. They can restore sheen and protect the repair.
Pros: Provides a comprehensive solution, restoring both color and sheen. Can be used on solid or strand-woven bamboo.
Cons: More expensive than individual products. May require more time and skill for application.
Best used for: When you need to restore both color and sheen, or if the scratch is in a high-traffic area.
Screen-and-Recoat Process Explained
Plan on a light abrade (screening) to scuff the old finish and a thin, even finishing coat to renew protection without full sanding. Prepare by clearing furniture, masking base edges, cleaning thoroughly, and verifying finish compatibility between old and new coatings before you start.
The goal is a uniform sheen and continuous protection; poor screening or wrong finish choice leads to visible lap marks or adhesion failures. Use the right abrasive for a light cut, keep coats thin and even, and always test a small area for adhesion and color before committing to the whole floor.
When screening and recoating is appropriate
The screen-and-recoat process is ideal when your bamboo flooring shows signs of widespread wear, dullness, or surface scratches. It’s a whole-floor approach that renews the finish continuity without the need for full sanding.
If you’re dealing with isolated scuffs or minor damage, consider using touch-up kits instead (see our previous section).
Screen-and-recoat is best suited for:
- Widespread finish wear: When more than 20% of your floor shows signs of dullness or reduced gloss.
- Surface scratches: When you have numerous light-to-moderate surface scratches that can’t be easily touched up with a pen or putty.
Tools and materials checklist for screening and recoating
Before you start, make sure you have all the necessary tools and materials. This will ensure a smooth process and help avoid common pitfalls.
- Screening pads: 120-grit or 150-grit for light abrading. Too coarse can damage the finish, too fine won’t remove enough.
- Vacuum: A good quality vacuum to clean up dust between steps and after screening.
- Tack cloths: To wipe away any remaining dust before applying the new finish.
- Finish product: Choose a compatible finish (urethane/urethane-blend, water-based, or oil-based) that matches your existing one. Check the label for compatibility with bamboo.
- Safety gear: Dust mask, gloves, and safety glasses to protect you during the process.
- Masking tape: To protect adjacent areas from overspray or drips.
- Moisture meter: To check your floor’s moisture content before applying a new finish. Incompatibility can lead to peeling or bubbling.
- Cleaning supplies: A suitable cleaner for your existing finish to prep the surface for screening and recoating.
Quick rule: Always check product labels for specific application guidelines and safety precautions.
Typical workflow and timing considerations
The screen-and-recoat process follows a specific sequence to ensure the best results. Here’s how to proceed:
1. Prep your workspace: Remove furniture, mask adjacent areas, and ensure proper ventilation.
2. Screen (light abrade): Use your chosen grit screening pad with light, even pressure. Work in the direction of the grain to avoid damaging the bamboo core.
3. Clean: Vacuum and wipe away dust with a tack cloth. Check for any missed spots to ensure a smooth finish application.
4. Apply finish: Use a compatible finish, applying thin, even coats to avoid laps and buildups. Follow the product label’s guidance for drying/curing times between coats.
5. Cure: Allow the final coat to cure according to the manufacturer’s instructions before replacing furniture and resuming normal use.
Quick rule: Always follow product labels for drying/curing times and recoat windows to avoid damaging your refreshed finish.
Benefits and Drawbacks of Using Touch-up Markers for Bamboo Floors
Touch-up markers are quick and easy for tiny surface scratches or color loss spots; dab, blend, and wipe per instructions, and always test color match first. They’re handy for veneer and solid bamboo surface-level defects where structural repair isn’t needed.
Markers save time and money but offer limited durability and can show up as spots if the sheen or color isn’t exact. Expect reapplication over time, avoid using them on deep gouges, and check product data for solvent type and finish compatibility to reduce streaking or adhesion issues.
Visual outcome and color-matching tips
Touch-up markers can blend scratches well, but they’re not perfect. Here’s how to minimize visible repairs:
Test colors before applying. Dab a bit on a scrap piece or hidden area. Let it dry, then compare under natural light.
Use thin layers. Apply multiple light coats instead of one thick one. This helps avoid streaks and maintains the floor’s natural sheen.
Blend strokes with the grain. Follow the bamboo fibers for a more natural look. Avoid harsh lines or obvious repairs.
Durability limits and maintenance implications
Touch-up markers aren’t as durable as the original finish. Here’s what to expect:
Markers wear off over time, especially in high-traffic areas. Repeat applications may be needed every 6-12 months, depending on use.
They’re less effective on matte finishes. Markers are best suited for satin or semi-gloss floors. On matte, they can look too shiny and obvious.
Maintain the floor to extend marker life. Regular cleaning and prompt attention to new scratches will help keep your touch-ups looking good longer.
Longevity, Effectiveness, and Impact on Appearance
Assess how long a fix must last and how visible you’ll accept the repair to be. Small marker or wax fixes will blend short-term on surface scratches but can fade or wear faster; a full screen-and-recoat restores uniformity and protection over a larger area for a longer period.
Durability depends on traffic, moisture, bamboo type, and prep quality—poor prep shortens life of any repair. Monitor repaired spots, note changes in sheen or color drift, and plan maintenance or repeat work based on where wear reappears rather than on a fixed timetable.
Factors that affect repair longevity
Repair longevity depends on several factors. Here’s what you need to consider:
Foot Traffic: High traffic areas like hallways and kitchens will wear repairs faster.
Finish Type: Urethane finishes are harder-wearing than oil-based or water-based finishes, extending repair life.
Sunlight Exposure & Humidity: Direct sunlight can cause fading, while humidity can warp or crack repairs. Keep these factors in mind when planning your repairs.
How repairs age and options for future refinishing
Over time, even the best repairs will show signs of aging. Here’s what to expect:
Repairs may fade faster than surrounding areas due to sunlight exposure. Edges can also wear down, becoming visible.
When localized repairs no longer cut it, you might need a larger project like full-sand and refinish. This is especially true if:
– Many repairs are needed across the floor
– The entire floor shows signs of significant wear or fading
– You want to change the finish type
Cost Considerations and Detailed Analysis
Break costs into materials, tools, and labor. Count recurring items like touch-up supplies separately from one-time purchases such as applicators or screening equipment, and verify coverage, cure times, and VOC info on product labels before buying.
Short-term touch-ups have lower upfront costs but may recur more often; screen-and-recoat is higher initial effort and product use but can extend the life of the floor. Compare contractor quotes by scope, number of coats, prep included, and cleanup so you know what you’re paying for.
Material and equipment cost checklist
Before you start, use this checklist to price out your DIY bamboo flooring scratch repair project. It’ll help you avoid running short mid-job.
- Touch-up kit: Includes filler, stain, and sealant. Check label for coverage rate to ensure it’s enough.
- Stain or sealant (separate): If not included in the kit, buy separately. Check compatibility with your existing finish.
- Sandpaper: Fine-grit (220-320) for smoothing scratches. Don’t skip; it ensures a smooth surface for filling.
- Applicator pads: For applying filler and stain. Check if they’re included in the kit or buy separately.
- Rubber gloves: Protect your hands from chemicals. A must-have!
- Safety glasses: Essential for protecting your eyes during sanding.
- Dust mask: For sanding to prevent inhaling dust particles.
- Tack cloth: Removes dust after sanding, ensuring a clean surface for filling.
- Plastic scraper or putty knife: For applying and removing excess filler. A small one is usually sufficient.
Quick rule: Always check product labels to confirm coverage rates and compatibility with your existing finish.
When professional service is cost-effective
Hiring a pro might seem expensive, but it can save you money in the long run. Here’s when it makes sense:
Firstly, consider the size of the area and complexity of the damage. Large areas or extensive scratches may require more time and materials than a DIYer can handle efficiently.
Time constraints are another factor. If you’re short on time, a professional can complete the job faster, reducing downtime for your space.
Professionals also have access to specialized tools and equipment that can make the job quicker and easier. Plus, they bring experience and expertise, ensuring a high-quality result with minimal risk of mistakes.
Tip: When getting quotes from contractors, ensure they include scope (area to be repaired), prep work, number of coats, and cleanup. This way, you can compare apples to apples.
DIY Vs. Professional Assistance: Risks, Skills, and Selecting Help
Decide on DIY only when damage is surface-level, area is small, and you’re comfortable testing finishes and matching sheen. For deep gouges, veneer failure, or extensive wear, err on the side of a professional who can match color, lay down even coats, and guarantee work.
Poor technique can make repairs more visible or damage the floor further. If you hire help, ask for before-and-after photos, written scope, number of coats, and warranty; demand a small test area so you can confirm color and sheen under your home lighting.
Safe step-by-step for a DIY touch-up
This sequence helps you safely repair minor scratches on your bamboo floor using touch-up markers or waxes.
- Clean the area: Use a soft cloth and mild soap to remove dirt. Let it dry completely.
- Lightly sand (120-grit): Gently smooth the scratch, being careful not to damage surrounding finish.
- Apply touch-up marker/wax: Follow package instructions for application. Work in small sections.
- Blend and buff: Use a soft cloth to blend the repair into the surrounding floor. Buff gently with a clean cloth.
- Check under different lighting: Ensure color match and sheen. If not satisfied, lightly sand again and retry.
How to vet and select a qualified contractor for screening/recoating
Choosing the right professional ensures your bamboo floor’s longevity and aesthetic appeal.
First, ask for credentials and certifications. Check if they’re licensed and insured. Ask about their experience with bamboo flooring specifically.
Review their portfolio and before-and-after photos. This gives you an idea of their work quality and style. Don’t hesitate to ask for references from past clients.
Request a written estimate outlining the scope of work, materials, timeline, and total cost. Ensure they provide a clear warranty in writing. Always demand an on-site assessment before signing any agreement.
Safety, Environmental Impact, and Maintenance Planning
Follow safety steps: wear gloves, eye protection, and a respirator when products emit fumes, ventilate the work area, and check SDS or product instructions for storage and disposal. Label leftover products, store them safely away from heat, and dispose of rags and containers per local rules.
Plan maintenance to prevent repeat damage—use furniture pads, mats at entryways, and control humidity to limit cupping or gaps. Choose lower-VOC options if indoor air quality matters, and schedule periodic inspections so small issues get caught before they require larger repairs.
Safety precautions during repair work
When working on your bamboo flooring, safety should always be your top priority. Here are some essential steps to keep you safe:
Personal Protective Equipment (PPE): Always wear gloves to protect your hands from chemicals and debris. Eye protection is crucial as well, to shield your eyes from any potential hazards. If the product you’re using emits Volatile Organic Compounds (VOCs), consider wearing a mask or respirator.
Ventilation: Ensure there’s adequate ventilation in the work area. Open windows and use fans to keep air circulating. This helps reduce your exposure to VOCs and other harmful fumes.
Fire Safety: Be cautious when using solvents or other flammable products. Keep them away from heat sources, sparks, and open flames. Always follow the storage instructions on the product’s Safety Data Sheet (SDS).
Environmental considerations and greener alternatives
Choosing eco-friendly products can help reduce your environmental impact. Here are some factors to consider:
Low-VOC Products: Opt for touch-up kits and coatings with low or zero VOC emissions. These products are less harmful to both you and the environment. Check product labels or safety data sheets (SDS) for VOC content.
Water-Based Coatings: Water-based finishes are generally more environmentally friendly than solvent-based ones. They emit fewer VOCs, are easier to clean up, and often dry faster.
Recycling and Disposal: Look for products with recyclable packaging. Properly dispose of used rags, empty containers, and leftover products according to local regulations. Some communities offer hazardous waste collection days or facilities.
Maintenance and prevention to minimize future repairs
Preventive maintenance can significantly prolong the life of your bamboo flooring and reduce the need for frequent repairs. Here are some practical tips:
Area Rugs and Felt Pads: Use area rugs in high-traffic areas to protect your floor from scratches and wear. Attach felt pads to furniture legs to prevent them from scraping or scuffing the floor.
Cleaning Routines: Regularly clean your bamboo flooring with a suitable cleaner to remove dirt, dust, and other debris that could potentially scratch the surface. Be sure to follow the manufacturer’s recommendations for cleaning products.
Humidity Control: Maintain consistent humidity levels in your home to prevent expansion or contraction of the bamboo planks, which can lead to gaps or warping over time. Aim for a relative indoor humidity between 35% and 50%.
Conclusion
Protecting your floor’s look and staying safe matters more than quick fixes. Stick with proven steps, test first, and work steadily to avoid costly mistakes that can ruin the finish or the planks.
Assess the damage, decide whether a touch-up kit or a screen-and-recoat is most appropriate, and then follow a simple sequence: pick the method, test in a hidden spot, prepare the area and materials, apply per the kit or process, allow proper curing, and recheck the overall appearance and wear. Do the work in small, controlled sections and document what you did so you can repeat or adjust if needed.
Common mistakes to avoid include overapplying liquids or markers, skipping a test area, and rushing the cure or dry time. Always ventilate, wear eye and skin protection, and keep tools clean and out of traffic paths. If the job requires more than surface touch-ups, or if you’re unsure about the finish compatibility, pause and get a professional opinion—better to invest in a safe repair than pay twice later. When you follow these steps, you’ll protect durability, keep the bamboo looking right, and finish with confidence.
FAQ
What makes bamboo flooring a solid choice for DIY repairs?
Bamboo is sturdy and easy to sand or touch up in small spots. It’s important to follow the manufacturer’s finish and care instructions. Check labels or datasheets for any repair limitations.
What are the common causes of scratches on bamboo floors?
Heavy foot traffic, dropped items, and moving furniture without protection are the usual culprits. Pet claws and grit on shoes also scratch the surface. Keep debris up off the floor and use felt pads on furniture.
How do touch-up kits work, and when should I choose them?
Touch-up kits are for minor surface scratches and nicks. They’re best when you need a quick, cosmetic fix without refinishing a large area. If scratches are deep or span a wide area, a screen-and-recoat may be a better option.
What is the screen-and-recoat process like, and what should I watch for?
It involves lightly sanding the top finish and applying a new coat. You’ll need proper ventilation, masking, and the right finish for your flooring. Always test a small area and follow the product instructions exactly.