
Introduction
Before diving into dowel and epoxy repairs, you need to understand the basics. This method is ideal for fixing damaged concrete where strength and load-bearing capacity are essential. Proper preparation and execution can make all the difference between a lasting repair and a quick failure.
Key takeaways
- Clean hole debris thoroughly to maximize epoxy bonding and load-bearing strength.
- Dry the hole completely before epoxy application to avoid weak cures.
- Wipe with alcohol or acetone and air-dry before mixing epoxy.
- Drill per manufacturer guidance; oversize not required for most repairs.
- Use a tight-fitting dowel and precise hole diameter for best contact.
- Clamp firmly until epoxy reaches full cure before reattaching screws.
Table of Contents
- Introduction
- Key takeaways
- Quick overview and when to choose dowel-and-epoxy repairs
- Tools and materials checklist
- Planning the repair and selecting the right dowel size
- Safety precautions for drilling and epoxy work
- Preparing the damaged hole: assessing debris and looseness
- Step-by-step hole cleaning methods that actually make epoxy bond
- Drilling and sizing the hole for a tight dowel fit
- Mixing and applying epoxy correctly for best bond
- Inserting dowels, clamping, and ensuring alignment
- Drilling pilot holes and reattaching screws without damaging the repair
- Finishing, cleanup, and inspection for long-term durability
- Common mistakes and troubleshooting
- Cost, time estimates, and when to call a pro
- Conclusion
- FAQ
Quick overview and when to choose dowel-and-epoxy repairs
Dowel-and-epoxy repairs shine when you need real load transfer through a hollow or damaged concrete member, when a cosmetic patch near the surface is enough, or when you’re fixing stripped holes in concrete substrates. Moisture and dampness drive epoxy choice, so pick products rated for the conditions and plan for extra cure time if the surface is damp. Before you start, assess hole size and depth, wall thickness, and any existing cracks or shifting, and know whether you can achieve a flush, concealed repair with proper surface prep.
Choose an epoxy system, matching pot life and cure time to your work pace, and select dowels and diameters that fit the hole while leaving room for anchors or screws. Expect realistic strength gains, possible color or texture differences, and some visibility if the repair is near the surface, with tolerances for flushness that may require careful grinding or filling. Plan the steps in your head: clean, align, dry fit, mix and apply epoxy, insert dowel, cure, then drill pilot holes and reattach. Safety matters—ventilation, eye and hand protection, and confirming the epoxy has cured before loading are non-negotiables.
When to repair versus replace
Deciding between repairing and replacing concrete depends on the extent of damage. If you see cracks that are narrower than a quarter-inch, consider dowel-and-epoxy repairs. For wider cracks or significant structural issues, replacement might be necessary.
Cost is key. Repairing can save money but won’t fix deep-settlement problems. If the concrete slab has sunk more than an inch, it’s time to replace rather than patch up. Check base compaction and soil stability before deciding.
Structural needs also play a role. For driveways or walkways with light traffic, repairs might suffice. But for areas like garage floors that bear heavy loads daily, replacement ensures long-term durability.
Strength you can expect from a proper dowel-and-epoxy repair
Dowel-and-epoxy repairs are strong, but they won’t match the original material’s strength. Think of it like this: if your concrete is as tough as steel, epoxy and dowels will be more like reinforced plastic. It’s good for small fixes but not structural work.
For things like fixing a shelf or furniture hinge, it works great because you’re dealing with lighter loads. Just make sure the base material is solid—check base compaction before applying epoxy to ensure your repair holds up over time.
If you’re thinking of using this for bigger jobs, like repairing large cracks in a concrete slab, think again. It’s better to replace or use more robust methods for those situations. Dowel-and-epoxy is best kept for minor repairs where the load isn’t too heavy.
Tools and materials checklist
You need a drill or hammer drill, carbide masonry bits in the right size, a depth stop, a vacuum or shop vac readiness, a brush or canned air for cleaning, and a clean, organized workspace where dust can be controlled. For materials, stock two‑part epoxy (or a fast‑setting variant if your schedule demands), epoxy mixing cups and sticks, the dowel material matched to the hole, masking tape, solvent wipes, and rags for thorough cleanup and keeping surfaces free of debris. Before drilling, verify the hole diameter and depth, use a proper pilot hole if required, drill perpendicular to the surface, deburr the edge, and pull dust out with vacuum and compressed air so the epoxy will seat and cure properly.
Mix the epoxy to the correct ratio, stir with a smooth, figure‑eight motion to minimize bubbles, apply a thin coat into the hole and onto the dowel, then insert and hold until the epoxy starts to set and the dowel stays aligned. Getting this right matters because voids, misalignment, or premature cure can ruin a joint, so insist on good ventilation, following kit instructions, and a clean, well‑lit workspace that supports inspection for voids and proper load readiness.
Essential tools and optional extras
This checklist helps you verify your tool setup before starting concrete work to avoid costly mistakes.
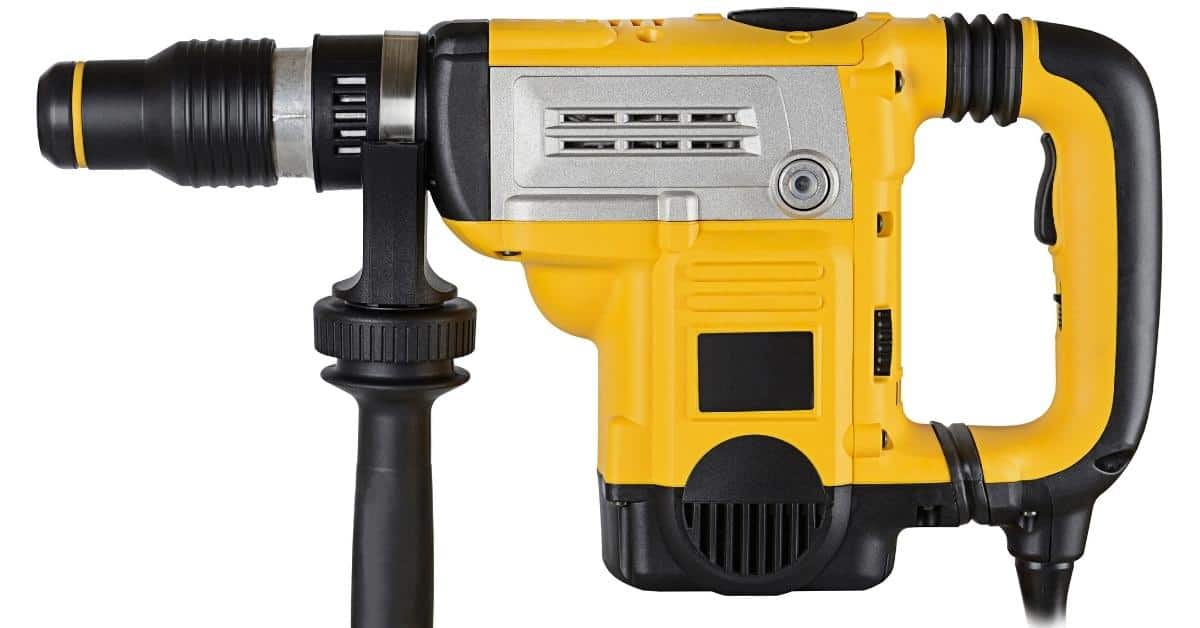
- Drill types: Ensure you have a hammer drill for drilling into concrete. Confirm it has variable speed settings.
What goes wrong: Using the wrong type can damage bits or fail to make holes properly. - Bits: Check that your masonry bits are sharp and undamaged, with correct size for dowels.
How to confirm: Test by drilling into a scrap piece of concrete. - Dowel jig/guide: Verify the jig is compatible with your drill and accurately marks hole positions.
What goes wrong: Inaccurate holes lead to weak joints or misaligned forms. - Clamps: Confirm you have enough clamps for holding formwork in place. Check they are adjustable and secure.
How to confirm: Test by clamping two pieces of wood together tightly. - Cleanup tools: Have brooms, shovels, and wheelbarrows ready for debris removal after pouring.
What goes wrong: Leaving concrete residue can cause tripping hazards or damage surfaces.
Quick rule: Always double-check your tool setup before starting to avoid rework later on the site.
Epoxy and dowel material choices
Use this checklist when selecting epoxy types and dowels for your concrete project to ensure durability and proper fit.
- 2-part epoxy: Choose a 2-part system. Check the ratio on the container; it should match the manufacturer’s instructions precisely. Skip at your peril: mismatched ratios lead to weak bonds.
- Carpenters’ glue alternative: If using carpenters’ glue, ensure it’s designed for concrete work and has a high-strength rating. Check packaging for specific use cases. What goes wrong: standard wood glues won’t hold in concrete.
- Dowel species: Use hardwood dowels like oak or maple. Avoid softwoods as they can degrade over time. Confirm by checking the dowel’s hardness when you buy it. Skip at your peril: softwood dowels will rot and weaken joints.
- Dowel size: Match dowel diameter to hole size; typically 1/4″ or larger for structural integrity. Measure both to confirm fit snugly but not too tight. What goes wrong: oversized holes lead to weak connections.
- Epoxy curing time: Allow epoxy to cure fully before stressing joints. Check manufacturer’s instructions for timing. Skip at your peril: premature use can break the bond.
- Sealant compatibility: Ensure any sealants used are compatible with both concrete and dowels. Test a small area first if unsure. What goes wrong: incompatible materials can cause cracking or peeling.
- Dowel length: Dowel should be at least 2x the thickness of your concrete slab for best results. Measure to confirm adequate length. Skip at your peril: short dowels won’t provide enough support.
- Storage conditions: Keep epoxy and dowels in a cool, dry place until use. Check storage area before starting work. What goes wrong: exposure to heat or moisture can degrade materials.
- Epoxy color match: For aesthetic reasons, choose an epoxy that matches your concrete’s tone. Compare colors visually when selecting. Skip at your peril: mismatched colors look unprofessional and shoddy.
- Dowel spacing: Space dowels evenly across the joint; typically 6″ to 12″ apart for best results. Measure spacing during installation. What goes wrong: uneven spacing can cause stress points in concrete.
Quick rule: Always double-check material compatibility and curing times to avoid costly mistakes on site.
Planning the repair and selecting the right dowel size
Matching dowel diameter to hole and screw size
When you’re fixing concrete, the right dowel-to-screw ratio is key. A good rule of thumb: your dowel should be at least half the diameter of your screw. So if you’ve got a 1/4-inch screw, use a 1/8-inch or larger dowel.
Also, make sure to check how far from the edge of the concrete your hole is. The edge distance should be at least three times the diameter of the dowel. This keeps the repair strong and prevents cracks from forming around the edges.
Remember, a sloppy fit means weak repairs. Take time to measure accurately and use the right tools for drilling clean holes. A little extra care here saves headaches later on.
Accounting for depth, glue line and pilot holes
When you’re planning your repair, the dowel length is crucial. It needs to be long enough to penetrate both pieces of concrete, but not so long that it hits rebar or other obstacles inside. Aim for a screw that goes in at least 1 inch deeper than your concrete thickness.
The glue line between the dowel and hole is also key. Make sure there’s enough space for the glue to fill without squeezing out. This means leaving room around the dowel, not just fitting it snugly.
Lastly, pilot holes are a must. They guide your screws straight in and prevent splitting. Drill these about 1/4 inch smaller than your screw diameter. And don’t forget, keep a safe distance from edges. At least an inch is good practice to avoid cracking the concrete.
Safety precautions for drilling and epoxy work
PPE and workspace setup
Before you start drilling and epoxy work, make sure your workspace is stable and safe. Wear goggles, gloves, and a respirator or use ventilation. Don’t skimp on these; they keep you from getting hurt.
Set up your tools on a flat, sturdy surface. If you’re working outdoors, check base compaction to ensure stability. A wobbly work area can lead to accidents and ruined projects. Keep all materials within easy reach but organized so you don’t trip over them.
Safe handling and disposal of epoxy
Mixing epoxy is a precise process, so always follow the manufacturer’s instructions carefully. Keep in mind that epoxy can irritate your skin, especially if you’re sensitive or have cuts. If you get it on your skin, wash it off right away with soap and water.
When disposing of leftover resin or solvent, don’t just dump them down the drain or throw them in the trash. These materials are hazardous waste and need to be disposed of properly. Check local regulations for how to handle such waste safely. Usually, you’ll find a special facility that accepts these types of chemicals.
Remember, safety first when dealing with epoxy. Wear gloves, goggles, and a mask while working with it. And always have some vinegar handy—it neutralizes the epoxy if you spill it on your skin or clothes.
Preparing the damaged hole: assessing debris and looseness
A damaged hole starts with stripped threads, crushed fiber around the rim, glue residue, or loose fragments that will ruin a dowel bond. Check for enlargements or irregular hole shape that can shift load and reduce support. Identify debris like dust, concrete chips, old epoxy, and sealants, and note how each could mess with adhesion.
Also test for glue/resin residue inside and around the hole and decide if it must be cleaned before drilling. Clean, neutralize, or dry-fit to confirm the hole is clean and the edges intact before proceeding. A quick visual and tactile check plus a dry-fit test saves the job and prevents surprise failures.
When a hole needs reamed out versus just cleaned
Deciding whether to clean or ream out a damaged concrete hole is crucial. If the existing hole is too small for your dowel, you need to ream it out. This means enlarging the hole until it matches the diameter of your dowel. But if the hole is just dirty and loose material needs clearing, then cleaning suffices.
To make this call, first check how deep the hole is compared to what’s needed for your dowel. If it’s not deep enough, you’ll have to ream out more concrete. Also, look at the sides of the hole; if they’re rough or too tight for the dowel, that’s another sign to ream.
Remember, a hole that’s too small can lead to weak connections and structural issues down the line. So don’t skimp on making sure it fits your dowel perfectly. If you’re unsure, err on the side of caution and go with reaming out.
Visual checkpoints for a successful prep
Use this checklist to ensure your hole is ready before moving on to the next steps.
- Firm walls: Walls should feel solid and stable. Tap them gently; they shouldn’t sound hollow or crumbly. Skip this, and you risk a weak foundation for your repair.
- No powdery residue: Check for any loose powder on the hole’s walls. If there is, brush it out thoroughly. If left in place, it can weaken the bond of new concrete.
- Consistent diameter: Measure across the hole at multiple points to ensure uniform width. Any irregularities should be smoothed out or reamed to match. Inconsistent size leads to poor fit and weak spots.
- No sharp edges: Look for any jagged cuts around the hole’s perimeter. Smooth them down with a file or grinder. Sharp edges can cause cracks in new concrete.
- Clean surface: Ensure there is no dirt, oil, or other contaminants on the walls of the hole. Clean thoroughly if necessary. Dirt and grime prevent proper bonding.
- No water accumulation: Check for any standing water in the bottom of the hole. Drain it completely before proceeding. Water can weaken new concrete and cause structural issues.
- Proper depth: Measure from the surface to ensure your hole is deep enough according to your project requirements. Adjust if necessary. Inadequate depth means insufficient support for repairs.
- No cracks or splits: Inspect walls and base of the hole for any existing cracks. Fill them with a suitable patching compound before proceeding. Neglecting these can lead to future structural failures.
Quick rule: If it looks good enough to stick your hand in, it’s probably ready to move forward.
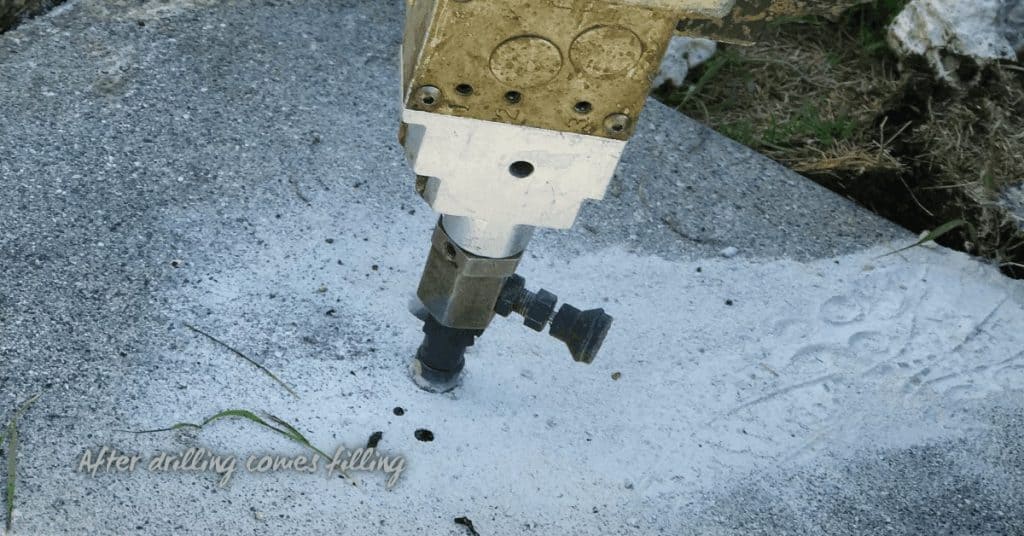
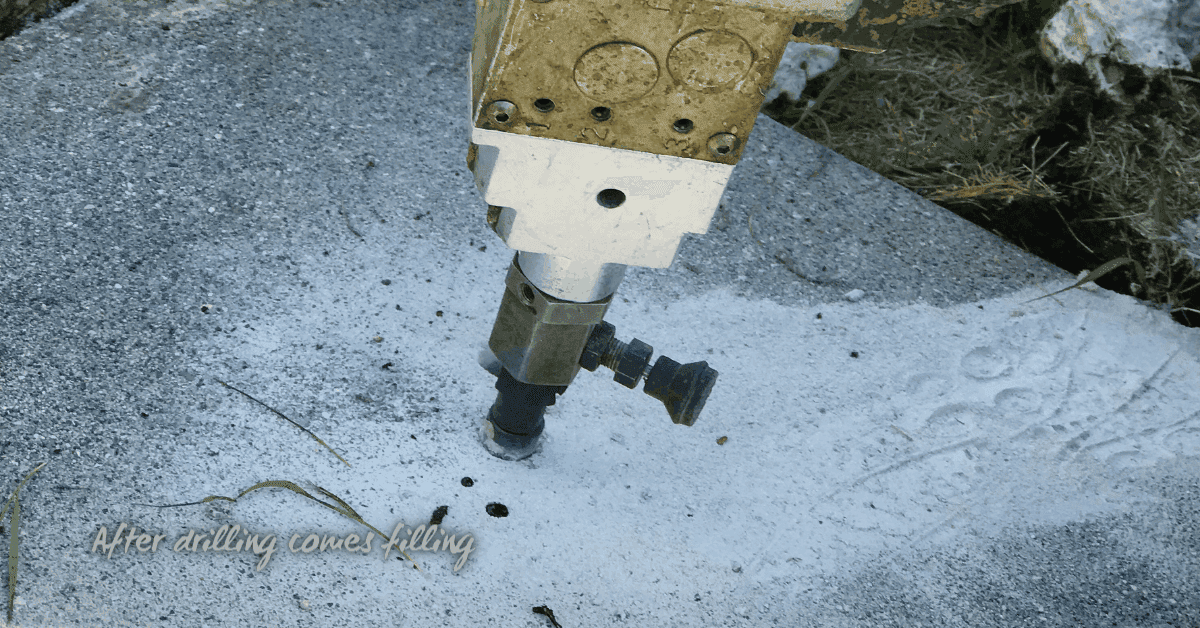
Step-by-step hole cleaning methods that actually make epoxy bond
Begin with a dry vacuum to pull out loose dust and debris from the concrete and dowel holes, because moisture or damp days simply hide grime and give a false sense of cleanliness, which sabotages epoxy bonding. Keep the nozzle close to surfaces, move steadily, and avoid stirring dust into the air. Next, grab a stiff polypropylene brush and scrub the hole walls and surrounding surface to disrupt fines, expose fresh concrete, and prevent fine dust from sealing back into pores, then vacuum again to remove what the brush freed.
Then give a controlled compressed-air pass to blow out voids and clear the surface, but never blast debris toward your eyes, never over-pressurize holes, and always wear eye protection and a dust mask, and avoid guiding dust back into the hole. Finish with a solvent wipe to remove oils and greases, check dryness with a no-streak test, and wait for any moisture to evaporate before epoxy; if dust persists after the initial pass, repeat steps, and if oil is detected, extend the solvent wipe or use a dedicated cleaner before priming.
Step-by-Step Cleaning Process
This sequence will ensure your concrete holes are clean and ready for epoxy bonding, giving you a strong, lasting repair.
- Action: Put on safety gear like gloves and goggles.
Reason: Protect yourself from dust and chemicals.
Check: Ensure all skin is covered or protected by gear.
Note: Skip this step, and you risk injury. - Action: Use a wire brush to remove loose debris.
Reason: Prep the surface for cleaning.
Check: The hole should look uniformly rough without any flaky bits.
Note: If the concrete is crumbling, call in an expert. - Action: Vacuum out loose particles with a shop vac.
Reason: Remove dust that can weaken epoxy adhesion.
Check: The hole should be visibly clean and free of debris.
Note: If you see water pooling, dry the area thoroughly first. - Action: Apply a degreaser to remove oils or grease.
Reason: Ensure epoxy bonds properly without contaminants.
Check: The surface should feel dry and slightly tacky after rinsing.
Note: If the area feels slippery, re-clean it. - Action: Rinse thoroughly with clean water.
Reason: Remove all degreaser residue.
Check: The surface should be dry and free of soapy film.
Note: If the area remains wet, wait until it dries completely. - Action: Dry with compressed air or a clean cloth.
Reason: Ensure no moisture hinders epoxy bonding.
Check: The hole should be dry to touch and free of dust.
Note: If the surface feels damp, continue drying until it’s completely dry. - Action: Inspect for any remaining contaminants.
Reason: Confirm cleanliness before applying epoxy.
Check: The hole should look clean and free of debris or oil.
Note: If you find issues, repeat cleaning steps. - Action: Let the surface cure for at least 24 hours after cleaning.
Reason: Allow any remaining moisture to evaporate fully.
Check: The hole should be completely dry and free of condensation.
Note: Rushing this step can weaken your epoxy bond. - Action: Apply a thin layer of epoxy primer if needed.
Reason: Enhance adhesion for better bonding.
Check: The primer should be evenly spread and dry to the touch.
Note: If you skip this step, your repair may fail.
Pro tip: Always double-check that your surface is completely clean and dry before applying epoxy. A little extra care here can save a lot of hassle later on.
Mechanical cleaning: brushes, picks, and reamers
When it comes to mechanical cleaning, you’ll need a few tools: wire/nylon brushes for scrubbing away loose material, dental picks for getting into tight spots, and small reamers for removing debris from deep holes. Start with the brush to loosen up any dirt or old concrete bits that aren’t firmly attached.
Once the surface is loosened, switch to a dental pick to clean out those hard-to-reach corners where loose material can hide. This step is crucial because even small amounts of dust or debris can weaken your epoxy bond. Don’t rush this part; take your time and be thorough.
Finally, use a reamer to scrape away any remaining residue from the hole’s sides and bottom. A clean surface means better adhesion for your epoxy. Remember, if you find large chunks of loose material that won’t budge with brushing or picking, it might indicate deeper issues like poor base compaction. Check base compaction before proceeding to ensure a solid foundation.
Final cleaning: compressed air and solvent wipe
After you’ve done your mechanical cleaning with brushes, picks, and reamers, it’s time for the final touch. Use a can of compressed air or a shop vac to blow out any remaining dust and debris from those hard-to-reach spots in the hole.
Once you’ve got everything blown clean, take a rag soaked in alcohol or acetone and give the surface a thorough wipe. This step is crucial for removing oils and residues that could weaken your epoxy bond. Don’t skip it!
Tip: Make sure to let the solvent evaporate completely before applying any epoxy. Rushing this can ruin your work.
Drilling and sizing the hole for a tight dowel fit
Align the drill, bit size, and center punch so you produce straight, perpendicular holes every time, then size the hole for either an interference fit or a slip fit based on your adhesive choice (epoxy needs a tighter bore than polyurethane) and the dowel diameter you’re using. Deburr and clean the bore, set a depth stop or tape marker to prevent overshoot, and dry-fit the dowel to confirm the exact fringe of engagement before you mix adhesive or set the piece in place.
Drilling technique matters: use the right speed and feed for wood or concrete, start with a pilot hole, then ream to final size, and tap occasionally to clear debris so you don’t chase a wandering hole. Verify alignment with a square and level, and edge chamfer or countersink if you want a flush seating. After drilling, vacuum or blow out dust, wipe the bore dry, and plan adhesive timing so you get a clean, strong bond with minimal squeeze-out.
Using guides, depth stops, and drill speed
To keep your drill steady while drilling holes for dowels, always use a guide. A simple plastic jig works great if you’re doing multiple holes at the same size. For precision, clamp a metal straight edge to your work surface as a guide.
Set up your drill with a depth stop before starting. This prevents drilling too deep and damaging the base material or hitting rebar below. Adjust the depth stop carefully so it matches the dowel length plus an extra 1/8 inch for safety. Check this every time you change hole sizes.
Select your drill speed wisely to avoid tear-out at the bottom of the hole. For concrete, use a slower speed around 500 RPM. Faster speeds can cause the bit to spin out and damage the edges of the hole. Always wear safety glasses when drilling.
Test-fitting a dry dowel and adjusting tolerances
After drilling your hole, grab the dowel and give it a try. Make sure you’re not forcing anything; if it doesn’t slide in easily, that’s okay—just don’t hammer or twist it in yet.
If there’s any play or gap between the dowel and the hole, sand down the dowel until it fits snugly but still moves with a little pressure. If you need to make the hole bigger, use a reamer tool carefully to avoid going too far. Remember, aim for an interference fit where the dowel is slightly smaller than the hole.
Once you’ve got that perfect fit, double-check your work by dry-fitting again. This step might seem like overkill, but it’s better to catch any issues now before you glue everything up and regret it later.

Mixing and applying epoxy correctly for best bond
Choosing the right epoxy viscosity and cure time
Pick your epoxy based on where you’re applying it. For deep cracks, go for a low-viscosity type to get into tight spots. If you’re working with vertical surfaces, opt for a thixotropic formula that won’t run down the wall like water.
Cure time is crucial too. A faster cure means less downtime but can be tricky if your surface isn’t ready yet—make sure to check base compaction. Longer curing times give you more leeway for adjustments, but plan around it in your schedule.
Remember, the right epoxy choice depends on your project needs. Don’t rush into picking just any type; take a moment to think about what will work best for your surface and timeline.
Applying epoxy inside the hole and on the dowel
Once you’ve got your epoxy mixed right, it’s time to get it into the hole. Use a small funnel or a squeeze bottle with a thin nozzle to inject the epoxy slowly. Make sure you coat the entire surface of the dowel as well. This is crucial for a strong bond. If you rush this step and leave air pockets, your repair won’t hold up.
After injecting the epoxy into the hole, give it a quick check to make sure there are no bubbles or gaps around the dowel. You can use a thin rod or wire to gently poke around inside the hole if needed. This helps push out any trapped air and ensures the epoxy fills every corner.
Remember, dowel placement is key too. Make sure it’s centered in the hole before you start pouring the epoxy. If the dowel isn’t straight or well-placed, your repair won’t be as strong. Take a moment to double-check everything before moving on.
Inserting dowels, clamping, and ensuring alignment
Choose the right dowel size and material for the substrate and epoxy you’re using. Dry-fit the dowel to ensure a snug, flush fit and check tolerances, reaming if needed. Align precisely using a centerline, a jig, or pilot guides so future screw paths stay true.
Apply the epoxy in the right amount with proper mixing and use careful application methods to avoid air voids. Clamp or brace during cure with temporary supports and the correct number and placement of clamps to prevent movement or tilt. Re-check alignment before final fastening to save trouble later.
Press-fit vs. glue-line strategies and tapping tips
When it comes to dowel insertion, you’ve got two main choices: press-fit and glue-line. Press-fit means the dowels are a tight fit in their holes, ensuring they stay put without any extra help. Glue-line is when you add a bit of adhesive around the dowel for added security.
Light tapping with a hammer is key to seating your dowels properly. Tap just enough so that the dowel sinks into its hole by about a quarter-inch. This slight interference ensures it won’t budge later on. Over-tapping can damage the dowel or the concrete, so be gentle.
Signs of proper seating include a snug fit with no wiggling and minimal dust around the dowel. If you see excessive dust or feel any looseness, check your base compaction and try again. Remember, precision here means less hassle down the line when everything stays aligned as it should.
Clamping setups and waiting times
When it comes to clamping, you’ve got a few options: C-clamps for straight edges, corner clamps for angles, and weights for large flat surfaces. Make sure your setup is solid before moving on. Don’t skimp on the waiting time; let the concrete cure at least 24 hours after tapping to ensure it’s strong enough.
After inserting dowels and pressing them in place, clamp everything down tight. Check that all pieces are aligned properly and there’s no movement under pressure. If you’re using glue-line strategies, make sure your joints are clean and dry before applying any clamps or weights.
Avoid the temptation to load up on new work too soon. Wait at least a day after tapping to give the concrete time to set. This wait is crucial for preventing cracks and ensuring everything stays in place as you intended. If you need to re-drill dowels, wait until the initial cure has taken hold—usually around 24 hours.
Drilling pilot holes and reattaching screws without damaging the repair
To drill pilot holes without wrecking the repair, mark and align precisely, center punch, scribe lines, and use a guide so the new hole lines up exactly with the existing dowel or repair path. Choose the pilot bit size and type to match the dowel diameter and substrate, whether wood or concrete, and account for any epoxy-filled zones so you don’t wall out or crack the surrounding material. Drill with a steady, slow feed, keep the bit perpendicular, and use a drill stop or shallow entry to minimize chip-out, splitting, or undermining the repair before you seat the dowel.
Debris control matters: vacuum or blow out dust between steps, wipe the bore clean of concrete dust and wood chips, and keep the hole clear before epoxy and dowel insertion. Verify the dowel fits snugly, apply the proper epoxy or adhesive, insert with minimal rotation, and reassemble screws with even torque, planning for a potential re-drill if alignment shifts. Do a dry fit first, confirm thread engagement, and keep replacement screws or slightly larger dowel options ready if the repair will bear load.
Picking pilot size and screw type for repaired holes
Check base compaction before drilling. If the concrete is weak, go with shorter screws to avoid splitting the repair.
Select a pilot bit diameter slightly smaller than your wood screw’s root diameter. This ensures a snug fit and prevents the screw from stripping out easily.
If you’re fixing large or deep holes, consider using thicker screws for added strength. Shorter screws can also work if the concrete is in good condition but space is tight.
Speed and pressure tricks to prevent tear-out or mushrooming
When drilling pilot holes, keep the drill at a low speed. This prevents overheating and tearing out the material around your repair. Check base compaction before you start; soft spots can cause screws to sink without holding.
Apply light pressure while drilling. Too much force can lead to tear-out or mushrooming, ruining your work. Let the drill do the cutting. If you feel resistance, back off and check if you’re on a harder spot in the concrete.
To finish, countersink slightly so the screw head sits flush with the surface. This helps distribute weight evenly and prevents water from pooling around the screw. Remember, it’s better to go slow and steady than rush through your work.
Finishing, cleanup, and inspection for long-term durability
After the repair cures, remove epoxy squeeze-out from the dowel area while the material is still tack-free or fully cured, then sand the joint edges with progressively finer grits to level the surface and prevent raised epoxy edges that catch finishes. Carefully trim and touch up any stain or paint on the surrounding wood, choosing finishes compatible with the existing materials and testing a small area to ensure color match without weakening the bond. Flush any visible dowel ends, seal with a clear coat as needed, and run a final cleaning to prepare for a smooth, long-lasting finish, followed by a concise inspection for joins, voids, and cure time readiness.
A thorough cleanup and precise sanding prevent moisture traps and surface irregularities that can set up failure months later, especially on high-traffic or load-bearing joints. Using the right finish protects the repair from moisture, UV, and wear, and sealing dowel ends helps preserve color and prevent moisture intrusion. A simple final inspection checklist—flush alignment, no adhesive slime, fully seated dowels, cure time elapsed, and a light functional test—will save you from rework and costly damage.
Cosmetic blending and color-matching epoxies
Use this checklist when you’re ready to blend in repairs or touch-ups with existing concrete surfaces for a seamless look.
- Sand surface: Smooth out any rough patches. Confirm by running your hand over the area; it should feel smooth and even.
- Select matching epoxy color: Choose an epoxy that closely matches the surrounding concrete. Hold samples next to existing surfaces in natural light for comparison.
- Apply dye evenly: Mix dye according to instructions and apply a thin, uniform layer. Check by looking for any streaks or uneven coloring.
- Blend edges carefully: Feather the epoxy into surrounding concrete without creating visible lines. Step back and look at the repair from different angles; it should blend seamlessly.
- Use wood plugs for holes: For larger repairs, use wooden dowels to fill gaps before applying epoxy. Confirm by tapping around the area; there shouldn’t be any hollow sounds or loose spots.
- Seal with clear coat: Apply a thin layer of clear protective coating over repaired areas. Check for even coverage and no drips or bubbles.
- Inspect under UV light: Use a blacklight to check for any inconsistencies that might not be visible in normal lighting conditions.
- Allow proper curing time: Follow manufacturer’s instructions on drying times. Rushing this step can lead to weak spots and uneven finishes.
- Clean tools immediately: Clean all tools used with solvent while the epoxy is still wet; dried epoxy is much harder to remove.
- Protect from foot traffic: Keep people off the repaired area until it’s fully cured. Walking on it too soon can cause damage and uneven wear.
- Check for bubbles or cracks: Look closely at the surface for any signs of imperfections that could indicate issues with application technique.
- Touch up any missed spots: Address any areas where the epoxy didn’t fully cover or blend in. Missing this can lead to water infiltration and further damage over time.
- Inspect under different lighting conditions: Check your work at various times of day, as light changes can reveal inconsistencies not visible earlier.
Quick rule: Always double-check repairs in both natural and artificial light to ensure a seamless blend.
Performance checks and when to re-evaluate
This checklist helps you verify the concrete’s performance after initial use. Use it a few days or weeks later to catch any issues early.
- Load Testing: Place heavy objects on the slab to see if there are weak spots. Confirm by checking for cracks or sinking areas.
- Waterproofing Test: Pour water over the surface and check for pooling in corners or along edges. What goes wrong: Water damage can weaken concrete.
- Slope Check: Use a level to ensure proper drainage slope towards drains. Confirm by observing water flow direction.
- Expansion Joint Inspection: Look for any cracks around joints that might indicate movement or stress. Confirm visually without gaps.
- Cleaning Effectiveness: Clean the surface with mild detergent and check if it stays clean over time. What goes wrong: Poor cleaning can damage the finish.
- Color Consistency: Compare new areas to existing ones for color matching issues. Confirm by visual inspection without noticeable differences.
- Surface Hardness Test: Press a screwdriver into the surface and check if it leaves marks. What goes wrong: Soft spots can lead to wear over time.
- Edge Integrity Check: Look for any chipping or flaking at edges, especially around corners. Confirm by visual inspection without damage.
- Sealant Inspection: Ensure sealants are still intact and not peeling away from joints. What goes wrong: Missing sealant can lead to water intrusion.
- Rebar Cover Check: Measure the concrete cover over rebar (should be at least 3/4 inch). Confirm by measuring with a ruler without exposure of metal.
- Concrete Leveling: Use a straight edge across the surface to check for unevenness. What goes wrong: Uneven surfaces can cause tripping hazards.
- Drain Functionality Test: Pour water into drains and observe if it flows freely without clogs or leaks. Confirm by visual inspection of proper drainage.
Quick rule: Re-check your concrete every season to catch issues early before they become costly repairs.
Common mistakes and troubleshooting
Common mistakes in epoxy fixes boil down to a handful of failure modes you’ll see on the job: insufficient cleaning that leaves oil, dust, and debris behind; using the wrong epoxy type or mismixing the kit; holes or dowels that are the wrong size or depth; and misalignment or shifting during cure that seals the problem in. For each, you’ll find practical, repeatable fixes: a thorough cleaning protocol that removes dust, oil, and debris; selecting the right epoxy and following exact mixing ratios; checking hole depth and diameter with a gauge and correcting dowel insertion to avoid voids; and clamping or stabilizing parts during cure to prevent movement. Also, don’t ignore environmental effects—temperature, humidity, and cure time can make or break strength, so you’ll need a plan to manage suboptimal conditions rather than limping into a poor bond.
This matters because a quick, methodical approach saves you time and prevents rework, especially when you’re elbow-deep into a repair and the clock is ticking. The right workflow gives you fast diagnostics—symptoms point to likely causes, and remedies are clear—plus a rescue path if a hole or dowel is already set and you can’t start over. Before you start, you’ll verify tools and materials, like a hole-size gauge, proper dowel material, and an epoxy kit with a reliable working time, and you’ll use a post-fix checklist to confirm strength, alignment, and surface prep, so you avoid common on-site mistakes such as rushing cure or re-drilling through cured epoxy.
Fixes for a loose dowel after curing
If you find a dowel is loose after the concrete has cured, don’t panic. The first step is to remove any debris around it and check if the hole was drilled properly in the first place. If the issue is due to poor base compaction or an undersized hole, you’ll need to take action.
To fix a loose dowel, start by re-drilling the hole slightly larger than the original dowel size. Then, use a high-strength epoxy to fill the gap around the dowel, ensuring it’s securely in place again. If you’re dealing with multiple loose dowels or if they are critical for structural integrity, consider using threaded inserts. These can be screwed into the concrete and provide a more reliable connection.
Remember, when working with epoxy, follow the manufacturer’s instructions carefully to ensure it sets properly. Rushing this step could lead to further issues down the line. If you’re unsure about any part of the process, consult an expert before proceeding.
Handling epoxy failures and rework strategies
If your epoxy fails, don’t panic. The first step is to remove the cured epoxy completely. Use a chisel and hammer to break it up, then scrape out any residue with a putty knife or similar tool. Make sure you get every bit of old epoxy out.
Once clean, re-prep your hole. This means cleaning the surface again and making sure there’s no dust or debris left behind. Check that the base is still compacted properly—check base compaction to ensure it hasn’t shifted since you first installed.
If epoxy isn’t working out, consider switching to a different adhesive type or using dowels instead. Sometimes, especially in high-load areas, dowels provide better support and stability. Talk to your supplier about what would work best for your specific situation.
Cost, time estimates, and when to call a pro
Cost is made up of three main parts: materials (epoxy, anchors, dowels, cleaners), tools or rentals, and any extra supplies (primer, mixing cups, disposable brushes). Typical DIY material costs run from about $20 to $60 for epoxy kits and $1 to $5 per anchor or dowel, with cleaners and sleeves adding a small extra margin, while pro-grade options can push materials higher. Time varies by scenario: a minor surface retap and epoxy cure might be a few hours spread over a weekend, whereas a full dowel replacement with proper prep and curing can stretch to a day or more; plan for windows to reassemble and cure before loading weight or reinstalling fixtures. Thresholds for calling a pro show up when you’re dealing with large damaged areas, potential structural concerns, or moisture intrusion, where labor costs quickly eclipse DIY savings and safety must take priority.
Replacement versus repair hinges on whether you should drill new holes, use sleeve anchors, or switch to a concrete repair product if the substrate is compromised or the hole pattern is sloppy. Consider warranty and code implications when choosing epoxy-dowel fixes versus anchors or replacement sleeves, and beware of securing a repair only to find it voids a warranty or fails inspection. Quick-reference: ballpark costs per hole, time estimates, and a simple decision flowchart help you decide to DIY if under about $50–$75 and under 2 hours per hole, or call a pro if the job exceeds roughly $200–$250 per hole or if moisture or structural issues are present.
Budget materials vs. higher-end options
Choosing between budget and premium materials can save money upfront but might cost more later due to durability issues or poor performance.
- Epoxy resin: Used for sealing cracks, bonding concrete surfaces. Look for high strength class ratings like 40 MPa. Avoid if you need quick setup times; it takes longer than cheaper alternatives. Cheap epoxy can crack and peel over time.
- Dowels: For reinforcing concrete joints or fixing broken pieces. Opt for stainless steel or galvanized options to prevent rusting. Cheaper carbon steel dowels will corrode, causing structural issues down the line.
- Concrete mix: Determines overall strength and appearance of your project. Look for high compressive strength ratings like 4000 psi. Premixed bags are easier but more expensive than bulk powder. Mixing too much water weakens concrete; follow instructions carefully.
- Mortar: Type N mortar is suitable for general use, while Type S offers higher tensile strength and is better for load-bearing applications. Check the bag for compressive strength ratings of at least 2500 psi. Cheaper mortars can lead to weak joints that crack easily.
- Sealants: Acrylic or silicone sealants prevent water damage. Choose UV-resistant options if exposed to direct sunlight; otherwise, cheaper alternatives are fine for indoor use. Poor quality sealants may shrink and peel away from the surface over time.
Pro tip: Always store materials in a cool, dry place before mixing or applying them. This prevents premature setting and ensures better performance on site.
Complexity indicators that warrant a professional
If you spot signs of serious structural issues, it’s time to call in the pros. Look out for load-bearing failures, which can be life-threatening if not fixed right away. Also, don’t ignore large areas of rot or significant damage—these aren’t DIY fixes and require a carpenter’s expertise.
When dealing with concrete work, especially around foundations, make sure to check base compaction. If the ground isn’t properly compacted before pouring, you risk settling issues down the line. This is not something to guess about; get an expert opinion.
Remember, cutting corners on structural repairs can lead to bigger problems later. It’s better to spend a bit more now and ensure safety than deal with costly fixes or worse—structural collapse—later.
Conclusion
A clean hole and a proper epoxy bond give you a repair that lasts and looks right. When you respect the steps, you avoid repeat fixes and protect the work you’ve already done.
Check in this order: verify the hole is clean and free of debris, select the right dowel size, dry fit, mix epoxy per the manufacturer, apply evenly, insert the dowel, wipe excess, clamp for alignment, cure fully, then test and reattach screws if needed. Do each step deliberately and don’t rush the cure times or you’ll lose strength.
Common mistakes to avoid are skipping debris removal, using too little or too much epoxy, and failing to align the dowel straight. Keep safety in mind: wear eye protection, work in a ventilated area, and never rush epoxy curing or drill deeper than intended. If you notice wobble, misalignment, or a weak bond during testing, stop and reassess before continuing.
If the repair involves a structural load, large or multiple holes, unseen damage, or you’re not getting a solid bond after a couple of tries, it’s time to call a pro. Stay methodical, stay safe, and you’ll have a durable fix you can trust and reuse for years to come.
FAQ
Should I clean the hole before epoxying?
Yes. Dust and debris will ruin the bond. Clean with compressed air or a stiff brush, then wipe the hole clean with a rag.
How do I mix epoxy and apply it to the dowel?
Mix the epoxy exactly as the label says. Keep to the pot life. Dip the dowel or coat the hole, then press it in firmly.
What mistakes will ruin the bond?
Don’t skip cleaning. Don’t use water or solvent left in the hole. Don’t rush cure time or use too little epoxy.
How can I verify the hole is clean?
Look for a bright, smooth hole with no dust. Feel with a clean finger or wipe with a fresh rag. If you feel grit, clean again and recheck.