

Introduction
Drain holes in concrete planters that won’t crack are achieved by using sleeves or inserts and timing the drilling to the curing stage. Keep the hole protected with a sleeve and drill during the right curing window, then finish with your chosen patch. Always check the product label or maker’s instructions for recommended hole size, material, and cure time.
Planter holes influence seed starting and watering, so keep drainage predictable and avoid stress on the surrounding concrete. Consider sleeves or inserts to reduce cracking and follow safe timing for drilling while the mix is workable but not wet, and test fit before final assembly. If you’re unsure, consult local rules or the insert manufacturer and adjust your approach to fit your climate and project.
Key takeaways
- Planter drainage matters; use sleeves or inserts to prevent cracking from drilling.
- Check concrete readiness by firm but drill-friendly resistance with steady pressure.
- Sleeves and inserts reduce stress; choose slightly oversized for easy fit and seal.
- Drill slowly; wear eye protection and gloves, use correct bits to avoid cracks.
- Seal around sleeves with compatible sealant; cure times affect final strength and water retention.
- Alternatives like wicking or LECA offer drainage without drilling; inspect plant needs.
Table of Contents
- Introduction
- Key takeaways
- Why Drainage Holes Matter in Concrete Planters
- When to Drill Concrete: Timing, Curing, and Readiness Checks
- Sleeve and Insert Options That Protect Concrete
- Drilling and Cutting Methods That Minimize Cracking
- Tools, Materials, and Safety Checklist
- Installation Steps: Marking, Drilling, Sleeving, and Sealing
- Alternatives to Drilling: Wicking, LECA, and Layering Systems
- Troubleshooting, Repairs, and Maintenance
- Conclusion
- FAQ
Why Drainage Holes Matter in Concrete Planters
Drainage holes are essential for plant health in any concrete planter. Proper holes prevent waterlogging, which can lead to oxygen deprivation and root rot. A well-drained planter supports a robust, vigorous root system over time.
Drainage also shapes watering routines and soil choices. Hole size and count, along with soil moisture retention, influence how often you water and which media you should use. In the long run, good drainage reduces salt buildup, minimizes weight stress, and lowers crack risk from hydrostatic pressure around roots.
Plant health and moisture balance
Proper drainage is crucial for plant health. Without it, waterlogging can lead to oxygen deprivation, causing roots to suffocate.
Overwatering symptoms include yellowing leaves, wilting, and a foul odor from the soil. Roots may become black and mushy, leading to root rot.
Drainage holes prevent these issues by allowing excess water to escape, maintaining a balanced moisture level around roots.
Soil structure and water flow
Drainage holes work hand-in-hand with your chosen soil mix or potting media. They allow water to pass through, preventing saturation.
With proper drainage, soil amendments like perlite or vermiculite can help maintain aeration and prevent waterlogging even in moisture-retentive soils.
Holes also facilitate better water flow, ensuring your plants receive consistent moisture without being drowned by excess water.
When to Drill Concrete: Timing, Curing, and Readiness Checks
Follow the concrete mix’s curing instructions and avoid exposing the surface to stress too early. There is a safe window for drilling larger holes that is tied to how strength develops after demolding. Premature drilling increases the risk of cracking.
Use simple readiness checks before drilling. Perform a surface hardness test and a quick durability check, plus moisture cues to gauge readiness. Environmental conditions like temperature and humidity also matter and can slow or speed up curing.
Interpreting manufacturer guidance and curing notes
Before you start drilling, consult your planter or concrete mix manufacturer’s instructions. They provide specific guidelines on the initial curing period and any special care needed.
Initial curing is crucial for concrete to gain early strength. Typically, it takes 24-72 hours at normal temperatures (50°F – 90°F).
Manufacturers may also suggest protecting the concrete from harsh weather conditions and excessive stress during this period.
Visual and tactile readiness tests
Before you pick up your drill, perform simple checks to ensure your concrete is ready. These tests won’t give you a specific cure time but will indicate when it’s safe.
Surface hardness test: Gently scratch the surface with a coin or nail. If no mark appears, it’s likely ready. A tap test: Tap the surface lightly with a hammer and listen for a dull thud instead of a hollow sound.
Check for moisture: Ready concrete should feel firm but not wet or tacky. Look for a uniform color change, minimal chalkiness, and no micro-cracking near your intended drill area.
Sleeve and Insert Options That Protect Concrete
Sleeve options include removable pots, rigid sleeves, and flanged drains, each made from different materials and affecting how drilling stress is transferred. These choices help isolate the planter wall from full drilling stress and reduce crack risk. Consider how each option handles long-term drainage reliability.
Installation timing matters too. Pre-pour versus post-pour placement changes bonding and curing outcomes. Sealant choices and compatibility with your concrete mix influence performance and ease of maintenance over time.
Removable Pot Inserts and Nursery Liners
Using removable pots or nursery liners is a smart way to create drainage without altering your concrete planter. Here’s how:
These are separate containers, usually made of plastic or ceramic, that fit inside your concrete planter. They have their own drainage holes at the bottom.
Benefits: Easy to remove for repotting, no root intrusion into concrete, and they don’t affect the structural integrity of your planter.
Permanent Sleeves and Flanged Inserts
For permanent drainage solutions, consider rigid sleeves or flanged inserts. They distribute stresses around the hole, reducing cracking risk.
Rigid sleeves are typically made of plastic or metal, while flanged inserts have a lip at the top that sits on the planter’s surface, distributing weight evenly.
How they work: These isolate drilling stress from the planter wall. They’re inserted before pouring concrete, allowing the concrete to cure around them. The sleeve or insert takes the brunt of any stress, protecting your planter.
Drilling and Cutting Methods That Minimize Cracking
Follow a progressive drilling plan by starting with a small pilot hole and gradually increasing to the final diameter. This approach reduces stress concentrations and heat buildup that can cause fractures. Aligning with the inner cavity of the pot helps avoid weak spots.
Use core bits and proper slow-speed rotation to minimize vibration. Wet-drilling techniques help keep the bit cool and reduce dust, but know when water is essential. Plan for clean bit trajectories and straight drilling to prevent wandering.
Progressive drilling and pilot-to-core sequence
Drilling concrete is like building a road. You don’t start with a highway, you start with a path.
Start small. Drill a pilot hole, just a fraction of the final size. This helps distribute stress evenly and prevents sudden cracks.
Then, gradually increase your bit size, stepping up to the final diameter. It’s like widening that path into a road, but gently, not all at once.
Wet vs. dry cutting and cooling techniques
Concrete drilling is hot work. Literally. The friction from the bit generates heat, which can make your hole bigger than you want.
That’s where cooling comes in. Water or a misting setup keeps the bit and concrete cool, reducing thermal expansion and dust. It’s like pouring water on hot pavement to keep it from buckling.
Wet drilling is essential when you’re using larger bits or core drills. But for smaller holes, dry drilling might be fine. Just keep an eye on that heat.
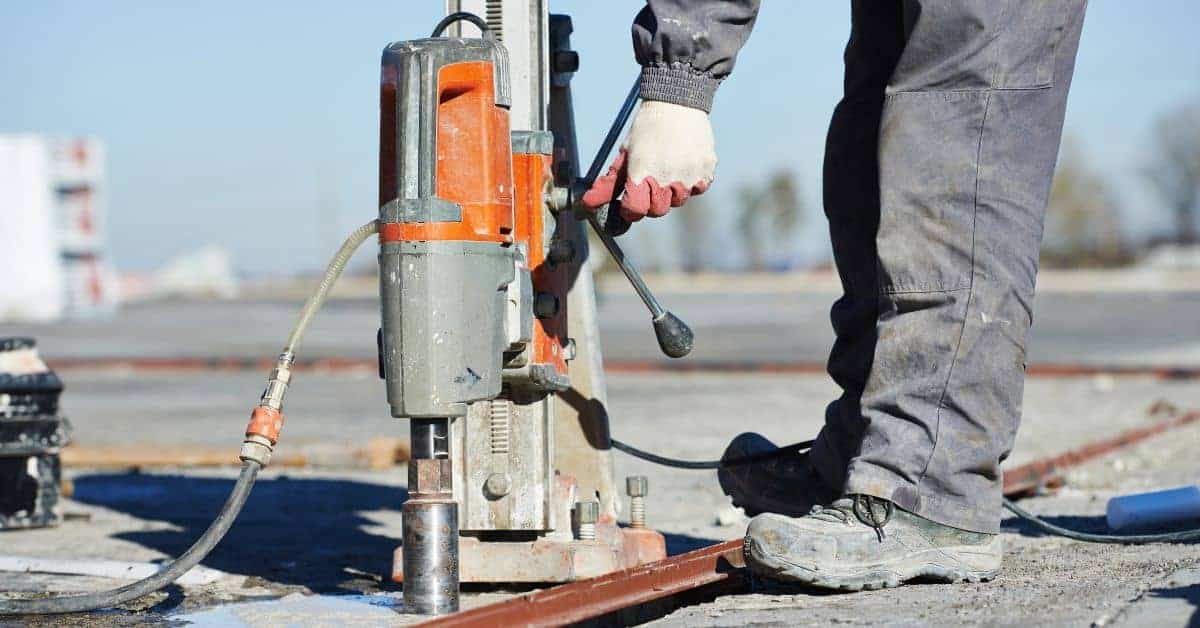
Tools, Materials, and Safety Checklist
Assemble masonry-rated drill bits, core drill bits, hole saws, and sleeves or inserts that fit your planter. Select concrete-safe sealants that are compatible with your chosen sleeve. Have a complete sleeve and insert kit on hand before you start.
Safety first: wear eye protection, gloves, a dust mask, and hearing protection. Ensure good ventilation, clamp the planter, and keep the work area clean to prevent slips and misdrills.
Choosing Bits, Coring Tools, and Anchors
Before you start drilling, make sure you have the right tools for your concrete planter. Here’s a checklist to help you.
- Masonry-rated drill bits: For concrete, use bits rated for masonry work. They’re harder and can handle the pressure.
- Core drill bits: These cut holes cleanly. Choose one that matches your planter’s thickness.
- Hole saws: For larger holes, hole saws are your friend. Again, match size to your insert or sleeve.
- Concrete-safe sealants: Use epoxy or silicone-based sealants to prevent water from seeping behind the inserts.
- Sleeves/Inserts: Choose ones that fit snugly in your planter. Too loose, and they’ll wobble; too tight, and you’ll crack the concrete.
- Avoid: Wood or metal bits: These aren’t designed for concrete and will overheat, dull quickly, and possibly crack your planter.
Quick rule: Always match tool size to your insert or sleeve. Too small, and water will leak; too large, and the insert won’t stay put.
Safety First: PPE and Setup
Before you start drilling, ensure your workspace is safe. Here’s what to check.
- Eye protection: Wear safety glasses or goggles to protect from debris.
- Gloves: Use work gloves to protect your hands from cuts and vibrations.
- Dust mask/respirator: Concrete dust is harmful. Protect your lungs with a proper mask.
- Hearing protection: Drilling can be loud. Wear earplugs or earmuffs to protect your hearing.
- Appropriate clothing: Wear long sleeves and pants to protect your skin from debris and vibrations.
- Well-ventilated workspace: Ensure your workspace is well-ventilated to avoid inhaling dust.
- Secure clamps: Clamp your planter securely to prevent it from moving during drilling. A wobbly planter can crack or break your bit.
- Electrical safety: Keep your tools away from water and ensure they’re in good working condition to prevent electrical shocks.
Quick rule: Always prioritize safety. A few extra minutes of setup can save you from serious injuries.
Installation Steps: Marking, Drilling, Sleeving, and Sealing
Accurately mark the hole position and size on the planter, keeping drainage alignment and rim clearance in mind. Create a quick mock-up template to verify measurements before drilling.
Choose the drilling method and tools that minimize cracking, and pre-wet the area as needed. Decide on sleeving or insertion options and plan how they interact with concrete thickness and planter design.
Marking and support strategies before cutting
Before you start drilling, mark the exact position of your drain hole. Consider drainage alignment, rim clearance, and structural integrity.
Use a pencil or marker to draw a small circle on the planter where you want the hole. Make sure it’s centered and won’t interfere with the planter’s structure or finish.
Protect the surrounding finish by covering it with masking tape or cardboard. This prevents chips and scratches during drilling.
For larger or heavier planters, support them properly. Place them on a stable surface or use clamps to secure them in place. This keeps the planter steady while you drill, reducing the risk of cracks or wobbling.
Inserting and sealing the drain assembly
Once your hole is drilled, it’s time to install the sleeve or insert. Choose one that fits snugly in your hole and aligns with your planter’s design.
To install, gently tap the sleeve into place using a rubber mallet. This prevents enlarging the hole and maintains a tight fit. Ensure it’s level and seated properly, leaving enough room for the planter liner or pot.
For a watertight seal, use a compatible sealant like silicone or polyurethane caulk. Apply it evenly around the sleeve’s outer edge before inserting it into the hole. This creates a flexible joint that prevents leaks and cracking.
Allow the sealant to cure according to the manufacturer’s instructions. Once cured, perform a quick water test by filling the planter with water. Check for any leaks around the drain assembly. If none are found, your drain is properly installed and sealed.
Alternatives to Drilling: Wicking, LECA, and Layering Systems
Explore non-drilling options like water-wicking, LECA, and internal fabric layering inside a concrete planter. Each method has its own best-use scenario and plant compatibility. Consider how these choices affect moisture control and plant health.
Understand setup concepts for each option, including where components belong and how to prevent waterlogging. Weigh pros and cons such as simplicity, cost, and potential for mineral buildup or shifting soil over time.
Water-wick and passive irrigation systems
Water-wick systems are a great non-drilling option for concrete planters. They work by transferring excess water away from roots into a reservoir, preventing root rot.
To set up, you’ll need a wick material like felt or rope, and a reservoir at the planter’s base. Place the wick in the soil, with one end near plant roots and the other submerged in the reservoir.
Choose this method when using concrete planters for plants that prefer consistently moist but well-draining soil, like ferns or certain tropicals.
LECA, hydroponic media, and layered drainage
Lightweight expanded clay (LECA) is another excellent option for internal drainage. It’s inert, so it won’t affect soil pH or nutrient levels.
Layer LECA at the planter’s bottom, topped with horticultural fabric to separate it from your growing medium. This creates a drainage layer without needing holes in your concrete.
Monitor water levels carefully, as LECA can absorb excess moisture and dry out quickly. Avoid overwatering to prevent root rot.
Troubleshooting, Repairs, and Maintenance
Diagnose cracks by distinguishing hairline from larger edge cracks and checking for movement or damage near drainage areas. Identify whether cracks are related to sleeves, inserts, or edge support.
Explore repair options such as epoxy or patch blends for small cracks and re-seating or replacing sleeves or inserts. Establish a maintenance routine that includes inspecting drainage paths and re-sealing where needed.
Repairing small cracks and reinforcing edges
First, identify the cause of your concrete planter’s hairline cracks. If they’re minor and don’t align with drain areas or sleeves/inserts, you can likely repair them yourself.
For hairline cracks, use a lightweight epoxy or concrete repair blend. Apply it sparingly, following the manufacturer’s instructions. Let it cure according to the package directions before using your planter again.
If edges are chipped, use a polymer-infused patching compound. Apply it with a putty knife, ensuring it’s flush with the surface. Allow it to cure as directed.
Important: If cracks are large, run deep, or align with drain areas/sleeves/inserts, consult a professional. They may indicate structural damage that requires expert attention.
Maintenance tips and seasonal checks
Regular inspections are key to keeping your concrete planter in tip-top shape. Check for any signs of cracking, chipping, or other damage every few months.
To prevent freeze-thaw stress, ensure water drains completely from the planter before temperatures drop. If necessary, tilt the planter slightly to encourage drainage.
Manage watering patterns to avoid over-saturation near the drain area. Allow soil to dry out between waterings, and adjust your watering schedule as needed based on weather conditions.
Note: In winter, consider covering the planter or moving potted plants indoors if temperatures drop below freezing.
Conclusion
Patience pays off here. When you protect the concrete from cracking and make sure the drainage works, your planter stays durable, looks right, and you don’t waste material or time.
When you do this next, confirm the planter is fully cured and stable, choose sleeves or inserts that fit your hole size, mark and drill only in the ready zone, install sleeves or seals cleanly, and test the system with water and a light load before going to final planting. If you’re not sure about timing, call it a test drill, verify readiness, and proceed in small steps. Use the safer drilling methods you learned, seal joints well, and keep perimeter surfaces protected while you work.
Common mistakes to avoid are drilling before curing is complete, forcing a fit that cracks the concrete, and skipping sealant or sleeve protection. Keep a steady pace, wear safety gear, and work slowly through test patches first. Remember to check for burrs or ragged edges that can harbor cracks, and never rush a curing window or overfill with moisture when sealing.
If the project starts to stall—if the material shows unexpected cracking, the sleeve doesn’t seat, or you don’t have a reliable drainage path—consider bringing in a pro. Addressing issues early saves you from costly repairs later. Stay practical, stay safety-focused, and you’ll end with a planter that drains well, lasts long, and looks solid.
FAQ
Can I start seeds directly in a concrete planter after drilling the drainage holes?
You can start some seeds directly if the mix drains well and you don’t flood the roots. Use a light, airy seed starting mix and keep watering consistent. Check seed packets for depth and spacing, and never plant where the soil is staying soggy.
What watering technique works best for seedlings in concrete planters?
Water slowly and evenly, letting the soil absorb before adding more. Use a tray or saucer under the pot to catch excess water and prevent soggy bottoms. If you see water pooling, adjust the soil mix or drainage sleeves so water drains freely.
Should I use heat mats or domes for starting seeds in planters?
Heat mats or domes can help when starting seeds, but only if you monitor moisture and temperature closely. Remove the dome once seedlings show leaves to prevent mold or overheating. Always follow the mat or dome manufacturer instructions and local safety guidelines.
What soil mix and amendments help seedlings thrive in concrete planters?
Choose a light, well-draining mix with some organic matter and a touch of vermiculite for moisture retention. Avoid heavy soils that stay wet; mix in perlite or vermiculite if drainage seems slow. If unsure, check product labels or manufacturer guidance for seed-starting blends.