
Introduction
Shining hardwood floors means restoring a clean, even gloss without relying on wax buildup.
Dull or patchy shine usually comes from wear on the finish, buildup from grime, or moisture-related damage, not just dirt.
To test what’s going on, check for water beading, lift of the finish, and uniform reflection in good lighting.
Fixes range from cleaning and buffing with a microfiber pad to reapplying a proper finish or sealer, while avoiding wax or vinegar unless the manufacturer allows it—check labels and local rules; alternatives include using floor-safe cleaners and a maintenance recoat or refinishing steps as needed.
Key takeaways
- Identify dullness causes: worn finish, sun fading, moisture damage, or buildup.
- Perform simple visual tests: swipe with microfiber and look for haze or streaks.
- For fixes, avoid wax; buffed recoat or proper screen cleaning helps.
- Use recommended cleaners and degreasing methods instead of vinegar for safety.
- Schedule refinishing when finish shows significant wear or damage.
- Safety: ventilate area, wear eye and skin protection, test stain bleed first.
Table of Contents
- Introduction
- Key takeaways
- Why Your Hardwood Floors Look Dull — Common Causes
- Quick Visual Checkpoints and Tests to Diagnose the Problem
- Why Wax and Vinegar Often Cause Problems — Myths and Facts
- Safe Cleaning and De-Greasing Methods to Restore Shine
- When to Refresh or Refinish: Fixes for Finish Damage
- Comparative Guide: DIY Remedies Vs. Commercial Products
- Preventative Maintenance to Keep Hardwoods Shining Long-Term
- Safety, Environmental, and Cost Considerations
- Conclusion
- FAQ
Why Your Hardwood Floors Look Dull — Common Causes
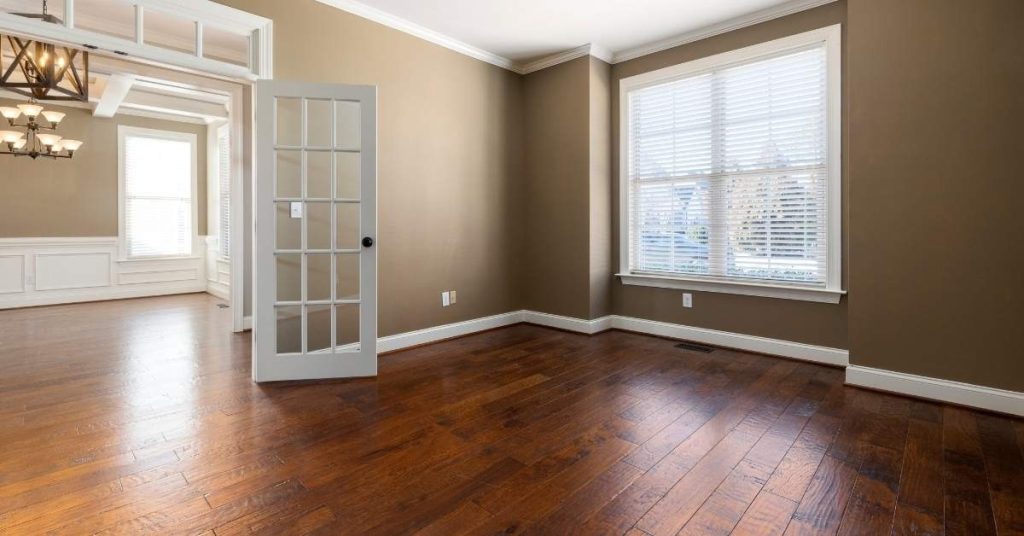
Hardwood floors lose their luster for two distinct reasons: surface film buildup and finish failure. A hazy, streaky, or sticky film usually points to residue left from cleaners, wax, or polish that hasn’t been fully rinsed away. Finish failure presents as dull patches, wear through, or a cloudy look where the coating has degraded. Knowing which one you’re dealing with guides the repair path and prevents making the problem worse.
Common culprits include residue from cleaners or wax buildup, incorrect cleaners, moisture ingress, and actual wear or thinning of the polyurethane or finish. Use a quick symptom checklist to match observed issues to likely sources, then choose targeted remedies such as cleaning for films or refinishing for wear. Prevention starts with a routine cleaner, entrance mats, controlled humidity, and seasonal checks to catch issues early.
Finish Wear vs. Surface Residue
When your hardwood floors start looking dull, it’s crucial to figure out if the problem is a worn finish or just surface residue. Both can make your floor appear lackluster, but they need different solutions.
Worn Finish: If you see visible wood grain, fading, or deep scratches, your polyurethane finish might be wearing thin. This happens over time due to foot traffic and wear.
Surface Residue: On the other hand, if your floor feels sticky or has a hazy film, it’s likely just surface residue. This can happen from using the wrong cleaner, wax buildup, or not cleaning properly.
Chemical and Moisture Damage Causes
Certain chemicals and moisture can dull your hardwood floors and even cause damage. Here’s what to watch out for:
Acids: Vinegar, citrus cleaners, and other acidic products can etch your floor’s finish, creating a dull, hazy look. This is permanent and requires refinishing.
Household Cleaners: Some cleaners leave behind residue that builds up over time, causing a dull film. Always use cleaners specifically designed for hardwood floors.
Moisture: Water can damage your floor’s finish if it sits too long. It might cause temporary haze or, in severe cases, warp the wood.
Physical Causes: Scratches, Abrasion, and Sun Fade
The daily wear and tear on your hardwood floors can lead to a loss of shine. Here’s how:
Scratches and Abrasion: Foot traffic, grit tracked in from outside, and furniture drag can scratch and abrade the finish, making it look dull.
Sun Fade: Prolonged exposure to sunlight can cause your floor’s finish to fade. This is more noticeable on floors near windows or in rooms with lots of natural light.
Regular maintenance, like using area rugs and keeping the floor clean, can help minimize these physical causes of dullness.

Quick Visual Checkpoints and Tests to Diagnose the Problem
These simple, low‑risk checks help you decide if shine loss is residue, finish wear, or structural damage. Start with a water bead test, fingertip wipe, light angle inspection, and a small solvent spot test to map out the cause. Record what each test shows so you can compare results over time and track progress after cleaning or repairs.
In the water bead test, a few drops on an inconspicuous area should bead for film residue, while spreading or sheeting suggests a different issue. The fingertip wipe can reveal a dull film or lifted oils versus a worn finish. Use oblique lighting to spot micro-scratches or dull patches that aren’t visible straight on, then confirm with a mild solvent test in a hidden spot to differentiate buildup from wear or damage.
Water bead and fingertip tests
Before you start cleaning or refinishing, use these simple tests to understand your hardwood floor’s condition.
- Water Bead Test: Apply a few drops of water on an inconspicuous area. If they bead up, there might be residue or film. If they sheet out and soak in, the finish is worn, or the surface is porous.
- Fingertip Wipe Test: Gently rub a small area with a clean fingertip or microfiber cloth. If it lifts off oils or leaves a dull film, there’s residue buildup.
Quick rule: These tests help you understand if your floor needs cleaning, refinishing, or both.
Solvent spot test (safe at-home method)
Before using any solvent, patch-test first to ensure it’s safe for your floor. Here’s how to do a conservative solvent test:
- Preparation: Choose an inconspicuous area and use a small amount of isopropyl alcohol or mineral spirits.
- Application: Apply a tiny drop on a cotton swab and gently rub the floor.
- Observation: If the shine returns, or residue dissolves, it’s buildup. If no change, wear or damage is more likely.
Quick rule: Always patch-test first to avoid damaging your floor.
Light-angle inspection and magnified visual checkpoints
Use light angles and magnification to reveal issues not visible at a glance. This helps you understand the extent of damage.
- Raking Light: Use oblique lighting to reveal abrasions, dull patches, or micro-scratches that aren’t visible head-on.
- Magnification: Use a magnifying glass or your phone’s camera with zoom to check for fine scratches and haze.
- Photography: Take pictures of problem areas for progress tracking and to show professionals if needed.
Quick rule: Regular light-angle inspections help you stay on top of minor issues before they become major problems.
Why Wax and Vinegar Often Cause Problems — Myths and Facts
This section clarifies what wax and vinegar mean for modern sealed hardwood floors and which finishes are affected. It matters whether you’re dealing with polyurethane, water-based finishes, or penetrating oils. Understanding the scope helps you avoid chasing problems that aren’t there and keeps you from hardening the wrong surface.
Vinegar can interact with certain finishes in ways that alter gloss or integrity, and wax can interfere with coatings designed to breathe or cure. Distinguish common claims from measured outcomes, and use manufacturer guidance as your north star before testing anything in an inconspicuous spot. Where appropriate, note safe exceptions and verify with the label or data sheet before proceeding.
Vinegar: when it helps and when it hurts
Vinegar is a weak acid, making it a no-no for most sealed hardwood floors. It can etch or damage finishes over time.
Diluted vinegar (1 part white vinegar to 2 parts water) can safely clean unsealed wood or specific antique finishes. But never use full-strength vinegar, and always test first.
For sealed floors, stick to pH-neutral cleaners. They’re safer and just as effective for daily cleaning.
Wax on modern finishes: temporary gloss or long-term trouble?
Paste or car wax can give a quick shine, but it’s temporary. It builds up over time, attracting dirt and making floors look dull faster.
Wax can also interfere with future refinishing. It creates a barrier that prevents new coats from adhering properly.
For modern finishes like polyurethane or water-based coatings, skip the wax. They provide their own protection and shine.
Common care myths to stop following
‘More shine = more wax’: Not true. Too much wax builds up, attracts dirt, and makes floors look dull.
‘Vinegar cures all’: False. Vinegar can damage finishes over time. Stick to pH-neutral cleaners for sealed floors.
‘Sweeping is enough’: Nope. Regular vacuuming and occasional thorough cleaning are needed to remove embedded dirt.
Safe Cleaning and De-Greasing Methods to Restore Shine
Begin with a pH-neutral hardwood cleaner and test on a small, hidden area to ensure compatibility with your finish. Build a routine that minimizes dwell time and avoids soaking the floor, then use a soft cloth or pad to lift residues without scratching. The goal is to remove buildup while preserving the existing finish.
For stubborn degreasing, choose a cleaner labeled for hardwoods and apply with a light touch, then wipe away completely to prevent new film formation. Establish maintenance frequency that fits your traffic, and always ventilate, wear gloves, and dry thoroughly to prevent moisture damage and gloss loss.
Materials and Tools Checklist
Before you start, gather these supplies to ensure a thorough yet safe cleaning.
- Microfiber mop: Gentle on finishes, traps dust.
- pH-neutral hardwood cleaner: Prevents dulling and delamination. Check label for compatibility with your finish.
- Soft scrub pads or microfiber pads: Non-abrasive, lifts residue without scratching.
- Bucket: For mixing cleaner and rinsing mop.
- Fans: For quick drying after cleaning.
- Avoid: Abbrasive scrubbers: Can scratch the floor. Ammonia cleaners: Damaging to hardwood finishes.
Quick rule: Always test cleaner on a small, inconspicuous area first.
Step-by-Step Cleaning Routine for Stubborn Film
Follow this sequence to remove tough buildup without damaging your floor.
- Dry sweep or vacuum the floor to remove loose dirt and debris.
- Test a small, inconspicuous area with cleaner to ensure it doesn’t dull or damage the finish.
- Dilute the cleaner according to package instructions in your bucket of warm water.
- Mop the floor using even strokes, working backwards from one corner of the room to the other.
- Rinse the mop frequently in clean water to avoid spreading dirt around.
- Rinse the floor thoroughly with clean water to remove all cleaner residue. Wipe with a damp cloth to check for streaks.
- Dry the floor thoroughly using fans or a dry microfiber cloth, working in small sections.
- Repeat every month or quarterly depending on traffic and buildup.
Spot Treatments for Sticky or Greasy Areas
For tough spots, use these targeted remedies to remove residue without damaging your floor.
Mineral spirits: For general grease and grime. Apply sparingly with a cloth, let sit briefly, then wipe off and dry. Ventilate well and test on a small area first.
Commercial adhesive removers: For stubborn spots like gum or wax. Follow package instructions for application and safety precautions. Always patch test before use.
Quick rule: If residue persists after treatment, consider calling a professional to avoid further damage.

When to Refresh or Refinish: Fixes for Finish Damage
Finish condition determines the path: surface wear and micro-scratches may respond to buffing and recoating, while deeper wear or damage may require screening and a new coat or a full sand‑and‑refinish. Use clear criteria to decide which route matches your floor’s reality without overpromising results. A small test on a discreet area helps confirm adhesion and finish behavior before a full change.
Preparation, tools, and materials vary by method, and humidity or moisture levels can influence outcomes. Be mindful of color or texture changes and the potential for dust fallout during any refinishing. Getting multiple quotes and testing on a sample area can prevent surprises and help you choose the best approach for your space.
Screening and recoating (light to moderate wear)
When your hardwood floor shows light to moderate wear, screening and recoating can bring back its gloss. Screening is like a gentle exfoliation for your floor, removing the top layer of finish without sanding deep.
Preparation: Vacuum thoroughly. Test your screen disc on a small area first. Use a random orbital sander or buffer with the screen disc, moving in lines. Follow up with a tack cloth to remove dust.
Now, recoat using a compatible finish. Start with a thin coat, let it dry, then lightly sand with fine-grit paper and wipe clean before applying the final coats. Always follow manufacturer’s instructions for best results.
Spot repairs for scratches and gouges
Small scratches and gouges don’t need a full refinishing. Here are quick fixes:
Shallow Scratches: Use a blending stick or colored putty, matching your floor’s color. Apply sparingly, let dry, then lightly sand and finish to match sheen.
Deep Gouges: Fill with wood filler, let dry, then sand flush with the surface. Stain if needed, then finish to match surrounding area.
Tip: Always test on a small, hidden area first to ensure color and sheen match.
When to choose full sanding and refinishing
Full sanding and refinishing is needed when your floor shows signs of deep wear, widespread discoloration, or finish failure across large areas.
Signs: Deep gouges that can’t be filled, water rings that won’t buff out, or a dull, uneven sheen. If your floor has been waxed and now feels sticky or looks patchy, it’s time to refinish.
Expect dust during sanding. Protect yourself with a respirator and seal off other rooms. Sanding removes all existing finish, so you’ll start fresh with stain and new coats of finish. It’s a big job but gives the best results for heavily worn floors.
Comparative Guide: DIY Remedies Vs. Commercial Products
This guide compares outcomes, risks, and longevity of do‑it‑yourself options like vinegar or wax against professional cleaners, restore kits, and commercial finishes. Focus on what issue you’re solving, how risky each option is to your current finish, and the expected duration of results. Use this lens to decide when a DIY fix is appropriate and when a pro is worth the investment.
Consider how safety, finish compatibility, and long‑term impact shape your choice. Document results with patch tests and photos to track progress and avoid widespread damage. Use beginner‑friendly product categories and know when to seek professional help for significant wear, water damage, or failed DIY attempts.
Best commercial cleaners and restorers (what to look for)
When shopping for professional products, look for these key features:
pH-neutral: Won’t damage or dull your finish. Safe for all sealers.
Solvent-based restorers: Can tackle tough grease and grime. Ideal for heavy traffic areas.
Ignore claims like ‘miracle shine’ or ‘one-step wonder’. Focus on ingredients and user reviews.
Cost-effective DIY fixes that actually work
Try these budget-friendly solutions:
pH-neutral cleaner (like Murphy Oil Soap): Dilute according to instructions. Safe for all finishes.
Mineral spirits: For adhesive residue or sticky spots. Apply, let sit, then wipe off.
Microfiber pads: Use with cleaner for gentle buffing and shine restoration.
When to call a professional
Don’t DIY these issues:
Structural moisture damage: Warped or cupped boards need expert assessment and repair.
Large-area finish failure: Extensive wear, water rings, or scratches may require screening or sanding.
Lack of tools/skills: If you’re unsure about screening, sanding, or refinishing, hire a pro to avoid further damage.
Preventative Maintenance to Keep Hardwoods Shining Long-Term
Implement an actionable plan that covers daily care, monthly cleaning, and protective measures. Quick dusting, prompt spill blotting, and avoiding standing water help preserve finish sheen, while routine deeper cleans remove buildup without dulling gloss. These habits form the backbone of long‑term shine.
Protect high‑traffic zones with rugs, place felt pads under furniture, and manage humidity within the manufacturer’s recommendations. Seasonal checks for dull spots or wear gaps and timely resealing are key to preventing future problems. Use simple spot tests to verify cleaners don’t create new issues and to time maintenance before trouble surfaces.
Routine cleaning schedule and dos and don’ts
A daily dusting with a microfiber broom or cloth is all you need to keep your hardwoods shining. Do it quickly, just enough to remove surface dirt.
Immediately blot spills, don’t let liquids sit on the finish. Standing water can dull and damage the seal.
Avoid harsh cleaners like bleach or ammonia. They strip the finish, making it look dull. Stick to pH-neutral cleaners, they’re gentle yet effective.
Never wet mop hardwoods, too much water can warp and damage your floors.
Protecting high-traffic zones and furniture
Entry mats cut down on grit, place them at every door, especially in high-traffic areas.
Felt pads under furniture legs protect your floors from scratches. Use them on all moving pieces, like chairs and tables.
Area rugs help distribute wear evenly. Rotate them regularly, every few months to prevent uneven wear.
Move heavy furniture occasionally too. Lift instead of sliding, it’s easier on your floors.
Long-term planning (humidity control and seasonal care)
Hardwoods love stability. Keep humidity between 30-50%, or as recommended by your manufacturer.
Use humidifiers in winter, dehumidifiers in summer to maintain this range. Moisture swings cause wood to swell and shrink, damaging the finish.
Sunlight fades hardwoods over time. Use curtains or UV-blocking film, especially on south-facing windows.
Inspect your floors seasonally for dull spots, scratches, or wear gaps. Reseal or refinish as needed, every few years based on wear.
Safety, Environmental, and Cost Considerations
Prioritize respiratory safety, ventilation, and personal protective gear when working with cleaners and sealants. Protect skin and eyes, and handle containers according to label directions to minimize exposure and accidents. Build a plan that keeps workers and occupants safe throughout cleaning and refinishing tasks.
Balance eco‑friendly options with performance and cost, and follow disposal rules for wipes, rags, and empty bottles. Compare DIY vs. pro service costs and plan for long‑term floor life with minimal chemical use. Always check product labels and local regulations to ensure compliant use and disposal.
Personal safety and ventilation
When working with solvents and cleaners, your safety is paramount. Here’s what you need:
Personal Protective Equipment (PPE): Gloves to protect your hands, goggles to shield your eyes, and a respirator mask to safeguard your lungs.
Ventilation: Ensure the area is well-ventilated. Open windows, use fans, or consider using a HEPA vacuum to minimize dust and chemical exposure.
First-aid steps: If you get chemicals on your skin or in your eyes, rinse immediately with plenty of water. For severe reactions, seek medical attention promptly.
Environmental and disposal guidance
Consider the environment when choosing products. Low-VOC (Volatile Organic Compounds) options are less harmful to air quality.
For solvent disposal, follow these steps:
1. Check local hazardous waste rules. Some areas require special handling or collection events.
2. Follow label instructions. This will guide you on safe storage and disposal.
3. Use separate containers for used wipes, rags, and empty bottles.
Budgeting: DIY vs. professional costs and expected lifespan gains
Restoring shine yourself can save money, but consider the trade-offs:
DIY: Lower upfront cost, but more time investment and potential mistakes.
Professional: Higher initial cost, but expert results and time saved.
To extend floor life:
1. Regular cleaning: Routine maintenance keeps floors looking newer longer.
2. Minimize chemical use: Overuse can damage finishes. Always follow manufacturer guidelines.
3. Address issues promptly: Quick fixes prevent minor problems from becoming major ones.

Conclusion
Keep your floor shining by sticking to proven, safe methods and by knowing when to stop and call in a pro. The goal is durable, even gloss without risking finish damage or costly fixes, and that starts with careful testing and clean, conservative steps.
First, do a quick, practical check: test in a small, inconspicuous area, use only recommended safe cleaners, and note any staining, dullness, or sticky residue. Clean with a light touch, de-grease if needed, rinse and dry thoroughly, then decide whether a light recoat or a refinishing refresh is appropriate. If finish damage is present, or if you see peeling, obvious wear, or water damage, stop and plan a proper fix rather than improvising.
Common mistakes to avoid are real and easy to make: never use wax or vinegar as a cure for dull floors; never scrub aggressively or flood the floor with water, as that can drive finish damage deeper; never mix cleaning products or skip a small-area test before a full application. Use only tested products, follow labels, and respect the consistence of the finish you’re restoring. Always prioritize safety—ventilate, wear gloves if you’re working with cleaners, and dry the surface completely before walking on it.
If you notice deep scratches, water damage, significant finish wear, or the sheen is uneven despite careful cleaning, it makes sense to call a professional. They can recoat or refinish with the right materials and ensure long-term durability. Stay steady, follow the checks, and you’ll keep floors looking good without costly mistakes or downtime.
FAQ
What commonly causes a dull or inconsistent shine on hardwood floors?
Dust, residue from cleaners, and floor finish wear are the usual culprits. Water spots, soap films, and micro-scratches can also dull the look. Check for buildup near baseboards and in high-traffic paths.
How can I test the floor to see what’s affecting the shine?
Run a quick smear test with a small amount of the product you plan to use, on a hidden area. Wipe with a clean cloth and evaluate if residue remains after drying. If the surface still looks flat, the finish or wood may need deeper restoration.
What are reliable fixes for a shiny floor without wax or vinegar?
Clean firmly with a pH-neutral or floor-specific cleaner to remove film. Lightly abrade the surface with a new, clean pad or properly matched refinishing screen if the finish is worn. Reapply an appropriate floor finish following the manufacturer’s instructions.
What common mistakes should I avoid when trying to restore shine?
Avoid using oil soaps, wax, or too much water since they can build up or cause streaks. Don’t use steel wool or harsh abrasives on a finished floor. Always test any product in a small area first and follow label directions.