

Introduction
Identify, assess, and repair water leaks in stucco walls with practical, step-by-step guidance.
The guide explains how to spot signs of moisture, evaluate damage, and implement reliable fixes to protect your home.
You’ll learn approachable inspection routines, common-sense tips, and safety notes to understand when professional help is advisable.
Key takeaways
- Inspect exterior stucco for cracks, gaps, or bulges after heavy rain or thaw.
- Use moisture meter or dry-wall test to identify hidden leaks behind plaster.
- Check flashing, caulk joints, and window/door penetrations for water intrusion points.
- For minor leaks, repair hairline cracks with appropriate stucco patching compound.
- Decide between repair or replacement based on extent of damage and wall age.
- Schedule seasonal inspections and maintain clear drainage around foundations to prevent moisture.
Table of Contents
- Introduction
- Key takeaways
- Quick overview: why stucco leaks matter
- Tools and materials checklist for inspection and basic repairs
- Step-by-step leak detection checklist
- Diagnosing the root cause: common stucco failure modes
- Repair options and step-by-step remediation checklist
- Repair vs. replace decision checklist
- Costs, timelines, and planning considerations
- When to hire a professional and how to choose one
- Preventative maintenance checklist and seasonal inspections
- Visual signs and examples to look for
- Conclusion
- FAQ
Quick overview: why stucco leaks matter
Leaks in stucco are more than a cosmetic issue; undetected moisture can quietly compromise a building by promoting structural rot, encouraging mold growth in hidden cavities, and degrading insulation, which leads to higher energy bills and costly repairs if moisture remains unchecked. Knowing the common entry points—cracks, gaps around windows and doors, flashing failures, improper expansion joints, damaged weep screed, and aging or overloaded stucco layers—helps you trace the moisture path before it causes widespread damage. This section sets expectations for what to look for on the exterior and interior, and why a methodical approach matters for safety and effective planning.
Immediate signs to watch for include staining, efflorescence, soft or spongy wall areas, peeling paint, musty odors, and sudden spikes in humidity or condensation, all of which indicate moisture is present and moving through the system. The guide emphasizes that moisture cannot simply “dry out” behind stucco without addressing the source, so early detection should lead to containment and a clear repair plan rather than invasive probing that risks further damage. For DIY readers, focus on exterior checks first, then interior indicators, and follow a practical sequence of detection, containment, and repair planning, keeping safety front and center and knowing when to call a pro when conditions exceed a safe DIY scope.
Common signs homeowners notice first
Most homeowners spot leaks by eye or smell. Look for brown stains or dark streaks on exterior stucco and matching discoloration on interior walls or ceilings. Paint blistering, peeling, or powdery white residue (efflorescence) are common visual clues that moisture is present.
Soft, spongy patches when you press the wall, damp insulation behind trim, or persistent musty odors indoors indicate active moisture and need faster action. Hairline cracks and open control joints are early warning signs; they may not feel wet yet but let water start the path inward.
Urgent items: visible interior damp spots, mold growth, rotting trim, or sudden humidity spikes. These point to ongoing intrusion and higher risk of structural or health problems. Less urgent but still important are small hairline cracks and efflorescence — fix the source before the issue grows.
How stucco is built and why it can fail
Traditional stucco is multiple coats applied over metal lath attached to sheathing. Older assemblies often relied on a single water-resistive layer and expected the stucco itself to shed water. Modern best practice uses a drainage plane: a WRB, flashing, weep screed, and a ventilated gap behind the stucco to direct water out.
Common failure points are the same on every system: missing or failed flashing at windows and roof intersections, blocked or absent weep screed, cracked stucco that channels water to the WRB, and improperly detailed expansion joints. Overloaded or excessively thick recoat layers can trap moisture instead of letting walls dry.
Key takeaway: if the water can bypass flashing or sit against the WRB, the wall will get wet. Fixes focus on restoring drainage and sealing transitions, not just patching the surface.

Tools and materials checklist for inspection and basic repairs
The Tools and materials checklist helps homeowners prepare a practical, prioritized set of items to inspect stucco walls for leaks and carry out basic, non-professional repairs. It highlights essential inspection tools—moisture meter, infrared camera, pry bar, caulk gun, respirator, and a sturdy ladder—and core consumables like sealants, patch mortar, and flashing, with notes on safe handling and budgeting considerations. Clear guidance on PPE, ventilation, and disposal supports safer work practices and reduces the risk of DIY missteps.
Using this toolkit and materials correctly matters because it streamlines the process from inspection to patch, seal, and protection, while aligning with typical stucco finishes and common failure points. The guidance helps you source the right products, estimate costs, and perform a quick pre-use check to ensure compatibility with wall type and climate. A short, practical sequencing—inspect, assess damage, seal gaps, patch, reseal—along with storage and replacement intervals, keeps projects efficient and durable without overcommitting beyond your skill level.
Recommended diagnostic equipment and cost tiers
Choose tools that match the job and your budget. Below are low, mid and high-tier options with clear pros and cons.
- Screwdriver & probe Basic for tapping and opening suspect seams. Inexpensive and essential for visual checks. Carry extra tips and avoid forcing rusted fasteners.
- Handheld moisture meter Reads moisture percentage in stucco and substrate. Look for pin and pinless modes (20–50% useful range). Calibrate before use and keep probes clean.
- Infrared camera (rental) Spots temperature differences indicating moisture. Rent by day for $50–150 or buy basic units $300+. Use on cool mornings and avoid direct sun for best results.
- Inspection mirror & torch Helps see behind trim and in cavities. LED torch with adjustable beam is best. Carry spare batteries and use a magnetic pickup for dropped screws.
- Pry bar & nail puller Opens trim and small sections safely. Choose a slim bar to minimize damage. Pry slowly to preserve reusable components.
- Endoscope camera Small-diameter tube for wall cavities. Useful for targeted checks; consumer units $30–150. Avoid forcing through insulation and note orientation.
- Thermal imaging pros Professional full-scan when leaks are complex. Best for multi-story or hidden leaks; expect $200–600 for a technician visit. Book early and request report images.
Safety gear and fall protection essentials
Protect yourself before you open walls or climb ladders. Use the gear below and respect limits—replace worn items promptly.
- Respirator (N95+) Filters stucco dust and silica particles. Use N95 for light work, half-mask with P100 cartridges for extensive grinding. Fit-test before work and store masks dry.
- Eye protection Impact-rated safety goggles or faceshield. Prevents dust and chips from entering eyes. Clean lenses regularly and replace scratched units.
- Chemical-resistant gloves Protect from sealants and solvents. Nitrile for general use, thicker leather for prying. Change gloves if torn and dispose of contaminated pairs properly.
- Hard hat Shields from falling debris on multi-level jobs. Choose ANSI-rated models. Keep suspension straps dry and inspect weekly.
- Ladder & stabilizer Sturdy extension ladder with stabilizer bars. Use levelers on uneven ground and maintain three points of contact. Rent taller scaffold for extended work above one story.
- Fall harness system Required for work above one story or uncertain footing. Full-body harness with rated anchor and shock-absorbing lanyard. Inspect hardware before each use and follow anchor capacity rules.
- Ventilation & disposal Fan or respirator when sanding or grinding. Bag and seal debris per local rules to limit silica exposure. Wet down dust when practical and never use compressed-air blowouts.
Step-by-step leak detection checklist
Step-by-step leak detection starts with a clear exterior-to-interior sequence, guiding homeowners through the building envelope first—façade, flashing, joints, and windows or doors—before moving inward to ceilings, walls, and basements, so you can pinpoint where moisture intrusion begins. Exterior checks include visual and tactile scrutiny of stucco for cracks, bulges, and soft spots, along with a careful look at flashing, sealants, and gutter or drainage conditions that may channel water toward vulnerable areas. Roof-edge details, parapets, downspouts, and overhangs or soffits are examined for signs of water diversion toward vulnerable stucco, followed by moisture mapping with a meter and controlled tests like a hose test on suspected exterior zones.
This routine not only helps isolate the leak path but also minimizes interior disruption by confirming exterior sources before disturbing interior finishes, using moisture readings to establish baselines and track high-moisture zones across ceilings, walls, and penetrations. Documenting findings with photos and measurements at each step creates a practical map you can follow or share with pros, so you can prioritize repairs and prevent repeat damage rather than guessing where leaks originate. By emphasizing an orderly exterior-to-interior approach and careful testing, homeowners gain a repeatable, safe method to verify leaks and protect the home’s structure and finishes.
Step-by-Step Process
A concise sequence to find leaks from outside to inside while keeping the site safe and documented.
- Prepare and secure the area. Put on PPE, set ladders correctly, and lay down drop cloths; safety prevents accidents and damage. Check that helpers know the plan.
- Do a daylight exterior sweep. Look for obvious cracks, bulges, and failing sealant around penetrations; these often point to entry paths.
- Check roof edges and drainage. Confirm gutters, downspouts and flashing divert water away; standing water near stucco is a bad sign.
- Use moisture meter and camera. Map high readings and take photos with timestamps; this narrows problem zones fast.
- Perform controlled hose tests. Start low and work up, watching interior for damp spots; document times and spray locations.
- Probe cavities if needed. Cut a small inspection hole behind suspected areas to confirm source; be prepared to stop and call a pro if rot or mold is extensive.
- Repair temporary and clean up. Patch small defects, reseal, remove debris, and retest to confirm the leak is controlled.
Exterior visual inspection checklist
Walk the perimeter with attention to the building envelope. Scan stucco for hairline cracks, horizontal cracks at control joints, and any bulging or soft spots that suggest trapped moisture.
Inspect around windows, doors, vents and electrical penetrations. Look for failed caulk, gaps at the jambs, and missing or rusted flashing; these are common leak entry points. Check the roofline, parapets and overhangs for damaged edge flashing and blocked gutters that channel water onto walls.
Examine weep screeds and the base of the wall. Debris, poor grading, or splashback staining often indicate chronic wetting that can drive leaks inward.
Non‑destructive testing: moisture meters & thermal imaging
Use a pin or pinless moisture meter to map moisture levels. Pins give precise localized readings; pinless scans larger areas quickly. Record baseline readings and mark hot spots for follow-up.
Thermal imaging shows temperature differentials where wet materials cool differently. It helps prioritize where to probe but watch for false positives from shade, recent rain, or HVAC drafts. Combine meters and imaging to reduce misreads and target the next test step.
Provoked testing: hose/flood test and cavity probes
Perform controlled hose tests on suspected exterior zones. Spray a 3–5 foot section for 10–15 minutes, starting low and moving up; have someone watch inside for leaks and note the time and location of any appearance.
If hose tests point to a spot, remove a small stucco patch or trim piece to inspect the cavity. Look for wet insulation, damaged WRB, or poor flashing termination. Document findings with photos and measurements before any larger demolition or repairs.
Diagnosing the root cause: common stucco failure modes
Diagnosing aging, cracking, and moisture-related issues behind and around stucco is essential to prevent further damage. Common signs to watch for include random hairline cracks, wider or stepped cracks at joints, delamination or blistering, and spongey or soft sections. Identifying whether the issue is caused by improper curing, substrate movement, moisture intrusion, or incompatible materials helps guide repairs and cost estimates. Always start with non-destructive checks and document findings before any probing or removal.
This checklist emphasizes safe, non-destructive assessment: perform careful visual inspections, map patterns of cracking, check for dampness with a moisture meter, take photos, and note the location and extent of any suspected damage. Prioritize leaks and areas where water has a direct path behind the finish (around windows, roof / gutter intersections, penetrations). Use a gentle probe only to verify softness and avoid damaging the stucco. If readings rise behind the stucco or if delamination is widespread, treat as moisture intrusion and plan remediation with the appropriate flashing, sealing, and repair strategies. Keep records to support quick DIY fixes or professional referrals.
Cracks, movement joints, and delamination signs
Hairline shrinkage cracks are common and usually cosmetic; they run randomly and feel tight. Wider cracks, stepped cracks over blockwork, or cracks at control joints indicate movement or substrate settlement and need prompt tracing back to the source.
Delamination shows as blistering, a spongey finish, or sections that pop off when prodded. Use a gentle probe and document the area size. Note whether moisture readings rise behind the stucco—wet readings plus delamination almost always mean water is trapped behind the finish.
Flashing, window/door details, and penetration failures
Water commonly tracks from windows, doors, and roof intersections. Look for misaligned or missing step flashing, stuck or absent head flashings, and sealant gaps where the stucco meets frames. Staining below these details is a strong clue the flashings failed.
Probing around sills and penetrations can reveal soft spots and hidden paths. Check transitions where different materials meet—poor terminations or reversed flashings create channels that carry water deep behind the stucco.
Hidden damage indicators (rot, mold, insulation wetting)
Soft or delaminated sheathing, sagging window sills, and localized paint failure inside are signs of underlying rot. Musty odors, persistent interior stains, or bubbling drywall near stucco walls point to chronic moisture.
Insulation that clumps, loses loft, or shows damp spots reduces thermal performance and flags long-term wetting. Use moisture readings, photos, and notes to map affected areas and prioritize repairs. When multiple indicators appear together, escalate to a professional assessment.
Repair options and step-by-step remediation checklist
The repair options are presented from simplest to most invasive: sealants or crack injections for narrow, active leaks, then patching, localized stucco replacement, and finally a full re-clad when substrate or moisture conditions demand it. A diagnostic checklist guides selection: signs of active leaks, moisture behind plaster, crack width, substrate stability, and whether roof flashing or gutters are feeding water. Each method is matched to criteria such as crack width, moisture intrusion, and overall wall condition, with a clear workflow from surface prep to cure and verification. This section, titled Repair options and step-by-step remediation checklist, provides actionable steps linked to the exact headings to guide you precisely to the relevant content.
For DIY projects, following the step-by-step remediation workflow helps ensure proper surface prep, correct product choice (waterproof sealants, injection materials, patching mortars), and careful application and cure times. It also emphasizes safety and containment to prevent mold spread, PPE, risk assessment, and knowing when to call a licensed contractor or stucco pro, especially for structural concerns. After repair, the plan includes leak verification tests, interior moisture monitoring, re-drying if needed, and documenting materials used to support future maintenance and prevention. Emphasize budgeting for containment, cleanup, and potential interior remediation when mold or rot is detected.
Step-by-Step Repair Process
Follow a logical sequence to stop active leaks, fix damage, and verify dryness. These steps keep repairs tight and avoid rework. Include explicit safety and cost considerations for each step so DIYers can plan accordingly.
- Set up safety and containment. Put on PPE, isolate the area, and cover interiors to limit mold spread; check stability before work. Include a rough cost estimate for containment materials and plan for weather-related delays.
- Confirm leak source. Use a hose test or moisture meter to verify the failing area; don’t guess—repair the cause, not the stain. Document findings with photos and measurements for warranty or future work.
- Prepare the surface. Clean, remove loose stucco and dust to ensure adhesive bonds; a solid substrate is the quick check. Remove any coatings that could inhibit adhesion and protect nearby finishes.
- Choose and apply repair method. Seal small cracks, inject epoxy for hairlines, or patch with compatible mortar for holes; match materials to existing stucco. Verify compatibility, mix ratios, and cure times per product data sheets.
- Replace or repair flashing/WRB if needed. Open a small access cut to expose the moisture plane when persistent leaks exist; flashings must lap and slope. Inspect for corrosion, damage, or gaps and plan for proper resealing and flashing laps.
- Cure and protect. Allow manufacturer cure times, protect from rain and freeze; surface should be firm and dry to touch. Consider temporary weatherproofing and monitoring during cure.
- Verify and document. Perform a water test and record moisture readings and materials used for future reference. Save results, photos, and maintenance notes for warranty and resale value.
- Plan and budget for post-repair maintenance. Establish a routine inspection cadence (e.g., every 6–12 months), track crack progression, and note any changes in moisture readings to catch recurrence early.
DIY fixes: when simple sealing or patching will do
Small cracks, failed caulk at penetrations, and surface spalls are often DIY fixes. If moisture tests show low dampness and the substrate is sound, you can proceed.
For hairline cracks use a quality acrylic-latex or polyurethane sealant and tool the bead flush. For chips or small holes, use a pre-mixed stucco patch or polymer-modified mortar; feather edges to blend. Re-caulk around windows and penetrations with a backer rod where gaps exceed 1/4 in.
Time estimate: most jobs take 1–4 hours plus cure time. Stop and call a pro if you find rot, ongoing wet pockets, or structural movement. Include a note on potential interior moisture control costs if mold is suspected.
Intermediate repairs: replacing flashings and WRB patches
When leaks persist despite surface repairs, the water-resistive barrier or flashing is often at fault. Access is required but you can still do it without a full re-clad if framing is sound.
Cut a controlled opening through the stucco to expose the WRB and flashing. Replace damaged WRB with self-adhered membrane and install new metal flashing with correct laps and sealant at terminations. Use compatible backer and patch the stucco in layers, matching thickness and finish.
Material note: choose corrosion-resistant flashing and WRB products rated for stucco systems. Stop and hire a stucco contractor if you uncover widespread rot or failing sheathing.
Major remediation and full re-clad: signs and process
Full re-clad is needed when moisture damage is extensive: delamination across large areas, pervasive rot, failed WRB throughout, or repeated leaks after repairs.
The process: remove stucco to the framing, replace rotten sheathing, install a continuous WRB, new flashings, housewrap, and proper drainage plane. Reinstall lath and a multi-coat or panel cladding system to manufacturer specs.
Quality checkpoints: continuous flashing at all penetrations, correct WRB laps, taped seams, and post-install water testing. Document materials and test results for warranty and resale value.
Repair vs. replace decision checklist
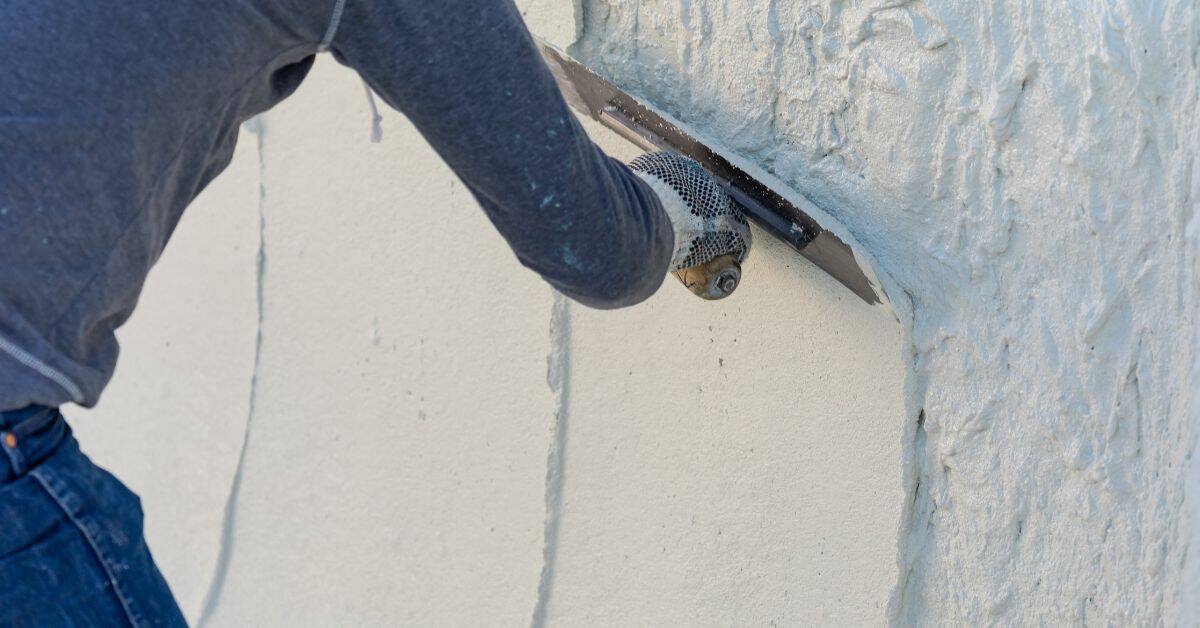
Establish a clear decision framework that distinguishes repairable issues from replacement needs by evaluating area size, moisture extent, and structural impact such as soft studs, rot, or mold behind stucco, then use key diagnostic signs to guide the call, including hairline versus large expanding cracks, staining or efflorescence, soft or hollow stucco, and visible rust on lath or framing and water intrusion patterns. Use a simple flow or yes/no checklist with rough cost bands and expected lifespans to decide whether localized repairs like crack sealing, re-mortaring, re-spotting, improved flashing, or resealing suffice, or whether partial or full re-stucco or system replacement is warranted.
Having a defined path helps DIYers gauge safety, permitting needs, and when to bring in a licensed stucco contractor, particularly for moisture barriers and structural work. It clarifies what constitutes a repairable fix versus a replacement route, so you can plan materials, timeline, and budget with realistic expectations. This context supports better warranties and maintenance documentation, reducing rework and ensuring long-term performance while keeping safety and code considerations front and center.
Low/medium/high damage scenarios with examples
Low: isolated hairline cracks, small patchy stains, or a single failed caulk joint. These are surface problems. You can usually seal cracks, re-spot, and reseal flashings and expect a multi-year fix.
Medium: multiple expanding cracks, localized delamination, or persistent staining that tracks to one bay. You may find soft or hollow stucco in spots and minor WRB laps that failed. Typical work includes localized removal, WRB repair, flashing replacement, and patching — often requires a pro but not full re-clad.
High: continuous moisture patterns across multiple bays, visible rusted lath, rotted sheathing or studs, or active mold behind the stucco. These signs point to systemic WRB failure. Expect partial or full system replacement and framing repair. Do not attempt major structural work without a licensed contractor.
Cost-impacting hidden factors to confirm before deciding
Extent of rot: small sheathing repairs are cheap; widespread stud replacement is expensive. Probe suspect areas to see whether damage is isolated or runs behind multiple bays.
Mold remediation and disposal add cost and time. If mold is present, containment and remediation protocols may be required by code and will push toward replacement.
Permits, code upgrades, and matching finish: older homes may need WRB upgrades or new flashings to meet current code. Matching existing texture and color can increase labor or force larger patches. Factor these into your decision before choosing repair over replacement.
Costs, timelines, and planning considerations
Realistic cost ranges should be stated for each repair option—seal/patch, flashing repair, partial re-stucco, and full re-clad—with clear upper and lower bounds and the typical project components that drive price, such as labor, materials, scaffolding, permits, and disposal. Key cost drivers shift estimates up or down depending on moisture intrusion extent, substrate condition, accessibility, weather windows, local labor rates, material choices, and whether mitigations like moisture barriers or drainage improvements are needed. Expect the numbers to reflect different scopes, from simple sealant work to full cladding replacements, with transparency about which line items are most variable.
The timing and sequencing from discovery to completion matter for budgeting and disruption—initial assessment, moisture evaluation, containment and mitigation, bids, contractor selection, actual repair, cure time, and final inspection each add weeks to months. Planning considerations help manage risk, including moisture mapping, potential hidden damage behind stucco, contingency budgets, temporary relocation if needed, and how permits or HOA rules affect scheduling. A practical decision guide clarifies when to patch versus partial re-stucco versus full recladding and suggests staging work to minimize cost and disruption while protecting long‑term performance; include a concise contractor questionnaire on scope clarity, warranty terms, moisture tests, access requirements, and cleanup.
Itemized cost checklist (parts, labor, hidden costs)
Start by listing obvious line items: materials (stucco mix, lath, sealant, flashing), labor hours, demo and disposal. Add scaffolding or lift rental and permit fees. Include diagnostic costs: moisture meter, core tests, and trades inspections.
Account for hidden-cost buckets: mold/rot remediation, insulation replacement, framing repair, and unforeseen substrate replacement. Factor warranty or inspection fees and post-repair painting. Typical order-of-magnitude ranges: small seal/patch jobs $150–$800, flashing repairs $500–$2,500, partial re-stucco $2,000–$8,000, full re-clad $12,000–$50,000+ depending on size and complexity.
Note that labor, access difficulty and disposal volumes push the price up. Keep a 15–30% contingency for hidden damage discovered after demo.
Typical repair timelines and weather/permit impacts
Timelines start with assessment (1–7 days) and moisture evaluation (1–3 days). Bidding and selection take 3–14 days. Small repairs can finish in 1–3 days; flashing work 1–5 days; partial re-stucco 3–14 days. Full re-clads often run 2–8 weeks including prep and finishes.
Curing and drying matter: scratch/float/finish coats need 24–72 hours between coats and full moisture equilibrium can take weeks. Cold, wet or humid seasons extend those windows and slow inspections.
Permits and weather can add time. Permits may impose 1–4 week waits or inspection callbacks. Schedule exterior stucco work in dry months when possible and build buffer time for re-inspection and unforeseen delays.
When to hire a professional and how to choose one
Know when a professional is needed by spotting red flags like persistent leaks, recurring moisture, visible stucco damage, or drainage problems that DIY fixes won’t solve. A contractor should cover a broad scope, including assessments, leak diagnosis, stucco and drainage repairs, waterproofing, insulation checks, and post-repair moisture testing to ensure lasting results. Look for clear expectations on how issues will be diagnosed and resolved, and how each step ties to preventing future problems. Credentials and experience with stucco systems and drainage are essential to verify the right expertise for your walls and climate.
This matters because choosing the right pro reduces the risk of recurring issues and wasted effort. A structured vendor evaluation—references, project portfolios, on-site assessments, and written estimates—helps compare scope, materials, and timelines. Expect a practical interview process with questions about timelines, cost breakdown, change orders, permits, cleanup, guarantees, and maintenance guidance. Verify licenses, insurance, bonding, and relevant certifications, plus warranty terms that protect your investment and clarify responsibility if problems reappear after work is done.
Questions to ask contractors and what to verify
Ask directly how many stucco remediation jobs they’ve done and for examples of similar drainage‑wall repairs. Request recent project photos, a couple of local references and a contact you can call. A contractor who avoids specifics or can’t produce a portfolio is a red flag.
Get a written scope that lists diagnosis steps, repair methods (flashings, WRB, re-clad sections), materials and a clear timeline. Verify how they will test for remaining moisture after repairs. Confirm who will pull permits and who is responsible for follow‑up if the leak recurs.
Before you sign, check license numbers, proof of insurance and bonding. Ask for an itemized estimate showing labor, materials, allowances and an explicit change‑order process. Make sure warranty length and what it covers are spelled out on the quote.
Insurance, permits, warranty and contract checklist
Require current general liability and workers’ compensation certificates and note policy numbers and expiration dates. For larger jobs, ask for proof of bonding. Do not accept verbal assurance—get insurance details on company letterhead or via the insurer’s verification line.
Confirm permit needs up front. Minor sealant work may not need one, but WRB replacement, structural modifications or full re‑clad usually do. Contractor should obtain permits or clearly state if you must. Permits protect you and ensure inspections occur.
Warranties vary: manufacturer vs. contractor workmanship. Prefer a written workmanship warranty of at least one year, with clear start date, exclusions (e.g., roof leaks unrelated to their work) and remedies. In the contract, insist on an itemized payment schedule, lien waiver on final payment, a defined cleanup plan, and a simple change‑order clause that requires written approval for extra costs.
Preventative maintenance checklist and seasonal inspections
A proactive preventative maintenance checklist helps homeowners catch leaks before they start by detailing quarterly quick checks and an annual thorough review focused on flashing, caulk, gutters, and grading. Key recurring problem areas to monitor include hairline stucco cracks, deteriorating window/door caulk, rusted flashing, and pooled water near the foundation, with exterior surfaces and interior signs like musty odors and stained drywall to inspect. Assignments vary by season, with homeowners handling simple tasks such as sealing joints and cleaning gutters, while more complex components like flashing or weep holes may require a licensed pro.
Seasonal cadence should break into spring, summer, and fall quick checks plus an annual pre-winter deep review, defining exact tasks after freeze-thaw cycles and following heavy rains. Tools and safety tips include caulk guns, exterior sealant, stucco patch, gutter tools, ladder safety, and precautions when power washing near electrical fixtures. Keep a simple maintenance log with photos of early signs, set reminders for upcoming checks, and know when to call a pro for flashing, weep holes, or any structural concerns to prevent recurrence.
Routine exterior care: caulking, gutters, landscaping
Walk the perimeter quarterly. Check all exterior sealant joints around windows, doors, pipes and light fixtures. Look for hairline cracks, hard or pulled-back caulk and brittle sealant; re-caulk with an exterior-grade, paintable sealant when gaps exceed about 1/8″. Keep a caulk gun, scraper and primer on hand.
Keep gutters and downspouts clean and flowing. Clear debris after fall and heavy storms. Repair loose hangers and extend downspouts to discharge at least 3–4 feet from the foundation to prevent pooling against the stucco.
Trim plants and maintain grading. Keep shrubs and irrigation sprays at least 12–18 inches from walls. Regrade soil to slope away from the foundation and check for erosion after seasonal heavy rains. These small tasks stop the common sources of recurring leaks.
Annual inspection template and documentation tips
Do a thorough annual review before winter. Walk the exterior and interior with a checklist: note cracked stucco, failed caulk, rusted flashing, flashing gaps, and any interior stains or musty odors. Take date-stamped photos of every problem area from multiple angles and measure crack lengths and widths where possible.
Keep a moisture log: record moisture meter readings at the same spots each year and note weather conditions. Store photos and notes in a simple folder or phone album labeled by date. Share this file with a contractor or insurer when requesting bids or filing claims.
Set reminders. Use calendar alerts for spring, summer and fall quick checks plus the annual pre-winter review. If flashing, WRB or structural issues appear, hire a licensed pro rather than delay.
Visual signs and examples to look for
Visual signs and examples help you separate active leaks from past issues by looking for fresh dampness, running water marks, and darkened stucco versus dry stains, then using quick on-site tests to verify moisture presence rather than cosmetic damage. Exterior indicators such as cracked stucco, hairline cracks near openings, water staining under eaves, efflorescence patterns, and soft or bulging finishes alert you to potential leaks, while interior signs like ceiling stains, warped drywall, bubbling paint, and musty odors point to moisture in living spaces. To prevent misreads, learn to distinguish blistering paint caused by moisture from paint that has blistered for other reasons and to read efflorescence patterns alongside active leaks, with careful notes on recent repairs or cleaning products that can confuse the issue.
Documentation and verification matter because a clear, traceable record speeds up decisions and reduces rework on job sites. By photographing signs from multiple angles with timestamps, mapping affected zones, and noting weather or rain events, you create a reliable history that supports when to escalate beyond DIY checks. Practical tests like grayscale moisture spatters, paper towel or dryer sheet dots, and safe probing help you gauge moisture presence before calling in meters or infrared imaging, while keeping safety in mind and avoiding unnecessary repairs or invasive probing. This approach helps you prioritize work, communicate findings effectively, and stay aligned with building health goals without over-testing or underestimating hidden moisture.
How to avoid misreading thermal and moisture tools
Handheld meters and infrared cameras help find leaks, but they lie if you don’t use them right. Run quick checks and understand limits before you trust readings.
- Calibrate regularly Follow the manufacturer’s calibration schedule. A cheap meter off by a few percent will send you chasing ghosts.
- Know the range Check the tool’s detection depth or surface temperature span. Infrared shows surface heat, not hidden wetness; moisture pins read deeper at specific density.
- Avoid sun bias Do scans in morning, evening, or overcast conditions. Direct sun and recent rain skew thermal contrasts and give false positives.
- Reference dry spots Take control readings on clearly dry stucco nearby. Use them as a baseline for comparison while on site.
- Use contact pins When in doubt, use a pin-type moisture meter for spot checks. Expect to pay $30–$150 to buy, or $25–$60/day to rent a professional unit.
- Layer methods Combine IR, pins, and simple paper-towel tests. If all three agree, you have a real issue.
- Watch coatings Paint, sealers, and salts change readings. Note recent painting or cleaning before trusting numbers.
Photo-log and moisture-reading template for homeowners
Keep a simple, consistent log. Start each entry with the date, time and weather notes (dry, light rain, just rained). Use a smartphone timestamp and write the same location name used on your sketch.
For each photo include: location tag (eg. north wall — window head), distance or scale reference, and one sentence describing the visible sign. Add a short line with the moisture reading and method used (infrared scan, pin meter at X% or paper towel result).
Sketch a basic wall map and mark photo numbers. Assign a quick severity level: low, medium, high. This format stays useful for insurance, bids, and contractor conversations.
Conclusion
Safety, durability, and appearance hinge on doing the right checks and proceeding with care. Stay disciplined, verify every step, and don’t skip the basics of detection, analysis, and proper sealing.
First, confirm the leak area using the step-by-step detection checklist, inspect flashing and joints, test small patches in an unobtrusive spot, and keep the work area clean and dry. Gather the necessary tools and materials, work in daylight, stay off wet surfaces, and progress in the smallest practical sections to avoid big pullbacks.
Common mistakes to avoid include ignoring tiny cracks and pretending they’ll fix themselves, using improper sealants or fasteners that don’t suit stucco, and drilling or grinding too aggressively without testing a patch first. Always wear eye protection and gloves, shut off nearby utilities if you’ll be near electrical or plumbing, and work from a stable ladder or scaffolding with a helper when needed.
If you’re dealing with widespread moisture, multiple leaks, structural concerns, or you’re venturing into major remediation, it makes sense to hire a professional and vet candidates based on recent jobs, clear timelines, and written scope. Stay focused, follow the plan, and you’ll protect your home’s skin without wasting time or money.
FAQ
How can I tell if a stucco wall leak is recent or old?
Look for damp spots that keep showing up after rain. Check for new cracks or crumbling stucco around windows and corners. If water drips behind the wall board or stains travel down, it’s likely a recent leak that needs fixing now.
What’s the quickest way to stop a leak through stucco?
Contain the drip with a temporary seal while you locate the source. Patch obvious cracks with a compatible exterior sealant and dry out the area. Don’t wait for more rain to test a fix—check after a light rain to confirm it stopped.
Do I need to remove and replace stucco to fix leaks?
Not always. Small cracks and damaged flashing can be repaired without a full re-skin. If water has soaked the insulation or framing, you’ll likely need replacement work—don’t skip that step or the leak will come back.
What should I inspect around windows and doors?
Check the sealant around frames for gaps or dried, cracked lines. Look at the metal flashing above and at corners for rust or holes. Re-seal and replace flashing as needed to keep rain from seeping behind the stucco.