
Introduction
Bubbling stucco under paint happens when moisture gets trapped and lifts both the stucco and the paint.
Key takeaways
- Inspect bubbling areas for moisture signs before chipping or sanding anything.
- Differentiate active moisture from historic damage to plan repairs carefully.
- Trace water sources from roof, gutters, and plumbing to prevent recurrence.
- Allow substrate drying fully before priming; use moisture meters as guidance.
- Follow a safe repair workflow: removal, patching, priming, and sealing with eye protection and mask.
- Choose compatible primer and coating; avoid sealing in moisture-prone zones.
Table of Contents
- Introduction
- Key takeaways
- Why Stucco Paint Bubbles — Mechanisms and Common Failure Modes
- Diagnosing Active Moisture Versus Historic Damage
- Common Moisture Sources and How to Trace Them
- Drying Time Factors and How to Confirm the Substrate Is Dry
- Step-by-Step Repair Workflow from Removal to Patching
- Primer and Paint Recoat Choices for Repaired Stucco
- Timing and Application Techniques to Avoid Repeat Bubbling
- Tools, Materials Checklist, Safety, and When to Call a Pro
- Conclusion
- FAQ
Why Stucco Paint Bubbles — Mechanisms and Common Failure Modes
Bubbles happen when the paint loses a firm grip on the stucco surface. Adhesion failure starts at the boundary where coatings meet the substrate. Moisture inside the wall and movement of the stucco can push the coating away. These are the core physical and chemical reasons behind bubbling.
As you diagnose, keep the focus on the potential failure modes: trapped moisture, poor surface preparation, and substrate movement. Use manufacturer instructions and product labels to confirm what each material requires for proper adhesion. This sets up the next steps for diagnosing the exact cause on your wall.
How paint bonds to stucco and what can break the bond
Stucco’s porous surface allows paint to adhere by filling these tiny holes. A good primer helps create a strong bond.
Contaminants, like dirt or grease, can stop paint from sticking. Incompatible coatings may cause adhesion failure too.
Moisture also plays a role. If stucco isn’t dry enough, paint won’t stick properly.
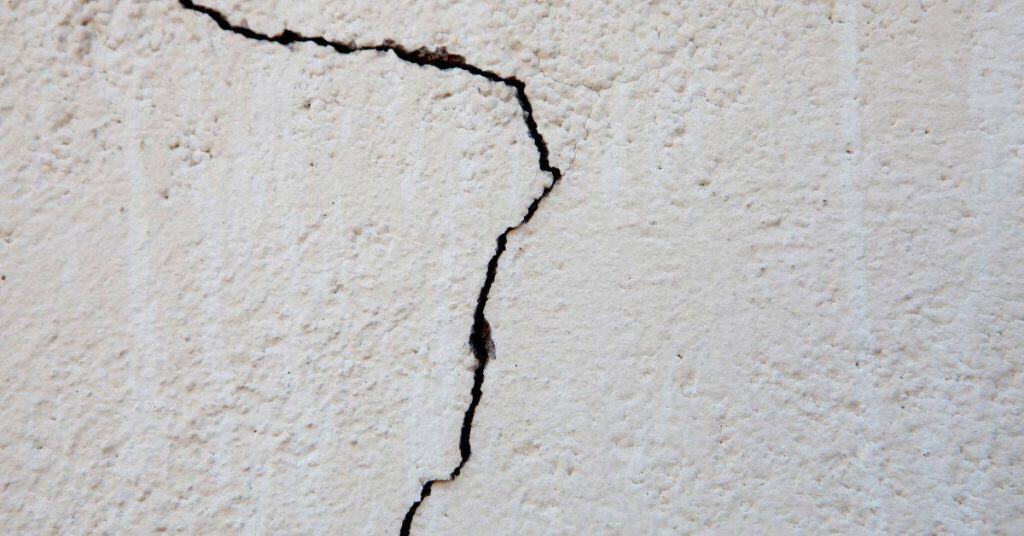
Typical appearance and patterns of bubbling
Bubbles can appear in different ways. Localized blisters might mean a specific issue with that spot.
Widespread lifting could indicate a problem with the entire surface, like using the wrong paint or applying it too thick.
Edge delamination – where bubbles start at edges and corners – often points to trapped moisture or inadequate preparation.
Diagnosing Active Moisture Versus Historic Damage
Start by scanning the patch for fresh signs of moisture intrusion. Look for wet areas, staining, or new bubbling patterns that mirror recent conditions. Next, consider if the issue could be from past leaks or prior repairs that have since cured.
Use a measured approach to decide on repair order: verify with product data sheets or manufacturer instructions when interpreting any readings. If moisture is ongoing, remediation takes priority before repainting, even if the surface looks dry elsewhere.
Visual inspection checklist and visual checkpoints
Before you start poking holes, use this visual checklist to get a sense of the moisture situation.
- Staining: Dark spots or streaks can indicate water intrusion. Check for discoloration around bubbled areas.
- Soft spots: Gently press on the stucco. Softness could mean trapped moisture.
- Efflorescence: A white, powdery residue might signal excess moisture.
- Pattern symmetry: Symmetrical bubbling may suggest historic damage, while asymmetrical patterns could point to current issues.
- Bubble size: Small bubbles often indicate historic damage. Large ones might be active.
- Bubble location: Check if they’re concentrated in one area or spread out. This can help pinpoint the source.
- Paint condition: Flaking, peeling, or alligatoring paint could mean moisture underneath.
- Wall surface temperature: Feel the wall. Cooler spots might indicate moisture.
Quick rule: If you see signs of active water intrusion, address that first before repairing bubbles.
On-site moisture checks and simple tests
Now it’s time to confirm your visual findings with some simple on-site tests. Don’t rely on fixed timeframes; check product/manufacturer thresholds instead.
Moisture meters: These tools measure the moisture content in building materials. Stick probes into the stucco and compare readings to manufacturer guidelines.
Temporary plastic-sheet checks: Seal a small area with plastic sheeting, leaving no gaps. If moisture condenses on the underside of the sheet, you’ve got active moisture.
Remember, these tests are just indicators. They won’t give you definitive answers but can help guide your next steps.
When to consider lab tests or professional investigation
Sometimes, DIY checks aren’t enough. Here are signs it’s time to call in the pros:
Persistent high readings: If your moisture meter keeps showing high readings, even after attempted repairs, it might be time for lab tests.
Hidden leaks: When you suspect a leak but can’t find its source, consider hiring a professional to perform infrared scans or other invasive testing.
Mold smell: A musty odor could indicate hidden mold growth, which requires immediate professional attention.
A building scientist or certified inspector can provide expert guidance and perform specialized tests to pinpoint moisture issues accurately.
Common Moisture Sources and How to Trace Them
Exterior penetrations and flashing failures are common entry points for rain and humidity. Inspect caulk joints, corners, and where walls meet windows or doors. Interior sources like plumbing and condensation can drive moisture toward the stucco from behind the scenes.
Trace water paths by following visible stains and by testing suspected areas according to the product label or manufacturer guidance. Prioritize fixes at the largest suspected sources before recoat planning.
Exterior entry points: roof, flashings, windows, and penetrations
Water can seep into your stucco system through various exterior points. Here’s what to look for:
Roof transitions: If the roof meets the walls, check for proper flashing. Water can run down the roof and behind improperly flashed areas.
Windows and doors: Poorly sealed window returns and door frames can let water in. Check caulking and ensure it’s intact all around openings.
Penetrations: Any hole through the exterior wall – like vents, pipes, or electrical boxes – needs a proper seal to keep water out.
Interior and plumbing-related sources
Moisture can also come from inside your home. Here’s how:
Plumbing leaks: A leaky pipe or fixture can send water into walls, eventually reaching the stucco.
HVAC systems: Condensation from air conditioning units or humidifiers can migrate through walls and cause problems.
Check under sinks, behind toilets, and around showers for any signs of moisture. Also, inspect your HVAC system for condensation issues.
Hidden moisture drivers: capillary rise and vapor pressure
Sometimes, moisture problems aren’t obvious. Here are two sneaky culprits:
Capillary rise: Moisture from the ground can wick up through porous materials like stucco.
Vapor pressure differences: Water vapor moves from high to low pressure areas. If your home is cooler than outside, moisture can move into walls and condense.
To combat these issues, ensure your foundation is properly waterproofed, and maintain a balanced indoor humidity level (around 30-50%).
Drying Time Factors and How to Confirm the Substrate Is Dry
Drying depends on air movement, temperature, humidity, and the thickness of the stucco and plaster layers. Material conditioning and substrate porosity also play big roles. Don’t rely on a fixed calendar; rely on conditions and tests instead.
Adopt a testing-first mindset and use the proper test methods described by product instructions or manufacturer data sheets. If tests show insufficient dryness, hold off on primer and paint until the substrate meets the test criteria.
Environmental and substrate factors that affect drying
The speed at which your stucco dries depends on several factors. Understand these to plan your recoating job better.
Temperature and relative humidity play a big role. Warmer temperatures and lower humidity speeds up drying. Sun exposure helps too, so south-facing walls dry faster than north-facing ones in the Northern Hemisphere.
The mass of your stucco also matters. Thicker or denser substrates take longer to dry. Patience is key here.
Reliable methods to verify dryness before recoating
Before you grab that paintbrush, make sure your stucco is bone-dry. Here’s how:
Use a surface moisture meter. Stick it onto the wall and check the reading. Most meters have a scale from 0-20%. Below 15%, you’re good to go.
For deeper checks, use an in-situ moisture meter or a relative humidity probe. These measure moisture within the substrate itself. Follow manufacturer guidelines for interpretation.
Always check with the paint manufacturer too. Some have specific tests to ensure your surface is ready for recoating.
What to do if drying is slow or uneven
If your stucco isn’t drying as expected, don’t rush. Here are some steps to speed things up:
Improve ventilation. Open windows and doors. Use fans to circulate air.
Temporarily reduce interior vapor loads. Turn off humidifiers. Dry your laundry elsewhere if possible.
If you find persistent wet spots, address them before moving on. Moisture meters can help pinpoint these trouble areas.

Step-by-Step Repair Workflow from Removal to Patching
Begin by removing failed material and bubbling paint back to solid, clean stucco. After removal, inspect the substrate for cracks, softness, or moisture signs. Plan repairs in logical stages so you can test between steps.
Proceed with patching and rebuilding only after confirming the underlying surface is sound. Recheck dryness and surface condition with the recommended test method before applying primer again.
Step-by-Step Cleaning Process
This sequence guides you through the repair workflow, from preparation to final checks. It ensures a solid foundation for your recoat.
- Preparation: Put on safety gear – gloves, goggles, and a dust mask. Tape off areas not being worked on.
- Remove loose materials: Scrape or brush off bubbled paint and loose stucco using a stiff-bristle brush or putty knife. Be gentle to avoid damaging the substrate.
- Inspect the substrate: Check for any signs of rot, mold, or further damage. If found, address these issues before proceeding.
- Main work: Repair stucco layers and prep for primer (next steps).
- Cleanup: After patching, clean up the area. Vacuum or sweep to remove dust and debris. Inspect your work – it should be smooth and ready for priming.
Safe removal of bubbled paint and loose stucco
Safely exposing the sound substrate involves careful technique and basic safety precautions. Start by scoring the bubbled areas with a utility knife to break the bond between the paint and stucco.
Wear gloves to protect your hands from sharp edges and debris. Use a wide-blade scraper or putty knife to gently pry off the loosened material. Work in small sections, applying steady pressure.
If the bubbled paint is stubborn, use a heat gun to soften it before scraping. Be careful not to overheat the substrate. Always wear safety gear when using power tools.
Repairing stucco substrate and feathering patches
Bonding new stucco to old requires understanding key principles. First, ensure the profile of your patch matches the existing stucco. This helps water run off evenly.
Keying is crucial for a strong bond. Use a stiff-bristle brush or wire brush to roughen the substrate, creating more surface area for the new mortar to adhere to. Follow manufacturer instructions for compatible repair mortars.
Never mix your own stucco unless you’re an experienced applicator. Always use pre-mixed or follow exact mixing instructions to avoid damaging the substrate with improperly mixed materials.
Cleaning and surface preparation before priming
Thorough cleaning removes salts, efflorescence, and contaminants that could hinder primer adhesion. Start by brushing off any loose material with a stiff-bristle brush.
Use a solution of water and mild detergent to clean the surface. Apply it with a sponge or soft-bristle brush, then rinse thoroughly with clean water. Allow the surface to dry completely before priming.
Ensure the right surface texture for primer adhesion. The substrate should be smooth but not slick. If necessary, lightly sand the surface with fine-grit sandpaper (220-320 grit) and wipe off any dust with a damp cloth before priming.
Primer and Paint Recoat Choices for Repaired Stucco
Choose primers that are compatible with stucco and suited to moisture conditions. Decide between breathable options and film-forming types based on the environment and the repair scope. Understand how each option handles moisture movement and adhesion.
Cross-check with the product label and compatibility notes from the manufacturer. Ensure the topcoat you select matches the primer and is appropriate for exterior use and your climate.
Primer types and when to use them
A primer’s job is to prepare the surface for paint. For repaired stucco, choose wisely.
Penetrating primers soak into the substrate, sealing it from moisture while allowing vapors to escape. Use these on new or bare stucco.
Bonding primers create a strong bond between the paint and the surface. They’re great for painting over existing paint or to seal stains.
Moisture-tolerant formulations are designed to handle damp conditions without peeling. Use these when moisture issues persist, but ensure the substrate is dry before applying.
Paint types, finishes, and vapor-permeability considerations
Stucco needs to breathe. Here’s what you need to know about paint.
Latex and acrylic paints are common choices for stucco. They’re flexible, durable, and allow moisture to escape.
Choose a flat or satin finish for better vapor permeability. Gloss finishes can trap moisture, leading to bubbling.
Check the paint’s permeability rating. Higher ratings mean more breathability. This is crucial for stucco that’s prone to moisture issues.
Compatibility, adhesion tests, and reading product labels
Before you paint, ensure your primer and paint play nice together.
Do a simple adhesion test. Apply some primer to a small area, let it dry, then lightly score it with a nail. If the primer peels off, it’s not compatible.
Read product labels carefully. Look for info on:
– Suitable substrates (like ‘stucco’ or ‘masonry’)
– Primer/paint compatibility
– Required surface preparation
If you’re unsure, contact the manufacturer or consult a paint professional.
Timing and Application Techniques to Avoid Repeat Bubbling
Work during favorable conditions to control humidity and surface temperature. Layer in the correct sequence: clean surface, primer, and then finish coat, allowing proper cure between steps. Keep air flow steady to promote even drying of each layer.
Follow environmental controls and manufacturer’s recommendations for recoat windows and cure times. Use these guidelines to minimize the risk of future bubbling on repaired stucco.
When to apply primer and topcoat after repairs
Wait for the repaired area to be completely dry before applying any new paint. Rushing this step can lead to bubbling again.
Dry conditions are crucial. Use a moisture meter if you’re unsure. Follow manufacturer’s cure windows, not default schedules.
For primers, wait at least 24 hours after the last repair work before applying. Topcoats should go on only when the primer is fully cured and the area is bone-dry.
Application methods, coverage, and environmental control
Stucco takes paint best with a brushing or rolling application. Spraying can cause uneven coverage and runs.
Control the environment: keep temperature between 50°F to 90°F (10°C to 32°C) during application and drying. Humidity should be below 80%.
Apply paint in thin, even coats. Let each coat dry according to manufacturer’s guidelines before recoating.
After painting, keep the area well-ventilated but avoid direct sunlight or drafts that could speed drying and cause stress on the paint film.
Preventive details: sealants, flashings, and water-shedding details
The key to preventing future bubbling is stopping moisture at its source. Ensure proper flashings around windows, doors, and other openings.
Use high-quality caulking on seams and joints. Apply it generously but be careful not to overfill or leave gaps.
Manage weep holes. Keep them clear of debris so water can drain properly. If they’re clogged, moisture will build up behind the stucco and cause bubbling again.
Maintain good drainage around your home’s foundation to prevent water from seeping into the walls in the first place.
Tools, Materials Checklist, Safety, and When to Call a Pro
Prepare a DIY-friendly kit with scrapers, brushes, rollers, protective gear, and appropriate sealants. Gather consumables for cleaning, patching, and priming, plus moisture testing tools if available. Safety first: use PPE and follow basic site safety steps.
Know your triggers for hiring a pro, such as persistent moisture, structural questions, or repeated failures after remediation. When in doubt, verify guidance with labels, data sheets, or local code and inspection rules before proceeding.
Tools and equipment checklist
Before you start, make sure you have all the necessary tools. Here’s a quick checklist to help you.
- Tape measure: To ensure accurate patching and coating.
- Moisture meter: Rental option. Essential for locating moisture sources.
- Hammer and chisel: For removing loose stucco and paint.
- Wire brush: To clean the surface before patching.
- Stucco repair kit: Includes mortar, mesh tape, and tools for mixing.
- Paint sprayer or roller: For applying primer and paint. Consider renting a sprayer for large areas.
- Ladder: For accessing high areas. Ensure it’s stable and secure.
- Safety glasses and gloves: To protect from debris and chemicals.
Quick rule: Don’t skip checking your tools before starting. Missing a tool can lead to delays or incorrect repairs.
Materials and product selection checklist
Choosing the right materials is crucial for a successful repair. Here’s what to check on product labels.
- Stucco patch mortar: Match it to your existing stucco. Check the label for color and texture guides.
- Primer: Ensure it’s compatible with your substrate and paint type. Look for permeability ratings.
- Paint: Check for vapor permeability. It should match or exceed your existing paint’s rating.
- Sealant: Choose one that’s flexible, waterproof, and compatible with your stucco and paint.
- Adhesion promoter (if needed): Some primers include this. It helps paint adhere to the repaired area.
- Temperature limits: Check labels for application temperature ranges to avoid freezing or overheating issues.
- Cleaning supplies: TSP substitute, scrub brush, and rags for surface preparation.
Quick rule: Always read product labels. Using incompatible materials can lead to bubbling, peeling, or poor adhesion.
Safety, permits, and professional referral triggers
Your safety and the success of your project depend on following these guidelines.
- PPE: Wear safety glasses, gloves, and a dust mask when sanding or mixing chemicals.
- Work at heights: Use secure ladders and maintain three points of contact. Consider hiring help for high areas.
- Permits: Check local building codes. You may need permits for structural repairs or repainting.
- Structural damage: If you find cracks or crumbling, stop and consult a professional to avoid further damage.
- Persistent moisture: If moisture tests show consistent high readings, call a pro. It could indicate a serious underlying issue.
- Electrical hazards: Turn off power to outlets near work areas to prevent shocks.
- Fire safety: Keep flammable materials away from heat sources and open flames.
Quick rule: If you’re unsure about any aspect of the job, don’t hesitate to call a professional. Safety first!
Conclusion
Moisture control is the backbone of a lasting repair. If the wall stays wet or you see new bubbling, the fix won’t hold and you’ll waste time and money chasing repeat failures.
First, verify the area is dry and free of active leaks, distinguish active moisture from historic damage, trace potential moisture sources, assemble the necessary tools and materials, follow the repair workflow from removal to patching, select compatible primer and paint for the repaired stucco, test the drying time in a small area, and apply coatings only under the right conditions. Keep the process simple and methodical, and document what you find so you don’t miss a source.
Common mistakes to avoid include skipping the moisture source check or rushing the repair, using the wrong primer or paint for repaired stucco, skipping the test patch, and ignoring safe work practices or not sealing around openings. Safety rules to live by: wear eye and skin protection, work in good ventilation, and never work on damp substrate. If you’re unsure about the extent of moisture, or if the substrate refuses to dry after a proper approach, pause and reassess.
If the moisture problem is ongoing or the damage is widespread, it makes sense to call a professional rather than gamble with a partial fix. A pro can verify moisture sources, perform deeper diagnostics, and ensure flashing, drainage, and substrate conditions are addressed. Stay confident, follow the steps you’ve outlined, and you’ll get a solid, durable finish without costly rework.
FAQ
What steps should I take to confirm I’m dealing with active moisture again before repainting?
Check for ongoing damp by feeling the surface for cool, damp spots and looking for fresh staining or efflorescence. Use a moisture meter if you have one, and repeat checks after a rain or irrigation cycle. If the surface dries consistently, you may be ready to proceed, but verify with a noninvasive test first.
How do I time the drying process and know when the substrate is ready for a new coat?
Wait until the substrate reads consistently dry at multiple spots and is no longer transferring moisture to a patch board or cloth. Temperature and airflow help, but avoid rushing it; if you see new bubbling, step back and let it dry longer. Use the manufacturer’s guidance on drying windows for your materials as a reference.
Which recoat options prevent repeating bubbling, and what should I check before applying?
Choose a primer and finish system compatible with both the substrate and the local climate. Check labels for moisture tolerance, surface prep needs, and cure times. If in doubt, compare manufacturer instructions and local rules, and consider testing a small area first.
What common mistakes trigger another bubble after repainting, and how can I prevent them?
Avoid sealing in moisture by painting over damp stucco. Don’t skip surface prep or use incompatible products. Follow a careful workflow: dry substrate, proper primer, compatible topcoat, and correct application technique, then monitor for signs of trouble after drying. If you see new bubbles, halt and reassess moisture sources and drying progress.