
Introduction
Repairing stucco around exterior electrical boxes is about sealing the gap and protecting the gasket from moisture.
This job is hands-on and requires careful prep, clean surfaces, and proper patching to keep water out. Work slowly and check the seal around the box after each step.
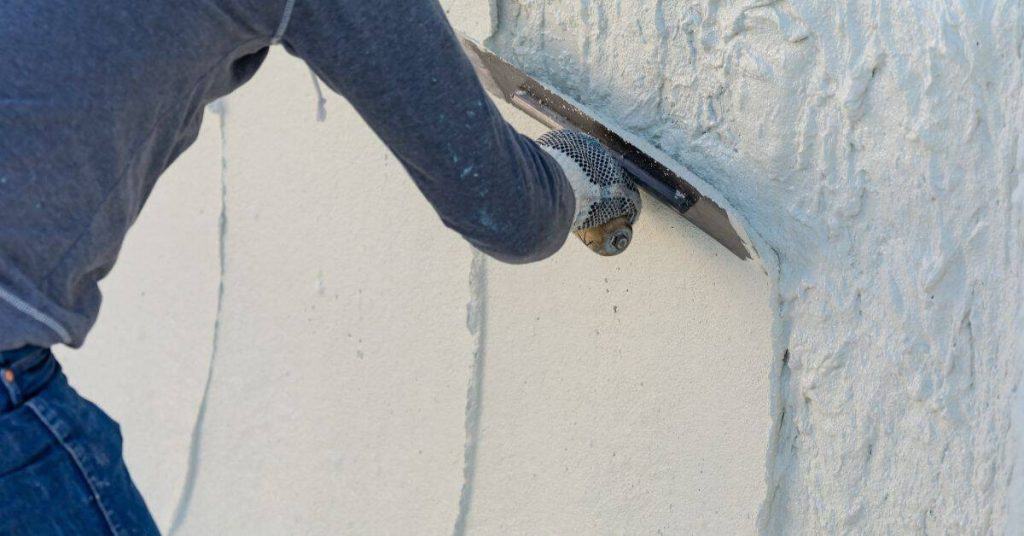
Start by cleaning the area around the box and loosening old material. Use a patch or skim coat that matches the surrounding stucco and gently press it into the gap, avoiding compression of the gasket. Let the patch cure as directed and recheck for moisture under the gasket after it sets.
Key takeaways
- Shut off power at the main disconnect before inspecting exterior boxes.
- Guard existing wiring; avoid disturbing damp-rated box seals during replacement.
- Securely protect the gasket area with temporary plastic and clean surfaces.
- Match stucco thickness and texture to maintain weatherproof flashing continuity.
- Apply appropriate flashing under and around the box to prevent leaks.
- Test for water intrusion after rebuild; re-seal with compatible gasket material.
Table of Contents
- Introduction
- Key takeaways
- Tools and Materials Checklist
- Material Specs and Standards Explained
- Safety and Code Considerations
- Inspection and Damage Assessment
- Preparation and Box Protection
- Waterproofing and Flashing Installation
- Rebuilding Stucco Around the Box
- Gasket Detail, Sealing, and Testing
- Conclusion
- FAQ
Tools and Materials Checklist
Make a focused inventory of the essential tools and materials you will need for exterior electrical box work. Note the purpose of each item and how it interacts with masonry, stucco, and flashing components. Check compatibility with the box style and substrate before you start.
Keep a running list of labels, manufacturer instructions, and local rules to verify as you gather supplies. If a item’s spec isn’t clear, verify the data sheet or contact the manufacturer for guidance. Use the information to confirm you have a complete, compatible kit before you cut or remove any material.
Tools
Before you start, ensure you have all the necessary tools to safely remove and apply stucco around your exterior electrical boxes.
- Utility knife: For scoring and cutting backer rod and sealant.
- Tuckpointing trowel: To apply and smooth out repair stucco.
- Drill with masonry bit: To create pilot holes for fasteners.
- Safety glasses: Protect your eyes from debris.
- Work gloves: For handling materials and tools.
- Dust mask: To protect against stucco dust.
- Ladder: For reaching high electrical boxes.
- Flashlight: To inspect electrical components in dark spaces.
Quick rule: Always prioritize safety. Wear PPE and keep electrical components dry to prevent shorts or fires.
Materials
Before you start, ensure you have all the necessary materials to repair your stucco around exterior electrical boxes.
- Lath: To create a base for your new stucco application.
- Corrosion-resistant fasteners: To secure lath and prevent rusting.
- Cement or repair stucco: Match the existing texture and color for seamless repair.
- Flashing: To direct water away from electrical boxes.
- Backer rod: To fill gaps before applying sealant.
- Gasket-compatible sealant: To create a watertight seal around the box.
- Stucco data sheets: Verify product compatibility to ensure longevity of your repair.
Quick rule: Always check product data sheets to confirm materials are compatible and suitable for exterior use.
Material Specs and Standards Explained
Explain the key material types you will encounter, including stucco, lath, flashing membranes, sealants, and gaskets. Look for performance attributes that matter for exterior use, such as moisture resistance and durability. Always read the label and data sheet for limitations and application notes.
Choose products with appropriate exterior ratings and substrate compatibility. Verify mean product life, moisture tolerance, and curing characteristics through official product literature or the manufacturer’s instructions. When in doubt, compare options to ensure long term performance at the box edge.
Stucco mixes and premixed patch products
When repairing stucco around exterior electrical boxes, you’ll need the right mix to ensure durability and longevity. Here’s what to look for:
Cement-based mixes are traditional but can crack over time due to shrinkage. They’re okay for small repairs, but consider other options for larger ones.
Polymer-modified stucco mixes add flexibility and strength. They resist cracking better than cement-based mixes and are a good choice for exterior repairs.
Acrylic repair products offer excellent adhesion and flexibility, making them ideal for patching. Always follow the manufacturer’s guidance for substrate bonding and exterior use.
Sealants, gaskets, and flashing materials
The right sealant, gasket, and flashing can prevent water intrusion and keep your electrical boxes dry. Here are key factors to consider:
- Silicone: Good for exterior use due to its UV resistance and flexibility. Look for 100% silicone with a low modulus rating to accommodate movement.
- Acrylic: Inexpensive but not ideal for exterior use as it can degrade under UV exposure. Avoid using on outdoor electrical boxes.
- Polyurethane: Offers excellent adhesion and flexibility, but it’s sensitive to moisture during application. Ensure the surface is dry before applying.
- Metal Flashing: Provides a durable barrier against water intrusion. Look for corrosion-resistant materials like galvanized steel or aluminum.
- Flexible Membranes: Self-adhesive membranes offer ease of application and flexibility to accommodate movement. Check the manufacturer’s specs for UV resistance and adhesion properties.
Safety and Code Considerations
Practice solid electrical safety by de-energizing circuits and keeping the area dry. Use PPE and follow lockout procedures as you work around the box. Keep access clear and avoid shortcuts that could injure you or others.
Know when to pause and call a licensed electrician or building official. If anything about the installation conflicts with local rules or code guidance, stop and verify with the right authority. Always verify applicable labels, instructions, and local requirements before proceeding.
Electrical safety steps
Before you start, de-energize the circuit. Turn off the power at your main electrical panel.
Use a non-contact voltage tester to confirm that the wires are dead. Touch the tester’s tip to each wire in the box.
Once confirmed, secure the work area with barriers if needed, and keep live-work to a minimum. Always call a pro for live-work.
Local code and inspection points
Before you start repairing, use this checklist to ensure you’re up to code.
- Check local codes: Exterior penetrations, box mounting, weatherproofing may have specific rules.
- Permits needed? Some repairs require permits. Check with your local building department.
- Inspection required? Some repairs need inspection before you close up the stucco.
- Box mounting: Ensure the box is securely mounted, level, and flush with the surface.
- Weatherproofing: Check that the gasket is intact, and the box is properly flashed.
- Grounding: Ensure all metal parts are grounded correctly.
- Wiring method: Confirm wires are properly installed and secured in the box.
- Stucco thickness: Ensure stucco is thick enough to protect the box but not so thick it causes cracking.
Quick rule: Always check local codes before starting any repair work. It’s your responsibility to ensure you’re up to code.
Inspection and Damage Assessment
Perform a systematic inspection to determine the extent of stucco failure and water intrusion around the box. Check for cracks, spalling, and signs of moisture behind the finish. Identify any obvious compromises in the substrate or flashing that could affect the repair.
Assess whether the box, substrate, or framing are compromised. Look for rot, corrosion, or loose framing connections. Document findings with notes so you know what needs repair or replacement before proceeding.
Signs of water intrusion and substrate damage
Before you start repairs, use this checklist to identify signs of water damage and substrate issues.
- Staining or discoloration: Check for dark spots or stains on the stucco. This indicates water has penetrated.
- Efflorescence: Look for a white, powdery substance on the surface. It’s a sign of water moving through the stucco.
- Soft or spongy substrate: Gently press the stucco. If it feels soft or gives way, the substrate is damaged.
- Delamination: Check if the stucco is peeling away from the substrate. This indicates a loss of adhesion.
- Rust on nails or screws: Rust is a sign of water intrusion and can lead to further damage.
- Mold or mildew: Presence of mold or mildew indicates moisture has entered the substrate.
- Cracking or crumbling stucco: These are clear signs of water damage and need immediate attention.
- Wet insulation: If the electrical box is surrounded by wet insulation, it’s a sign of serious water intrusion.
Quick rule: If you find any of these signs, deeper repair is needed. A simple patch won’t solve the problem.
Determining repair scope: patch, partial, or full rebuild
Based on your inspection findings, use this checklist to decide the extent of repairs needed.
- Minor cracks: If cracks are small and localized, a simple patch may be sufficient.
- Widespread cracking: This indicates a larger problem that might require partial or full rebuild.
- Water stains but no soft spots: A patch might work, but keep an eye on the area to ensure no further damage occurs.
- Soft spots but no cracks: This could indicate hidden water intrusion. Consider a partial or full rebuild.
- Delamination but no other signs: A partial rebuild might be needed to replace the damaged stucco and reinstall flashing.
- Rust on nails/screws but no other signs: A patch could work, but ensure all rusted fasteners are replaced.
- Mold/mildew but no structural damage: A partial rebuild might be needed to replace the damaged stucco and treat the mold.
- Structural damage or wet insulation: A full rebuild is likely necessary to address the underlying water intrusion problem.
Quick rule: If you’re unsure about the extent of repairs needed, it’s always better to err on the side of caution and do a partial or full rebuild rather than risk further damage with a patch.
Preparation and Box Protection
Describe safe methods to expose the repair area while protecting the interior of the electrical box. Keep the box dry and remove debris that could contaminate the sealant or flashing materials. Use temporary coverings to shield openings from moisture.
Prepare the substrate for new flashing and stucco bonding by cleaning and priming as required. Ensure the box remains accessible and dry during the prep work, and plan drainage paths away from the electrical components.
Removing failed stucco and cleaning the substrate
Start by cutting away any loose, degraded stucco around the electrical box. Use a utility knife or a chisel to score and snap off chunks. Be careful not to damage the wiring