
Table of Contents
- Why Reclaim Concrete for Stepping Stones?
- Assessing and Sorting Leftover Concrete
- Tools, Materials and Safety Gear Checklist
- Preparing Molds and Forms for Stepping Stones
- Recipes and Mixing Strategies for Variable Leftover Concrete
- Reinforcement, Layering and Structural Techniques
- Casting and Finishing Techniques
- Curing, Demolding and Post-Cure Treatments
- Design Ideas and Decorative Treatments
- Troubleshooting Common Failures and How to Fix Them
- Project Planning, Costing and When Reclaiming Saves Money
- Long-Term Durability, Maintenance and Local Regulations
Introduction
Leftover concrete can be repurposed into durable, decorative stepping stones.
You’ll learn why reclaiming scraps matters for cost, sustainability, and garden design, and the guide walks through practical steps, tips, and project-friendly techniques.
By the end, you’ll know how to assess scraps, mix a workable batch, shape stones, cure them safely, and place them for a cohesive path.
Why Reclaim Concrete for Stepping Stones?
Reclaiming concrete for stepping stones cuts waste and greenhouse gas emissions while delivering a lower-cost route to hardscape. By upcycling leftover slabs and fragments, you get flexible design options—color, texture, and shapes—that fit garden beds, paths, and patios without buying new material.
Think of it as a practical DIY upgrade that speeds project starts and yields a cohesive, eco-friendly hardscape. Start with a quick quality check on leftovers, test mix compatibility, and plan appropriate stone sizes and thicknesses to ensure stable, durable walkways; plan for drainage and base preparation, then consider curing, sealing, and anti-slip finishes to maximize longevity. Expect occasional bonding quirks between batches, moisture concerns, and color variance, but mitigate these with small test pours and mindful batch mixing notes. This approach aligns with local outdoor codes, provides seasonal installation flexibility, and supports long-term maintenance like a regular sealing schedule and gentle cleaning to keep your upcycled concrete stepping stones looking intentional and lasting.
Environmental and cost benefits
Reusing concrete for stepping stones keeps heavy material out of the landfill and cuts new manufacturing. Every cubic yard of concrete you reclaim is roughly 2 tons diverted from waste streams. For a small DIY project that can mean diverting a half‑ton or more of material that otherwise would be hauled off.
On embodied carbon, reclaimed concrete beats new mix. Using old slabs or chunks instead of fresh ready‑mix or new pavers typically reduces the carbon footprint by about 50–80%, because you avoid the cement manufacturing step. That’s a real, measurable reduction if you care about emissions.
Money-wise, expect solid savings. Salvaged concrete can cut material costs roughly in half to two‑thirds compared with buying ready‑mix or most commercial pavers. In practice that means a DIY stepping stone can cost you a few dollars to maybe $15 each in materials and grind/cut labor, versus $30–$100+ per unit if you buy new pavers or have concrete trucked in and poured. Do the math for your project size — the bigger the job, the bigger the savings.
Quick checks before you commit: inspect pieces for heavy rebar or contamination, check for soundness (no crumbling), and factor in extra time for cutting/setting. If the slabs pass those tests, you’ll save money and carbon and keep tons of waste out of the dump.
When reuse is appropriate vs when to dispose
If the slab is sound and mostly clean, you can usually cut it into stepping stones. Walk the surface. Tap for hollow spots. Check for oil stains, paint, or strong chemical odors — those are deal-breakers for garden use. Small surface cracks are fine. Deep cracks or crumbling edges mean extra work and a poor finish.
Look at the steel. Thin, embedded wire or small ties are okay; heavy bars or large, corroded rebar make cutting dangerous and the piece unstable. If rebar sticks out, plan to remove it properly or skip the piece. Also skip material that’s been exposed to fuel, solvents, or concentrated salts — contamination can kill plants and leach into soil.
If you’re unsure about contamination or the concrete is severely weathered or carbonated, don’t gamble. Take a sample to a recycler or local hazardous-waste facility for advice, or send it to the landfill if required. When in doubt, dispose responsibly rather than planting problems into your yard.

Assessing and Sorting Leftover Concrete
Leftover concrete comes in three states—fresh wet mix, partially set, and cured rubble—to help decide if it can form stepping stones, be repurposed as base fill, or require crushing and reprocessing. Use quick indicators of appearance, texture, and odor, and apply simple slump, set time, and hardness tests to guide suitable reuse paths while minimizing handling and waste. Concurrently conduct a contamination check for oils, paints, chemicals, excessive fines, or stray reinforcements, and determine safe removal, segregation, or discard decisions before any on-site placement.
Establish a sorting and labeling system with color codes or tags that reflect reuse potential, required processing (screening, crushing, remixing), and safety notes to prevent accidental cross‑contamination. Account for workable age windows and moisture needs, noting how temperature and humidity influence plasticity and cure rate, and offering guidelines to rework slightly aged mixes or dry‑sift textures for uniform stepping‑stone surfaces. Pair essential PPE and testing tools with a clear disposal plan that routes unusable leftovers to recycling streams or proper waste handling, ensuring immediate next steps are obvious to every crew member.
Identifying mix types and set stages
Look first at appearance and feel. A very wet, soupy pile is a high-slump mix or fresh ready-mix — it flows and sags. A “green” lump will hold shape but still feel pliable. If you can press it and leave a thumbprint, it’s in the plastic/green stage and still workable for small pours or patching. A rock-hard chunk means it’s set and needs crushing or disposal.
Check texture and aggregates to guess the mix type. Fine, smooth paste with few visible rocks usually came from bag mixes or finishing mixes; coarse, stone-rich lumps are from structural batches. That tells you whether you can reuse it as patch material, as aggregate for backfill, or only for crushing.
Decide quickly and act: if it’s plastic/green, use it or move it to a nearby pour — do not add water to revive set concrete. For rock-hard material, break and screen it for aggregate or send it to recycling. Contaminated or chemically altered concrete is not worth salvaging; toss it.
Testing for contaminants and reinforcement issues
First look and simple tests will save you trouble. Smell and sight tell a lot: a dark sheen or water that beads on the surface usually means oil or fuel contamination. Wipe a small area with a rag and solvent—if the rag comes away dark or oily, treat that load as contaminated. For alkali or salt problems, mix a spoonful of concrete dust with distilled water and test the slurry with pH strips; readings above 10.5 or heavy white salts (efflorescence) are a red flag.
Rusted rebar needs a hands-on check. Tap the concrete with a hammer near any rust stains; hollow sounds or loose, flaking concrete suggest delamination around the bars. If the rebar is heavily pitted or you can see more than a quarter-inch of section loss, don’t reuse that piece for structural work. Minor surface rust can often be chipped away and accepted for non-structural fill, but be conservative—rust spreads.
Know when to call a lab: if contamination is visible but you don’t know the source, if you plan to reuse material in structural work, or when local disposal rules may consider the material hazardous. Ask the lab for tests for hydrocarbons, chlorides, sulfates and pH. For a practical sample, collect several small pieces from different spots, wrap them in clean plastic, and label where they came from. If you’re unsure, err on the side of testing—cheap compared with a failed repair or a hazardous disposal bill. Do not bury or reuse suspect concrete without confirming what’s in it.
Tools, Materials and Safety Gear Checklist
A practical checklist for starting stepped stone projects, covering essential molds and forms, tool sets, PPE, release agents, additives and decorative supplies. It highlights choosing molds for stepping stones, material options (urethane, silicone, rubber), recommended sizes and thickness, edge profiles, and whether to cast hollow or solid units, plus how to test mold release compatibility with leftover concrete. It also outlines the key measuring, mixing, cutting, cleaning and finishing tools, plus which items can be shared across batches, and the safety gear and workspace controls that keep work areas clean and compliant.
Having these items prepared in advance saves time, reduces contamination risks, and improves consistency and finish. It supports safer, smoother pours by pairing appropriate release methods with mold prep and testing, while documenting additives and color plans to avoid compatibility issues with leftover mix. For DIY and job sites, a well-organized kit means fewer delays, better control of curing and surface texture, and a cleaner, safer workflow from setup through final finishing.
Safety and handling essentials
Don’t skip the basics you already saw in the checklist: wear proper PPE — nitrile or alkali‑resistant gloves, ANSI/EN-rated safety goggles, and a fitted respirator with P100/HEPA filters when cutting or grinding cured concrete. For heavy cutting/grinding with rebar, upgrade to a full-face shield, hearing protection, and an NIOSH‑approved respirator and use local exhaust or water suppression to control dust. Use a vacuum with HEPA filtration when collecting dust and bag/contain waste; double-bag contaminated dust and follow local hazardous-waste rules for disposal.
Handle bags and buckets smartly. Plan each lift, keep the load close to your body, bend at the knees and drive with your legs. Use a dolly, small crane, or a helper for anything heavy or awkward. If you feel a pull in your back, stop and rethink the lift.
Control dust and know first aid for alkaline burns. Keep material damp or use a HEPA vacuum when sweeping and block wind where possible. If material contacts skin or eyes, immediately flush with water for at least 15–20 minutes, remove contaminated clothing, and get medical help for persistent pain or vision problems.
Molds, forms and finishing tools
These are the pieces that shape and finish your poured concrete. Pick the right mold material and the right finishing tools and your job looks like a pro job. Use cheap options where they work and spend on the stuff that affects durability and appearance.
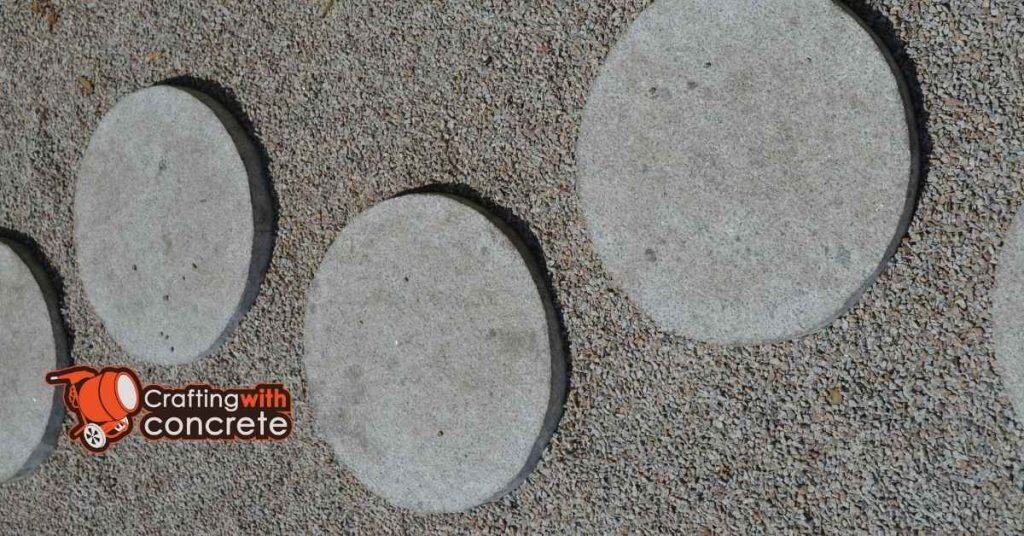
- Plastic stepping stone molds — Lightweight, easy to clean and great for common sizes like 12″, 16″ and 20″ rounds or squares. Buy medium‑density plastic or recycled plastic; avoid brittle thin trays that crack. Cheap homeowner molds are fine ($10–$40); cracked molds ruin shape and waste concrete.
- Plywood/wood forms — Built on site for custom sizes and thicknesses, good for irregular shapes or large slabs. Use exterior-grade plywood and seal edges; cut to the desired depth (1–3″ for most stones). Optional if you can buy molds; cost $5–$30 in materials or $10–$25 to rent a form kit. Untreated low-grade wood absorbs water and softens, causing bowed edges and weak stones.
- Silicone/rubber molds — Flexible for undercut designs and easy demolding without release agents. Look for high-tear-strength silicone rated for repeated concrete pours. Pricier ($25–$120); buy if you need detailed textures, otherwise rent or use plastic. Using thin rubber will tear and stick to concrete, wrecking detail and wasting material.
- Finishing trowel — Smooths and compacts the surface after the float stage; 6″ to 12″ stainless steel blades work for most stones. Use a margin or finishing trowel depending on edge access. Essential; cheap stainless trowels ($8–$30) are fine. Using a warped or rusted trowel leaves gouges and speeds weathering.
- Concrete float — Brings cream to the surface for a uniform finish; wood or magnesium floats are common. Choose a float size that fits the stone (small hand floats for <16″ stones). Essential for clean surfaces; $10–$40. Skipping the float or using the wrong float leaves weak, dusty surfaces that flake later.
- Stamps and texture mats — Add patterns or faux stone textures before the concrete sets. Match the stamp size to your stone; press evenly and don’t lift once set. Optional — buy if you want texture ($15–$80) or rent for one-time jobs. Cheap, thin stamps tear and give inconsistent impression that looks amateur and traps water.
- Mixing bucket & paddle — For small batches, a 5–10 gallon bucket and a 1/2″ SDS paddle on a drill mix concrete fast and evenly. Use low‑speed drill (400–800 rpm) and don’t overmix. Essential for hand pours; cheap drill and paddle ($20–$80) work fine. Mixing by hand or at too high speed introduces air and weakens the stone.
- Rubber mallet & shims — Tap molds and seats to remove air pockets and level forms. Use soft blows and small plastic or composite shims to set consistent thickness. Optional to buy; $10–$25 total or use a hammer with a wood block. Hard metal hits or skipping adjustment causes voids and uneven edges that chip easily.
- Cutting and grinding — For trimming cured reclaimed slabs, use a wet saw with a diamond blade for concrete, or an angle grinder with a diamond cup for grinding and a dust shroud plus HEPA vacuum. Have replacement blades, water supply, and PPE ready. Never dry-cut without proper dust control and upgraded respirator.
Pro tip: Combine a rigid plastic or plywood form for structure with a thin silicone insert for detail. Rent expensive specialty molds or stamps for one-offs. Always test one sample stone with your chosen mold and finish tool so you catch fit and cure issues before pouring the whole batch.
Preparing Molds and Forms for Stepping Stones
Plan stepping-stone molds to match your leftover concrete volume with a consistent thickness for stability, while anticipating curved, square, or irregular profiles to fit your garden layout and drainage needs. Use reusable interior surfaces like melamine, sealed plywood, or plastic form panels, and seal seams, corners, and fasteners to prevent leakage and ensure clean edges when the concrete sets.
Choose a surface texture—smooth, lightly textured, or ribbed for traction—and pair it with a release method (eco-friendly spray, wax, or a commercial form release) that works with your mix to minimize trowel work. Aim for about 1.5–2 inches of thickness and plan reinforcement for larger stones with rebar, welded wire fabric, or fiberglass mesh; use spacers and edging to keep uniform depth and prevent wobble. Design molds for easy grid or interlocking layouts, add alignment dowels or keys to maintain straight edges and even gaps, schedule a gentle cure with moisture control, and store molds clean and flat for next use.
Mold materials, sizes and shapes
Your choice of mold material controls how the concrete cures, how the surface looks, and how easy the job is. Pick something that matches the finish you want, the number of stones you’ll cast, and how rough you’ll be on the molds.
- Flexible silicone — Used for repeat casting of detailed shapes and textures. Look for shore A 20–40 and kitchen-grade or contractor silicone labeled “mold” or “casting”; thin, hard silicones tear. Expect $15–$60 per mold; great for curved, decorative pieces but avoid if you need perfectly straight edges. Wrong choice: brittle silicone will tear and ruin several pours.
- Rubber/polyurethane — Tough, flexible and faster-release than silicone for heavy use. Choose a mold rubber rated for concrete or “polyurethane mold” with good tear strength; some are stiffer (shore A 40–60). Costs $30–$100 for poured molds; pick this when you’ll cast dozens. Cheap rubbers can craze or permanently stretch, causing warped stones.
- Rigid plastic (HDPE/PP) — Off-the-shelf plastic forms for simple, flat stepping stones. Look for food-grade HDPE or polypropylene, 3–5 mm thick, with smooth surfaces. $5–$30 each. Use when you want clean edges and fast demolding; avoid for detailed textures because they’re too stiff. Low-quality plastic can crack or bond to concrete if not properly released.
- Plywood/plywood-lined frames — Good for large, custom shapes and thick stones. Use exterior-grade plywood (CDX or BCX), 3/4″ for sides, sealed with paint or tape to prevent water soak. $15–30 per sheet; cheap plywood will delaminate and give rough edges. If you skip sealing, the wood will absorb water and warp—stones may crack at the edges.
- Foam (EPS/XPS) — Fast and cheap for carved or stacked shapes and beveled undersides. Use dense XPS for cutting crisp edges; EPS is cheaper but crumbly. Sheets run $5–$25; glue with construction adhesive or hot wire-cut for shapes. Don’t use low-density foam — it will crumble into the concrete and cause voids and weak spots.
- Release agents — Keeps concrete from sticking to any mold surface. Buy a concrete form-release spray or paste wax; look for “concrete release” or petroleum-free labels if using textured molds so they don’t stain. $8–$20 per can/bottle. Cheap cooking oil is a temporary hack but causes staining and weak edges over time.
- Reinforcement (wire/rebar) — Adds tensile strength for thin or load-bearing stones. Use 4–6 mm rebar or 2–4 mm welded wire mesh sized to fit inside the stone with 1″ cover from edges. Wire mesh costs $10–$40; rebar pieces are inexpensive per length. Skip reinforcement on very thin, unsupported stones and they’ll crack under foot traffic.
Pro tip: Buy a small amount first and test one stone. Store rigid plastics flat and keep silicone/rubber out of direct sun. Mix small batches if you’re unsure — cheap mistakes waste bags of concrete and time, not just money.
Preventing stick and aiding demold
Coat the mold before every pour. For smooth plastic or metal molds use a spray or paste release agent made for concrete. For porous or reclaimed-mix work, a thin coat of a silicone or vegetable-oil based release is safer than heavy petroleum — too much grease leaves stains and weakens the surface. Let the agent dry to a tacky film, don’t leave puddles.
Line soft or damaged molds with a thin sheet of polyethylene, PVC, or a cut-open contractor garbage bag when you expect rough reclaimed pieces. That gives you a flexible barrier, so you can peel the liner away and avoid chipping edges. For large stones a light dusting of fine sand over the release helps the mold grip the concrete enough to transfer texture without sticking.
Before demolding always check base compaction and tap the sides with a rubber mallet. Wait until the concrete has set enough to hold shape — overnight for small stones, longer for cold weather or reclaimed mixes — then warm the mold slightly or flex the liner to break adhesion. Clean and reapply release after each use; reusing dirty or gummy agents is the fastest way to ruin the next piece.
Recipes and Mixing Strategies for Variable Leftover Concrete
Three moisture states—fresh/partially set, and very dry/cured—demand distinct handling pathways that specify exactly when to add cement, water, or aggregates to restore workable consistency without sacrificing early strength or surface finish. The section also delivers concrete mix formulas and ratio guidelines tailored to each state, including target slump or flow, air content considerations, and how pigments or decorative aggregates influence workability and set behavior.
A practical, step-by-step workflow for each state covers assessment, reclaiming or rewetting, blending with fresh cementitious, managing mix-in times, and testing consistency, set time, and bonding potential against stepping-stone guides. This matters on a DIY or jobsite where leftovers vary wildly, helping you avoid over-wetting, segregation, or strength loss while offering safe, polymer additives, bonding agents, or surface enhancers as appropriate and noting when grout or mortar routes are preferable for very dry material. Finish with clear safety gear, tooling, cleanup and curing strategies, including outdoor cure regimes and simple measurement logs to reproduce consistent results.
Reworking undercured or green concrete
If the concrete is still plastic and hasn’t set hard, you can often re-temper it to finish the job. First check base compaction, remove any standing water, and scrape off obvious laitance. Measure the slump or feel the mix—if it’s only stiffening a little, add water in very small amounts (shy of a cup at a time for small batches) and mix thoroughly until workable. Work fast; every minute counts.
Don’t panic and dump bags of cement or sand into the mix. Adding dry ingredients mid-cure hides problems and weakens the final strength. Keep re-tempering limited: small water additions and short remixing within the original working window (usually the first 30–60 minutes) are OK. Beyond that, strength and durability drop and you should consider removing and replacing the concrete.
Finish lightly and cure aggressively after reworking. Avoid heavy troweling that squeezes out paste. Protect the surface from wind and sun and keep it moist for the first 24–72 hours. If you’re unsure whether rework will hurt the structure, stop and call a pro—fixing a bad repair later is far more expensive than starting over.
Using crushed cured concrete and reclaimed aggregates
Crushed cured concrete and reclaimed aggregate can work fine if you know what you’ve got. Look for contaminants, salts, paint, or too much fine dust. You want a reasonably clean, well-graded material. Do a quick visual sieve and do a trial batch before you touch the job mix—don’t guess.
For visible structural work stick to conservative blends: up to about 20–30% reclaimed aggregate by volume into a new mix for structural elements. For sidewalks, footings that aren’t heavily loaded, or general backfill you can push 30–50%. Above 50% you’re in repair/recycling territory and should treat the mix like a new design rather than a simple substitution.
If you add a lot of reclaimed material you usually need extra binder. Add roughly 5–15% more Portland cement by weight when reclaimed aggregate is 30–50%. If you exceed 50% or the recycled material is dusty, add a pozzolan or a cement replacement admixture and consider 10–20% extra binder. Adjust water for absorption—reclaimed rock soaks up mix water fast, so measure slump and add water in small amounts.
Always compact the base and freshly placed mix properly and cure it. If strength matters, have a local lab or experienced contractor test cores or 7–28 day cylinders from your trial mixes. And don’t be lazy: check base compaction and do that trial batch—saves headaches and money later.
Practical sample mixes and targets
- Fresh leftovers (plastic/green) — Use as-is or blend 1 part fresh Portland cement to 6 parts existing mix by volume to boost binder, add a plasticizer per manufacturer dosing, and target a slump of 3–4″ for stepping stones. Example small batch: 1 kg cement + 6 kg reclaimed mix yields ~7 kg workable material (adjust water to reach 3–4″ slump).
- 20–30% reclaimed aggregate — Mix: 1 part cement : 2 parts sand : 3 parts coarse (by volume), with reclaimed aggregate replacing up to 30% of coarse. Target water/cement (w/c) by weight: 0.45–0.50. For a 10 kg cement batch (approx. 1 bag 22 lb/10 kg), add 4.5–5.0 kg water (plus adjust for aggregate absorption) to hit slump ~3″.
- 50%+ reclaimed (repair/recycling) — Treat as a new design: 1 part cement : 1.5 parts sand : 2 parts coarse, add water-reducing admixture and 10–20% extra binder by weight. Target w/c 0.48–0.55 and do a trial batch. Expect lower early strength; test cylinders before installation.
Notes: measure w/c by weight when possible, keep target slump 2–4″ for hand-packed stepping stones (lower for exposed aggregate), and always adjust for reclaimed aggregate absorption. Record batch weights/volumes so you can reproduce color and strength between pours.
Quick field QA and validation
Before committing to full production cast at least two trial stones and, if strength matters, make 2–4 standard 2″ x 4″ or 2″ x 2″ cylinder/cube specimens per mix to cure under the same conditions. Recommended simple checks:
- 24‑hour handling: the sample should hold shape and resist light tapping.
- 7‑day strength target: for non-structural stepping stones aim for at least 2,000–2,500 psi (13–17 MPa) as a practical DIY threshold; for higher loads seek 3,500+ psi. Send specimens to a lab if exact psi is required.
- Simple field hammer test: tap with a heavy screwdriver or small hammer—hollow sounds or flaky surfaces indicate delamination or poor bonding.
- Adhesion check for overlays: cut a small 1″ patch and try to peel—if it separates easily, the bond is insufficient.
If trial specimens fail, do not install the stones. Increase binder, reduce w/c, or adjust reclaimed aggregate proportion and retest. Document each trial batch (weights, admixtures, ambient conditions) and only approve a mix that meets your handling and strength goals.
Reinforcement, Layering and Structural Techniques
Reinforcement options for stepping stones reclaimed from leftovers include wire mesh, rebar, and fiber, each excelling in crack resistance, post-load durability, and workability on small pours. Layering methods for thin stones focus on achieving adequate thickness through base preparation, compatible mortars or bonding agents, and finishing techniques that minimize telegraphing and chipping. Edge-strengthening techniques—such as chamfered or beveled edges, embedded reinforcement along perimeters, edge overlaps with adjacent slabs, and dowel-style connections—help reduce edge breakage during use and settlement.
This matters on the job by guiding how you sequence pours, stagger joints, and control joints to keep the surface stable over time. A clear approach to curing, waterproofing, and maintenance reduces cracking risk through freeze–thaw cycles and makes inspections for cracks or spalling routine rather than reactive. In practice, thinking through thickness, load expectations, substrate compatibility, and quick troubleshooting keeps a DIY project moving smoothly from pour to long-term performance.
Choosing reinforcement for size and use
Pick reinforcement based on the stone footprint, not just stone type. For pieces under about 1 sq ft (gravel, small cobbles), a good woven geotextile and a well-graded 2–3″ compacted aggregate base will keep things from sinking. For medium units (pavers or slabs ~1–4 sq ft), add a geogrid between the subgrade and base and a 4″ compacted base. For large flagstones and slabs over ~4 sq ft use either a full mortar bedding or a thicker (5–6″) compacted base with geogrid under the base to control differential settlement.
Match reinforcement to expected use. For foot traffic only, the above combos are usually fine. If you’ll push wheelbarrows, set plant pots, or expect concentrated loads in garden areas, go up one notch: thicker base, geogrid, and a solid edge restraint. If you skimp on reinforcement for heavier use you’ll be back fixing settled stones sooner than you think.
Before you lay anything, make sure you check base compaction and plan a continuous edge restraint to lock the pattern in. A lot of DIY jobs fail because people ignore compaction or skip the edge—don’t be that person. Make your decision now: lightweight fixups for decorative gravel, heavier reinforcement for anything you’ll walk on or load regularly.
Layered casting and bonded overlays
Start by building a solid structural base from the reclaimed rubble. Sort out and remove any organic material, oversize pieces or loose fines, then spread the rubble in even lifts and compact each lift until there are no soft spots. Check base compaction with a plate compactor or by hammer test — if it settles under firm blows you’ll get cracks later. Keep the base thickness generous (often 100–200 mm for footings or load-bearing pads) and decide up front if you need mesh or rebar tied into the layer; refer back to your reinforcement choices for sizing and spacing.
Once the base is set and flat, prepare the surface for the top finish. Clean the base of dust and laitance, dampen but don’t flood it, and apply a proper bond coat — a slurry of cement and water or a commercial adhesive — to prevent cold joints. Cast a thin, well-graded finishing layer (commonly 20–50 mm for overlays) while the bond coat is tacky. Work in manageable areas so you can screed and finish before the overlay begins to skin over.
Watch curing and detailing. Protect newly cast overlays from rapid drying and freeze-thaw; keep them moist for 3–7 days depending on weather. Cut control joints through the overlay down to the weak plane below, not through the structural base, to control cracking. If you see ponding, delamination, or a powdery surface after curing, you’ve got a bonding or compaction problem — don’t cover it up; rip it out and redo the bond or base properly.
Casting and Finishing Techniques
Casting and finishing techniques for stepping-stones focus on practical, repeatable methods that control mix design, mold choice, vibration, and texture to produce solid, durable units. Start with selecting plastic, reusable molds sized to stepping-stone dimensions and planning groutable joints, plus texture options from smooth to decorative patterns. Then outline concrete mixes and consolidation steps that minimize air voids through targeted vibration or tamping, define slump, aggregates, bonding agents as needed, and describe how to imprint surface textures and patterns during early set so edges stay clean and uniform.
Understanding these steps helps DIYers anticipate problems, achieve consistent curing surfaces, and plan finishing work such as sealing, edge trimming, and releasing agents without compromising hardness or clarity of texture. With proper planning for mold fit, texture methods, and cure timing, you gain reliable, aesthetically pleasing stepping-stones that resist cracking and fade, while keeping the workflow safe and efficient on site.
Methods to avoid bubbles and voids
These are the common screw-ups that lead to trapped air and weak spots. Short and practical fixes you can do on the job.
- Skipping proper consolidation — Not tapping, vibrating, or applying manual pressure leaves air pockets. For thin molds tap along the mold seams and use a small vibrator or a firm hand tool to work the material into corners.
- Over-vibrating — Too much or too aggressive vibration can cause segregation (heavier particles sink, voids form). Use short bursts and let the mix settle between passes; with thin molds use gentle tapping instead of prolonged vibration.
- Pouring from too high — Dumping material in from a height traps air and splashes into pockets. Pour close to the surface and feed the flow steadily so air can escape as you go.
- Ignoring fill direction and vents — Filling from the wrong end or without vents locks air in blind spots. Start at the farthest point and let material flow toward exits or add small vent channels for trapped air to escape.
- Relying only on one method — Tapping alone or only using pressure rarely clears every void. Combine gentle vibration/tapping with hand consolidation, and for very thin or detailed molds apply steady pressure (scraping or rolling) to push material into recesses.
Double-check these items before your next pour: proper consolidation, controlled vibration, low pour height, correct fill direction, and combining techniques will cut bubbles and voids dramatically.
Surface textures, stamps and embedded objects
Stamps and texture mats work when the concrete is at the right firmness — not soupy, not rock-hard. I tell crews: timing is everything. Float until bleed water disappears and the mix can take an impression. Use a light release agent, press mats with steady pressure, then back-rolling or tamping to get firm contact so details read cleanly. Work fast in heat and have helpers ready to move mats without overlapping seams badly.
Leaf prints and natural textures need a gentler touch. Lay the leaf or material on slightly tacky surface, press with a rubber roller, and lift straight up. For deeper relief, use multiple passes with a mat or carve edges once it firms up a bit. Don’t try to tool a texture at the pour peak or after it’s too hard — you’ll get ragged edges or tear-out.
Embed glass, tile or metal only when the concrete is plastic enough to envelop the back of the object — embed while plastic. Press items so they sit flush and give at least a half-inch of concrete cover around edges. For tile or heavier pieces, set them on a thin slurry or epoxy bed and add a mechanical anchor if outdoors or load-bearing. Clean all items, remove loose glaze, and seal the perimeter with a compatible grout or sealant after curing to prevent water wicking and long-term loosening. If you’re unsure about placement, set a few test pieces first and let them cure to check adhesion before committing to the whole surface.
Curing, Demolding and Post-Cure Treatments
Optimal curing hinges on tailored windows shaped by mix design, with rapid-set or higher Portland cement content demanding longer demold waits and more precise temperature and humidity targets, such as 50–85°F and ample humidity or misting for the early cure. Demolding signals include a reliable pull test, surface sheen, and substrate condition, while using release agents or mold liners and applying consistent pressure helps minimize edge spalling and cracking. Compare air curing to wet-curing (water mist, plastic sheeting, burlap) with clear, step-by-step procedures and safety notes to prevent mold or efflorescence, then plan post-cure sealing or coloring options with timing guidelines and simple tests for waterproofness and slip-resistance.
This matters on DIY jobsites where small mistakes compound into visible defects or costly rework, so a practical approach with a quick-start checklist and a concise troubleshooting flowchart helps you decide when to re-seal, re-wax, or re-wet-curing after the initial cure. Understanding common issues such as cracking, color unevenness, or color bleed lets you apply sensible thickness limits, joint control, and gradual drying to prevent them. Post-cure treatments—whether penetrating or film-forming sealers—have to be timed correctly to preserve color and durability, and the ability to test water resistance and slip resistance gives you confidence before opening the surface to use.
Wet curing and time estimates
For most outdoor small pours I plan on 24–72 hours demold before messing with forms, a clear gain in handling strength by day 7, and expecting near full design strength by day 28. Those are working targets — cold weather slows everything and heat or wind speeds it up. Use those ranges to decide when you can walk on, strip forms, or put loads on the slab.
For wet curing, keep the surface continuously damp for at least the first 7 days. The simplest methods for yards or patios are wet burlap covered with plastic, regular misting or fogging, or ponding small flat areas. If you can’t keep things wet, use a proper curing compound as a backup, but don’t kid yourself—curing compound is second best on exposed exterior work.
Before you strip forms or let heavy traffic near the pour, check actual conditions: surface hardness, absence of visible cracking, and local weather for the next 48–72 hours. If you see rapid drying, wind, or direct sun, be more aggressive about moisture. Remember the long game: early care prevents hairline cracks and weak concrete later, so err on the side of continuing to cure toward the 28-day full cure.
Sealing, coloring and polishing
Wait until the concrete has reached the proper strength and dryness from curing and demolding — don’t rush it after wet curing. Before sealing, check moisture with a simple meter or plastic sheet test. If the slab is still damp, a film-forming sealer will trap moisture and fail.
Decide between penetrating and film-forming sealers by use: penetrating sealers (silane/siloxane siloxane blends) with 40–60% active solids provide long-lasting water repellency while remaining breathable—good for exterior and freeze/thaw climates. Film-forming acrylic or polyurethane sealers give a glossy, wet look but typically have lower solids and can yellow or peel; use them only on decorative, low-abrasion surfaces and accept recoat schedules (1–3 years). Prefer products with VOCs within local limits and follow manufacturer recoat windows (commonly 24–72 hours post-cure if dry). For slip resistance, broadcast 20–30 mesh silica sand into the final coat or choose a textured film-forming product labeled for exterior pedestrian use.
For color, dyes give bright, uniform tones and work well with polished surfaces; stains create variegated, natural effects. If you polish, grind aggressively first, then step down through pads to refine the surface, apply a densifier, and finish with finer pads for shine. Control dust, keep tools moving, and don’t skip the final clean before sealing — trapped dust ruins the finish.
Design Ideas and Decorative Treatments
Design ideas for reclaimed-concrete stepping stones center on creating decorative, artisanal surfaces through mosaics, inlays, stamped patterns, multi-color pours, and blending reclaimed aggregates to achieve rustic charm. It covers material and technique considerations, from suitable concrete mixes and colorants for leftover material to release agents, forms, surface prep, and compatibility with inlays or embedded accents. Aesthetic direction focuses on textures and color palettes that harmonize with garden settings, including varied aggregate sizes for visual interest.
This matters on the jobsite because it translates planning into a practical workflow: choosing stone sizes, pattern templates, and a step-by-step process from plan to pour to cure, with guidance on when to grout or seal. It also helps balance durability, safety, and maintenance, addressing slip resistance, frost/thaw performance, surface protection, sealing frequency, and easy cleaning. Budget-minded makers gain tips on sourcing, renting tools, and reusing molds to minimize waste while achieving durable, inviting outdoor paths.
Mosaics, tiles and found-object inlays
Prep is everything. Check base compaction and remove loose dust or curing laitance. If the surface can flex even a little, either stiffen it or install an uncoupling membrane. Wet or exterior locations need waterproofing or an epoxy adhesive. Don’t stick tiles to dirt, paint, or loose concrete — they’ll pop off sooner or later.
Set tiles into a full bed of mortar or adhesive so every piece has support. Back-butter larger tiles and press mosaics down to remove air pockets. For glass and fragile objects use an epoxy or polymer-modified thinset rated for glass; for heavy found-objects use a structural mortar and mechanical anchoring where possible. Work in small areas so the adhesive doesn’t skin over; cold joints and voids cause delamination and failures.
Plan joints and movement. Use control joints at changes in substrate or at long runs. Grout and seal appropriately for the environment, and let adhesives and grouts cure the full time before load or water exposure. If you rush any of these steps you’ll pay for repairs later — do it right, or expect tiles to fail.
Natural textures and patinas
Pick the look before you start. Decide whether you want a soft, weathered patina from acid stains, a rough stone finish from sandblasting, or a controlled exposed-aggregate surface. Each method changes how the slab behaves and how slippery it gets when wet. If you plan to mix in mosaics or tile inlays mentioned elsewhere, mark those areas now so your blasting or etching doesn’t damage them.
Do the prep work right: check base compaction, make sure the concrete has cured long enough for acid work (usually 28 days), and clean thoroughly. Do a small-scale test patch in the same light and location you’ll use the final piece. Acid stains and chemical patinas can look totally different once sealed, so test patches are not optional.
Control is everything. For exposed aggregate, choose your aggregate size and set removal depth; too deep and you weaken the slab, too shallow and it looks inconsistent. Sandblasting gives texture fast but pits thin spots and eats mortar joints—rent a nozzle you can handle or hire a pro. With acids, use the right PPE, neutralize fully, and always finish with an appropriate sealer to lock in color and reduce dusting. If you’re unsure about structural issues or complex finishes, pay for a pro inspection—cheap mistakes are expensive to repair.
Troubleshooting Common Failures and How to Fix Them
This section identifies common stone and concrete failures such as cracking, delamination, frost damage, and low strength, and pairs clear diagnostic signs with practical fixes. It outlines how each problem arises and the impact on stepping stone performance, then points to straightforward remedies and prevention approaches you can apply on site.
Understanding these failure modes helps you prioritize quick checks, decide when to repair versus re-pour, and choose appropriate patching materials and curing plans to keep durability high. The guidance emphasizes realistic, actionable steps: moisture control, bonding improvements, proper sealing, sealers as needed, and sound curing routines that fit your project timeline. With these insights, you can reduce recurring defects, extend service life, and keep jobs moving smoothly even under variable weather and moisture conditions.
Cracking and shrinkage fixes
First, figure out the crack type. Hairline random cracks that show up in the first few hours are usually plastic shrinkage — concrete lost water too fast. Long straight snaps that follow joints or run into a pattern over weeks are drying shrinkage. Look at timing and pattern before you act.
For plastic shrinkage, keep the surface wet and cover with a curing membrane right away. If you see this often, change your mix or shade the slab during the pour. For drying shrinkage, add control joints in the right places or fix the restraint problems. If the slab moves because the base is bad, check base compaction and fix that first.
Small cracks can be routed and filled with a flexible epoxy or polyurethane sealant. Wider gaps or structural cracks need a proper patch mix and mechanical bonding — roughen the area, dampen it, then use a repair mortar designed for shrinkage resistance. If you’re unsure, photograph the crack, note when it appeared, and get a pro to confirm before spending on big repairs.
Poor strength or delamination
If the surface flakes, peels or sounds hollow, start by isolating the problem area. Tap and probe to find the extent. Check for visible contaminants like oil, paint, or laitance and remove contamination before doing anything else — bonding over grease or dust is pointless.
Next diagnose the cause. If the base is soft or poorly compacted, the fix may require stripping back and rebuilding; check base compaction and supporting layers. If the failure is a weak bond from poor mixing or wrong water ratio, you can sometimes salvage the area with a proper mechanical key, a bonding primer/adhesive, and a quality overlay. Small, thin delaminations often accept a resurfacer with a bonded system; large, structural delamination usually needs removal and replacement.
Do not just slap new material over a contaminated or loose plane — that’s a temporary bandage. Clean, prepare, and use the right adhesive or primer for the materials involved. If you’re unsure whether it’s a bonding issue or a deeper structural problem (different from simple cracking or shrinkage), pull out a test patch. That will tell you whether to overlay, glue, or replace.
Project Planning, Costing and When Reclaiming Saves Money
This section outlines how careful project planning, accurate costing, and strategic reclaiming of materials can lower every stone’s price by exposing where time, labor, and waste meet budget limits, across modular plans, risk buffers, and measurable milestones that keep the project aligned with client or site constraints. You’ll see sample project plans and time estimates that compare single-stone work to small and large batch casting, with explicit steps for molds, release agents, base prep, mixing, pouring, curing, and sealing, including deviations, sampling for texture, and standard curing windows. A line-item cost model and a budgeting checklist show reclaimed concrete value, materials, formwork, tools, and labor, plus break-even points under different scenarios to guide decisions before work begins, and sensitivity to formwork costs and scrap value.
Knowing these details helps a DIY or jobsite reader prioritize scope, optimize throughput, and reduce rework by setting expectations for yield, waste, and contingency buffers. The practical payoff is more reliable schedules, steadier budgets, and clearer tradeoffs between a single finished piece and batch production, with safer, leaner workflows. By documenting time estimates and cost drivers from site prep to sealing, you can plan safely and efficiently while keeping quality intact.
Time and labor estimates for typical projects
For a single reclaimed stone reset expect about 1–3 hours of work for a competent DIYer. That covers cleaning the stone, removing old bedding, check base compaction, trimming the stone, and setting it in new bedding. If the stone needs grinding or edge repair add more time or plan on a separate session.
A small path of roughly 10 stones usually runs 6–12 hours of labor spread over a day or two. Do the heavy prep first: remove turf, compact the base, and lay a level string line. Setting the stones is relatively quick, but factor in cleanup, minor adjustments, and time to let bedding settle before walking on it—don’t rush this or you’ll be fixing it later.
For a batch pour (new concrete pads or manufactured stone batches) plan on a full day for forms, mixing and pouring with 2–3 people. Allow 24–48 hours before light foot traffic and at least 7 days before heavier use; full cure for strength is 28 days. Stage pours to fit crew size—pouring too many sections at once without help kills quality. If you’re unsure about timing, slow down on prep; rushed pours show up as failures later.
Cost comparison: reclaimed vs fresh materials
Material choice decides whether your reclaimed job looks good and lasts. Cheap or wrong products erase savings fast with staining, crumbling joints, or failed bonds. Below are the specific items to pick off the shelf and when reclaimed still makes sense.
- Reclaimed bricks — Used for visible walls and paving. Look for sound faces, consistent size, and no active efflorescence or heavy salt damage. Cheap-looking bricks with deep spalls or high porosity will absorb water and freeze-crack; expect to pay nothing if salvaged, or $0.50–$2.50 each for cleaned reclaimed stock.
- New modular bricks — Used when reclaimed run out or need matching. Check grade/tolerance on the pack and frost rating (F2/F3 for exterior). Use new bricks when structural integrity matters; they cost about $0.75–$3 each and avoid the hidden risk of compromised reclaimed units that can cause wall collapse in time.
- Type N mortar — General-purpose mortar for above-grade, non-load-bearing work. Bag label shows N (moderate strength ~750 psi) and a 1:1:6 mix often; pick premixed tubs or bags for consistency. Use when matching older softer joints; don’t use Type N on below-grade foundations — cheap hard mixes can crack softer reclaimed bricks and cause spalling.
- Type S mortar — Stronger mortar for structural or below-grade work. Label will show S (higher strength ~1,800 psi) and often meets ASTM C270; buy pre-blended for jobsite convenience. Choose S for retaining walls or high-wind areas; avoid on soft historic bricks — it will force stress into the brick and cause breakage. Price: $6–$12 per 80 lb bag.
- Portland cement — The binder in most mortars and concrete. Look for Type I/II for general work and Type V for high-sulfate soils; use fresh sealed bags. Cheap, old, or moist cement cuts bond and causes weak, powdery joints. A 94 lb bag runs $8–$12; don’t use if clumped from moisture — it ruins mixes and strength.
- Masonry sand — Fills mortar and affects workability and color. Bags will note “masonry” or “concrete” sand and gradation; avoid very coarse or lime-rich sands for pointing. Too coarse sand weakens the mortar and causes poor finish; expect $4–$10 per 50 lb bag or $20–$40/ton delivered.
- Bonding agent — Liquid additive or paste to improve adhesion to old surfaces. Labels show “masonry bonding” or polymer content (acrylic or latex); choose polymer-modified for vertical reclaimed work. Skip it only on clean, porous surfaces; using none can lead to delamination and raked-out joints. A small bottle costs $10–$30; larger tubs $40–$80.
- Sealer / waterproofer — Protects reclaimed faces and joints from stains and freeze damage. Look for breathable, masonry-safe seals (silane/siloxane for water repellency). Don’t use non-breathable film-formers on historic masonry — they trap moisture and cause internal decay. Expect $25–$60 per gallon; cheap paint-on sealers are often the wrong choice.
- Curing and admixtures — Plasticizers, air-entrainers, or retarders to control set and durability. Bag or bottle specs list dosage and compatibility with Portland cement and polymers. Use admixtures when mixing in hot/dry weather or when reclaimed material increases suction; wrong admixtures cause incomplete set or weak concrete and cost $10–$50 per bottle.
Worked example — 10 stones, 12″ round, 2″ thick:
- Volume per stone ≈ 0.013 m³ (12″ dia × 2″ thick) → total ≈ 0.13 m³ (~0.17 yd³).
- Reclaimed scenario: reclaim covers 50% of coarse aggregate and some paste; expected material cost ≈ $50–$150 (bonding agent, extra cement, admixtures, sand) + tools; labor 8–12 hours. Approx cost per stone = $5–$15.
- New mix scenario: ready-mix or new bagged concrete, molds, sealer ≈ $200–$400 total; cost per stone = $20–$40+. Break‑even typically around 10–20 stones depending on tool rentals and time.
Adjust local prices, rental costs, and your time value. The example shows how reclaiming saves when you already have reusable leftover material and limited new binder needs.
Long-Term Durability, Maintenance and Local Regulations
Long-term durability comes from proper site preparation, careful material choices, and a clear plan for maintenance and disposal. Protect stepped stones from freeze-thaw damage with good drainage, proper slope, careful spacing, and a solid sub-base; watch for basal cracking or spalling as signs of wear, and routinely check drainage outlets and seasonal water pooling that can accelerate damage. Establish a practical maintenance rhythm and resealing interval, typically annual inspections and reseals every 2–5 years depending on climate, use, and whether reclaimed concrete includes new cement, air-entraining additives, and appropriately sized aggregates, while confirming local rules for disposal of contaminated concrete or coated materials.
This guidance helps DIY installers avoid costly cracking, edge chipping, and premature replacement by addressing bed preparation, joint filling, and proper reinforcement if needed, along with ensuring stones stay level and stable to minimize movement. It also clarifies how to manage run-off, weed suppression between stones, pest prevention, and safe handling of reclaimed materials to protect installers and the surrounding landscape. Knowing the local regulations and disposal requirements keeps projects compliant, reduces environmental risk, and helps identify legitimate recycling or drop-off options for contaminated or mixed concrete materials.
Maintenance and seasonal care
Check the surface every season for hairline cracks, chips and standing water. Light cleaning with a stiff broom and garden hose keeps grit from grinding the finish. If you see surface wear or dulling, plan to seal every 2–3 years depending on traffic and sun exposure; don’t skip the prep—clean, let dry, then apply the sealer exactly as the manufacturer says.
Winter demands respect. Clear snow with a plastic shovel and use a push broom where possible. Avoid rock salt on concrete or natural stone; it accelerates spalling and edge breakage. If you must use de-icers, pick a calcium-magnesium product labeled safe for the material and use it sparingly.
When chips or small spalls appear, act fast. Clean loose material, undercut the damaged edge if needed, then use a compatible patch or epoxy and tool it flush. For larger or recurring damage, call a pro rather than piling on temporary fixes—repair chips promptly or you’ll pay more later.
Legal, disposal and reuse compliance
Before you plan to reuse old material or leftover product, check local codes. Some municipalities or HOAs ban reuse of certain materials (treated wood, contaminated soil, roofing waste). If a code or permit forbids reuse, don’t try to work around it — you’ll pay fines or be forced to remove the work later.
If leftovers are contaminated with oil, solvents, heavy metals, pesticides, or mold, treat them as hazardous. Keep contaminated pieces separate, double-bag loose soil or dust, and contact your local solid-waste or environmental office for approved disposal routes. Most areas require dropping these items at a designated transfer station or a hazardous waste facility, not your curbside bin.
Practical next steps: many cities publish transfer station and hazardous waste info online—search “(your county) transfer station concrete” or call the public works or solid waste department. Typical fees run $20–$60 per cubic yard for special handling; turnaround is same day to a few days depending on facility. If in doubt, take photos and sample pieces to the local recycling center—many accept uncontaminated concrete for crushing at low or no cost.
Don’t forget to cross-check with the county building department, state environmental agency, and your local landfill or transfer station before you start cleanup or reuse. If you’re ever unsure, take a photo and call—saving a quick compliance check now beats an expensive rework or a ticket later. For ongoing upkeep, follow the regular maintenance steps covered earlier to avoid creating future disposal headaches.

Conclusion
Reclaiming leftover concrete for stepping stones is a smart mix of money saved, durability gained, and curb appeal improved, as long as you plan, test, and work safely. The key is to build from small trials to full projects, so you don’t waste material or time.
Start by sorting and testing small batches, then pick your molds, establish your mixing strategy, build in reinforcement where needed, pour in manageable layers, and follow a proper cure and finish schedule. Work in a clean, level space, use the right tools and safety gear, and test a patch before committing to the whole project. Safety first and test small batches become your guardrails for a solid result.
Common mistakes to avoid are skipping tests, over-wetting or under-mixing leftovers, and rushing demolding or curing. Keep your PPE on, handle molds and edges carefully, and give concrete time to cure before use. If local regulations or load-bearing requirements come into play, don’t push ahead without confirming with a professional or checking code requirements. When in doubt, call in a contractor or structural expert to verify specifics, and stay focused on a finish that lasts—the payoff is a sturdy, attractive path you can enjoy for years to come.
Quick-Start Decision Flow & Printable Checklist
Decision flow (one page quick actions):
- If slab is clean, sound, no large rebar → Cut to size or use as aggregate for stepping stones.
- If slab has light surface rust or hairline cracks → Chip loose rust, grind, test patch, and use with bonding slurry for overlays.
- If slab has oil/chemical staining or strong odor → Do not reuse in garden areas. Mark as hazardous and contact local transfer station.
- If slab has heavy corroded rebar (>25% section loss) or deep delamination → Stop; consult a structural pro and recycle or dispose properly.
- If reclaimed aggregate <30% of mix → Use conservative extra binder + w/c 0.45–0.50, cast trial stones.
- If reclaimed aggregate 30–50% → Add 5–15% extra cement by weight, use admixture, cast test cylinders.
- If reclaimed aggregate >50% → Treat as new design, consult lab or pro before installing stepping stones for load-bearing uses.
Printable checklist (minimum):
- Inspect piece for contaminants, smell, oil.
- Tap for hollows; check rebar condition (measure section loss).
- Sort and tag material (usable / needs crushing / hazardous).
- Cast 2 trial stones + 2 strength specimens per proposed mix.
- Record mix weights, w/c ratio, admixtures, ambient temp, slump.
- Test demold at 24–72 hrs; 7‑day strength target check; 28‑day target if structural.
- Seal after moisture test passes; pick sealer type per climate (silane/siloxane for exterior freeze/thaw).
- Dispose contaminated material via local transfer station; call public works if unsure.
When to Stop and Call a Professional
- Visible rebar with >25% section loss, heavy pitting, or continuous delamination around steel.
- Contamination tests positive for hydrocarbons, high chlorides (>0.5% by weight), or unknown hazardous chemicals.
- Planned stones >4 sq ft or intended to carry concentrated loads (lawnmower, wheelbarrow) — get structural advice.
- Repeated delamination, widespread low strength in trial specimens, or failure of bonding overlays in tests.
- Local permit required (e.g., within protected landscapes, public right-of-way, or HOA-restricted materials).
FAQ
What should I do first before pouring stepping stones with leftover concrete?
Clean the area where the stones will sit. Mix small batches and work fast so the concrete doesn’t set on you. Have a plan for spacing and level so they don’t wobble later.
How thick should each stepping stone be for durability?
Aim for about 2 inches thick for typical foot traffic. If you’ll drive a lawnmower or heavy loads over them, go thicker. Don’t skimp—thin stones crack and then you’re back to square one.
What additives or tricks help leftover concrete perform well?
You can add extra water sparingly and use a bonding agent if you’ve got a surface to pour onto. Don’t dump in lots of fillers or debris; it weakens the stone. Stick to simple mixes and keep it clean.
How do I prevent stepping stones from shifting or cracking?
Press them firmly into the ground and give each one a small margin of concrete on the edges. Build a shallow, compact base with gravel or sand for drainage. Avoid setting them on bare soil or clay that swells when wet.