
Introduction
Long-term storage of partially used paint means keeping the can sealed, preventing skin from forming, and preserving it for future remix. Keep containers tightly closed, label clearly, and store upright in a cool, stable spot away from direct heat or freezing conditions. Check the product label and manufacturer instructions for any shelf-life notes or specific storage recommendations in your area.
When you remix later, stir or shake thoroughly and test a small amount before using it on a project. Use a clean tool to avoid introducing contaminants and avoid mixing paints that are separated by color or type unless the manufacturer approves it. If you’re unsure about any step, refer to the label, follow the recommended remix methods, and comply with local rules on storage and handling.
Key takeaways
- Label containers clearly with contents and date opened to track storage longevity.
- Keep lids tight and store away from extreme heat to prevent skin formation.
- Remix steps: gently stir, test small sample before reapplying to surface.
- Reclaiming clay scraps efficiently, combine compatible colors and screen out contaminants.
- For long-term storage, adjust leftovers by thinning with approved medium per label guidelines.
- Safety: wear gloves and eye protection when handling old paint; avoid skin contact.
Table of Contents
- Introduction
- Key takeaways
- Quick Overview — When Long-Term Storage Makes Sense
- Tools and Materials Checklist
- Prep Steps Before Storage (Inspect, Clean, Condition)
- Practical Methods to Prevent Skin Formation
- Ideal Storage Environment and Routine Maintenance
- Step-by-Step Remix and Reuse Workflow After Years
- Troubleshooting Common Long-Term Storage Problems
- Cost-Effective, Eco-Friendly Alternatives and Final Tips
- Conclusion
- FAQ
Quick Overview — When Long-Term Storage Makes Sense
Keep partially used paint when you need an exact color match for future touch-ups, plan to finish the same project, or have small leftovers worth saving; check the can label for base type, batch information, and any storage warnings before deciding. Do one quick test: inspect the can for separation, odor, or contamination and note the opened date on your record.
Storing the right cans saves money and keeps finishes consistent, but holding incompatible or degraded paint costs time and creates rework. If you spot strong odor, mold, or a badly broken emulsion, treat it as likely unusable and plan to consolidate, recycle, or dispose instead.
How to decide keep vs discard
When you’re deciding whether to store partially used paint, consider these factors:
Remaining Volume: If there’s less than a cup left, it might not be worth storing. You’ll need at least that much for touch-ups or mixing new batches.
Paint Type: Water-based paints (latex) can usually be stored longer if the lid is intact. Oil-based paints may separate faster and require remixing before use.
Original Finish: If you’re unsure about the original finish, it’s better to discard. Mixing a new batch with unknown variables can lead to poor results.
Color Matching: If you need an exact color match for future touch-ups or projects, keep the paint. Otherwise, consider consolidating or disposing.
Health, safety, and legal considerations
Before you store or dispose of partially used paint, be aware of these risks:
Lead in Old Paints: Very old paints may contain lead. If the label doesn’t specify ‘lead-free’, test for lead before handling.
VOC Rules: Some areas have restrictions on volatile organic compounds (VOCs) due to air quality concerns. Check local regulations before storing or disposing of paint.
Local Hazardous-Waste Guidance: Always follow your city or county’s guidelines for hazardous waste disposal. They may offer special collection days or facilities for paint disposal.
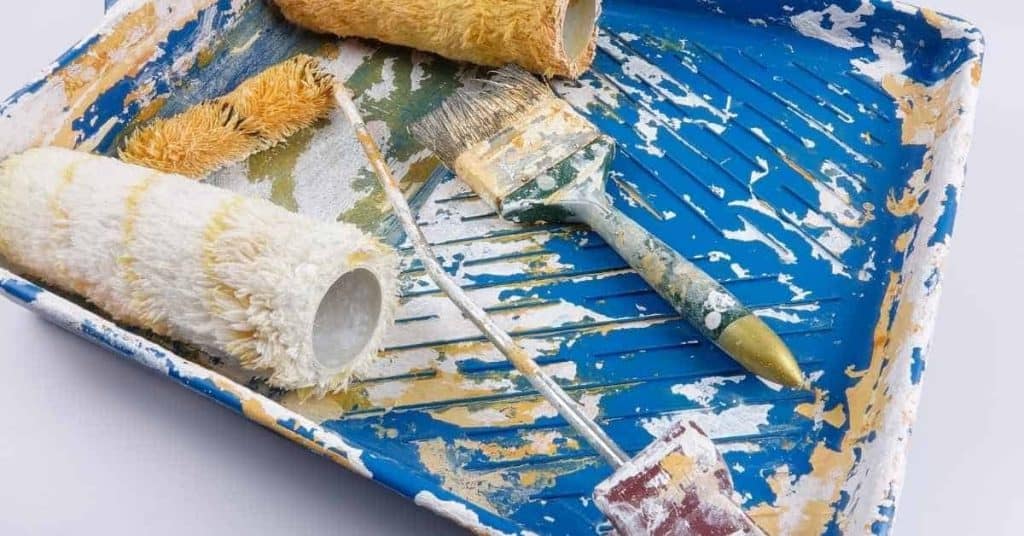
Tools and Materials Checklist
Gather airtight containers, clean pour spouts, strainers, labels, and basic PPE like gloves and eye protection; match sealing materials to the paint type by checking product directions for solvent or water compatibility. Have simple filters—mesh, coffee filters, or cheesecloth—and a clean stir stick or mechanical mixer ready for remixing.
Using the right gear cuts contamination risk and keeps paint usable longer, which reduces waste and saves you runs to the store. If you aren’t sure which seal or filter to use, check the manufacturer instructions or product data sheet to avoid chemical incompatibility.
Containers and sealing options
Use this checklist to choose the right containers for your partially used paint, ensuring they’re airtight and suitable for long-term storage.
- Air-tight jars: Glass or plastic food-grade jars with tight-fitting lids are ideal. Check for any cracks or damage before use.
- Small metal cans: Use empty paint cans or similar metal tins. Ensure they’re clean and free from rust.
- Resealable pails: For larger quantities, use 5-gallon buckets with resealable lids. Check the seal is intact before using.
- Plastic wrap or liners: Reduce headspace in containers by using plastic wrap or liners to create a tight seal.
- Avoid cardboard: Never store paint in cardboard boxes as they absorb moisture and can cause skin formation.
- Size matters: Choose containers that fit your paint quantity, making it easy to pour and minimizing wasted space.
- Corrosion-resistant: Ensure containers are resistant to the type of paint you’re storing. Solvent-based paints may corrode certain metals.
- Check compatibility: Verify that your chosen container is suitable for both solvent- and water-based paints, or use separate containers for each.
Quick rule: Always choose airtight containers to prevent skin formation and evaporation.
Filtering, stirring, and handling tools
Use this checklist to gather essential tools for filtering, stirring, and handling your stored paint safely and efficiently.
- Paint strainers: Use fine-mesh paint strainers or make your own with cheesecloth or pantyhose. Test the mesh size before use.
- Wide stir sticks: Choose sturdy, wide stir sticks to mix large quantities of paint easily.
- Funnels: Use funnels when pouring paint into containers to prevent spills and mess.
- Disposable trays/pans: Have disposable trays or catch pans ready for messy tasks like straining and remixing.
- Glass jars: For small quantities, use glass jars with lids for easy storage and pouring.
- Avoid metal funnels: Do not use metal funnels with solvent-based paints as they can cause reactions or corrosion.
- Labeling tools: Have permanent markers, labels, or label makers ready to identify your stored paint.
- Measuring cups/spoons: Use these for accurate measuring when remixing or adding additives to your paint.
Quick rule: Always filter and stir your paint before use to remove debris and ensure even consistency.
Safety and labeling supplies
Use this checklist to gather necessary safety gear and labeling supplies for proper storage and handling of your paint.
- Gloves: Use rubber or latex gloves when handling paint to protect your hands from chemicals.
- Eye protection: Wear safety glasses or goggles to shield your eyes from splashes and debris.
- Respirator/mask: When sanding or remixing, use a respirator or mask to protect against harmful fumes and dust.
- Permanent labels: Use permanent markers or labels to clearly mark your paint containers with color, base type (water/solvent), date opened, and remix status.
- Inventory system: Create a simple inventory system using a notebook, spreadsheet, or app to keep track of stored paints.
- Color-coding: Use colored labels or tape to group similar colors together for easy selection later on.
- Avoid touching eyes: Be cautious not to touch your eyes when handling paint to prevent irritation.
- Wash hands: Always wash your hands thoroughly after handling paint to remove any residual chemicals.
Quick rule: Always prioritize safety when handling and storing paint, using appropriate gear and clear labeling.
Prep Steps Before Storage (Inspect, Clean, Condition)
Start by inspecting the can for foreign debris, skin, separation, or off-odors and wipe the rim clean; if the can looks compromised, transfer usable paint to a clean, labeled container. Stir the paint slowly to re-emulsify pigments and note any lasting clumps, odor, or viscosity change on your record.
Prepping properly removes contaminants that lead to faster spoilage and reduces the chance of skin forming during storage. If the paint still shows curdling or mold after a gentle mix, err on the side of disposal to avoid contaminating other cans.
Inspecting paint quality
Before you store your partially used paint, it’s crucial to inspect its condition. Start by opening the lid and taking a whiff. If there’s an off odor, discard it immediately. That smell could indicate bacterial growth or mold.
Next, check for signs of contamination. Look for separated layers, which can happen over time due to gravity. If you see a distinct line between the paint and any liquid on top, that’s not ideal but might still be usable with remixing. However, if there are chunks or lumps floating in the paint, it’s best to throw it out. These could be cured bits of paint that won’t reincorporate.
Also, check for any sludge at the bottom of the container. This is usually a sign of pigment settling and can often be remixed back in. But if it’s thick and doesn’t mix well, you might need to thin your paint slightly using the manufacturer-recommended thinner. Always follow their guidelines to avoid damaging the paint.
Lastly, ensure the lid seal is intact. A broken or missing seal can allow air and contaminants in, ruining your paint.
Conditioning and partial re-homogenizing
After inspecting your paint, it’s time to condition it for storage. Start by removing any surface debris or foreign matter using a clean, lint-free cloth. Wipe the rim and interior of the container thoroughly.
Next, use a clean stir stick or mechanical mixer to gently reincorporate any settled solids at the bottom of the container. Stir slowly and consistently to avoid introducing air bubbles or foam. The goal is to re-emulsify the pigments and bases without creating too much agitation.
If your paint has separated into distinct layers, you might need to thin it slightly using the manufacturer-recommended thinner. Only do this if absolutely necessary, as thinning can alter the paint’s properties and coverage. Always follow the manufacturer’s guidelines for thinning ratios to avoid damaging the paint.
Remember, the key here is to be gentle. You’re not trying to whip up a new batch of paint, just reincorporate what’s already there. A little patience goes a long way in ensuring your paint remains usable after storage.
Practical Methods to Prevent Skin Formation
Use tight-fitting lids, clean rims, and surface barriers like plastic wrap or a thin film to keep air off the paint surface; for water-based paints, avoid large headspace and keep temperature steady. Consider higher-tech options only if you can follow manufacturer guidance, such as vacuum-sealed containers or inert-gas blanketing for long storage.
Keeping air and contaminants away prevents hard skin and reduces remix work later, which preserves color and performance. If you’re unsure about a more advanced method, read the product instructions or check with the paint maker before trying it on costly batches.
Minimize air and headspace
To prevent skin formation, minimize the amount of air trapped with your paint. Here’s how:
Transfer to a smaller container. If possible, pour your leftover paint into a smaller, clean jar or tin. This reduces the volume of air above the paint.
Use cling film as a barrier. Press a piece of cling film directly onto the surface of the paint before sealing the container. This creates an additional barrier against air.
Fill to the brim. When refilling your container, fill it right up to the top. This leaves less headspace for air to sit and cause skin formation.
Inert-gas and vacuum-style options
For a more robust solution, consider using inert gas or vacuum-sealing systems. These methods displace oxygen, which can cause skin formation.
Inert gas products. You can use nitrogen or argon gas to displace the oxygen in your paint container. This requires compatible containers and proper safety measures. Always check manufacturer instructions before use.
Vacuum-sealing systems. Vacuum-sealers can remove air from your container, preventing skin formation. They work best with compatible containers and require careful handling to avoid spills or contamination.
Remember, these methods aren’t always necessary but can be useful for long-term storage or precious paints. Always check compatibility and follow safety instructions.

Ideal Storage Environment and Routine Maintenance
Store paint in a cool, stable place away from direct sunlight with moderate humidity and good ventilation; keep cans off concrete floors and on pallets or shelves and label each can with opened date and contents. Use a thermometer and hygrometer to monitor conditions and adjust storage if extremes occur.
Consistent environment and regular checks prevent separation, skin, and breakdown that ruin paint over time and force costly replacements. If temperatures or humidity swing widely where you store paint, move cans to a more stable area or set alert limits on your monitoring tools.
Location and temperature considerations
Store your paint in a cool, dry place. Direct heat or freezing conditions can ruin it.
Ideally, the temperature should be between 50°F to 70°F (10°C to 21°C). Check your specific paint’s label for its recommended storage temperature range.
A shaded area away from direct sunlight is best. Basements or garages usually work well, but avoid areas prone to frost or extreme heat.
Periodic checks and simple upkeep
Inspect your paint storage every few months. Check the seals on containers for any leaks or cracks.
If you find a leak, re-seal the container immediately to prevent further damage. If it’s beyond repair, transfer the paint to a new, airtight container.
For small containers, top them up if they’re running low to minimize headspace and reduce the risk of skin formation.
If you notice any changes in consistency or color, or detect an unusual odor, it’s time for a closer look. Follow your maintenance checklist and remediation steps as needed.
Step-by-Step Remix and Reuse Workflow After Years
Start by verifying the paint type, batch notes, and storage history, then inspect for skin, mold, or heavy separation before doing any work; remove surface film, strain what remains, and remix slowly to restore uniformity. Test a small sample for color, adhesion, and viscosity before committing to a full application.
Following a clear workflow reduces surprises on the job and keeps your finish predictable, saving time and materials. If the sample fails color or adhesion tests or smells strongly of solvents, mark the can unusable and dispose of it properly.
Step-by-Step Process
This clear, numbered sequence guides you through the main work of remixing and reusing stored paint safely and effectively.
- Verify paint type and storage history. Check for separation, mold, or clumps. Note color shifts, odor, and any hazardous components.
- Gather tools: strainer, clean containers, stirrers, digital scale, safety gear, and labels.
- Remove skin gently using a warm water bath or decanting method to avoid exposing fresh paint to air. Skim off thickened layers.
- Strain the paint through progressively finer mesh to remove particles. Stir thoroughly between each straining.
- Test viscosity, color consistency, and adhesion potential on scrap material. Adjust with additives, thinners, or colorants as needed.
- Document exact ratios of remix for future reference.
- Clean up workspace, dispose of unusable portions safely, and label containers with lot numbers, date codes, and storage conditions.
- Store in air-tight containers at ideal temperature and humidity levels.
Removing skin and solids safely
Carefully removing the skin from stored paint prevents contamination and maintains its quality. Here’s how:
Warm gently: Place the can in a warm water bath (not boiling) to soften the skin without exposing it to air.
Decant carefully: Pour off the liquid paint slowly, leaving the skin behind. Use a clean funnel if needed.
Skim and discard: Once most of the liquid is out, use a clean, flat tool (like a putty knife) to lift and discard the skin. Avoid pushing it back into the can.
Strain only when necessary: If there are visible solids or clumps, strain the paint through a fine mesh before remixing. Stir thoroughly after straining.
Stirring, straining, testing, and adjusting
Thoroughly stirring, straining, and testing your paint ensures a consistent, usable product. Here’s how:
Stir well: Use a clean stirrer to mix the paint thoroughly. Stir in one direction for at least 5 minutes.
Strain progressively: Pass the paint through progressively finer strainers (e.g., from 100 mesh to 325 mesh) to remove particles. Stir between each straining.
Test on scrap: Make a test patch on scrap material to check viscosity, color consistency, and adhesion potential. Compare with original paint specs if available.
Adjust as needed: If the paint is too thick or the color has shifted, add small amounts of compatible fresh paint or recommended thinner until it matches the desired consistency and color. Document exact ratios for future reference.
Troubleshooting Common Long-Term Storage Problems
Identify whether a problem is fixable by checking skin thickness, odor, and remix response; skim thin skin, strain out debris, and mechanically re-emulsify separated paint to see if consistency returns. For foul odors, mold, or persistent clumping, isolate the can and consider disposal rather than risking contamination of other stock.
Quick, practical fixes can often salvage paint for touch-ups and small jobs and keep costs down. When a batch won’t recondition to acceptable color and working properties, follow local guidelines for safe disposal to avoid hazards.
Rescue techniques for separated or lumpy paint
If your paint has separated or formed lumps over time, don’t despair. Here are some techniques to bring it back to life.
Straining: Use a fine mesh strainer or cheesecloth to filter out any chunks or impurities. This helps restore the paint’s smooth consistency.
Mechanical stirring: For larger quantities, use a drill with a paint mixer attachment or an immersion blender. Ensure the tool is clean and dry to prevent contamination. Stir gently but thoroughly to break up lumps and remix the paint.
Rehydration: If your paint has become too thick due to drying out, add a small amount of its original solvent (like mineral spirits or water) to restore workability. Start with a few drops at a time, stir well, and add more if needed.
When paint is beyond saving
Sometimes, no matter what you do, paint can’t be salvaged. Here are some warning signs to look out for:
Persistent off-odor: If your paint has a strong, unpleasant smell that doesn’t go away after opening and stirring, it’s likely contaminated or spoiled. It’s best to dispose of it safely.
Cured bits that won’t rehydrate: If parts of the paint have cured so hard that they can’t be broken down with agitation or solvents, they’re beyond saving. Remove these bits and discard them.
Contamination: If you see mold, mildew, or other signs of contamination, dispose of the paint immediately to prevent further growth and contamination of other paints. Always wear gloves and a mask when handling potentially contaminated paint.
If your paint shows any of these signs, it’s time to dispose of it properly. Check with your local waste management department for guidelines on hazardous household waste disposal. Many communities have special collection days or facilities for this purpose.
Cost-Effective, Eco-Friendly Alternatives and Final Tips
Consolidate compatible leftovers, donate usable cans to community groups, or save small amounts for touch-ups and creative projects; label and track what you keep so nothing gets forgotten. Use a simple shelf log and rotate stock so older cans are used first and reduce waste from overbuying.
These steps cut waste, lower your material costs, and help the environment by keeping usable paint out of the landfill. If you’re unsure whether a can is good enough to donate or reuse, perform a small adhesion and color test or check with the receiving organization before handing it over.
Consolidating and Donating Leftovers
Got half-used cans of the same color paint? Combine ’em! It’s easier to store one big can than several small ones. Just make sure they’re compatible – same base, same type.
Don’t forget: Stir well before mixing. And mix in a large container first, then pour into your chosen storage can.
Can’t use it all? Donate! Local charities, schools, and community centers might need paint for their projects. Check online or ask around. They’ll appreciate it, and you’re keeping waste out of landfills.
Pro tip: Only donate paint in good condition. No curdled, separated, or foul-smelling stuff. Safety first!
Recordkeeping and Labeling for Future Reuse
Keep track of your paint with a simple label and log. Write the color, date opened, and any project notes right on the can. Use a permanent marker – it won’t come off in storage.
For the log: A notebook or spreadsheet works fine. List each can’s details, so you know what you’ve got and when to use it by. Keep it simple, keep it organized.
Before you buy more paint, check your log! You might already have what you need. No sense in wasting money – or paint.
Pro tip: Batch label your paint. If you’ve got a bunch of the same color, number them and keep track together. It’s easier to manage and use up.
Conclusion
Keep the core idea in mind: proper prep, solid storage, and a careful remix workflow protect your paint so it remains usable, safe, and looking right for years.
To make this work, follow a simple, straight path: inspect and clean the can, condition the contents if needed, seal tightly, label clearly with date and color, choose a stable, cool environment away from heat and sunlight, keep the lid snug, and set up a quick check routine to remix and reseal every few seasons while testing a small sample on a hidden patch before full reuse. If you stick to these steps in order and keep notes, you’ll avoid most common issues and save money in the long run.
Two mistakes to avoid are ignoring temperature and exposure, and skipping tests before big projects. Avoid heat sources, direct sun, and frequent opening that invites skin formation; always test a small amount on a hidden surface to confirm texture, color, and adhesion before committing to a larger batch. A practical rule is: if the sample looks or feels off, stop and reassess rather than forcing a full remodel of your project.
When in doubt, know when to call in a pro—if you encounter stubborn skin, lacquer-like separation, or off-odor, or you’re handling specialty finishes, seek expert advice. With careful practice, you can store partial cans confidently and reuse them later, keeping projects moving and waste to a minimum. Stay steady, follow the routine, and you’ll finish strong.
FAQ
How can I efficiently reclaim clay scraps without wasting material?
Keep scraps sorted by color and add small bits to a dedicated reclaim bucket. Break up larger pieces, reclaim moisture slowly, and avoid introducing fresh contaminants into the mix.
Is it safe to mix glazes from scratch, and what should I watch for?
Yes, you can mix glazes from scratch, but follow the manufacturer instructions and label everything clearly. Check compatibility of components and never guess on drying or firing behavior—test small batches first if possible.
What are practical glaze recycling techniques for a DIY project?
Reuse clean glaze leftovers by straining solids, remixing with compatible bases, and storing in labeled containers. Avoid cross-contamination by keeping colors and base types separate and using fresh lids to prevent evaporation.
What are common mistakes when reclaiming clay and how can I avoid them?
Common errors are adding too much moisture too quickly, letting contaminants in, and not testing reclaimed material before use. Always inspect for pinholes, dryness, or separation, and run a small test before committing a big batch.