
Introduction
A cold joint rescue is blending a second-day concrete pour to erase the seam and create one continuous surface.
If you can see a raised line, a color change, or a rough edge where the old pour meets new concrete, that’s a cold joint. The goal is to make the transition look and act like one continuous slab, not two pieces.
Before you pour again, prep the edge by cleaning, removing flaky material, and roughening the surface so the new concrete bonds.
Use a proper placement technique and a compatible mixer or bag mix, and follow the manufacturer or local rules for timing and curing. If you’re unsure about the right approach, check product labels or instructions for surface prep, admixtures, and timing, and consider a small test patch first.
Key takeaways
- Identify cold joints by visible change in texture and color at interface.
- Rinse surface, gouge, and use bonding agent before continuity pour.
- Wear eye protection and gloves when prepping surfaces and applying bonding agents.
- Use compatible mixer and staggered pour to reduce cold joint risk.
- Cure with proper protection and avoid sealing prematurely to prevent cracking.
- Inspect for dampness, clean edges, and schedule follow-up pours during dry conditions.
Table of Contents
- Introduction
- Key takeaways
- What Is a Cold Joint and Why It Matters
- Visual Checkpoints and Diagnostic Methods
- Tools and Materials Checklist
- Preparing Existing Concrete Before Continuing a Pour
- Techniques for Blending New Concrete with Old
- Finishing Techniques to Hide the Seam
- Curing, Protection, and Long-Term Durability
- Safety, Common Mistakes, and Cost Considerations
- Conclusion
- FAQ
What Is a Cold Joint and Why It Matters
A cold joint is a formal seam where new concrete meets old concrete without a full, cohesive bond. It differs from a true seam created with proper tooling or dowels. This matters for both slabs and walls because it can act like a weak link.
Common causes include long time gaps between pours, temperature swings, insufficient surface prep, or surface moisture preventing proper adhesion. The structural risks include reduced bond strength, differential movement, and potential cracking. Aesthetic concerns feature visible lines, texture mismatches, and moisture-related staining that can undermine long-term performance.
Causes of cold joints
Cold joints form when concrete pours are not properly sequenced, or conditions aren’t right for a strong bond. Here’s what causes them:
Delayed re-pours: Waiting too long between pours lets the first layer set and dry out. This stops the new concrete from bonding.
Insufficient consolidation: If the initial pour isn’t properly compacted, it won’t have a strong surface for the next layer to stick to.
Temperature or weather interruptions: Sudden temperature drops or rain can stop the chemical reaction that makes concrete harden. This leaves you with two separate layers instead of one continuous pour.
Structural versus cosmetic effects
Cold joints can cause both structural and aesthetic issues. Here’s how to tell them apart:
Structural: These affect the strength and durability of your concrete. They include reduced bond strength, increased risk of cracking, and potential movement between layers.
Check for these by tapping the joint with a hammer. A hollow sound indicates a weak bond. Also, look for any visible cracks or movement.
Cosmetic: These don’t affect your concrete’s strength but can make it look bad. They include visible lines, texture mismatches, and waterproofing issues.
These are usually obvious to the eye. However, they might also cause problems like honeycombing or rough finishes if not addressed.
Visual Checkpoints and Diagnostic Methods
Visual signs of a cold joint include a distinct line or abrupt transition, color or sheen mismatch, and rough or powdery textures at the seam. Exposed laitance or honeycombing may also appear along the edge.
Diagnostic checks should cover surface hardness, tapping for hollow sounds, and a light scratch test with a stiff tool to gauge cohesion. Document any spalling, delamination, or bridging gaps. Note environmental factors like pour date, ambient temperature, and curing conditions that affect bonding.
What to look for on the surface
Before you start any repair, use this checklist to identify visible signs of a cold joint.
- Distinct line or abrupt transition: Look for a clear seam between the two pours. This is often the most obvious sign of a cold joint.
- Color mismatch: Concrete can darken over time, but if there’s a sudden change in color at the seam, it could indicate a cold joint.
- Differences in sheen or texture: A smooth surface should be consistent. If you see variations, check for a cold joint.
- Exposed laitance or honeycombing: These are signs of poor bonding and can indicate a cold joint.
- Rough or powdery surface at the joint: This is often due to improper curing or lack of bonding between pours.
- Hairline gaps or offsets: Even tiny gaps can signal a cold joint. Check for these with a straight edge.
Quick rule: If you spot any of these signs, it’s likely you’ve found a cold joint that needs attention.
Simple tests and when to escalate
These basic checks can help confirm if you’re dealing with a cold joint. Know your limits though, and when to call in professionals.
- Gentle tapping test: Tap the surface with a hammer or even a screwdriver handle. A hollow or dull sound could indicate a void or weak bond at the seam.
- Scratch or gouge test: Use a stiff tool like a flathead screwdriver to scratch the surface. If it’s easy to gouge, that’s a bad sign.
- Check for spalling or delamination: These are signs of serious deterioration and should be addressed immediately.
- Use a flashlight or borescope: Inspect the joint edge for sheen, laitance thickness, or voids. This can help confirm if it’s a cold joint.
- Look for moisture migration or plastic shrinkage: These can indicate improper curing and bonding at the seam.
Quick rule: If your tests reveal serious issues, don’t hesitate to call in professionals. They have tools like pull-off testing or core drilling that can provide more accurate data.
Tools and Materials Checklist
Define the scope of the second-day prep by identifying the joint location, cure status, and the intended bonding method. Decide between mechanical roughening, bonding agents, and moisture management strategies to avoid a future cold joint.
Prepare surface prep tools (paddle, wire brush, grinder with a diamond wheel, shop vacuum) and mixing gear (drill, paddle). Include measurement and marking tools (tape, chalk line, level) and gather bonding primers or polymer additives as per manufacturer instructions.
Essential tools for preparation and placement
Before you start, ensure you have the right tools to prep and place your second-day pour. This checklist covers everything from cutting and cleaning to forming and placing.
- Tape measure: To accurately mark out and measure your joint location.
- Chalk line: For snapping straight, visible lines on the surface.
- Level: To ensure your pour is flat and even.
- Wire brush: To clean and remove any loose material from the existing surface.
- Scraper or chisel: For removing laitance and roughening the surface.
- Angle grinder with diamond cup wheel: For grinding down high spots and creating a uniform surface.
- Shop vacuum: To clean up dust and debris before and after pouring.
- Mortar hawk and trowel: For applying any bonding agent or polymer admixture.
- Paddle mixer (handheld): To mix your new concrete batch for a consistent pour.
- Forming tools (tamping bar, screed, etc.): To shape and level your second-day pour.
Quick rule: Having the right tools ensures a smooth prep process and a strong bond between your first and second-day pours.
Recommended materials and what to verify
Choosing the right materials is crucial for a successful second-day pour. This checklist covers bonding agents, mixes, admixtures, and sealers.
- Bonding agent: Choose one that’s compatible with your existing concrete and follow manufacturer instructions for application.
- Cementitious material: Match the type and strength of your original pour to maintain consistency.
- Polymer-modified additives: Consider using these for improved durability and bond strength, if needed.
- Admixtures: Use workability-enhancing admixtures to ensure a smooth, consistent pour.
- Water-to-cement ratio: Maintain the same ratio as your original pour for consistency in strength and appearance.
- Sealer or joint filler: Choose one that matches your existing concrete’s color and texture to minimize the appearance of a seam.
- Manufacturer data sheets: Always check these to ensure you’re using the right materials for your specific application.
- Local standards: Verify that your chosen materials comply with local building codes and standards.
Quick rule: Using the right materials and verifying their suitability ensures a strong, seamless bond between your first and second-day pours.
Preparing Existing Concrete Before Continuing a Pour
Inspect the slab for laitance, spalling, cracks, and lingering contaminants that could impede adhesion. Decide if sections require removal or repair prior to the next pour. Use caution when identifying areas needing repair and document findings for reference.
Clean thoroughly with a stiff brush, detergent, and degreaser if needed. A low-pressure wash or light grinding can help expose sound concrete. Roughen the surface to create a proper key using a grinder or wire brush, then address moisture and contamination before bonding.
Cleaning, removing laitance, and roughening
Start by clearing the surface of any loose debris with a stiff brush. Use a detergent solution to scrub away dust, dirt, and oils. If there’s paint or heavy contamination, use a degreaser.
Remove laitance – that thin, weak layer on top – using a low-pressure wash or light grinding. The goal is to expose sound aggregate and create a rough profile for better bonding.
Be careful not to damage the underlying concrete. Use a grinder with a coarse blade or a wire brush to achieve an appropriate surface tooth.
Repairing loose areas and addressing contamination
Remove any delaminated material using a chisel or grinder. Fill voids with a patching compound, ensuring a uniform substrate thickness.
If there are oil or chemical contaminants, clean them thoroughly. Use a degreaser if necessary, then rinse well to remove any residue that could impede adhesion.
Test for moisture vapor emission using a calcium chloride test kit. If the slab is damp, allow it to dry completely before proceeding.
Dewatering, priming, and applying bonding agents
Ensure the substrate is dry. If there’s moisture, consider using a dehumidifier or other dewatering methods to speed up drying.
Choose an appropriate primer or bonding slurry compatible with your new concrete mix. Follow manufacturer directions for application timing. Typically, you’ll need to apply it and let it cure/activate before the pour.
Perform a bond test using a small patch or skim coat to confirm adhesion before proceeding with the full pour. This ensures your preparation work has been effective.
Techniques for Blending New Concrete with Old
Set a clear goal of structural continuity and a visually seamless blend, and define when it is better to rework versus proceed. Establish acceptance criteria for bond and appearance before starting.
Mechanical methods include keying, roughening, and physical interlock with dowels or keys. Chemical bonding can involve bonding agents, overlays, and color-tinting strategies to match shade, plus proper surface prep for adhesion.
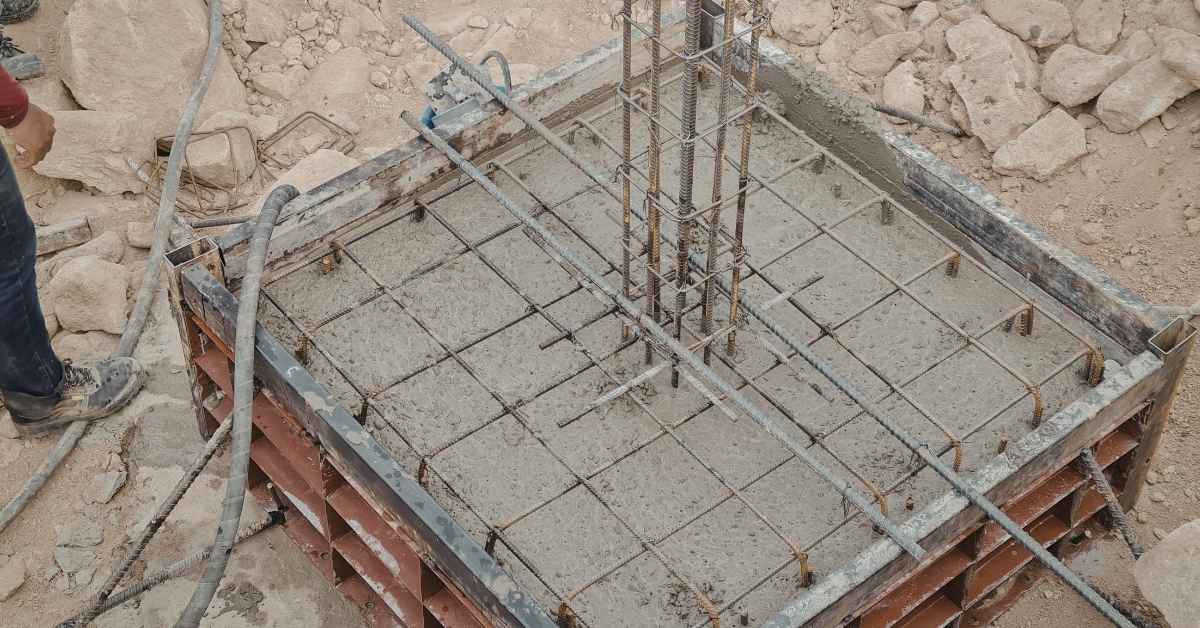
Creating mechanical keys and reinforcement ties
To achieve structural continuity across the cold joint, you need to create physical interlocks. Here’s how:
Doweling: Drill holes into both the old and new concrete. Insert steel dowels, securing them with epoxy or grout. This transfers loads evenly.
Keys and shear keys: Cut grooves (keys) into the existing surface before pouring new concrete. This increases the bond area and prevents slippage.
For rebar extension, cut and bend rebar ends from the old pour, then embed them in the new concrete. Stagger them to distribute stress evenly.
Matching mix, slump, and using admixtures
To blend new concrete with old visually, match the mix. Here’s how:
Use similar aggregates. They should be of comparable size, shape, and color.
Adjust slump to match the existing concrete’s consistency. Too much water weakens the new pour; too little makes it difficult to place.
Use admixtures sparingly to enhance performance or color. But remember, too many can affect curing and strength development.
Placement methods and consolidation
Proper placement minimizes cold-joint lines:
Place new concrete against the existing surface, working from one side to the other. This helps avoid weak planes.
Vibrate the new concrete thoroughly using a poker vibrator. This eliminates voids and ensures good consolidation.
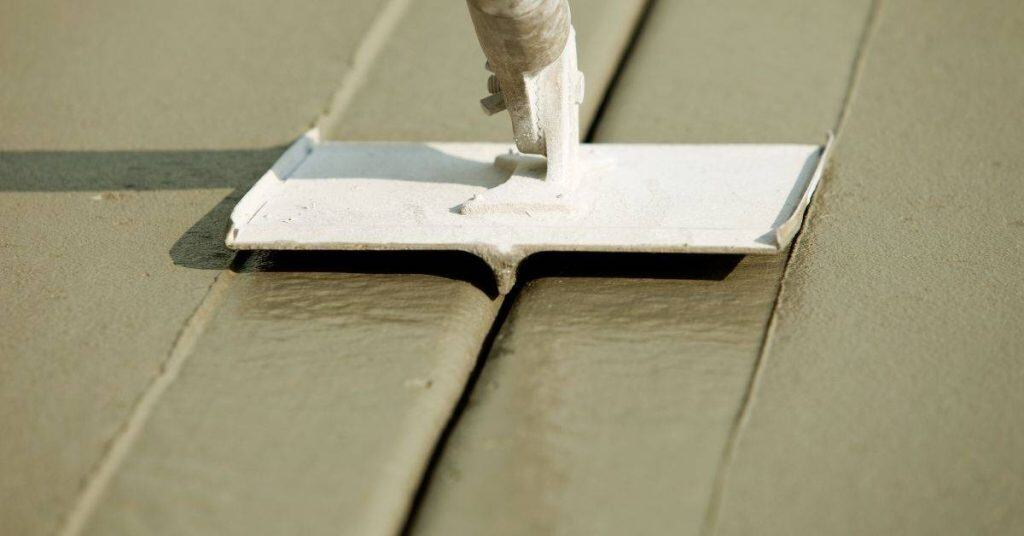
Finish the new pour with a float or trowel, matching the texture of the existing surface. Feather the edges to blend seamlessly.
Finishing Techniques to Hide the Seam
Plan texture reproduction from the existing surface, whether trowel lines, broom finish, or stipple, and outline steps to reproduce it along the seam for visual continuity. Mood and lighting can affect perceived texture, so consider these during finishing.
Coordinate color, stains, sealers, and patch compounds to minimize contrast. Use feathering, micro-sanding, and light rolling or glazing as needed, then verify with multiple viewing angles before final sealing.
Texture matching and tool selection
Recreating the existing pour’s texture is crucial to hide the seam. Here are tools and techniques to achieve that.
- Broom finish: Use a broom with stiff bristles, similar to the original. Work perpendicular to the seam for consistency. Timing: Texture within 15-30 minutes after pouring.
- Trowel lines: Use a magnesium float or steel trowel to create consistent groves. Practice on scrap concrete first. Timing: After initial broom finish, wait 20-30 minutes before troweling.
- Stipple finish: Use a stipple tool with rubber or plastic tips. Apply in circular motions for an even texture. Timing: After troweling, wait 15-20 minutes before stippling.
- Rentable tools: Broom finishers, magnesium floats, and stipple tools can be rented at home improvement stores. Prices vary but expect around $30-$60 per day.
- Patterned finishes: Use a patterned tool or stamp for complex textures. Practice on scrap concrete first. Timing: After initial finish, wait 15-20 minutes before stamping.
Coloring, staining, and surface treatments
Matching the color of your existing concrete is key to hiding the seam. Here are some options:
Integral color: Add color to the concrete mix before pouring. This ensures consistent color throughout but requires precise measurement.
Stains: Apply stains after the concrete has cured (at least 28 days). Test on small areas first to ensure even coverage and desired shade. Consider oxidation times for natural-looking results.
Topical coatings: Use sealers, dyes, or epoxy overlays to change the surface color. These can be applied after the concrete has cured and provide a quick way to match colors. Always test on small areas first.
Curing, Protection, and Long-Term Durability
Coordinate curing methods for the second-day pour and avoid seam disturbance during early cure. Consider curing compounds, misting, or blankets, and plan around environmental conditions.
Implement protective measures to control moisture loss and temperature shifts. Think about long-term durability, possible expansion joints, and appropriate coatings for joint encapsulation and appearance maintenance.
Appropriate curing strategies
Listen up, homeowner. Concrete needs moisture to gain strength, just like you need water to survive. Here’s how to keep it happy:
Keep it wet, but not too wet. Aim for a damp surface, not dripping. Check your concrete mix’s label or manufacturer instructions for the right duration. It’s usually around 7 days, but can vary.
Use plastic sheets or curing compounds to seal in moisture. Don’t rely on rain alone; it can cause surface damage. And whatever you do, don’t let it dry out too fast. That’s a one-way ticket to cracks and weak concrete.
Protecting the repair from traffic and weather
Once you’ve made your repair, it’s crucial to protect it while it gains strength. Here’s what you need to do:
Temporary Protection: Cover the repaired area with a protective membrane or plastic sheeting. This shields the repair from rain and snow, preventing damage from freeze-thaw cycles. Check your local climate data to determine how long this protection is needed.
Load Restrictions: Keep traffic off the repair until it’s fully cured. For most concrete repairs, this means no heavy vehicles or foot traffic for at least 7 days. Always check the product label or manufacturer instructions for specific guidelines. If you’re unsure, consult a local engineer.
Chemical Exposure: Protect your repair from chemicals that could damage it while it’s curing. This includes de-icing salts in winter and any chemical spills. Keep the area clean and dry as much as possible.
Inspection schedule and maintenance tips
Use this checklist every two weeks for the first three months after your repair, then quarterly thereafter. Regular checks help catch issues early, preventing costly rework.
- Check Joint Width: Ensure joint width is within 1/2″ to 3/4″. Too narrow restricts expansion, too wide allows water intrusion.
- Inspect Surface Level: Check for any dips or high spots. Uneven surfaces can cause water ponding and increased wear.
- Check Joint Filling: Ensure joint filler is fully seated and flush with the surface. Any gaps can allow water and debris to enter.
- Inspect Expansion Joints: Check for proper movement. If frozen, they may need adjustment or replacement.
- Check Curing Progress: Monitor curing process. Insufficient curing causes rapid drying and reduced strength.
- Inspect Edges: Check for any cracks or separations at joint edges. These can grow quickly if left untreated.
- Monitor Traffic Loads: Ensure loads are within design limits to prevent excessive stress on the repair.
- Check Drainage: Verify proper drainage away from the repair. Standing water weakens concrete and promotes deterioration.
Quick rule: Always address any issues found during inspections promptly to prevent minor problems from becoming major ones.
Safety, Common Mistakes, and Cost Considerations
Outline site safety requirements, including PPE, ventilation, and temperature controls for pouring and curing. Address lockout/tagout and safe setup around fresh concrete for a DIY crew.
Highlight common beginner mistakes such as inadequate moisture control and poor cleaning, and discuss how these affect bond. Compare repair strategies and outline practical cost considerations without compromising seam strength.
Safety measures on existing concrete jobs
Working with existing concrete requires careful safety planning. Always wear appropriate PPE, including hard hat, safety glasses, and steel-toed boots.
Fall protection is crucial when working at heights. Use guardrails or personal fall arrest systems as needed.
Ventilation is key when saw cutting existing concrete to prevent dust inhalation. Use a wet saw or ensure proper ventilation with fans.
Safety data sheets (SDS) should be consulted for any bonding agents and admixtures used. Handle these materials according to the manufacturer’s guidelines, using appropriate gloves and protective clothing.
Common beginner mistakes to avoid
Even with the best intentions, beginners can make costly mistakes when repairing cold joints. Here are some common pitfalls to steer clear of:
- Inadequate surface prep: Proper cleaning and roughening of the first-day concrete is crucial for bond strength. Neglecting this step can lead to delamination.
- Poor timing: Attempting repairs under unsuitable temperatures or without proper cure/finish timing can compromise seam strength and durability.
- Mismatched finishes: Using different concrete mixes, additives, or surface treatments on the new pour can result in visible seams and inconsistent appearance.
- Neglecting moisture management: Properly managing moisture before, during, and after pouring is vital to prevent cracking and other defects.
Take your time to prepare the surface correctly, follow temperature guidelines, and allow adequate cure time to ensure a strong, durable repair.
Cost factors and choosing a repair method
The cost of repairing cold joints varies depending on several factors. Understanding these variables can help you make informed decisions about your repair method.
Labor costs are often the most significant expense, especially for complex repairs like full break-and-pour. Obtain multiple quotes to compare labor rates and efficiency.
Material costs include bonding agents, polymers, sealants, and any additional concrete needed. Simpler methods like simple overlays may require fewer materials but could need reapplication if the underlying issue isn’t addressed.
Consider method complexity and potential downtime when choosing a repair method. More complex repairs may have higher upfront costs but could offer better long-term durability, saving you money in the long run. Weigh these factors against your budget and timeline to choose the best approach for your needs.
Conclusion
One solid seam matters for safety, durability, and a clean look. If you stay disciplined, you can blend a second-day pour without creating a weak or obvious patch.
Next, check the plan in plain terms: inspect the old surface for moisture and roughness, clean and roughen the area, apply a bonding step if you have one, mix and place new concrete to match the existing slab, feather the new into the old with consistent depth, smooth and finish the joint, then cure and protect it until fully set.
Avoid these common missteps: rushing the process or skipping surface prep, using cold or contaminated concrete, and trying to patch a joint that isn’t properly prepared. Always wear PPE, keep the work area well ventilated, test a small area first, and stop if conditions are unsafe or the joint won’t hold. If in doubt about moisture, subsurface conditions, or structural load, slow down and reassess before proceeding.
If the job needs more than surface prep, or if you see large cracks, hollow spots, or ongoing movement, call a professional. When you can proceed safely, stay methodical, document each step, and finish with a proper cure to stay on track for long-term durability and a solid look.
FAQ
How can I identify a cold joint on my existing concrete before pouring again?
Look for a visible line or change in texture where the old and new concrete meet. A cold joint often feels rough or glossy at the seam. If unsure, do a light abrasion test and check the surface for a distinct break or color difference after a quick test patch.
What are the practical steps to blend a second-day pour with the old concrete?
Roughen the old surface to create a key. Clean dust and loose material, then apply a bonding agent per the manufacturer’s instructions if you’re using one. Pour fresh concrete and work it into the edge with a squeegee or trowel to minimize a hard seam.
What surface preparation is essential before continuity pours?
Remove all loose material, laitance, and debris from the edge. Dampen the surface as needed per product guidance to avoid drawing water from the new mix. If using a bonding agent, apply it exactly as directed on the label.
How do I choose a mixer and mixing method for blending old and new concrete?
Use a mixer that’s appropriate for the amount and type of concrete you’re handling. Follow the manufacturer instructions for timing and mixing speed. If in doubt, consult the product label or ask the supplier about compatibility with your project.