
Introduction
Rust telegraphing through concrete patches happens when corroded rebar pushes outward, showing up as stains, cracks, or rough patches on the surface. This is a sign the patch is not fully sealing the reinforcing and moisture is getting to the steel. In this article we’ll explain what to look for and how to approach repairs in plain, hands-on terms.
You’ll learn how to spot when rebar is too close to the surface and what that means for patch durability. We’ll cover practical steps to repair rust marks, set up a patch that lasts, and check workmanship for a solid, long-lasting result. Think of this as a straightforward, tool-safe guide you can follow on a weekend project.
Key takeaways
- Identify rust staining and flaky patches before patching to prevent surface telegraphing.
- Rebar too close often shows through when patch mix lacks bonding or cure.
- Remove loose material, clean properly, and roughen surface for better patch adhesion.
- Choose patch repair methods compatible with acoustic or visual rust marks.
- Plan for long-term protection: sealant, coating, and rebar corrosion monitoring schedule.
- Safety note: wear eye protection and respirator when grinding near rust stains.
Table of Contents
- Introduction
- Key takeaways
- What Is Rust “Telegraphing” and Why It Matters
- Causes When Rebar Is Too Close to the Surface
- Inspecting and Diagnosing Rust Telegraphing Problems
- Safety, Health, and Environmental Considerations
- Planning the Repair: Active Vs Dormant Corrosion and Scope Definition
- Concrete Patch Repair Methods for Rust Telegraphing
- Prevention Strategies During Concrete Placement and Long-Term Protection
- Tools, Materials Checklist and Material Specs Explained
- Conclusion
- FAQ
What Is Rust “Telegraphing” and Why It Matters
Rust telegraphing is when corrosion of embedded rebar shows up on the surface as staining or visible distress. It can appear as cracks, delamination, or bulges near the metal. This signal flags hidden vulnerability in the structure and deserves careful attention.
Moisture, chlorides, and electrical potentials drive corrosion and create internal cracking that pushes outward toward the patch. The result is a creeping failure that weakens load transfer and may threaten safety. Watch for staining patterns, expanding cracks, or spalling that point to too-close rebar and inadequate cover.
How telegraphing differs from other surface defects
Telegraphing is caused by corrosion of embedded steel rebar, unlike other surface defects. Here’s how it differs:
Corrosion-driven defects: These are caused by moisture and chlorides attacking the rebar, leading to rust formation that expands and causes cracking from within.
Shrinkage cracks: These are usually thin, random, and form due to concrete drying out. They don’t widen over time or indicate internal corrosion.
Plastic settlement cracks: These occur when fresh concrete settles as it hardens. They’re often wider at the top and narrow downwards, not caused by corrosion.
Thermal cracking: These are caused by temperature changes causing expansion and contraction of the concrete. They don’t indicate internal corrosion like telegraphing does.
Typical signs to watch for
Knowing what to look for can help you identify corrosion-driven damage early:
Visible indicators: Stains (brown, rust-colored), map cracking (interconnected cracks forming a pattern), spalling (concrete flaking or breaking off), and powdering (a crumbly surface) all suggest corrosion.
Behavioral signs: Active leakage (water seeping out), expanding cracks (cracks widening over time), and bulging or puffing of the concrete surface near rebar locations can indicate ongoing corrosion.
If you notice any of these signs, it’s time to investigate further. Don’t wait until the damage is severe.
Causes When Rebar Is Too Close to the Surface
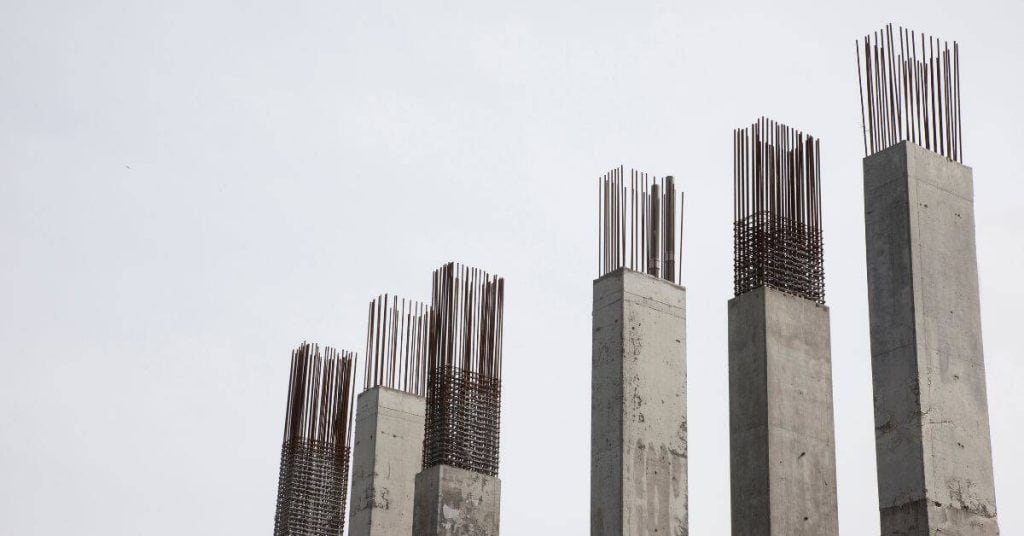
The mechanism starts with insufficient cover and poor consolidation. That combination creates pathways for moisture, oxygen, and chlorides to reach steel and accelerate corrosion. The corrosion products then press upward against the patch, making the defect visible.
Critical factors include how thick the cover is, how well the concrete was compacted, and whether cracks or voids exist. Chloride and carbonation exposure, plus surface moisture, all feed the upward pressure and telegraphing tendency.
Role of concrete cover and placement errors
Ensuring proper concrete cover over rebar is crucial to prevent corrosion. Here are common mistakes to avoid:
- Insufficient cover: Check design and as-built records to ensure minimum cover thickness relative to rebar size.
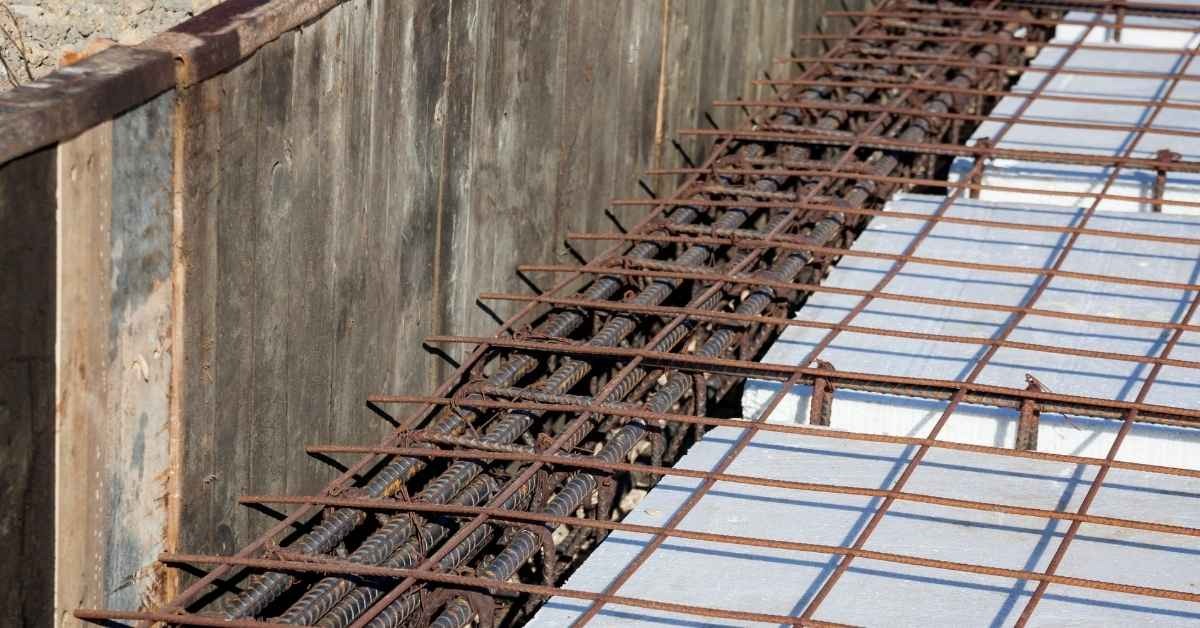
- Poor consolidation: Vibrate concrete properly during placement to eliminate voids that can trap moisture and oxygen.
- Formwork errors: Ensure forms are properly aligned and supported to maintain cover throughout the pour.
- Rebar placement: Verify rebar is correctly positioned within the formwork, following design specifications.
Proper cover and placement protect rebar from corrosive agents and help maintain concrete’s integrity.
Environmental and material contributors
Material choices and environmental factors can exacerbate corrosion when cover is marginal. Consider the following:
- Deicing salts: Use appropriate deicers for your region, and rinse surfaces regularly to prevent chloride buildup.
- Marine exposure: Specify higher-quality concrete mixes with greater resistance to sulfate attack if exposed to seawater.
- Poor concrete mix: Use high-quality aggregates and appropriate admixtures for your climate to minimize cracking and staining.
- Carbonation: Limit exposure to carbon dioxide-rich environments, as it can accelerate corrosion when combined with moisture.
- Inadequate curing: Ensure proper curing to develop concrete’s strength and resistance to moisture penetration.
Inspecting and Diagnosing Rust Telegraphing Problems
Rust telegraphing signals underlying issues such as active or dormant corrosion and potential rebar deterioration. It also hints at how long a patch might hold and what prep is needed before repair.
Use a practical visual checklist to spot stains, delamination, spalling, or exposed rebar. Simple DIY checks like tapping for hollow sounds can indicate delaminated zones, and roughness can reveal bonded versus loose layers.
Visual and simple field checks
Start your inspection by visually mapping the affected area. Look for rust-colored stains, surface delamination, powdery or spalling concrete, and exposed rebar.
Sounding is another quick check. Tap or knock on the concrete with a hammer. Hollow or dull sounds indicate delaminated zones where the concrete has lost its bond with the underlying layers.
Measure crack width and distribution using a simple ruler or feeler gauge. Narrow cracks (less than 0.2mm) may not require immediate attention, but wider ones should be prioritized.
When to use nondestructive tests and when to open up
Nondestructive testing (NDT) can provide deeper insight without causing further damage. Use a cover meter to estimate rebar depth, or a rebound hammer to measure concrete strength.
Moisture mapping can help locate water intrusion points. However, these tests have limitations. If you suspect significant damage or need precise information, consider cutting test patches to expose the underlying structure.
When in doubt, consult a structural engineer. They can provide professional guidance and ensure your repairs are safe and effective.
Safety, Health, and Environmental Considerations
Immediate hazards include appropriate PPE, ventilation, and fall protection. Set up clear work zones and control access to limit exposure and accidents. Keep the site organized to reduce slip risks and missteps during messy repairs.
Dust, rust, and old coatings can carry contaminants. Plan for dust suppression, containment, and careful handling of waste materials. Check for regulatory requirements and keep records of safety checks and training.
Personal protective equipment and dust control
Safety starts with the right gear. Here’s what you need during concrete removal and grinding.
- Respiratory protection: Use a half-face respirator with P100 filters to protect against rust particles and contaminants. Tip: Rent for around $50/day.
- Eye/skin protection: Wear safety glasses with side shields and disposable gloves. Key: Change gloves frequently to prevent cross-contamination.
- Hearing protection: Use earplugs or earmuffs when using power tools. Tip: Disposable foam earplugs are cheap and effective.
- Head, foot, and clothing protection: Wear a hard hat, steel-toed boots, and long-sleeved shirt to protect against falling debris and chemicals. Key: Ensure your gear is in good condition before starting work.
- Dust suppression/collection: Use water spray during grinding to control dust. Collect dust with a HEPA vacuum or use an enclosure around the work area. Tip: Rent a HEPA vac for about $30/day.
Waste handling and local regulations
Proper waste disposal protects your health and the environment. Here’s how to handle contaminated materials:
Concrete and rust residues: Segregate and contain these wastes separately. They can be disposed of in a regular landfill, but check local regulations first.
If old coatings are suspected to contain regulated materials like lead, follow these steps:
– Consult hazardous-waste guidance for proper handling.
– Contact your local waste management authority for disposal instructions.
– Keep records of all waste handling and disposal activities.
Chemical wastes: Segregate and contain these separately. Dispose of according to the manufacturer’s guidelines (found on Safety Data Sheets). Always check local regulations before disposing of chemicals.
Planning the Repair: Active Vs Dormant Corrosion and Scope Definition
Distinguish active corrosion from dormant conditions by looking for ongoing signs like rust bleed or progressive damage. This difference drives how you approach the repair and what level of intervention is needed.
Use practical assessment methods to map activity and document the extent of contamination. Define clear repair boundaries and decide whether the goal is a temporary patch or a full rehabilitation, with success criteria in mind.
Assessing movement and structural implications
Before diving into repairs, understand what’s causing the rust ‘telegraphing’. Is it ongoing water ingress, cracking, or structural load issues? Here’s how to assess:
Check for movement: Look for cracks that are widening or new ones forming. This could indicate an underlying structural issue.
Inspect load paths: Check if the rusting rebar is part of a load-bearing element. If so, temporary shoring might be needed before repairs.
Remember, if you find signs of movement or structural issues, address them first. Patching over these problems won’t solve the root cause and could lead to further damage.
Cost and downtime trade-offs
Repairing rust ‘telegraphing’ involves more than just patching. Here’s what impacts cost and schedule:
Labor: The complexity of the repair, access issues, and whether it’s a temporary or structural fix all affect labor costs.
Access: If the repair is in a hard-to-reach area, you might need specialized equipment, which adds to cost and downtime.
Environmental controls: Depending on the size of the repair and local regulations, you might need dust control measures or other environmental protections.
To keep costs down and minimize downtime, prioritize critical areas first. Get multiple estimates from reputable contractors to compare options.
Concrete Patch Repair Methods for Rust Telegraphing
Begin by confirming the rust and delamination extent, then plan the sequence for removal, rebar treatment, and bonding. Reference industry standards and avoid prescribing exact dosages or product names to stay within safe guidelines.
Describe safe concrete removal and rebar de-rusting, then apply inhibitors or protective coatings as appropriate. Ensure the surface will accept a repair mortar and that curing will meet standard practice for durable bonding and resistance to telegraphing.
Rebar treatment and corrosion-control options
First off, you gotta stop the rust. Here’s how:
1. Clean it up: Use a wire brush or grinding tool to mechanically remove rust. Be safe, wear eye protection and gloves.
2. Repair section loss: If rebar’s lost some meat, you’ve got options:
– Physical repair: Fill with a cement-based grout or use a concrete patch.
– Corrosion inhibitors: Apply a coating to slow rust. Check product labels for the right one.
– Sacrificial/anodic repairs: Use a zinc coating to take the hit instead of rebar.
3. Replace or splice: If rebar’s too far gone, replace it. For splicing, use a sleeve or lap splice, following manufacturer instructions and local codes.
Choosing and applying patch materials and bonding systems
The right materials ensure your repair lasts. Here’s what you need to know.
- Cementitious Repair Mortar (Type N): Used for general repairs, it’s cheap but has limited flexibility. Look for ASTM C476 strength class. It’s fine for small patches but can crack in larger areas due to shrinkage.
- Polymer-Modified Repair Mortar: More expensive, it’s flexible and durable. Check for polymer content (higher is better). Great for larger repairs and active cracks. Won’t crack like cementitious mortars.
- Epoxy Mortar: High strength, low shrinkage. Used for heavy-duty repairs. Look for high tensile strength. Expensive but worth it for critical areas. Requires proper ventilation during application.
- Bonding Agents: Use before applying patch material. Promotes strong bond between old and new concrete. Check compatibility with your chosen mortar. Cheap homeowner drill is fine to apply.
- Concrete Primers: Similar to bonding agents, they prepare the surface for better adhesion. Look for acid-resistant primers if you’re patching near acid sources (e.g., pool decks).
Pro tip: Always buy materials from reputable brands and stores. Check labels for storage conditions – some need to be kept cool or dry. Mix small batches at a time to avoid waste.
Finishing, curing, and verifying repair integrity
Once you’ve applied your patch material and bonding system, it’s time to finish the job right. Here’s how:
Finishing: Use a concrete trowel or float to match the texture of the surrounding concrete. Work quickly and smoothly to avoid leaving marks. If you’re unsure about the correct technique, check a video tutorial or ask at your local hardware store.
Curing: Keep that patch moist for at least three days to let it cure properly. You can use plastic sheeting or keep it wet with a sprinkler. Rapid drying can weaken the patch and cause cracking. Check the product label for specific curing instructions.
Verifying repair integrity: After the patch has cured, check its adhesion and stability. Tap it gently with a hammer (sounding) to listen for any hollow spots that might indicate delamination. Keep an eye on it visually over time to ensure it’s not cracking or separating from the base concrete.
Prevention Strategies During Concrete Placement and Long-Term Protection
Define cover requirements and keep rebar spacing in mind to minimize exposure. Practical tolerances depend on the project and local rules, so verify with current codes and guidance before pouring.
Focus on placement practices, low-permeability mixes, proper curing, and thoughtful joint and drainage details. Develop a plan for routine inspections and timely maintenance to curb future telegraphing risks.
Design and placement controls to ensure adequate cover
Adequate concrete cover over rebar is crucial to prevent rust ‘telegraphing’. Here’s how to ensure it:
1. Verify layout and pour: Check plans, mark out positions for chairs/spacers before pouring.
2. Use chairs/spacers properly: Place them accurately, maintain consistent height throughout the pour.
3. Consolidate well: Proper vibration ensures concrete fills all spaces around rebar, maximizing cover.
4. Review as-built placement: After pouring, compare actual placement with design to ensure no deficient cover areas.
Protective strategies post-cure
Once concrete has cured, implement these protective measures to slow chloride and moisture ingress:
1. Sealers and coatings: Apply appropriate sealers or coatings to reduce water absorption and prevent chlorides from reaching rebar.
2. Water management: Ensure proper drainage, slopes, and control joints to minimize standing water and reduce the risk of moisture ingress.
3. Monitoring schedule: Establish a routine inspection plan to check for signs of corrosion or cracking early, allowing timely repairs before they become major issues.
Tools, Materials Checklist and Material Specs Explained
Assemble a practical set of tools and PPE tailored to patch repairs around embedded reinforcement. Include dust management equipment, grinders, chisels, mixing tools, trowels, and respirators; plan for containment of dust and debris.
List common repair material types and the key specs you should verify, such as bond strength and cure conditions. Check product data sheets for compatibility with existing concrete and any corrosion protection requirements, plus local code references.
Tools and equipment for common repairs
Before you start any patch repair, make sure you have the right tools. This checklist helps you gather everything needed to tackle embedded reinforcement issues.
- Safety glasses: Protect your eyes from debris and dust.
- Gloves: Essential for handling sharp edges and chemicals.
- Respirator: Dust protection is crucial when grinding or chiseling.
- Grinder with diamond blade: For cutting and removing old concrete.
- Angle grinder with wire cup: For surface preparation and rust removal.
- Chisel set: For manual removal of damaged concrete.
- Dust collection system: To keep your workspace clean and safe.
- Mixing bucket: For preparing repair materials.
- Trowel set: For applying and finishing patches.
- Level and straight edge: To ensure patch surface is even.
- Moisture meter: To check substrate readiness before patching.
- Rebar locator tool: To find and mark embedded reinforcement.
Quick rule: Always double-check your tools before starting. Missing a crucial item can lead to delays or poor repair quality.
Material specs and standards to reference
Understanding material specifications and industry standards ensures you use the right products for your patch repairs. Here’s a checklist to guide your selection.
- ACI 301/318: These codes provide guidelines on concrete repair methods and materials.
- ASTM C881/C928: Standards for epoxies and grouts used in concrete repairs.
- Local building codes: Check for any specific requirements in your area.
- Manufacturer literature: Read product data sheets to understand performance specs, environmental ratings, and packaging sizes.
- Compatibility: Ensure materials are compatible with existing concrete and rebar protection systems.
- Tensile/adhesion properties: Check these values to ensure good bond strength between old and new concrete.
- Cure time and temperature range: Consider these factors when planning your repair schedule.
- Warranty/limitations: Understand what’s covered by the warranty and any limitations on use.
- Certifications (ASTM/ISO): Look for third-party testing certifications to ensure product quality.
Quick rule: Always document your material selection process and keep records for future audits or inspections.
Conclusion
Fixing rust telegraphing through concrete patch repairs is doable, but you must be deliberate and safety‑driven to keep it durable and looking right.
First, survey the signs, confirm the cause (active vs dormant corrosion), and map the extent. Then line up a simple plan: gather the right tools and materials, test a small area first, follow proper bonding and curing steps, and finally seal and protect the patch while you keep an eye on it for cracking or new rust.
Avoid these missteps: rushing the diagnosis or patch, using the wrong patch materials or bond coats, and skipping moisture control or curing steps. Don’t neglect safety: wear eye and skin protection, isolate the work area, and never work on damp or deteriorating concrete. If the rebar is severely corroded, or you’re unsure about structural implications, call in a professional rather than pushing ahead, and remember: with careful planning and steady execution, you’ll restore strength and appearance without wasting time or money.
FAQ
What causes rust telegraphing through a concrete patch when rebar is too close to the surface?
The rust stain follows the path of exposed rebar as corrosion pushes the surrounding concrete apart. When the rebar is shallow or near the surface, moisture and air accelerate rebound cracking and staining. The result is a visible, harder-to-hide rust line under patches.
How can I tell if rebar is too close to the surface in a slab?
Look for thin, almost translucent patches or dark lines that run in straight segments. Tap the area and listen for hollow sounds that signal voids or weak cover. If you see rust staining that seems to track along lines, check with a magnet or refer to the slab’s intended rebar depth from plans if available.
What repair steps help stop rust marks and improve patch longevity?
Remove loose concrete around the stain, clean the surface, and treat the exposed area per label directions. Use a patch material compatible with existing concrete and follow cure instructions closely. Seal joints and edges to limit moisture ingress after patching.
What safety considerations should I follow during patch repairs?
Wear eye protection, gloves, and a respirator if dust is heavy. Ventilate the area and control dust from grinding or chipping. Read product labels for ventilation, mixing, and curing instructions, and follow local rules on disposal of removed material.