
Introduction
A carbonation test shows how much the concrete has hardened through exposure to CO2, which can affect how anchors hold. This article walks you through what that means for anchors and simple repairs, in plain DIY language. You’ll learn what to check on materials, tools, and local rules when you plan a fix.
The test result helps you decide if anchors will perform reliably or if you need surface preparation or different products. We cover practical checklists, storage hints, and things to look for on label instructions and manufacturer guidance. Always verify with the product label and local requirements before proceeding.
Key takeaways
- Choose a country and verify local codes, standards, and climate effects for carbonation testing.
- Use reliable tools and materials; confirm labels and manufacturer guidance before testing.
- Product details matter; check mix type, cure options, and compatibility with anchors.
- Shelf life and storage conditions affect performance; store per label instructions.
- Interpreting results guides repairs; understand risks, alternatives, and safety precautions.
- Safety warning: wear PPE, follow ventilation and handling rules; concrete repairs can fail if rushed.
Table of Contents
- Introduction
- Key takeaways
- Choose a Country: Local Codes, Standards, and Climate Effects
- Why Carbonation Matters for Anchors and Concrete Performance
- DIY Carbonation Test Methods and Step-by-Step Procedures
- Tools and Materials Checklist
- Interpreting Results and What They Mean for Anchors
- Repair Options, Product Details, and Advantages
- Shelf Life, Storage Conditions, and Material Handling
- Application Instructions, Curing, Common Mistakes, and Safety
- Conclusion
- FAQ
Choose a Country: Local Codes, Standards, and Climate Effects
Local building codes and anchor standards shape how tests and repairs are done. Climate factors like freeze–thaw cycles, marine exposure, and deicing salts influence testing options and material choices. Before buying anchors or repair products, verify jurisdictional requirements with the right sources.
Consult national or regional codes, product standards, and regulatory guidance. Use authoritative websites or printed manuals and locate them quickly via official portals or professional associations. Practical decisions depend on how local rules affect test methods, acceptance criteria, and product selection under climate risk.
Where to check standards and approvals
To ensure you’re using approved anchors and repair products, consult these authorities:
Building Code Office: Check with your local building department for approved lists of anchors and repair materials that meet their specific codes.
National Standards Body: Look up national or regional standards like ASTM International, ACI (American Concrete Institute), or Eurocodes to ensure products comply with relevant standards.
Anchor Manufacturer Approvals: Verify if the manufacturer’s approvals match your local codes. Some manufacturers list approved regions on their websites.
How climate changes testing and repair priorities
Climate plays a significant role in determining the urgency of repairs and how you should test your concrete:
Humidity: High humidity speeds up carbonation, making repairs more urgent. Test for carbonation depth to determine the extent of repairs needed.
Temperature Cycles (Freeze-Thaw): Extreme temperature changes can cause concrete to deteriorate faster. Prioritize repairs in areas with frequent freeze-thaw cycles and test for signs of deterioration.
Chlorides (Marine Exposure, Deicing Salts): Chlorides accelerate reinforcement corrosion. If your area is exposed to marine environments or deicing salts, prioritize testing and repairs, and consider using chloride-resistant repair materials.
Why Carbonation Matters for Anchors and Concrete Performance
Carbonation lowers the pH of concrete over time, which can weaken the protective passive layer on steel. This raises corrosion risk for rebar and for embedded anchors. Understanding this helps explain repair urgency and long‑term performance concerns.
Relate carbonation to common failure modes such as corrosion‑induced cracking and bond loss. Affected factors include aging concrete, high moisture, cracking, and curing or sealing deficiencies. This connection guides retrofit choices and anchor planning.
Mechanism and signs of carbonation
The heart of the problem lies in a chemical reaction called carbonation. Over time, CO2 from the air diffuses into concrete, reacting with calcium hydroxide (a byproduct of cement hydration) to form calcium carbonate.
This lowers the pH of the concrete, typically from around 12-13 down to 8 or less. At these lower pH levels, the protective passive film on embedded steel starts to break down, increasing corrosion risk.
Visible signs of carbonation include:
- Rust staining on the concrete surface
- Spalling – flaking or chipping of the concrete cover
- Loss of cover – exposure of reinforcement due to deterioration of surrounding mortar
Common causes of carbonation-related deterioration
Carbonation is a natural process, but several factors can speed it up and exacerbate its effects:
Concrete porosity – higher porosity allows CO2 to penetrate more easily. This can be due to poor mix design or inadequate compaction.
Inadequate cover depth – insufficient concrete around reinforcement leaves steel more exposed to CO2 and moisture, accelerating corrosion.
Poor curing and environmental exposure also play a role:
- Inadequate curing allows the outer layer of concrete to dry out too quickly, increasing its permeability to CO2.
- High humidity or moisture levels increase the rate of carbonation.
- Wide cracks provide easy pathways for CO2 to reach embedded steel.
DIY Carbonation Test Methods and Step-by-Step Procedures
DIY carbonation testing has limits and should be understood before relying on results. Each method reveals different aspects of cover depth and progression. Use results to inform, not replace, professional assessments when critical anchors are involved.
Non‑destructive in‑place methods include simple surface tests and light observation techniques. Document exposure, color changes, and any observed patterns. Use a structured approach to interpretation and decision making.
Step-by-Step Process
The following steps guide you through performing DIY carbonation tests safely and effectively.
- Preparation: Gather safety gear (gloves, goggles), tools (hammer, chisel, drill, coring bits), reagents (phenolphthalein solution, water).
- Safety checks: Ensure no live electrical wires nearby. Wear appropriate PPE.
- Surface exposure: Carefully expose a small area of concrete using a hammer and chisel or by drilling with a coring bit.
- Main test: Apply phenolphthalein solution to the exposed surface, wait for color change (pink = uncarbonated, gray/white = carbonated).
- Documentation & cleanup: Record results, clean up tools and area. If unsure, consider consulting a pro.
Phenolphthalein spray test (practical steps)
The phenolphthalein spray test is a simple, non-destructive method to estimate carbonation depth.
First, ensure the surface is clean and dry. Then, apply phenolphthalein solution using a spray bottle or brush. Wait 10-15 minutes for the color reaction.
Pink: Uncarbonated concrete. Gray/White: Carbonated concrete. The depth of pink indicates carbonation depth.
If results are inconclusive (e.g., inconsistent color change), consider repeating the test or consulting a professional for further analysis.
Drill-depth profiling and core sampling overview
Drilling depth profiles involves taking small samples at varying depths to observe carbonation progression. It’s more destructive but provides better depth resolution.
Use a coring bit on a drill to extract small cores (1-2 inches in diameter). Start from the surface, incrementally drilling deeper with each sample.
The color change in each core indicates carbonation depth. If results are inconsistent or critical anchors are involved, consider sending samples for lab testing.
Non-destructive and rapid checks
Quick, non-destructive checks help identify potential carbonation issues without damaging the concrete.
Visual inspection: Look for cracks, spalling, or discoloration. Sounding: Tap the surface; dull sound may indicate delamination. Moisture check: Use a moisture meter to detect excess moisture.
Half-cell potential testing measures corrosion risk in reinforced concrete. It’s more complex but provides valuable insights into reinforcement health. Consult a pro for interpretation and when results are unclear.
Tools and Materials Checklist
Core tools and PPE should cover basic hand tools, measuring devices, and eye/respiratory protection. Choose appropriate PPE and ensure proper fit for the job. Keep a designated area for mixing and testing safety gear on hand.
Test methods and reagents should be listed with general setup steps and category links for indicators and kits. Favor non‑toxic options and refer readers to category pages rather than brand names. Include basic repair materials and cross‑references to repair system categories.
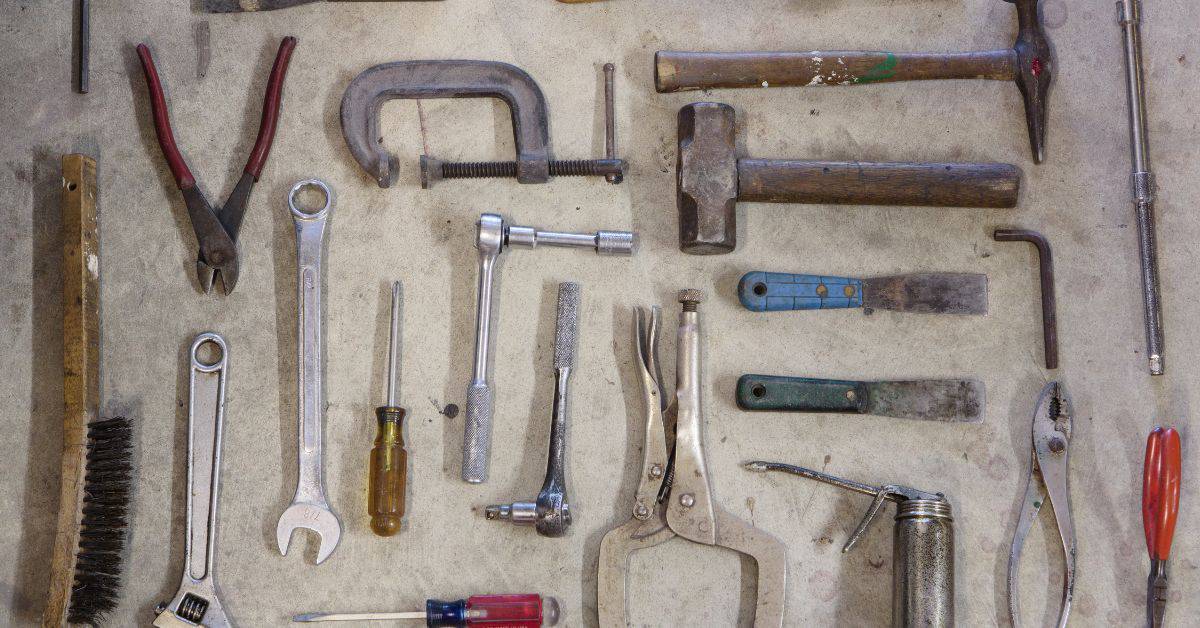
Essential tools and PPE
Before you start testing or repairing, ensure you have the right gear to keep you safe and get the job done.
- Drill with depth control: For core sampling and creating test patches. Without it, you might damage the concrete or miss critical areas.
- Hammer/chisel: To remove loose material and create small test samples. Neglecting this can lead to inaccurate results.
- Spray bottle: For applying phenolphthalein solution evenly. Inadequate application may result in false readings.
- Goggles: Protect your eyes from debris and chemicals. Skipping this risks eye injuries.
- Gloves: To protect your hands from harsh chemicals and sharp edges. Without them, you’re at risk of cuts and chemical burns.
- Dust mask or respirator: Essential for protecting against harmful dust particles. Improper fit or use can lead to respiratory issues.
- Hard hat: Required when working in areas with overhead hazards. Neglecting this can result in serious head injuries.
- Tape measure: To accurately measure test areas and repair dimensions. Inaccurate measurements can compromise results or repairs.
Quick rule: Always prioritize safety gear. It’s non-negotiable on any jobsite.
Reagents and consumables to have on hand
These are the chemicals, solutions, and materials you’ll need for testing and basic repairs.
- Phenolphthalein indicator: For detecting carbonation. Without it, you can’t accurately test for concrete deterioration.
- Cleaning solvents (isopropyl alcohol or acetone): To prepare surfaces for testing. Contaminants can skew results.
- Patching mortar samples: For small repairs. Using the wrong mix can lead to weak, ineffective patches.
- Temporary corrosion inhibitors: To protect exposed reinforcement during repairs. Omitting this can accelerate rebar corrosion.
- Epoxy or polyurethane anchoring adhesives: For securing new anchors. Inadequate adhesion can compromise anchor performance.
- Corrosion inhibitors (for anchors): To protect new anchor systems from corrosion. Skipping this can shorten the lifespan of your repairs.
- Surface bonding agents: To improve adhesion between old and new concrete. Without it, repairs may delaminate over time.
Quick rule: Always use high-quality materials to ensure lasting results.
Interpreting Results and What They Mean for Anchors
Carbonation results help define risk to existing anchors by showing how deep carbonation has progressed relative to embedment. This informs corrosion risk and bond strength expectations. Use the results to set the stage for next steps with anchors.
Translate findings into practical risk tiers and actionable decisions. Consider anchor type and embedment when deciding to re‑tighten, re‑anchor, or replace. When in doubt, consult anchor manufacturer guidance and seek structural input for critical work.
What positive vs. negative results indicate for pH and corrosion risk
The carbonation test tells us if your concrete’s alkaline protection is still working or not.
Positive result (no color change): Your concrete’s pH remains high, protecting steel reinforcement from corrosion. Corrosion risk is low.
Negative result (color change): Carbon dioxide has neutralized the alkalinity. Steel can corrode if moisture is present. Corrosion risk increases.
Consider both test results and visual/moisture evidence to assess your anchors’ condition.
Anchor selection and installation after testing
After testing, choose corrosion-resistant anchors. Stainless steel or galvanized are good choices.
Consider embedment depth. Deeper embedment reduces exposure to carbonation. Follow manufacturer’s guidelines for your chosen anchor type.
Verify suitability with the manufacturer’s specifications and local building codes. Always follow their installation instructions.
Install new anchors only in sound concrete. If you’re replacing anchors, remove and dispose of old ones properly.
Repair Options, Product Details, and Advantages
Identify repair options suitable for carbonation damage in a DIY context, including surface coatings, repair mortars, overlays, and bonded patches. Note when each option is appropriate for surface protection versus structural restoration. Match choice to the assessed carbonation impact.
Data‑sheet details to compare include base chemistry, intended use, substrate compatibility, curing requirements, and handling guidelines. Evaluate performance factors such as permeability, bond strength, and durability relevant to carbonation. Outline practical selection steps and cross‑references to category pages for materials.
Surface coatings and corrosion-inhibiting treatments
When carbonation damage is superficial, a surface sealer or coating can be sufficient. These treatments protect against further moisture intrusion and inhibit corrosion.
Vapor permeability is crucial; low perm values keep moisture out but allow trapped water to escape. Check data sheets for this info.
Ensure the chosen product has good adhesion to existing concrete. A proper bond prevents peeling and maintains protection. Always follow manufacturer’s guidelines for application and surface prep.
Repair mortars and patching systems
For deeper cracks or spalls, repair mortars are needed. These fill voids, restore structural integrity, and protect against further damage.
Check the setting type. Fast-setting mortars can be useful for quick repairs, while slower ones allow more working time. Consider the bond to existing concrete; a strong bond ensures the repair stays put.
Shrinkage is another key factor. Low shrinkage prevents cracks from forming around the patch. Always verify compatibility with your substrate’s chemical base and intended use.
Shelf Life, Storage Conditions, and Material Handling
Explain shelf life in practical terms for common DIY concrete products and how aging affects performance. Consider how cure times and bond strength may shift with storage conditions. Keep expectations aligned with product guidance.
Reading batch and expiry information is essential for reliable results. Verify lot numbers, use by dates, and storage notes before use. Maintain organized storage, rotate stock, and follow disposal guidance per local rules.
How to verify shelf life and product condition
Before using any concrete product, check its shelf life and condition. Here’s how:
Visual Checks: Look for signs of deterioration like cracks in the container or separation of components.
Smell Test: Some products emit a distinctive smell when they’ve gone off. Trust your nose, but remember, some reactive products always have a strong odor.
Mixing Test: If in doubt, mix a small amount. If it doesn’t combine smoothly or changes color unexpectedly, reject it.
Best on-site storage and handling practices
Store your concrete products right to maintain their performance:
Dry and Sheltered: Keep them in a dry, sheltered area away from rain and snow. A dedicated, climate-controlled space is ideal.
Avoid Temperature Extremes: Protect products from direct sunlight and drastic temperature swings. Extreme heat or cold can degrade performance.
Safe Handling: During mixing and application, follow manufacturer PPE recommendations. Avoid contact with skin and eyes, and wash hands thoroughly after handling.
Application Instructions, Curing, Common Mistakes, and Safety
Provide concise substrate prep steps and ensure product readiness for small repairs. Confirm compatibility with the carbonation test or repair product instructions and assess moisture conditions. Plan work to match manufacturer guidelines.
Outline practical application steps, curing methods, and timing. List common DIY mistakes to avoid and emphasize safety, ventilation, and SDS compliance. Follow product instructions without shortcuts to protect people and the project.
Step-by-step application and curing tips
The following steps ensure durable, long-lasting repairs.
- Prepare the substrate: Identify compatible concrete conditions. Clean and roughen the repair area using a wire brush or needle gun to increase surface area for better bonding. Test for moisture content – it should be below 4%.
- Prime if required: Apply a primer to seal the surface, prevent dusting, and improve adhesion per manufacturer instructions.
- Mix the repair mortar: Follow the product’s mix ratio exactly. Use clean water and mix thoroughly until you achieve a smooth, lump-free consistency within the specified pot life.
- Apply in thin layers: Apply the mixed mortar in thin, even layers to avoid over-stressing the concrete. Feather edges to blend with surrounding concrete for a seamless finish.
- Address voids or micro-cracks: Fill any voids or micro-cracks with the repair mortar using a trowel or putty knife. Ensure complete coverage to prevent further deterioration.
- Cure properly: Follow recommended curing methods – moisture, plastic sheeting, or curing compound – for the specified duration. Proper curing enhances bond strength and carbonation resistance.
Common mistakes and troubleshooting
Avoid these common DIY errors to achieve successful repairs.
- Skipping surface prep: Inadequate cleaning and roughening leads to poor adhesion. Always prepare the substrate as instructed.
- Incompatible substrates: Ensure the repair product is compatible with your concrete type and age. Check manufacturer guidelines for suitable applications.
- Improper mixing or dosing: Follow mix ratios precisely to maintain product performance. Incorrect mixing can result in weak repairs.
- Over- or under-application: Applying too much or too little mortar can compromise repair integrity. Apply thin, even layers as instructed.
- Failing to protect cured areas: Expose cured repairs to sunlight, wind, or rain can degrade the surface and reduce bond strength. Shield repaired areas until fully cured.
Addressing these common mistakes ensures better repair outcomes.
Safety and environmental precautions
Prioritize safety during testing and repairs with the following measures:
PPE: Wear appropriate personal protective equipment – gloves, eye/face protection, dust mask – to safeguard against chemical exposure and debris.
Ventilation: Ensure adequate ventilation when mixing and applying repair mortars. Open windows or use fans to prevent the buildup of harmful fumes.
Waste disposal: Dispose of waste materials responsibly, following local regulations. Do not pour leftover mortar down drains or into waterways.
Safe handling of chemicals: Follow manufacturer guidelines when handling chemical admixtures and reagents like phenolphthalein. Store chemicals safely and out of reach of children and pets.
Conclusion
The core takeaway is simple: test realistically, protect people and the concrete, and you’ll keep anchors reliable and the finish looking right.
First, confirm local codes and climate considerations, then assemble your tools and materials, do a small-area test, follow the step-by-step method, read the results, plan repairs, and seal up with proper curing and storage. Do each step in that order, and document what you see so future work stays clear and safe.
Common mistakes to avoid are skipping prep or small-area testing, using the wrong moisture or carbonation assumptions, and ignoring safety gear or ventilation. Always wear eye protection and a respirator where advised, work slowly, and don’t push through with unknown results or damaged anchors. Safety first and steady, conservative progress save time and money in the long run.
If you’re unsure after testing, or you’ve got critical anchors or structural questions, don’t push ahead alone. Call a professional for a precise assessment, proper repairs, and code-compliant solutions. Stay methodical, document every step, and you’ll finish with durable, safe results that you can trust.
FAQ
What are common causes of concrete failure that carbonation reveals?
Carbonation can expose the steel in anchors and rebar, leading to reduced bond and strength. It often shows up as cracks, spalling, or hollow sounds when tapping concrete. Look for areas with weathering, old repairs, or water intrusion that may have accelerated deterioration.
What repair products and methods are typically effective after carbonation?
Use products that are labeled for damaged or degraded concrete and compatible with existing material. Always follow the manufacturer instructions and check local rules or labeling for suitability and use. Be prepared to pair repairs with proper surface prep and sealing to slow further carbonation.
Are there real-world examples of how repairs were done and what happened?
Case studies show varying results based on surface prep, depth of damage, and load demands. Look for details on damage extent, chosen repair method, curing guidance, and how the area performed over time. Use these as a guide, not a guarantee for your project.
What are the basic steps and tools for applying repair materials?
Prepare the surface by cleaning and roughening where needed. Mix and apply the repair material per label directions. Tool finish and allow proper curing as instructed. If any step is unclear, check the product label, datasheet, or manufacturer instructions for specifics.