

Introduction
Before applying any coating to your concrete surface, it’s crucial to test for moisture. But with busy schedules and project timelines, knowing when and how long each test takes is essential.
This guide compares the timeline of using a concrete moisture meter and the plastic sheet test, helping you plan your pre-coating checks efficiently.
For the full guide, see Concrete Moisture Meter vs Plastic Sheet Test: What Each Tells You Before Coating.
Understanding the Timeline: Moisture Meter vs Plastic Sheet Test
The time it takes to perform each test varies, affecting your overall project schedule. Here’s a breakdown:
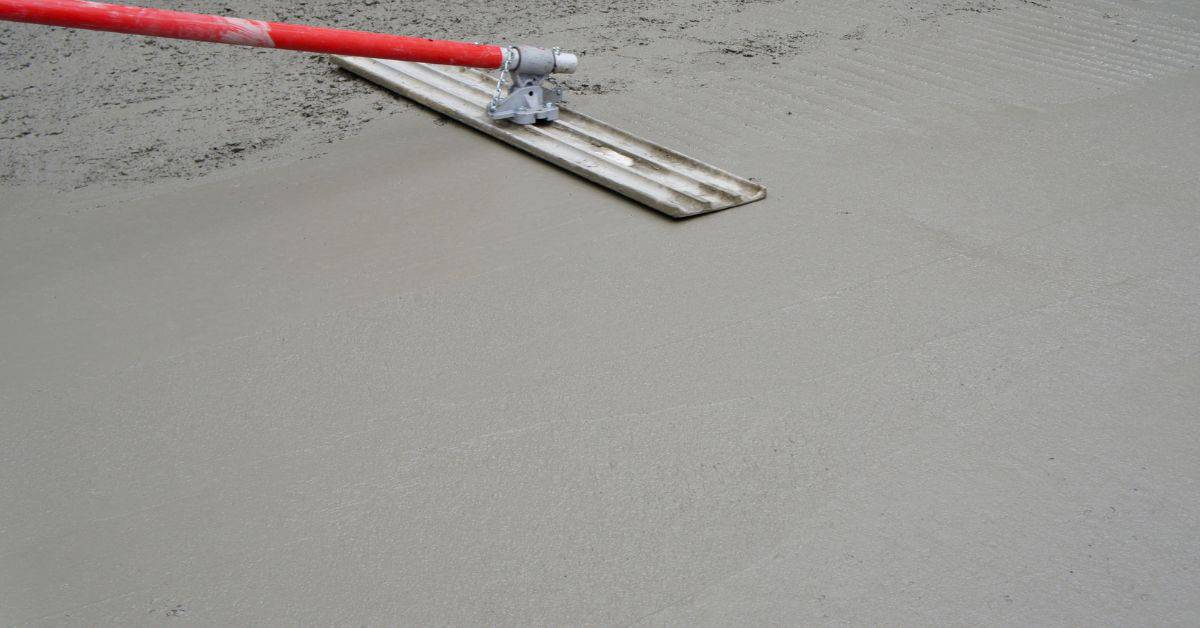
- Concrete Moisture Meter: Quick and straightforward, moisture meters provide instant readings at the surface or near-surface. The process typically takes just 10-15 minutes per reading, making it ideal for rapid, localized checks.
- Plastic Sheet Test (Rubber Dam): This method requires more time as it involves applying a plastic sheet to the concrete, taping the edges, and waiting for at least 72 hours before checking for moisture. The actual observation takes only a few minutes, but the total process can span several days.
Consider your project timeline when choosing which test to perform. If you’re on a tight schedule, a concrete moisture meter might be the better choice due to its speed. However, if time allows and you need a longer-term indication of moisture trends, the plastic sheet test could provide valuable insights.
Key takeaways
Understanding the prep time for each test helps integrate these checks into your overall project schedule. For instance, if you’re planning to apply a coating that requires a specific drying period before application, factor in the waiting time for the plastic sheet test.
- Choose moisture tests based on coating type, substrate, and project timeline.
- Plastic sheet method signals humidity pressure, but is less quantitative than meters.
- Concrete moisture meters provide quick in-situ readings; wear PPE and calibrate per guidance.
- Calcium chloride tests offer quantitative data but require strict protocol adherence.
- Watch for limitations: surface conditions, curing status, and test depth sensitivity.
- Document results clearly and check acceptances against local codes and coatings.
Table of Contents
- Introduction
- Key takeaways
- Why Moisture Testing Matters Before Coating
- Overview of Common Concrete Moisture Tests
- How Each Test Is Performed — Step-by-Step and Visual Checkpoints
- Pros and Cons — Accuracy, Depth Sensitivity, and Limitations of Each Method
- When to Choose Which Test — a Practical Decision Guide
- Standards, Material Specs, and Acceptance Criteria — What to Check
- Interpreting Results and Common Mistakes to Avoid
- Practical Considerations — Cost, Time, Safety, Tools and Logistics
- Conclusion
- FAQ
Why Moisture Testing Matters Before Coating
Concrete moisture under a coating is one of the main causes of adhesion loss, blistering, pinholing, and premature coating failure; testing ahead of work helps avoid those problems and protects warranties. Before committing to a product, check the coating product data sheet or manufacturer instructions for the required test method and acceptance criteria.
Different tests measure different things—surface dampness, moisture vapor emission rate (MVER), or in-slab relative humidity (RH)—so choose tests that match the coating’s spec. Test at appropriate times: during cure, after surface prep, and immediately before priming, then document results so installers and owners can defend warranty claims and make clear remediation decisions if moisture is too high.
Risks of coating over wet or damp concrete
Concrete needs to be dry before applying any coating. Trapped moisture can cause a world of trouble, both short-term and long-term.
First off, moisture weakens adhesion. Your fancy new coat won’t stick like it should. It’ll start peeling or flaking soon enough.
Next up, you get blistering. Moisture gets trapped under the coating, creating bubbles that eventually pop, leaving ugly marks and weak spots.
And don’t forget about pinholing. Tiny holes form as moisture tries to escape, ruining your coat’s smooth finish. All this leads to a coating that looks bad and doesn’t last.
How testing fits into quality control and warranties
Moisture testing isn’t just about checking a box. It’s a crucial part of quality control that protects both you and the installer.
Documented test results guide installer decisions. They know what they’re up against and can choose the right products or take extra steps to mitigate moisture issues.
And here’s where it gets really important: moisture testing supports warranties. Manufacturers won’t cover coatings applied over wet concrete. But if you’ve got test results showing your concrete was dry, they can’t argue with that. It’s your proof that everything was done right.
So, keep those test records safe. They’re like a insurance policy for your coating job. And remember, transparency is key. Share those results with your installer and anyone else involved in the project.
Overview of Common Concrete Moisture Tests
The plastic-sheet method (ASTM D4263), calcium chloride MVER (ASTM F1869), and in-situ RH probes (ASTM F2170) are the core tests; handheld electronic moisture meters give quick, nondestructive screening data. Each yields different outputs—surface condensation patterns, mass-based vapor emission, or internal RH—so compare what you need to measure against what the coating manufacturer calls for.
Use plastic sheets for a fast visual check, calcium chloride when you need MVER numbers, and RH probes when embedded moisture is the critical metric; moisture meters are useful for mapping variability but are not a substitute where a specific standard is required. Consider site prep, sampling locations, ambient conditions, and test duration as they all affect accuracy; when in doubt follow the standard or product data sheet for setup and interpretation guidance.
Plastic Sheet Method (ASTM D4263)
The Plastic Sheet Test, also known as the ‘Seal Test’, is a simple and quick way to check for surface moisture or condensation on your concrete. It’s qualitative, meaning it gives you a yes/no answer rather than a precise measurement.
Here’s how it works: You seal a piece of plastic sheeting tightly onto the concrete with tape. After 16-24 hours, if there’s water droplets on the underside of the plastic or on the concrete itself, that indicates moisture at the surface. This test is great for quick checks but doesn’t tell you about moisture deeper in the slab.
Use this method when you’re concerned about surface condensation or want a fast, easy check before applying coatings. But remember, it’s not suitable for all situations – especially if you’re dealing with moisture-sensitive flooring systems that need more detailed information.
Calcium Chloride Test (ASTM F1869)
The Calcium Chloride Test measures moisture vapor emission rate from your concrete over time. It’s a quantitative test, giving you a numerical result in pounds per thousand square feet per 24 hours (or similar units).
Here’s how it works: You apply a calcium chloride solution to small discs placed on the concrete surface. After 72 hours, you weigh the discs again. The weight change tells you how much moisture vapor was emitted.
This test is useful when you’re planning to install moisture-sensitive coatings or flooring systems like epoxy or thin-set tiles. It helps you understand if your slab is emitting too much moisture for these materials. But keep in mind, it only measures surface moisture – not internal conditions.
In-situ RH Probes (ASTM F2170)
The In-situ Relative Humidity (RH) Probe Test is a bit more invasive but gives you a direct indication of internal moisture conditions within your concrete slab. It measures relative humidity at a specific depth.
Here’s how it works: You drill holes into the concrete, insert probes to the desired depth, and leave them for 72 hours. The probes measure RH at that level, giving you an idea of moisture content inside the slab.
This test is ideal when you suspect internal moisture issues or need more detailed information about your slab’s condition before installing moisture-sensitive flooring systems. However, it’s destructive and requires more time and effort than some other methods.
How Each Test Is Performed — Step-by-Step and Visual Checkpoints
Prepare the slab first: remove dust, curing compounds, and contaminants, verify ambient temperature and dew point, and pick representative locations including high-risk zones near slabs edges or known moisture sources. For the plastic-sheet test, tape a clear sheet flat to the slab, leave for the manufacturer or standard-recommended time window, then document condensation type and percent of wetting at the underside and on the slab surface with photos.
For RH probes follow device calibration and drill or use manufacturer-specified probe depths and spacing, log time-stamped readings at multiple locations, and note penetration depth for pin-type meters or the coupling conditions for pinless meters. Capture annotated photos of each setup, record test method, ambient conditions, and sample map so results are defensible and can drive decisions about delay, mitigation, or acceptance.
Step-by-Step Process
Use this checklist before, during, and after any concrete pour to ensure a strong, durable slab. Follow these steps for best results.
- Preparation: Check the weather forecast. Concrete needs warm temperatures (above freezing) and no rain for at least 24 hours.
- Site Cleanup: Remove all debris, vegetation, and loose soil from the area to prevent contamination and ensure proper compaction.
- Formwork Setup: Inspect forms for damage or gaps. Ensure they’re level, square, and properly braced. Check form release agent application.
- Base Preparation: Compact the base material (gravel, sand) using a plate compactor until it’s firm and stable. Check moisture content; it should be below 3%.
- Concrete Mix Design: Follow the mix design specified for your project (check manufacturer instructions). Ensure all materials are clean and dry.
- Concrete Pour: Pour concrete in lifts no more than 8″ thick. Spread evenly using a shovel or rake, keeping it level with form tops.
- Finishing: Use a bullfloat to remove excess water and smooth the surface. Then use a trowel for final finishing. Check for air pockets; they should be minimal.
- Curing: Cover the slab with plastic sheeting or wet burlap immediately after finishing. Keep it moist for at least 7 days to allow proper curing.
- Final Inspection: After curing, check for any cracks, delamination, or other defects before removing forms and allowing traffic on the slab.
Quick rule: Always follow the manufacturer’s guidelines for concrete mix designs and application. Check local building codes for specific requirements.
Plastic sheet step-by-step and visual checkpoints
Use this checklist when preparing to apply a plastic sheet for moisture protection or vapor barrier. It’s crucial to follow these steps to ensure the sheet works effectively and prevents costly rework.
- Prepare surface: Ensure the concrete is clean, dry, and free of any debris. Remove any loose material by brushing or vacuuming.
- Check for level: The surface should be reasonably flat to prevent wrinkles in the plastic sheet. Use a straight edge and level to check.
- Seal seams: Overlap sheets by at least 6 inches (15 cm) and seal with tape designed for your specific plastic sheet type.
- Seal edges: Seal the edges of the plastic sheet to the concrete using construction adhesive or a similar product. This prevents moisture from bypassing the barrier.
- Wait time: Allow the sealants and adhesives to cure according to the manufacturer’s instructions before proceeding with your project.
- Check for darkening: After waiting, check if there are any dark spots on the plastic. This indicates moisture is present and needs to be addressed.
- Inspect for condensation: Look for water droplets or condensation under the plastic sheet. If present, find and fix the source of the moisture.
- Photograph or note: Document any issues found during your inspection. This will help you keep track of problem areas and their solutions.
- Remove carefully: When it’s time to remove the plastic sheet, do so gently to avoid damaging the underlying concrete surface.
Quick rule: Always check local building codes and manufacturer instructions for specific product requirements. Regular inspections during the process can help prevent costly rework and ensure your project’s success.
Calcium chloride setup, timing, and handling notes
Use this checklist before, during, and after your calcium chloride test to ensure accurate results and prevent costly mistakes.
- Prepare the site: Clear the area of debris. Ensure the surface is clean, dry, and free from contaminants that could affect the test.
- Check enclosure integrity: Inspect the plastic sheeting used to contain the water for any holes or tears. Repair if necessary.
- Weigh before adding water: Use a scale accurate to 0.1 kg to weigh the empty container and record the weight.
- Add water carefully: Gradually add water, ensuring it’s free from contaminants like dirt or oil. Avoid overfilling; leave space for calcium chloride.
- Measure calcium chloride: Weigh out 1.2 to 1.5 kg of calcium chloride per liter of water (check product label for exact ratio).
- Add calcium chloride: Slowly pour the measured amount into the water, stirring gently until fully dissolved.
- Seal and weigh again: Seal the container tightly. Weigh it again to confirm no significant weight loss due to spillage or evaporation.
- Check initial temperature: Measure the solution’s temperature. It should be between 20°C and 30°C for accurate results (check manufacturer instructions).
- Monitor test duration: Allow the test to run for at least 7 days, checking for any signs of leakage or contamination.
- Store calcium chloride properly: After use, store any remaining calcium chloride in a cool, dry place away from heat sources and direct sunlight.
Quick rule: Always wear gloves when handling calcium chloride to prevent skin irritation. If you skip this, you might end up with uncomfortable rashes or burns.
RH probe installation, equilibration and reading procedure
Use this checklist when installing a relative humidity (RH) probe to monitor concrete curing. It ensures accurate readings and prevents costly mistakes.
- Drill hole: Drill a hole at least 6″ deep into the concrete, perpendicular to the surface. Check: Hole depth is consistent with probe length.
- Probe placement: Insert the RH probe into the hole, ensuring it’s fully seated and level with the concrete surface. Check: Probe is flush with the surface, no gaps.
- Seal hole: Apply a suitable sealant around the probe to prevent moisture from escaping or entering. Check: Sealant is applied evenly, no gaps.
- Equilibration time: Allow 24-72 hours for the probe to equilibrate with the concrete’s moisture content. Check: Probe has been in place for at least 24 hours before reading.
- Read frequency: Read the probe every 12-24 hours during the first week, then weekly until the concrete reaches its desired RH level (typically 75-85%). Check: You’re not reading too frequently or infrequently.
- Clean probe: Before each reading, clean the probe with a damp cloth to remove any dust or debris. Check: Probe is clean before each reading.
- Calibrate probe (if needed): Some probes may require calibration. Follow manufacturer’s instructions. Check: Probe is calibrated correctly.
- Record readings: Keep a record of RH levels over time to monitor concrete curing progress. Check: You’re recording each reading.
Quick rule: Always re-seal the hole after each reading to maintain accurate RH measurements and prevent probe damage.
Pros and Cons — Accuracy, Depth Sensitivity, and Limitations of Each Method
Each method measures different physical properties: the plastic-sheet method shows surface moisture behavior, calcium chloride measures water vapor released over time, and RH probes read internal slab humidity at depth—moisture meters give relative indications near the surface. That means accuracy and relevance depend on whether the coating cares about surface dryness or embedded moisture; check the coating spec for which metric it requires.
Environmental factors—temperature, ambient RH, slab curing stage, and surface prep—can skew results and require acclimation or repeated sampling, and instruments need calibration and appropriate probe spacing for repeatability. For warranty-critical jobs prefer standards-based tests with documented procedures and full records; use quick meters to map trouble spots but rely on standardized tests for acceptance criteria and formal reporting.
What the Plastic Sheet reliably tells you (and what it misses)
The plastic sheet test, ASTM D4263, is simple and cheap. It’s great at showing surface moisture.
It doesn’t tell you how much vapor is coming out or what the internal RH of your slab is. That’s important for coatings. It only gives a yes/no answer to ‘is it dry enough to coat?’
Think of it like checking if your floor is wet by touching it with a plastic sheet. You’ll feel moisture, but you won’t know how much or why.
Calcium chloride strengths and weaknesses
The calcium chloride test, ASTM F1869, gives a number. That’s useful for comparing readings over time or across different areas.
It’s sensitive to temperature and humidity. So, you need to control those during the test. It also only checks a small area – about 2 square feet.
It tells you how much moisture is coming out at the surface, but it doesn’t tell you what’s happening inside your slab. That’s important for long-term performance and warranties.
RH probe advantages and limitations
The RH probe test, ASTM F2170, gives you the most depth-relevant data. It measures internal slab RH where your coating will be.
It requires drilling holes, which some DIYers might not want to do. Also, it needs time – up to 72 hours for the probe to equilibrate with the concrete.
This test is best for warranty-critical projects because it gives you a quantitative measure of slab interior RH. But it’s more complex and time-consuming than other methods.
When to Choose Which Test — a Practical Decision Guide
Select tests based on project risk, timeline, and the coating’s required metric: use RH probes when manufacturers specify internal slab RH, calcium chloride when they call for MVER, and plastic sheets for a fast visual check or preliminary screening. If the coating product data sheet names a test, follow that; when it doesn’t, choose the method that most closely aligns with the coating’s failure mode (vapor drive vs surface dampness).
High-risk or warranty projects typically need standards-based testing and documented reports; low-risk or quick-turn residential jobs may begin with a plastic sheet or meter mapping and escalate if readings are borderline. When results conflict, run the more definitive test called for by the coating spec, increase sample density, and document the escalation path so you can justify delay, mitigation, or acceptance decisions to the owner or manufacturer.
Quick, low-risk checks vs full diagnostic testing
The plastic sheet test (ASTM D4263) is great for quick, low-risk checks. It’s simple and cheap. Use it when:
- You’re on a tight budget.
- The floor has low traffic, like in garages or basements.
- Coating delay isn’t critical, e.g., DIY timelines.
But remember, it’s not foolproof. For high-traffic floors or moisture-sensitive coatings, consider full diagnostic testing:
- Calcium chloride test (ASTM F1869) for deeper readings.
- In-situ RH probes (ASTM F2170) for real-time monitoring.
Projects requiring manufacturer-level validation or warranties
When coatings have strict specs or warranties, like in commercial projects, you need accurate, validated results. Here’s why:
- Warranties often require lab-verified tests.
- Manufacturers may demand specific test methods for coating compatibility.
For these projects, in-situ RH probes are your best bet. They provide real-time, accurate readings. Here’s how:
- Install the probes as per ASTM F2170.
- Let them equilibrate for 48-72 hours.
- Read and record the results.
Standards, Material Specs, and Acceptance Criteria — What to Check
Key ASTM standards to reference include the in-situ RH method (ASTM F2170), calcium chloride MVER (ASTM F1869), and the plastic-sheet visual method (ASTM D4263); each standard defines procedure and reporting requirements. Always consult the coating product data sheet and system specifications to find which test method and acceptance criteria the manufacturer requires before you proceed.
Record method name, test locations and depths, calibration records, ambient conditions, and pass/fail thresholds as stated by the coating manufacturer or specification. If criteria aren’t clearly stated on the product data sheet, contact the manufacturer for written guidance and use conservative test selection and documentation to protect warranty and avoid misinterpretation.
Key ASTM Standards to Reference
Before you start testing, make sure you’re using the right standards. Here’s a checklist of key ASTM standards and what they measure.
- In-situ RH with ASTM F2170: Measures moisture content in concrete at specific depths where coating will be applied. Use this to ensure your substrate is ready for coatings.
- Moisture Vapor Emission Rate with ASTM F1869: Determines the amount of moisture emitted from a surface over time. This helps predict potential issues with coatings.
- Plastic-sheet method with ASTM D4263: Measures relative humidity beneath a sealed plastic sheet on concrete. It’s a quick, simple test but has limitations.
- Calcium Chloride Test (ASTM F1869): Measures moisture vapor emission rate using calcium chloride. It’s destructive and less common now, but still relevant for some coatings.
Quick rule: Always check the latest revision of these standards before testing to ensure you’re following current best practices.
How Manufacturers Express Moisture Limits and What to Confirm
When checking coating product data sheets, look for these key points about moisture limits. They’ll help you understand what’s acceptable for your substrate.
- RH at depth: Some manufacturers specify a relative humidity limit at a certain depth (e.g., 75% RH at 40% of slab thickness).
- Moisture Vapor Emission Rate (MVER): Others provide an MVER limit in pounds per thousand square feet per 24 hours.
- Qualitative measures: Some give general guidelines like ‘low’, ‘medium’, or ‘high’ moisture content.
- Units and tolerances: Ensure you understand the required units (e.g., RH%, MVER in lbs/1000ft²/24hrs) and acceptable ranges.
Quick rule: Always confirm moisture limits with the coating manufacturer to avoid misinterpretation or application issues.
Interpreting Results and Common Mistakes to Avoid
Translate test outputs into coating decisions by comparing the measured metric against the coating’s specified acceptance criteria—don’t assume a pass on one test means the slab is acceptable for all coatings. If results fall outside the required range, options include delaying work for further drying, selecting moisture-tolerant primers or systems, or installing mitigation; follow manufacturer instructions and document the chosen path.
Common mistakes include using the wrong test type, testing before the slab has reached required cure time, ignoring ambient conditions, or treating limited spot readings as representative of the whole slab. To avoid those errors verify the method, increase sample density in suspect areas, note conditions at testing, and keep a clear record of readings, photos, and decisions so you can justify your actions if a failure or warranty question arises.
Comparing different test outputs on the same slab
You’ve got your results from the plastic sheet, calcium chloride, and RH probes. Now what? Here’s how to make sense of ’em:
Plastic Sheet Test vs Others: This one’s a bit different. It measures surface moisture, not slab’s core. So, if it’s high but others are low, check base compaction. If it’s wet up top, but dry below, you’ve got a problem.
Calcium Chloride vs RH Probes: These two measure moisture in the slab’s core. But calcium chloride can be affected by temperature and takes longer. RH probes are quicker, but less accurate at low moisture levels. If they differ, recheck both, make sure you’re comparing apples to apples.
Remember, each test has its place. Use ’em together to get a full picture of your slab’s moisture situation. Don’t rely on just one. It’s like checking your car’s oil – you need to know what’s going on under the hood too.
Common sampling and timing errors
Here are some common pitfalls to avoid when taking moisture readings on your concrete slab.
- Testing before slab equilibration: Concrete continues to cure and release moisture after placement. Testing too early can give false readings. Wait at least 7 days for slabs on grade, or check manufacturer’s recommendations.
- Poor sealing: Ensure the probe is properly sealed against the concrete surface to prevent ambient air from affecting readings. Use a damp cloth or rubber seal around the probe.
- Small sample size: Take readings at multiple points across the slab, not just one. A minimum of 4-6 points per 1000 sq ft is recommended to get an accurate average.
- Ignoring ambient conditions: Temperature and humidity can affect moisture readings. Try to test under consistent conditions, or adjust your readings accordingly based on the RH% at testing time.
Double-check these points before taking your readings to ensure accurate results.
Practical Considerations — Cost, Time, Safety, Tools and Logistics
Plan testing into the project schedule: fast screening with plastic sheets or meters is useful early, but standards-based tests take longer and can affect coating start dates and labor planning. Bring the right kit—moisture meters with calibration references, plastic sheets and tape, probe equipment and drill bits, thermometers/hygrometers, PPE, and a camera—and verify equipment calibration and manufacturer instructions before use.
On-site safety matters: watch for trip and slip hazards from sheets, use electrical safety practices with powered meters, wear appropriate PPE when drilling for probes, and control dust during surface prep. Keep clear records of who performed tests, equipment serial numbers or calibration dates, environmental conditions, and annotated photos to support scheduling, cost decisions, and any future warranty discussions.
Cost and time trade-offs between methods
The plastic sheet test is typically the quickest and least costly method. It requires minimal materials – just sheets, tape, and a few hours of labor to apply and check.
Moisture meters with RH probes are more expensive due to equipment costs, but they’re faster for large areas once installed. They also provide immediate results without waiting for desiccant changes or lab analysis.
Lab-grade tests like calcium chloride can take 24-72 hours and involve additional material costs (calcium chloride, plastic cups, etc.). They may require rework if results aren’t acceptable, impacting your project schedule.
Tip: Get quotes for each method to understand the true cost implications on your specific project.
Safety precautions and regulatory/handling notes
PPE: Wear gloves, safety glasses, and protective clothing when handling desiccants or chemicals. Drilling for RH probes requires dust protection.
Calcium chloride: Follow the Safety Data Sheet (SDS) for proper handling, storage, and disposal. Keep it away from eyes, skin, and clothing.
Moisture-related hazards: Wet surfaces can be slippery. Ensure good footing when walking on test areas. Ventilate spaces to prevent excess moisture buildup and potential mold growth.
Regulations: Follow local regulations for waste disposal, especially with chemicals like calcium chloride.
Tools and materials checklist for each test
Use this checklist to ensure you have everything needed before starting your moisture tests.
- Plastic sheet test: Plastic sheets, duct tape, sharpie marker, timer, ruler (for measuring moisture gradient).
- Calcium chloride test: Calcium chloride powder or pre-packaged pouches, plastic cups or bags, timer, scale for weighing.
- RH probe test: Moisture meter with RH probes, drill and appropriate bits, sealant (like silicone caulk), tape measure, level.
Quick rule: Always double-check your tools and materials before starting. Missing items can lead to inaccurate results or wasted time.
Conclusion
Moisture control is non negotiable for a durable coating. Do the checks, confirm moisture levels, and you protect appearance, adhesion, and long life.
Start with a small, practical check: verify surface and subfloor conditions, choose the moisture test that fits your project, follow the step by step and visual checkpoints you learned, compare readings to the material specs and acceptance criteria, and only proceed to coating when results are solid and well within limits. If you’re unsure, document the results, run a quick retest in a nearby area, and use the test in the same way you’d review a job brief before you lay down coating material.
Common mistakes to avoid are rushing the test, skipping the small-area verification, and ignoring safety rules like proper ventilation and edge protection when moisture or dust is involved. Always wear eye and skin protection, keep the work area well ventilated, and never coat over readings that don’t meet the spec. If a test shows borderline results or if the surface hasn’t dried as expected, pause, recheck the procedure, and reassess before moving forward.
If the readings are consistently outside the acceptable range or if the substrate is questionable, consider bringing in a professional. When in doubt, err on the side of extra drying time or surface preparation rather than risking coating failure. Stay methodical, stay safe, and you’ll finish with a coating that lasts and looks right.
FAQ
How do the plastic sheet test and a concrete moisture meter differ in purpose and what they tell you?
The plastic sheet test gives you a quick sense of surface moisture and drying trends, not a precise moisture value. A concrete moisture meter (or RH probe) gives a numerical reading at a specific depth, which is what coatings care about for adhesion.
What are the main limitations and accuracy concerns with the plastic sheet method?
It’s a gross indicator, not a moisture measurement at depth. It can mislead if the surface dries differently than the bulk, or if there are surface contaminants. Use it as a screening tool, not the final call for coating readiness.
Can you get quantitative results from a calcium chloride test, and how should you use them?
Calcium chloride tests provide a numeric value, but you must follow the manufacturer’s instructions exactly. Look at the label for the result units and the acceptance range. Compare it to the coating manufacturer’s specified limits and local guidelines, not a guess.
What depth range do RH probes measure, and how does that affect coating decisions?
RH probes measure interior humidity at a defined embedment depth. Depth matters: shallower readings can miss moisture deeper in the slab. Choose a probe depth that matches where your coating will bond and follow the product’s guidance on acceptable RH levels.