
Introduction
Learn to complete durable concrete work by applying practical DIY best practices and quick checks.
You’ll learn how to mix, place, cure, finish, and inspect concrete for quality, safety, and long term performance, with clear guidance on what to do and what to avoid to get reliable results.
Key takeaways
- Plan concrete mix volume cautiously; add 10% extra for waste and spillage.
- Check soil bearing and drainage; compact base before forms to prevent settlement.
- Use clean, graded aggregate; keep water-to-cement ratio consistent for strength.
- Tool cleanup immediately; cover unused concrete to minimize stiffening and waste.
- Pour in lifts no more than one meter to reduce cracking risk.
- Cure with moisture for seven days minimum; protect from wind and sun exposure.
Table of Contents
- Introduction
- Key takeaways
- Planning your concrete project
- Tools, equipment, and materials checklist
- Site prep and formwork best practices
- Mixing concrete: techniques and common pitfalls
- Pouring, finishing, and curing for durability
- Safety, environmental, and weather considerations
- Inspection, maintenance, and troubleshooting after the pour
- Conclusion
- FAQ
Planning your concrete project
Planning your concrete project means clearly defining the scope—whether you’re setting posts, pouring pads, laying a walkway, or fixing small areas—so you know what materials, forms, and finish you’ll actually need and how it will fit with existing surfaces. Decide early whether you’ll tackle it yourself or hire help by weighing simple forms, small areas, and tool access against red flags like structural concerns, drainage issues, permits, and any complex reinforcement. Estimate how long each phase will take, from site prep to curing, and list the labor and sequencing you’ll follow, plus rough material needs and the safety gear, so you can check budgets and logistics before you start.
For small projects, use a concise fill-in checklist for posts, pads, and walkways that covers scope confirmation, surface prep, form setup, measurement checks, cure planning, and a quick post-project inspection. Knowing these steps helps you spot problem areas early, plan weather contingencies, and avoid wasted trips, backtracking, or unsafe work. Always check product labels and manufacturer instructions, local rules, and permits as applicable to your site before starting, and adapt your plan to fit the space and your tools.
Assessing local codes and permits
Before you start your concrete project, check with your city hall or county office to find out what building codes apply. Look for specific sections on concrete work, like setbacks from property lines, required inspections, and permit requirements.
If you’re unsure about the specifics, call a local inspector or visit their website. They can give you detailed guidance on what permits are needed and any special considerations for your area. This upfront research will save you time and headaches later.
Remember to factor in inspection times into your project timeline. Some areas require inspections before pouring concrete, after the pour is complete, and sometimes even before backfilling or finishing work can begin.
Budgeting and cost estimation
To estimate costs for your concrete project, start by calculating how much material you’ll need. Use a volume calculator to figure out the cubic yards or bags of concrete required based on your dimensions.
Next, add up the cost of forms, reinforcement materials like rebar, and finishing tools. Check with local suppliers for current prices; they often have bulk discounts that can save you money. Don’t forget delivery fees if you’re ordering ready-mix concrete.
To keep costs down, consider renting or borrowing equipment rather than buying it outright. Also, look into using leftover materials from previous projects as formwork or reinforcement where possible.
Project planning and timeline
Create a rough project schedule that includes time for site preparation, form setup, concrete mixing and pouring, curing, and finishing. For example, you might need 1-2 days for prep work, another day or two for the pour, and several more days for curing.
Leave room in your timeline for unexpected delays due to weather or other issues. Concrete needs dry conditions and temperatures above freezing for proper curing. Plan ahead with a backup schedule if you encounter rainy days or cold snaps.
Include inspection times in your plan too, as these can add several days to the project duration. Coordinate closely with inspectors to ensure all steps are completed on time without rushing through critical phases like mixing and pouring.

Tools, equipment, and materials checklist
This section covers the core kit for DIY concrete work: a practical set of hand tools for finishing and edging, plus hauling and measuring gear, all laid out to minimize back-and-forth during pours. It highlights PPE and safety checks, the difference between portable and stand mixers, and how to source or rent items safely. You’ll also see how to plan a layout that speeds things up and reduces trips to the truck, plus quick maintenance steps to keep tools in good shape. Always check labels or manufacturer instructions for any tool or product you plan to use, and verify local rules if needed.
Knowing what to source or rent matters because it affects results and cost. This guide helps you balance budget with performance, so you’re not stuck improvising mid-pour. It also emphasizes practical safety, tool inspection, and routine care so gear lasts and stays reliable project after project. Think through delivery windows, inspect items on arrival, and set aside time for cleaning, drying, and proper storage after use.
Tool-by-tool uses and maintenance
Before you start pouring concrete, make sure each tool is ready to go. This checklist will help.
- Mixer: Ensure it’s clean and lubricated; check for any cracks or loose parts that could cause failure during use.
- Trowel: Inspect the blade for sharp edges or nicks, which can leave marks on your concrete surface. Clean debris from the trowel after each use to prevent rusting.
- Float: Check if it’s straight and free of cracks; a bent float will create uneven surfaces.
- Level: Verify that it’s calibrated correctly by testing on a flat surface. An inaccurate level can lead to misaligned concrete work.
- Vibrator: Ensure the cord is intact and the motor runs smoothly without any unusual noises or vibrations.
- Tape measure: Confirm accuracy with known lengths; a faulty tape measure will result in incorrect measurements.
- Screed: Make sure it’s straight and free of dents, ensuring even concrete thickness across the pour area.
- Bull float: Inspect for cracks or bends that can affect surface quality. Clean thoroughly after each use to prevent rust.
Quick rule: Always inspect tools before starting work to avoid costly mistakes and downtime.
Choosing the right concrete and additives
Picking the correct type of concrete mix is crucial for your project’s success. This checklist will guide you through the selection process.
- Bags vs bulk: Bags are easier to transport but may be more expensive; bulk mixes offer better value if you have storage space and equipment to handle it.
- Fiber additive: Check for fiber content on labels, which improves tensile strength and crack resistance in concrete.
- Plasticizer: Look for plasticizers that increase workability without affecting setting time; essential for complex pours or hot weather conditions.
- Accelerator: Use accelerators to speed up curing times, especially useful during cold seasons when concrete sets slower.
- Retardant: Retardants delay the initial set of concrete, giving you more time to work with it; ideal for large pours or remote locations.
- Cement type: Choose a high-quality cement that matches your project’s requirements (e.g., Type I for general use).
- Water-to-cement ratio: Ensure the mix has an optimal water content to achieve desired strength and durability.
- Slump: Measure slump correctly using a slump cone; too high or low can affect concrete’s workability and finish.
Quick rule: Always read product labels carefully to ensure you’re selecting the right mix for your project’s needs.
PPE and job-site safety gear
Wearing appropriate personal protective equipment (PPE) is essential before starting any concrete work. This checklist will help you stay safe on the job site.
- Gloves: Choose gloves that provide a good grip while protecting your hands from rough edges and chemicals; inspect for holes or tears.
- Eye protection: Wear goggles or safety glasses to shield eyes from dust, debris, and splashes; ensure they fit snugly around the face.
- Masks: Use a respirator or dust mask to prevent inhalation of concrete dust; check for proper seal against your face.
- Boots: Non-slip boots with steel toes are mandatory; inspect soles for wear and replace if necessary.
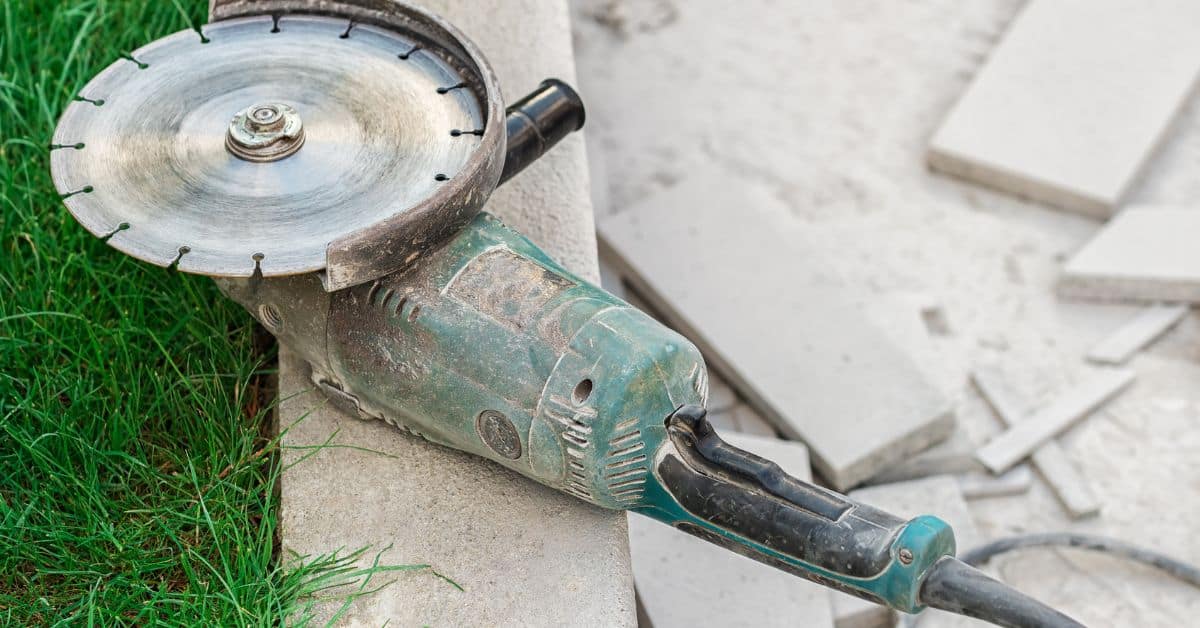
- Hearing protection: Earplugs or earmuffs can protect against loud equipment noise, such as mixers or saws.
- Ventilation: Ensure adequate ventilation when working indoors to prevent carbon monoxide poisoning from gas-powered tools.
- Safety harnesses: Use for elevated work; ensure straps are secure and inspect regularly for wear.
Quick rule: Always conduct a safety gear inspection before starting any concrete-related tasks.
Site prep and formwork best practices
Site prep starts with evaluating the soil and subgrade so the concrete has a solid base. Check moisture, drainage, weed and root removal, and set the excavation depth based on your mix design. Then plan compaction, base material, and formwork that stays true and square for a clean pour.
Good drainage and stable forms prevent shifting, cracking, and punch‑through after the pour. Build the forms with straight edges, proper bracing, and careful alignment, and check level and square often. Do release, reinforcement placement, and a final inspection before you pour to catch gaps or misalignments.
Soil, compaction, and subbase prep
Before pouring concrete, you need to make sure the soil is stable enough. Use a quick test or consult with an engineer if you’re unsure about the bearing capacity of your site. Remove any weeds or roots that could cause problems later on.
Select a suitable granular base material like gravel for your subbase. This layer should be compacted to ensure it’s solid and level, preventing future settling issues. Aim for at least 4 inches of compacted gravel under slabs and more for footings depending on local codes.
Proper compaction is key—use a plate compactor or hand tamper to get the job done right. Make sure your subbase has proper slope for drainage, avoiding water pooling that could weaken concrete over time.
Building and aligning forms
Cut your form materials accurately to fit the dimensions of your pour. Use plywood or lumber for straight edges and corners, making sure everything is square and level. Check with a carpenter’s level and laser tools.
Bracing is crucial—use stakes and braces to keep forms in place during pouring. This prevents shifting that can cause cracks or uneven surfaces. Seal joints between form panels with caulk or foam tape to prevent leaks.
Maintain alignment by checking your forms frequently as you work. Use shims if needed to adjust for any minor misalignments. Properly aligned and braced forms will give you clean, crisp edges on your concrete pour.
Reinforcement placement and spacing
For most residential projects, use rebar or wire mesh to reinforce slabs. Place rebar at the bottom of footings for added strength against uplift forces. Fiber reinforcement can also be mixed into concrete for additional durability.
Ensure proper cover over your reinforcement—this is the space between the top of the rebar and the surface of the slab. A minimum 1.5 inches is usually required to protect it from corrosion and ensure adequate bond with the concrete.
Check placement visually before pouring by walking around the site. Look for gaps, misalignment, or any exposed reinforcement that could cause issues later on. Proper spacing and support are critical for long-term structural integrity.
Mixing concrete: techniques and common pitfalls
This section explains bagged versus site-mixed concrete with practical, step-by-step mixing sequences and how to keep batches uniform. You’ll learn the right mixing order, how to add water gradually, and how to watch slump and consistency without over- or under-watering. We also cover equipment choices, cleanliness to prevent contamination, and cautions about retempering and reusing failed mixes.
Getting this right saves you time and avoids weak or uneven slabs, footings, and repairs by catching issues early and adjusting on the fly. You’ll get quick-field checks, how to segment large jobs into manageable batches, and simple notes to document each batch for quality control.
Batch mixing step-by-step
This sequence ensures a consistent and workable concrete mix every time.
- Mix dry ingredients thoroughly first: cement, sand, gravel. This prevents clumping and ensures even distribution of aggregates.
Quick check: Mix until there are no visible streaks or unmixed spots. - Add water gradually while mixing to avoid overwatering. Start with a small amount and add more as needed.
Quick check: Test slump by dropping a cone of concrete; it should hold its shape without excessive slumping. - Mix for at least 2 minutes to ensure all ingredients are well combined, but don’t overmix which can weaken the mix.
Quick check: Check for uniform color and consistency throughout the batch. - If using a mixer, load in dry materials first, then add water slowly while machine is running. Clean out any dead zones where unmixed material may accumulate.
Quick check: Run a quick test mix before starting your project to ensure proper mixing time and ratios.
Troubleshooting mix problems
Mixing concrete can go wrong in several ways, but with the right approach, you can often salvage a batch. Common issues include adding too much water or inconsistent batches due to improper measuring.
For overly wet mixes, start by letting it sit for a few minutes to allow excess water to settle out. Then use a shovel to gently fold in dry concrete mix until the desired consistency is reached.
Note: Overwatering reduces strength and increases shrinkage cracks; be cautious not to overcorrect.
Inconsistent batches can result from inaccurate measuring or improper mixing order. Always measure ingredients by weight for precision, and ensure all materials are thoroughly mixed before adding water.
Note: Cold weather can slow setting time while hot weather speeds it up; adjust accordingly with retarders or accelerators as needed.
Using admixtures and fibers correctly
Admixtures like air entraining agents, water reducers, and fibers can enhance concrete properties. Proper use ensures better workability and durability without compromising strength.
Add admixtures according to manufacturer guidelines based on the total weight of cementitious materials in your mix. For example, a typical dosage for an air-entraining agent is 0.5% by weight of cement.
Note: Always add fibers after initial mixing and before adding water; this prevents fiber clumping.
Fibers like steel or synthetic can improve tensile strength and crack resistance. Synthetic fibers are easier to handle but offer less reinforcement than steel fibers.
Note: Ensure even distribution of fibers throughout the mix for maximum effectiveness.

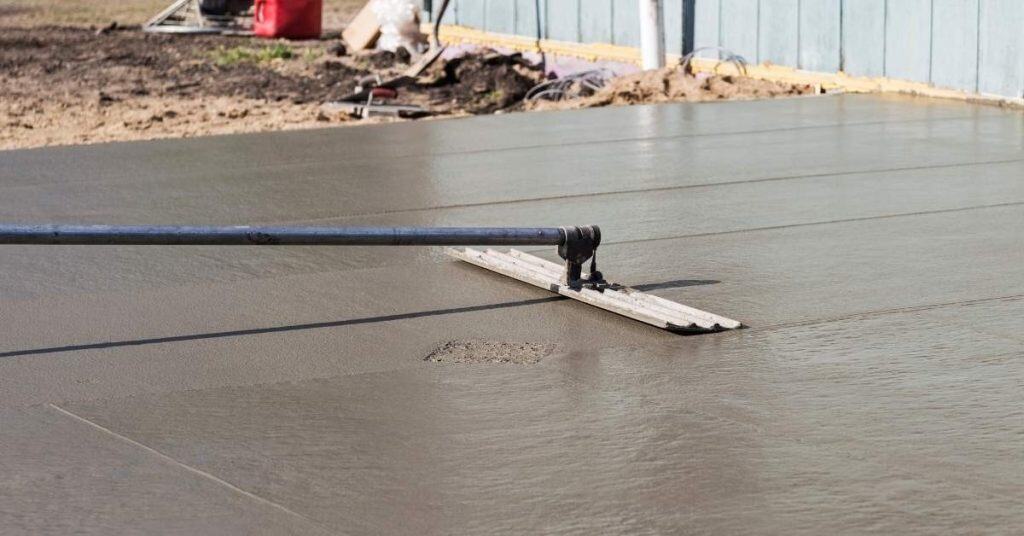
Pouring, finishing, and curing for durability
Pouring with control starts long before the first pour. Align form edges, place reinforcement, and plan your lifts so there’s no big gap or misalignment that creates a cold joint. Use a steady pour rate, consolidate as you go, and time lifts between steps so the new concrete bonds well with the old. Finish steps follow in sequence—screed to bring the surface level, bull float, and edge work, then jointing before moving to a final trowel pass. Keep moisture and temperature in mind and watch for segregation as you work, adjusting technique rather than forcing a single, rushed pour.
This matters for DIYers because it reduces cracking and gives you a durable, smooth surface with consistent texture. Knowing when to stop and what to do at each stage helps you spot readiness and avoid scorch marks or hollow spots. Then you finish with the texture you want and set up proper curing to maximize strength, using water, curing compounds, or blankets as appropriate and watching for humidity and temperature effects that can creep in after the pour. Check labels and manufacturer guidance for your products, and adapt to your local conditions with safe, practical options.
Pour sequence and avoiding defects
Avoiding common mistakes like cold joints, entrapped air, honeycombing, and segregation is key to a strong concrete pour. Here’s how:
- Plan ahead. Ensure formwork alignment and controlled pour rate to prevent cold joints.
- Vibrate properly. Use mechanical or manual vibration to eliminate entrapped air but avoid over-vibrating which can cause segregation.
- Avoid rapid placement. Slow down the pouring process if necessary to ensure proper consolidation between lifts.
- Control joints. Place control joints at regular intervals to manage shrinkage and prevent random cracking.
Maintaining these practices will help you pour a defect-free concrete slab that stands the test of time.
Finishing techniques explained
The right finishing technique can make or break your concrete’s appearance and durability. Timing is crucial to avoid overworking the surface:
To achieve a broom finish, start sweeping as soon as you’ve bull floated but before it sets up completely. For tined finishes, drag a textured mat across while the surface is still workable.
For smooth surfaces, wait until bleed water has evaporated and use a steel float to create a fine texture. Overworking can lead to scorch marks or weak spots, so be mindful of when to stop.
Curing methods and timelines
The curing process is vital for concrete strength and durability. Proper curing ensures the hydration process continues without interruption:
Water curing is effective but requires constant monitoring to avoid drying out too quickly. Curing compounds offer convenience with less maintenance, especially in dry climates.
Curing blankets or plastic can be used to retain moisture during cold weather. Ensure adequate coverage and check daily for proper hydration by looking for a uniform color change across the surface.
Safety, environmental, and weather considerations
Safety, environmental handling, and weather considerations go hand in hand on a concrete job, and you need a plan before you mix or pour. Do a quick on-site risk assessment, wear the right PPE (gloves, eye protection, and a respirator if silica is present), set up barriers to keep people away, and use fall protection and proper lifting techniques as you move materials. Inspect tools and electrical gear, use GFCI outlets, keep cords clear of wet areas, and establish lockout or tagout practices for maintenance or cleaning; plan for washout containment, minimize washwater runoff, reuse or recycle surplus material when possible, and keep spill kits and secondary containment ready to protect soil and water.
Control runoff and sediment by installing simple barriers or traps if needed, directing washout away from drains, and scheduling washing during dry periods to reduce infiltration risks; designate a small, controlled area for cleanup and containment. Weather and curing aren’t afterthoughts: monitor the forecast and adjust mixing, water content, and ambient conditions, use shields or shade on hot days, postpone pours during rain, and implement curing protocols to prevent premature drying or cracking.
Advanced safety procedures
Concrete work comes with its share of hazards. Always be aware of the chemical risks involved, like alkalinity and dust that can irritate your skin and lungs. Wear protective gear such as gloves, eye protection, and a respirator to shield yourself from these elements.
When lifting heavy forms or bags of concrete mix, use proper techniques to avoid back injuries. Bend at the knees, keep loads close to your body, and lift with your legs rather than your back. If you’re working on elevated surfaces, make sure fall protection is in place before starting any work.
In case of a concrete burn or other emergency, have an on-site first-aid kit ready. Know how to treat burns by rinsing the affected area with cool water and applying burn cream if available. Keep your site clear of obstacles so that everyone can move around safely without tripping hazards.
Weather and temperature adaptations
The weather plays a big role in how you handle concrete work. On hot days, the mix dries out faster, so use less water or add accelerators to speed up setting time. For cold conditions, protect your pour with insulating blankets or tarps to keep it warm enough for proper curing.
Wind can also affect drying times and cause cracking if not managed properly. Use windbreaks like plastic sheeting around the edges of your pour area to shield against strong winds. If rain is forecasted, avoid pouring concrete until after the storm passes; wet conditions can weaken the mix’s integrity.
Adjust your mixing ratios based on ambient temperatures—use cooler mixes in summer and warmer ones in winter. This helps maintain consistency throughout different seasons without compromising strength or quality of your pour.
Environmental best practices
Proper disposal of excess concrete is crucial for environmental protection. Use sealed, lined bins to contain washout water and solids until they can be properly disposed of or recycled. Avoid letting any runoff enter storm drains as it could contaminate local waterways.
Minimize waste by carefully measuring out your mixes and reusing surplus material where possible. Keep spill kits on hand for quick cleanup in case of accidental spills, and always follow local regulations regarding disposal methods.
To further reduce environmental impact, plan washout activities during dry periods to minimize soil infiltration risks. Designate a specific area for controlled cleanup operations away from natural water sources or sensitive areas like gardens and lawns.
Inspection, maintenance, and troubleshooting after the pour
After the pour, run through a thorough inspection to catch problems early and keep surprises to a minimum. Check surface quality for uniform texture, straightness of edges, and any visible flaws, while watching cure progress and noting surface moisture or temperature conditions that can affect hydration and finish consistency. Look for cracks (hairline versus larger gaps), spalling or hollow-sounding patches, efflorescence, laitance, and honeycombing, and verify joints and edges are intact, aligned, and ready for sealing or filling as needed.
These checks matter because small issues left unchecked become bigger repairs later, and they guide your maintenance plan for the life of the slab. Establish a practical routine: plan cleaning, drying if needed, and timely sealing with appropriate sealants or coatings, and keep a simple record of observations and actions; if you see persistent defects or unclear causes, consult a pro and rely on manufacturer instructions or label guidance for safe remediation.
Quick visual and physical checks
After pouring concrete, perform these quick checks at 24 hours, 7 days, and monthly to ensure your slab is on track.
- Surface smoothness: Check for bumps or dips. Uneven surface can lead to tripping hazards.
- Edge straightness: Ensure edges are sharp and clean. Blurry edges indicate poor formwork.
- Crack patterns: Look for hairline cracks. Structural issues if cracks widen over time.
- Spalling areas: Inspect for hollow-sounding patches. Spalls weaken the slab’s integrity.
- Efflorescence presence: White powder on surface indicates moisture intrusion. Clean to prevent staining.
- Laitance layer: Check for a thin, powdery film. Proper curing prevents laitance formation.
- Honeycombing signs: Look for voids in concrete. Poor compaction or mix issues cause honeycombs.
- Cure color consistency: Uniform gray tone indicates proper hydration. Discoloration may mean uneven curing.
Quick rule: Regular checks catch problems early, saving time and money on repairs.
Repair options for common problems
Address issues promptly to prevent minor defects from becoming major headaches. Here’s how to tackle them:
- Hairline cracks: Fill with epoxy or concrete patch. Ignore and they can spread.
- Surface spalls: Remove loose material, clean area thoroughly, then apply patch compound. Neglect leads to structural weakening.
- Joint failures: Reseal joints with polyurethane sealant. Cracks form if joints aren’t sealed properly.
- Mild efflorescence: Clean surface with water and mild detergent, then reseal. Stains can set in permanently if left untreated.
- Laitance removal: Use a wire brush or sandblaster to remove loose material. Laitance weakens the concrete’s integrity.
Quick rule: Small fixes now save big headaches later.
Long-term maintenance tips
To keep your concrete slab in top shape, follow these long-term care practices:
- Sealant application: Apply sealant every 2-5 years. Protects against moisture and stains.
- Cleaning schedule: Clean monthly with mild detergent. Prevents buildup of dirt and chemicals.
- Load management: Avoid heavy loads on fresh concrete for at least a month. Premature loading weakens the slab.
- Winter care: Use de-icing salts sparingly in winter. Salt damages concrete over time.
- Drainage checks: Ensure proper drainage around edges. Standing water causes cracking and spalling.
Quick rule: Regular maintenance keeps your slab looking great for years to come.
Conclusion
Solid concrete work pays off in safety, durability, and curb appeal. Keep the core steps in from planning to curing, and you’ll dodge costly mistakes.
If you’re moving forward, lock in the plan, verify permits if needed, confirm your formwork and grades, mix with the right water and aggregate, pour in manageable lifts, remove air pockets, screed and finish cleanly, and start curing promptly with proper moisture control and protection from sun, wind, and cold. Inspect as you go and document any fixes, then protect the surface until it hardens fully.
Common mistakes to avoid are rushing the pour, skipping proper joint control or reinforcement, neglecting weather and curing needs, and using the wrong mix or water ratio. Safety rules are simple: wear eye and skin protection, keep a clean, stable work area, and never work around wet concrete if you’re unsure of the steps. Test a small area if you’re unsure about a technique before you commit larger sections.
If conditions or project size push beyond your comfort zone—heavy pours, complex forms, or uncertain curing requirements—call in a pro. You want solid, uniform results, not a crack-filled headache. Stay disciplined, finish with care, and you’ll have concrete that performs for years to come.
FAQ
What mix is best for a DIY concrete project?
Use a standard concrete mix labeled for general purpose. Add water and mix per the bag instructions until the mix is uniform. Too much water makes a weak, sandy mess.
How thick should my slab be?
For a typical sidewalk or patio, aim for at least 4 inches. If you plan to drive on it, go thicker. Check any local rules or loads that a project must support.
Do I need formwork and curing?
Yes. Build sturdy forms to hold the shape. Keep the surface moist as it cures to prevent cracks and keep the strength up.
What mistakes should I avoid?
Avoid guessing on water amount. Don’t rush finishing or apply too much trowel work while the concrete is still setting. Don’t skip control joints or expansion gaps.