
Introduction
DIY Concrete Patio: Learn how to plan, mix, pour, and finish a durable patio yourself.
The guide walks through practical steps, common mistakes to avoid, and tips you can apply to real-world projects.
You’ll discover key considerations for site prep, curing, and maintenance to ensure a long-lasting result.
Key takeaways
- Assess soil stability and slope before starting to prevent surface cracking.
- Create a solid base with compacted gravel and proper edging for stability.
- Cure times and weather windows determine when you can finish each stage.
- Use a consistent trowel finish and broom texture to prevent staining.
- Seal within two weeks of final cure for best chemical resistance.
- Obtain any required permits early and prioritize environmental drainage considerations.
Table of Contents
- Introduction
- Key takeaways
- Is a DIY Concrete Patio Right for You?
- Tools, Materials, and Safety Gear Checklist
- Preparing the Site and Base for a Long‑Lasting Patio
- Pouring, Finishing, and Timing: Day‑by‑Day Process
- Stamping, Coloring, and Sealing Techniques
- Common DIY Mistakes and How to Avoid Them
- Budgeting, Permits, and Environmental Considerations
- Long‑Term Maintenance and Troubleshooting
- Conclusion
- FAQ
Is a DIY Concrete Patio Right for You?
A DIY patio is doable, but you’ve got to start with a solid plan: define the footprint, slope and drainage, soil stability, existing utilities, and local requirements before buying materials. Honestly assess your skill with form building, grading, sub-base prep, reinforcement placement, proper concrete mixing, and finishing, plus safety PPE. If any part feels beyond your comfort zone, consider hiring a pro.
Map the time commitment and schedule, outlining prep days, pour window, initial set and curing timelines, and weather contingency. Budget thoughtfully for concrete quantity, sub-base materials, forms, reinforcement, tools, sealer, and edge details, with a contingency for repairs or drainage tweaks. Establish criteria for DIY vs professional help: if slope or drainage is complex, if structural reinforcement is needed, or if permits or inspections are required, call a pro to avoid costly mistakes.
Assessing Site Conditions and Scope
Before you start, take a good look at your site. Check the soil stability and drainage to ensure water won’t pool on your new patio. If the ground is uneven or has significant slopes, it’ll add complexity to your project.
Measure out where your patio will go and mark it with stakes and string lines. This helps you visualize the space and plan for any obstacles like existing utilities or trees. Make sure to check local building codes and get any necessary permits before you start digging.
The size of your patio also plays a big role in how much work is involved. A small, simple design might be manageable on your own, but larger patios with intricate designs could push the limits of what you can handle. Take these factors into account to decide if this project fits within your skill set and available time.
When to Hire a Contractor
There are times when it’s best to leave the job to professionals. If you’re dealing with a large area or steep slopes, the work can become too complex and risky for DIYers. Professionals have the experience and equipment to handle these challenges safely.
If your patio design includes intricate stamping or coloring techniques, consider hiring someone who specializes in concrete artistry. These details require specific skills that might be tough to master on your own.
Costs can also escalate quickly if you encounter unexpected issues like underground utilities or unstable soil conditions. Professionals have the expertise to anticipate and mitigate these risks, saving you money and hassle in the long run.

Tools, Materials, and Safety Gear Checklist
A clear, prioritized checklist covers essential hand tools, power tools, measuring and marking gear, specialty prep and finishing tools, materials, and PPE, plus notes on substitutes and rental options. It emphasizes a practical setup sequence for formwork and layout, with compact and rental-friendly choices for small spaces. Expect guidance on tool use, storage, and when to bring in larger equipment, with reminders about suitable bagged versus ready-mix options and basic curing and sealing considerations.
Why it matters to you as a DIYer: a solid plan saves time, reduces waste, and keeps everyone safer. You’ll learn when to rent versus buy, how to assess tool condition, and how to sequence tasks from prep to curing, while factoring weather and ventilation. Use this to steer your purchases and rentals, avoid overbuying, and stay on track with formwork removal, joint filling, and protection during curing, all while following manufacturer instructions and local guidance for safety gear and handling.
Essential Tools for Pouring and Finishing
Before you start mixing concrete, make sure your tools are ready to go. This checklist will help ensure a smooth pour.
- Concrete mixer or truck: Check if you have access to a portable mixer or can arrange delivery from a concrete supplier. Without it, pouring becomes labor-intensive and time-consuming.
- Screed board: Ensure your screed is straight and level for even pours. Skipping this step leads to uneven surfaces.
- Magnesium bull float: Use for initial smoothing after screeding. A flat surface prevents cracking.
- Finishing trowels: Have at least two sizes, one for rough finish and another for fine detail work. Missing these can leave a rough or uneven surface.
- Jointer tool: For creating control joints to prevent cracks. Essential for large areas.
- Power drill with paddle bit: Necessary for drilling holes in forms or concrete. Handy for setting rebar and anchor bolts.
- Grinder: Useful for rough edges, cleaning tools, and smoothing surfaces. A must-have for finishing touches.
Quick rule: Always have your essential tools ready before starting to avoid delays or poor quality work.
Special Equipment for Stamping, Coloring, and Texturing
This checklist covers the specialized equipment needed for decorative finishes. Use it when you’re ready to add texture or color.
- Stamping tools: Choose stamps that match your design theme. Skipping this can result in a plain surface.
- Texture skins: For creating unique patterns on the concrete surface. Essential for adding character and detail.
- Liquid release agent: Prevents stamps from sticking to wet concrete. Powdered options are also available but require more prep time.
- Color hardeners: Add vibrant colors to your patio. Ensure even application to avoid uneven coloring.
- Sealers and stains: Protect the surface while enhancing color. Skipping this step can lead to quick wear and discoloration.
Quick rule: Always test stamps, release agents, and colors on a small area first before full application.
Safety and Site-Prep Supplies
Before you start pouring concrete, ensure all safety gear is ready. This checklist will help prevent accidents and protect your site.
- Gloves: Protect hands from rough edges and cement burns. Essential for handling tools and materials safely.
- Eyewear protection: Prevents debris from entering eyes during mixing or pouring. Skipping this can cause serious injury.
- Respirator mask: Filters out dust and harmful particles when working in enclosed spaces. Important for maintaining air quality.
- Form stakes and braces: Secure forms to ensure stability during pour. Missing these can lead to form collapse or concrete spillage.
- Erosion control supplies: Prevent runoff from damaging surrounding areas. Essential for environmental compliance.
Quick rule: Always wear appropriate PPE and secure your site before starting any work.
Preparing the Site and Base for a Long‑Lasting Patio
Preparing the site and base for a long-lasting patio means mapping out utilities, planning safe demolition, and shaping the grade for proper drainage. We’ll lay out what to remove, keep debris contained, and set a slope so water drains away from structures. We’ll plan formwork and reinforcement so the base stays stiff and the edges stay true.
Getting these steps right saves you from cracks, heave, and future repairs. A solid subbase and careful moisture handling make the patio satisfy over time, even with weather swings. Check labels and manufacturer instructions for base materials and confirm any local permit or timing requirements before you start.
Excavation, Subbase, and Compaction
Start by digging out the area to a depth that allows for proper compaction of your subgrade. The general rule is to dig at least 4 inches below grade level, but check local building codes as some areas may require deeper excavation.
For the subbase layer, use crushed stone or gravel. This material provides stability and helps prevent settling over time. A good depth for this layer is about 6 inches, though it can vary depending on soil type and load requirements. Make sure to compact each layer thoroughly before adding more material. Use a plate compactor or similar tool to ensure the subbase is solid.
Compaction is critical. Aim for at least 95% of maximum density as measured by a California Bearing Ratio (CBR) test or in-situ testing methods. This ensures your patio will be stable and less prone to cracking over time. Keep an eye on moisture levels during compaction; too wet or dry can affect how well the material packs down.
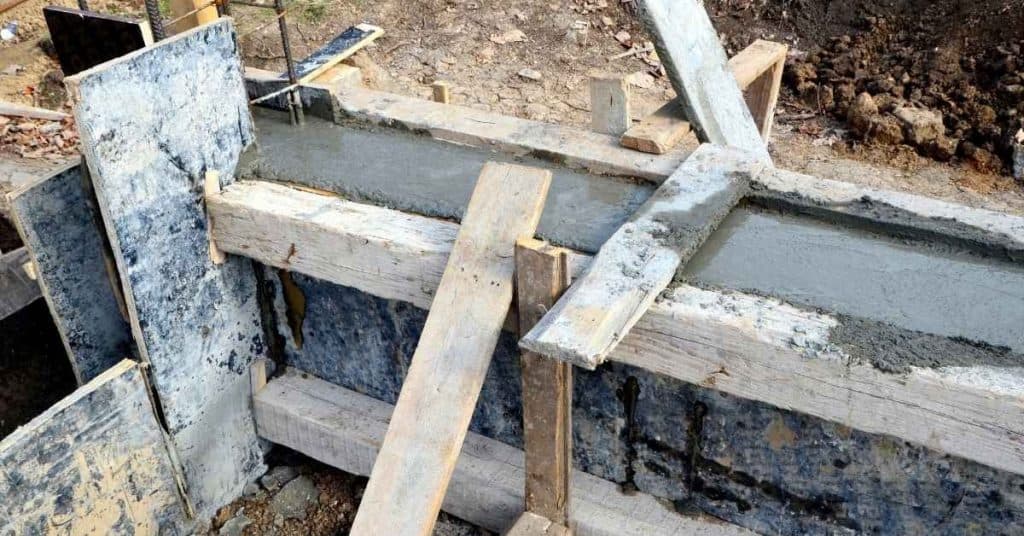
Forms, Reinforcement, and Drainage Planning
Lay out your forms carefully to match the patio dimensions. Use stakes and braces to secure them in place, ensuring they are level and straight. For corners or curves, use corner brackets for added stability.
Incorporate rebar or welded wire mesh into your formwork layout. Place it at regular intervals across the slab to prevent cracking. A common spacing is 6 inches on center for both directions. This reinforcement adds stiffness and durability to your concrete patio.
Plan for proper drainage by creating a slope of at least 1/4 inch per foot away from any structures like walls or house foundations. This prevents water from pooling around the edges, which can cause damage over time. Integrate control joints every 8-10 feet in both directions to manage natural cracking patterns.
Pouring, Finishing, and Timing: Day‑by‑Day Process
This section covers a practical day-by-day timeline from mixing and pouring to finishing and curing, with clear milestones for each stage. You’ll learn the open time, initial set, edging and bull float, and joint placement, with weather affecting these windows.
Weather drives timing more than you might think, so keep an eye on forecast and evaporation risk. A clear plan for batching, pour size, and vibration helps minimize cracking and drying stresses. Following the sequence from edging to joints and cures keeps the slab level, smooth, and durable for DIY use.
Pouring and Screeding the Slab
Mix your concrete to a consistency that’s easy to work with but not too soupy. Aim for a slump of around 4 inches, which is standard for most patios. Pour in sections no larger than what you can screed within about 15 minutes—this keeps the mix from setting up before you finish.
Once poured, use a straightedge to screed off excess concrete and level it out. Start at one end of your formwork and work towards the other, making sure to catch any low spots or high ridges as you go. This initial screeding sets the flatness for your slab.
After screeding, consolidate the concrete by vibrating it lightly with a hand-held vibrator. This removes air pockets and ensures good bond between the concrete and subbase. Avoid over-vibrating, which can cause segregation of aggregates.
Floating, Troweling, and Creating Control Joints
Bull float the concrete as soon as it’s screeded to smooth out any surface imperfections. Wait until the water sheen disappears before you start troweling for a smoother finish. Use a hand float or power trowel for this step.
Timing is crucial when creating control joints. Cut them while the concrete is still plastic but has lost its initial slump—typically 2 to 4 hours after pouring, depending on weather conditions and mix design. Make sure your cuts go deep enough to prevent random cracking later on.
For best results, use a grooving tool or saw to cut control joints rather than just scoring the surface with an edging tool. This ensures that the joint goes all the way through the slab thickness, providing better crack prevention.
Curing Best Practices and Weather Tips
Maintain moisture on your concrete for at least 7 days after pouring to ensure proper hydration. Use a curing compound or cover with plastic sheeting to keep the surface wet. This is especially important in dry weather.
Keep an eye on temperature too. Ideal curing conditions are between 50°F and 90°F (10°C to 32°C). Avoid pouring concrete when temperatures drop below freezing, as it can freeze before setting properly.
In hot weather, shade your slab from direct sunlight with tarps or plastic sheeting to slow evaporation. If it’s raining heavily, protect the surface from excessive water that could wash away cement paste and weaken the slab.

Stamping, Coloring, and Sealing Techniques
Stamping, coloring, and sealing is a coordinated workflow: choose between imprint patterns or overlays, verify substrate compatibility, and prep the surface for a durable stamp. Plan the timing for pour or overlay, control joints and expansion gaps, and follow the imprinting sequence with proper cure intervals before moving to color and sealers. Pick patterns that suit the space, test color release agents, and decide on seals that give long wear without hiding the design.
This matters for a DIY patio because the right prep, timing, and product choices prevent common issues like uneven stamps or blotchy color. It also helps you map a practical, repeatable process from start to finish, with realistic expectations for maintenance and re-coats. If in doubt, always check product labels and manufacturer instructions, and tailor your approach to your slab conditions and climate.
Choosing Stamps, Layout, and Stamping Workflow
You’ve got two main choices for stamping: seamless texture skins or patterned stamps. Texture skins give a natural look with no repeating patterns, while patterned stamps let you pick specific designs like brick or stone.
Lay out your stamps carefully to avoid seams where they meet. Use chalk lines and stakes to mark the layout before starting. Have your team ready to move quickly once the concrete is set but still workable—about 45 minutes after pouring for a typical patio.
Timing is key. If you wait too long, the stamps won’t leave clear impressions. Too early, and they’ll tear up the surface. Keep an eye on the concrete’s readiness by pressing your thumb into it; if it leaves a slight mark but doesn’t stick, it’s ready to stamp.
Remember, good communication is crucial. Have someone dedicated to checking the concrete’s readiness and another for laying out stamps accurately. This keeps everyone moving smoothly without bottlenecks or mistakes.
Coloring: Integral Color, Color Hardeners, and Stains
Integral color mixes right into the concrete for a uniform look. It’s easy to apply but can be pricey if you want vibrant shades.
For more control over your colors, use broadcast color hardeners. These come in powder form and are sprinkled on fresh concrete before stamping. They give great texture and depth but require careful application to avoid blotches or uneven coverage.
If you’re going for a weathered look, consider using acid stains. They add subtle variations that mimic aged stone or brick. Just be sure to test the color in an inconspicuous area first.
When applying release agents, wash off powdered types before stamping to avoid residue on your stamps. Liquid releases can stay on; just make sure they don’t interfere with the pattern’s clarity.
Sealing, Anti-Skid Options, and Final Protection
Choose a sealer that fits your needs. Penetrating sealers soak into the concrete for long-lasting protection against stains and water damage. Topical sealers form a clear film on top but can yellow over time.
Apply sealers after the concrete has fully cured, usually around 28 days post-pour. Test small areas first to ensure compatibility with your chosen color or texture.
Maintain your patio by re-sealing every few years depending on wear and tear. Near swimming pools, consider adding anti-skid additives for safety. These can be mixed into the concrete during pouring or applied as a topcoat after sealing.
Regular cleaning with mild detergent keeps your patio looking fresh and extends its lifespan. Avoid harsh chemicals that could strip away protective layers.
Common DIY Mistakes and How to Avoid Them
Common DIY mistakes in concrete come from rushing, skipping joints, poor drainage, bad mix handling, and improper curing. Expect visible cracks, settling, or an uneven surface if you ignore these. Take steps: compact the subgrade, ensure a slope of about 1/8 to 1/4 inch per foot for drainage, install proper formwork and expansion joints, and follow a sensible mix and curing plan. Don’t guess on joints or timing—verify reinforcement and joint locations with the plan and the product labels.
Doing it right saves you from costly patches and rework. Knowing the why helps you plan, protect the slab during curing, and keep water away from the foundation, which matters for long-term performance.
Preparation and Timing Mistakes
Avoid these common mistakes to ensure your concrete patio is strong, level, and free from cracks.
- Inadequate subgrade prep: Failing to properly prepare the ground can lead to uneven settling. Ensure you compact the soil thoroughly before pouring concrete.
- Mistimed stamping/finishing: Rushing these steps can cause surface imperfections and weaken the slab’s integrity. Wait until the concrete is at the right consistency for each step.
- Lack of expansion joints: Not installing proper joints can result in cracking as the concrete expands and contracts. Plan your joint layout before pouring to prevent this issue.
- Inadequate slope: Failing to create a 1/8–1/4 inch per foot slope for drainage can cause water pooling, weakening the slab over time. Ensure proper grading around your patio.
Making these adjustments will help you achieve a durable and aesthetically pleasing concrete patio.
Material and Application Errors
The right materials are crucial for the success of your DIY concrete project. Using incorrect mix ratios or improper finishing techniques can lead to poor results.
- Wrong water-to-cement ratio: Adding too much water weakens the concrete. Use a recommended mix design and measure accurately.
- Incompatible aggregates: Mixing different types of aggregate can cause uneven curing and cracking. Stick to one type for consistency.
- Over-troweling: Excessive troweling removes cement paste, weakening the surface. Trowel only when necessary and avoid overworking the concrete.
- Incorrect sealer selection: Using a sealant not suitable for your climate can cause discoloration or peeling. Choose a sealant rated for outdoor use in your region.
Making these choices will help ensure your patio remains strong and attractive over time.
Weather and Curing Failures
Pouring concrete during unsuitable weather conditions can lead to weak, dusty, or cracked surfaces. Proper curing is essential for the strength of your patio.
Mistakes like pouring in rain or extreme heat can cause rapid drying and cracking. Always check the forecast before starting your project and avoid working in adverse conditions.
Improper curing methods, such as not using misting systems or curing blankets, can result in a weak surface that is prone to dusting and cracking. Follow proper curing techniques to ensure your concrete sets correctly.
Maintaining the right environment during curing is crucial for achieving a strong and durable patio. Avoid foot traffic until fully cured to prevent damage.
Budgeting, Permits, and Environmental Considerations
Planning your budget sets the foundation: itemize materials, tools, labor if any, and a contingency you can adjust later. It also flags when permits or inspections are likely, and what environmental factors like runoff, heat, or sourcing choices could affect the project. A simple checklist helps you decide DIY versus hiring a pro and keeps you on track from day one.
Why it matters: good budgeting and permit awareness reduce rework, waste, and delays, and keep your slab aligned with site conditions and utilities. Thinking about drainage, shade, and local materials now pays off in durability and maintenance down the line.
Cost Breakdown and Ways to Save
The first step is understanding the major cost categories for your concrete patio project. Start with materials like concrete mix, rebar, forms, and edging. Tools such as a tamper, screed board, and trowel are essential but can often be rented if you don’t already own them.
Labor costs will vary based on whether you do the work yourself or hire a contractor. If you’re DIYing it, factor in your time and any rental fees for equipment. A good rule of thumb is to set aside 10-15% of your total budget as contingency for unexpected expenses.
To save money without sacrificing quality, look into buying materials in bulk or during sales. Consider using recycled aggregates for a more sustainable option that can also lower costs. Also, plan your project timing around when you might have help from friends or family to reduce labor costs.
Permits, Codes, and Neighbor Considerations
Before starting any concrete patio work, check with your local building department for permit requirements. You’ll need to know if a permit is required based on the size of your project or whether it’s in a specific zoning district.
Setback rules are crucial; make sure you’re not encroaching on property lines or violating any HOA guidelines. These can often be found online through city websites or by contacting local authorities directly.
It’s also wise to talk with your neighbors before breaking ground, especially if the patio will affect their views or access. This step can prevent disputes and ensure a smooth project flow.
Sustainable Choices and Weather Resilience
Choosing sustainable materials like recycled aggregates or permeable pavers not only helps the environment but also reduces long-term costs by minimizing stormwater management issues. Permeable options allow water to drain through, reducing runoff and erosion.
To combat heat island effects, consider incorporating shade elements such as trees or pergolas over your patio area. This keeps the space cooler during hot summer months and can extend the usability of your outdoor living space.
Proper drainage design is key for weather resilience. Ensure that your patio slopes away from any structures to prevent water damage. Also, timing concrete placement around cooler parts of the year or early morning hours can help reduce cracking due to thermal stress.
Long‑Term Maintenance and Troubleshooting
Long-term maintenance keeps the patio looking good and prevents small problems from turning into costly repairs. You’ll get a practical calendar with seasonal tasks like cleaning, resealing, crack inspection, weed control, and drainage checks, plus clear reasons why each task matters. For common issues, you’ll see DIY repair options and guidance on when a professional should be called.
This approach helps you catch problems early, choose the right repair method, and plan work around weather and curing times. Follow the triage cues for hairline cracks, settlement, popping, efflorescence, or stains, and use the DIY methods or escalate as needed. Keep in mind that proper surface prep and curing are key, and have a contractor-vetting checklist and questions ready when you need them.
Routine Cleaning, Resealing, and Stain Removal
To keep your concrete patio looking its best, regular cleaning is key. Use a stiff-bristled broom or power washer to remove dirt and debris. For stubborn stains like oil or rust, apply a degreaser or rust remover specifically designed for concrete. Let it sit for the recommended time before scrubbing with water.
Resealing your patio every two to three years helps protect against moisture damage and enhances its appearance. Choose a high-quality sealer that matches your patio’s finish—whether it’s stamped, colored, or plain. Apply the sealer according to the manufacturer’s instructions, ensuring even coverage without pooling.
If you notice stains from plants or other organic matter, address them promptly with a mild acid cleaner like muriatic acid diluted properly. Always wear protective gear when handling chemicals and follow safety guidelines carefully.
Repairing Cracks, Spalls, and Failed Stamps
Hairline cracks are common in concrete but can be easily fixed with a crack filler or epoxy. For larger cracks, use a concrete patch compound to fill the gap before smoothing it out. Make sure the area is clean and dry before applying any repair material.
Spalls—chunks of concrete that break off—are more serious and require careful attention. Remove loose pieces and chisel around the edges to create a neat edge for your repair mix. Use a high-strength patching compound, trowel it in place, and smooth it out before it sets.
If you have stamped patterns that are fading or damaged, consider applying an overlay with a matching stamp pattern. This can rejuvenate the look of your patio without full replacement. Always test small areas first to ensure color match and texture satisfaction.
Upgrades and Advanced DIY Techniques
Enhance your concrete patio with embedded lighting for a dramatic evening look. Install low-voltage lights or solar-powered fixtures around the edges or in pathways. Ensure proper spacing and wiring to avoid tripping hazards.
For colder climates, consider installing heated patios using electric cables or hydronic systems under the slab. This requires careful planning and installation by professionals due to electrical safety concerns.
Stamped overlays can add a fresh look without tearing up old concrete. Choose patterns that complement your existing design and ensure proper surface preparation before applying the overlay mix. Decorative inlays, such as glass or stone accents, can also be added for unique touches but require precise placement and sealing to prevent water intrusion.

Conclusion
You can finish this project with confidence by sticking to a solid base, proper curing, and careful finishing. Prioritize safety, keep the surface smooth and level, and you’ll gain a durable patio that looks right and lasts.
Proceed by confirming your site prep and base are solid, set your forms true, mix and place the concrete with consistent equipment and timing, check weather windows and curing steps, apply stamping or coloring only as directed, and seal after the surface is fully cured. Start each day by verifying safety gear, then verify the base, forms, and joints, and follow the sequence for pouring, finishing, and curing in the recommended order. If any step feels uncertain, pause and recheck before continuing.
Common mistakes to avoid are skipping a tested base or underspread concrete, rushing curing, and skipping proper joint control or sealing. Always wear protective gear, test a small area first, and keep weather and temperature in mind so you don’t trap cracks or color issues. If a project requires complex reinforcement, uncertain permits, or unusual site conditions, call in a professional before you push ahead, and remember that careful work now saves headaches and costs later.
FAQ
What is the biggest mistake DIYers make when pouring a concrete patio?
They skip planning. They cut corners with forms, slope, and curing. Do not skip the basics or you’ll pay later with cracks and a weedy edge.
How do I prevent cracking in a patio slab?
Set proper joints so the concrete can crack in predictable places. Keep the mix workable and control moisture during curing. Don’t pour on you-pick weather and rush it without proper joints.
When should I seal a newly poured patio?
Wait until it is dry and hard to the touch and the surface has stopped shedding moisture. Pick a dry, moderate day and follow the product directions. Sealing too soon or in the wrong weather wastes the job.
What basic tools do I need to start?
Get forms, a screed or straight edge, a trowel, a float, and a hand or power float for finishing. Have a rake, a watering can or hose, and a level to check the slope. Rent or borrow extras if you can; a small setup goes a long way.